[QUOTE=Eric aus Chemnitz;1666786]
It’s ready!
QUOTE]
Wow ! It’s beautiful! Great job!
[QUOTE=Eric aus Chemnitz;1666786]
It’s ready!
QUOTE]
Wow ! It’s beautiful! Great job!
What a beauty!!!
Potentially. As in - if it’s rough terrain and you’re not sure if you’re going to land the heel shift, you can heel shift and drag your ankle over the ankle shift in the same motion. Personally I did do that for a while but these days it seems I just try for the heel shift.
torque wrench?
Does anyone have a link to an installation guide? (Couldn’t find one on schlumpf or KH website.) Do those new features make it as easy to install as a spirit hub, or do you still have to be really anal about torque of bolts for bearing cups, and for axles?
thanks!
Attached is the additional insert that Florian wrote for the existing manual. He hasn’t had time yet to update the main manual. Assembly is quite similar to the previous hub. However, a few key changes make it a bit less delicate:
Kris
160323.Beilageblatt.1.pdf (954 KB)
Compatibility of Schlumpf hub with QX frames and d’Brake
QX frame, Schlumpf hub and d’Brake is the setup I built. But before someone wants to build a similar setup here’s a little warning: QX frames and d’Brakes are not compatible to Schlumpf hubs, they have to be modified!
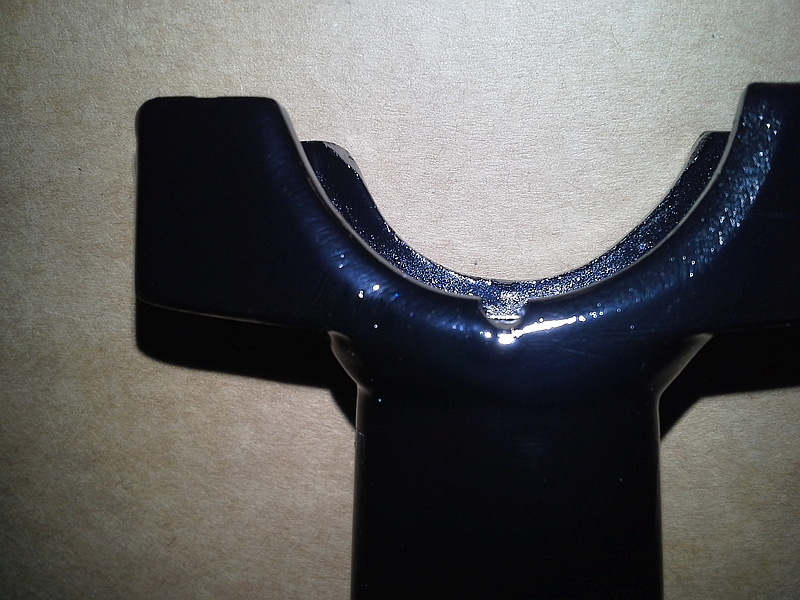
As shown below, Schlumpf hubs need an inner bearing shoulder of maximum 3.1mm width and 2mm height (=(42-38)/2).
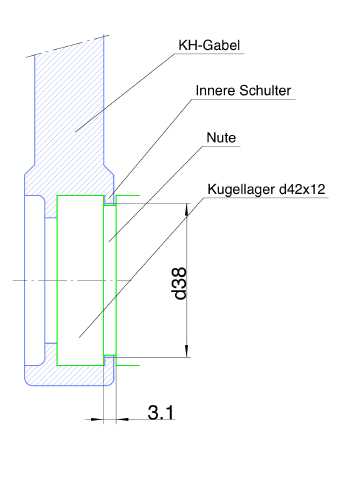
The original bearing holders of the QX frames have a shoulder that is 5.5mm wide and 4.5mm high (diameter: 33mm). That means you have to grind off 2.5mm off the inner side of each bearing holder as well as 2.5mm off the shoulder. If you don’t want to grind off so much from the side, you can also grind off a little less ad make a bevel where the shoulder is. Also the d’Brake does not fit. The shoulder is already 2mm high but about 1mm too wide.
If you want to use the small blocks that are provided with the 2016 model of the hub for torque support, you can’t use them as supposed to with this frame. The gab between the two halfes of the bearing holder is wider than theese blocks which means, you would lose them. My solution is to grind a groove right in the middle of the inner shoulder of the upper bearing cap to fit the block. I only used one of the two blocks.
Help! I’m about to go Schlumpfed 
Hi All,
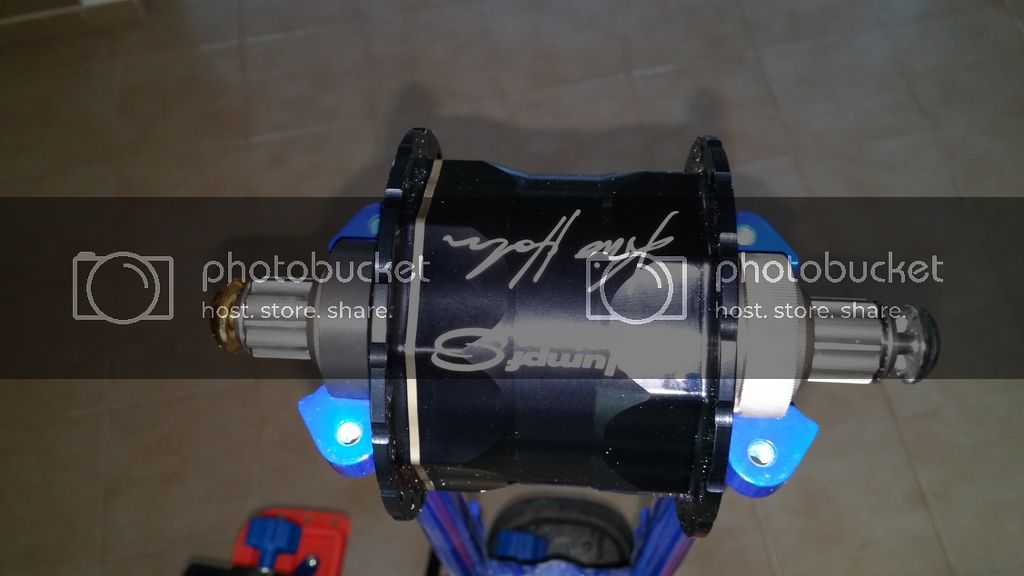
The moment has arrived- I finally got my brand new (and my first ever) Schlumpf :D:D:D
But, I’m pretty scared I’d do something wrong and I’d like to have your help please with the following issues:
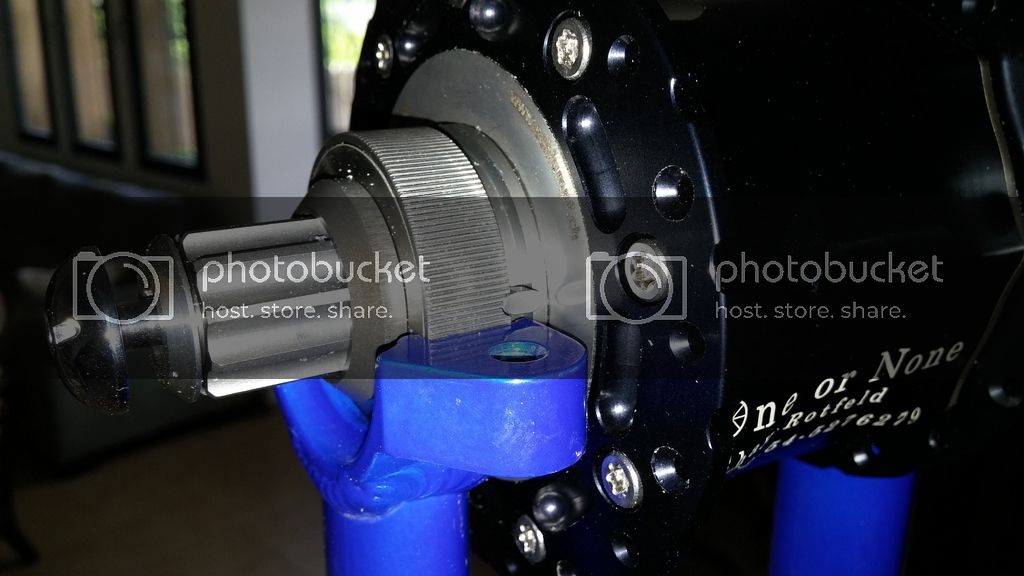
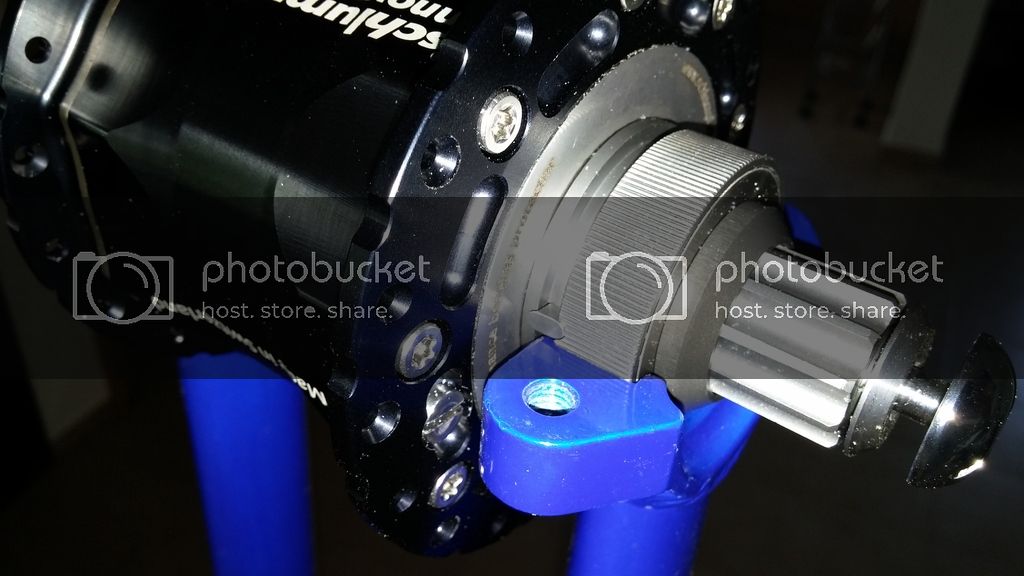
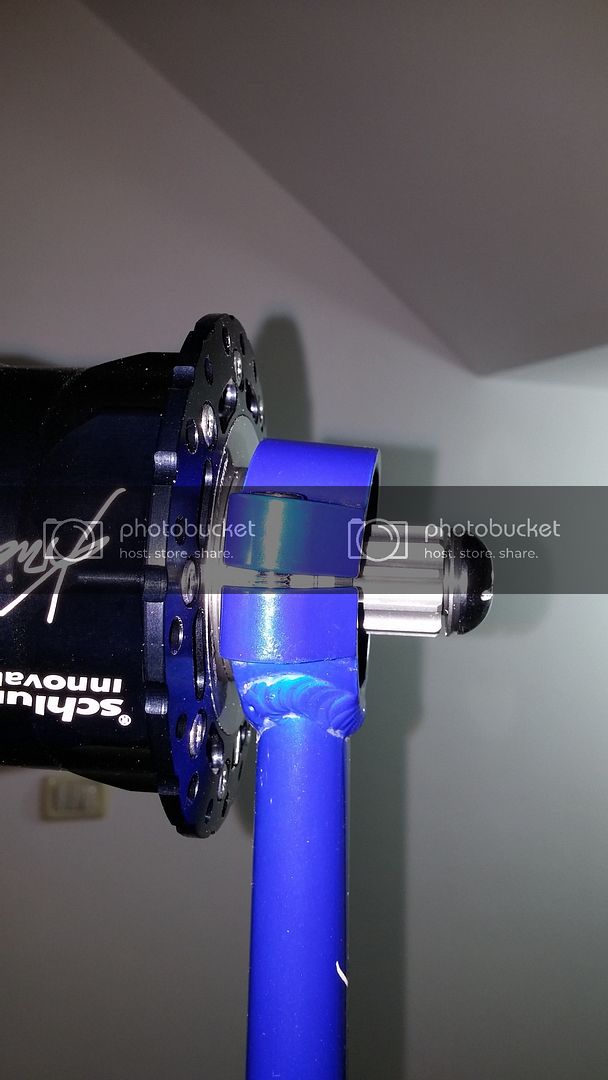
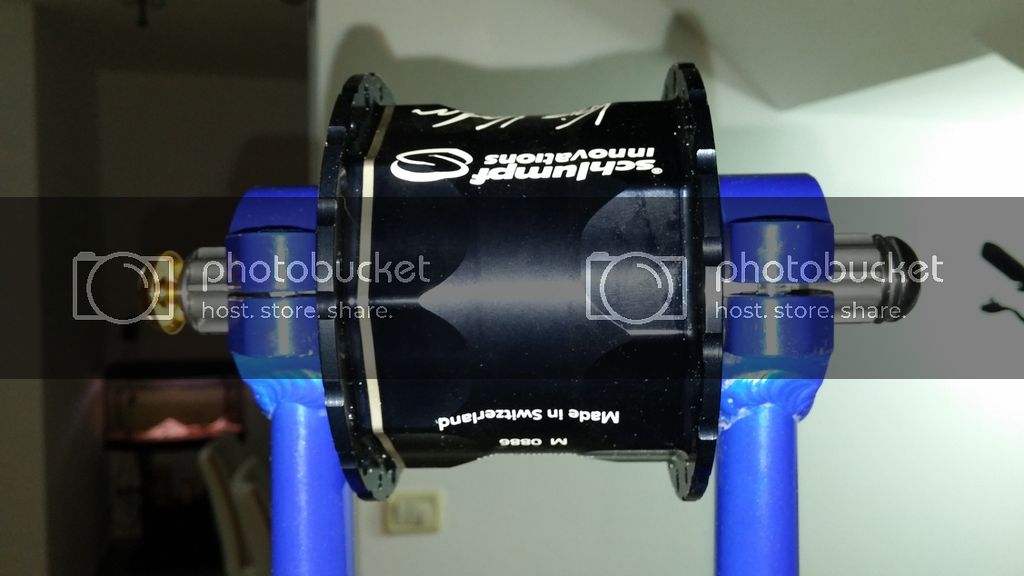
1- I have KH29 (2012 version if not mistaken) and I put the two “small protruding nubs” in its position on the hub.
Then I placed it on the fork and I’d like to make sure I got it right - pictures attached below (left and right sides). I can’t see both sides actually in contact with the frame, so I wanted to be sure it was done right.
BTW - it seems that the only thing holding the “nubs” is the pressure applied on them from both clamps sides; can’t they pop-out somehow during ride?
2- Regarding the sides (grey/ gold buttons), which is right and which is left - if it matters at all…
3- Regarding the oil - I found an old thread about it, saying it needs to be lubricated once a year. But how? Are there instructions on how to do it? I looked up on Schlumpf’s website but couldn’t find anything there.
Last question - is there anything else that needs to be done prior to installing the hub on the fork, mounting the cranks (removing the buttons first of course) and building the wheel?
Thanks a lot in advance for your answers; it’s most appreciated.
Installed perfectly right as I can see from the photos. If you really have a 2012 KH frame, then your lower bearing caps shall not have an inner lip. So the bearing cap will go over these blocks. The bearing holder shall clamp on the bearing and not on the blocks.
Most riders have the golden one on the right side. But it’s up to you with which foot you want to shift up or down. If you use a disc brake it may be better to have the rotor on the side with the gollden button (see point 3).
On the side where the knurled surface an the blocks are (shift down button) there is a slotted bolt. Unscrew it, press the syringe of grease into, reinstall it. Then shift - rotate - shift - rotate - …
If you have the brake rotor on this side, it may hide the grease bolt.
Hyperventilate delirious with joy and anticipation ![]()
![]()
Many thanks for your detailed answers @Eric aus Chemnitz ![]()
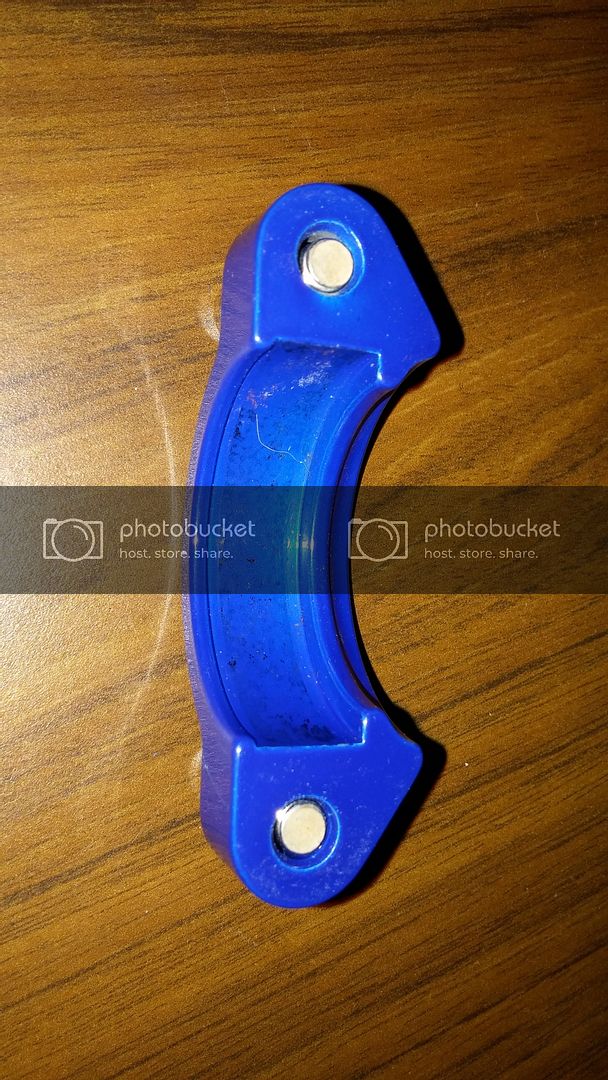
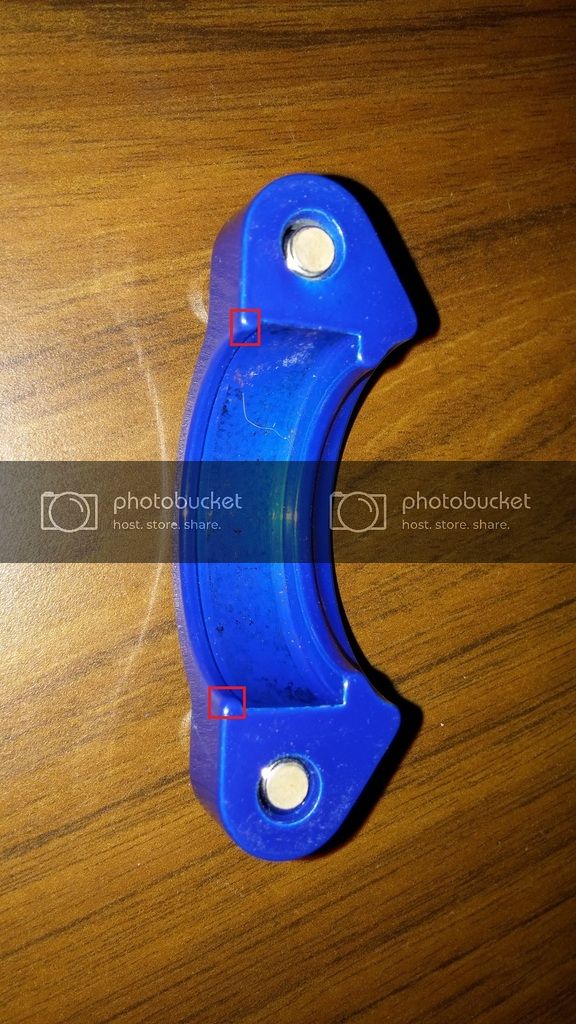
Just to be sure about the installation with the lower clamp, I’ve attached a picture of the lower clamp and appreciate if you could approve it’s good enough (without any modification needed) to just tight it in a normal way over the bearings as always been. I’m pretty nervous about these nubs…
Thanks a lot!
Try, if the two blocks go inside the lip. If yes, everything is fine, if not, you must grind off a little bit.
Houston we have a problem…
The blocks do not go inside the lip and in fact the clamp becomes offside while tightening the screw.
But I don’t get it, this KH frame should have been supported for this schlumpf version. What am I doing wrong then?
Thanks a lot for the help again; I really need it.
I don’t believe you’re doing anything wrong. Seems like there is too much lip left. Take a file or a dremel and get rid of the beginning and the end of the lip where the blocks are supposed to sit. This isn’t a big deal and can be done within a few minutes.
Maybe Kris could chime in to clarify if this version of the bearing holder should have already been Schlumpf compatible.
Thanks a lot @Eric aus Chemnitz for the quick response.
I tried to assemble it again and noticed that I didn’t tighten the counter clamp (on the other side of the schlumpf) and it put the schlumpf in offside while tightening only one side (where the blocks are).
Now it seems better - although the clamps holding onto the blocks and not onto the bearing. So it still looks weird and may be Kris could really help out if possible - it will be most appreciated.
Except for that, I’ve tried putting the lower clamp of a KH24 2015 version that I have and it still didn’t let the block go into the lip - that’s strange.
Additionally, it puts the hub in offside in relation to the frame, so it won’t work like this anyway.
Thanks again ![]()
That’s - in deed - very strange. The blocks protrude as much that they build one surface with the diameter 42 knurled surface. Thus, there shall be no lip/shoulder on the inside of the lower bearing cap. Yours has about 0.5 to 1mm lip. There’s no other way than to grind it off to make it fit.
So basically, I should grind off the lower clamp - as I marked in the photo, right?
But another thing I’m worried about is the frame itself (upper clamp), since the bearing isn’t sitting inside there because of the blocks contact and it may cause offside angle to the wheel in comparison with the counter bearing of the hub - so the wheel may not sit correctly.
Right
As Kris said:
So the two blocks shall be totally in the area of the lower bearing cap.
Got it!
Thanks a lot - you’ve really helped me big time with this. ![]()
I’ll update tomorrow about my progress with the wheel build, etc.
Good night.
Quick update: I successfully finished the wheel build of 29er and grind off the 0.5 mm clamp lip.
It’s uplifting feeling to accomplish this target at last.
There was only one thing that took me by surprise - how do you ride this thing?! It would probably take lots of practice.
I couldn’t even mount using wall support… How I like challenges ![]()
I will share my pics soon to serve as a knowledge base for others in my position.
Thanks again for the help.
Had mine of for a first test ride on a nearby parking lot today. It rides great. Mounting was not a big issue (I’ve been used to 24" until now). After I felt comfortable riding in first gear, I shifted to the second gear on the wall. It took me a few attempts to start, but when I was rolling, riding in second gear was easier than expected. After some rounds I shifted back to the first gear. I couldn’t even freemount and start. It was as hard to “relearn” riding it in first gear as it was before to ride in second gear. After a few changes I felt more and more comfortable with it.
The I wanted to shift this thing on the fly. I practiced the foot movement last week on my 24er so I was hoping that it would not be too hard to hit the shift button. But as I have only shoe size 40/41EUR (6.5-7UK / 7.5-8US) it was way harder than expected. Despide I practiced it while holding on a grilled window it took many many attempts until I managed to shift the first time.
Now, I managed to do a few upshifts on the fly but no downshift yet.
The only downside today is my tire rubbing against the frame on one side. When I put pressure on the pedal and pull the handle it rubs so much that mounting feels like if I had pulled the brake lever. So I may have to loosen all the spokes on this side and tighten the ones on the other side to center the tire in the frame. I’m not sure what is out of center now, the rim or the frame.
If you reverse the wheel in the frame, you will know the problem right away: