I considered waiting until the spring (after I build the tire and have a frame that will fit it) to post this but I think it is just too cool to wait.
This is a project that was born out of a car crash long ago and far away (two years ago in New Brunswick) and has been floating in my mind since. I had a 36" Nimbus SE rim which got cracked and dented in the crash near the rims seam. Since I had never ridden it and I am that kind of person I started thinking how I could use the rim despite the fact that it was broken beyond repair.
I decided I could cut out the damaged section pin the rim back together, somehow make it round again, build the wheel, and make my own tire. The toughest part was probably going to be the tire.
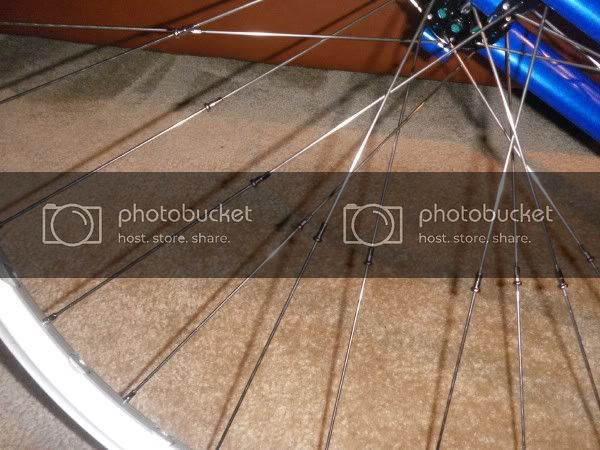
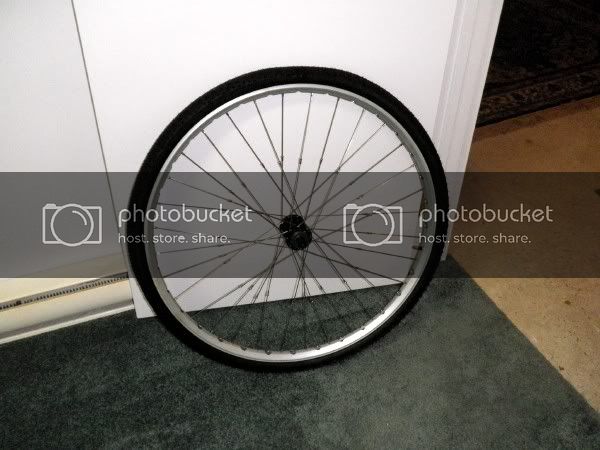
And now (finally) I modified the rim, pinned it together and built the wheel. I needed spokes longer than what were commercially available so ordered so got some short double threaded sections to stick on the end of a trials length spoke with a nipple as a connecter.
This is so cool! I’ve been thinking about making a larger wheel for myself for quite some time and the rim/tire are the things that seemed hardest. But your project is making me think it’s possible! I just read through that thread about building a tire. Maybe you can share some photos of the construction this time around.
How did you attach the rim back together?
Do you think it would be difficult to make a rim larger rather than smaller? Seems to me that increasing a rim’s diameter would cause it to go all bendy, where a smaller wheel would stay relatively round.
Don’t hold your breath, I probably won’t touch this thing again until April some time, but I will definitely take some pictures this time around.
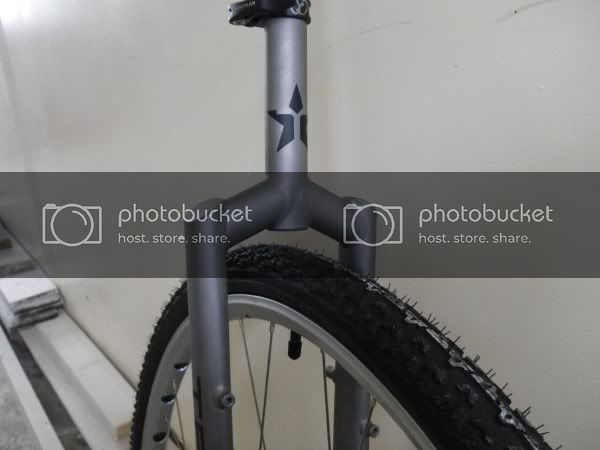
Before I cut the rim I pried the seam open and got the pins out so I could re-use them before cutting out the damaged section. I tried using the old pins to put it back together and it was just too hard, I eded up grinding the ridges off the old pin for one side and found a random chunk of round brass rod that fit perfectly for the other side. There was a gap at the seam until I built up the wheel and the spoke tension pulled it shut.
Before I built the wheel the rim was almost an inch out of round but now the seam is the only part more than 1 or 2mm out, I guess I could have pounded it down a bit, theoretically I still can. you can see the bump at the seam in the first photo, it’s at the top of the rim in that picture.
I have also been thinking of making a larger wheel as well but can’t see myself starting it any time soon, I would want to torture test this one first I think. I would probably use a couple low walled rims like DX32s since the should be easier to bend than a deep V type rim. I would love to see someone do this. The double spokes takes care of the spoke problem.
Assuming a 2" tire 2x24" rims = 44" wheel
2x26" rims = 48" wheel
and 2x29" rims = 53" wheel
My 45" is made from two 26" rims. The wheelchair rubber (tire) is very low profile.
But that’s the 1990’s wheel. The original wheel (1982) was made from three 26" rims. Tom Miller had improved his technique enough in the intervening years to be able to do it with just two rims. Before worked out the techniques, he wasn’t able to get the ends to behave. These were steel Schwinn tubular rims.
Interesting point about the seams on the big wheels. I know a bike shop that has a flat spot puller in the back which I think would work for getting rid of the dip. The old steel rims might have been more “springy” and harder to get into the shape you want than an aluminum rim.
Until I was talking to Daren Bedford about big wheels I didn’t realize that Tom Miller used a bent wire that connected to the rim twice instead of really long spokes. The dual spoke thing I did was great for this wheel but I think Tom’s solution would be better for the big wheels since production hubs only have so many spoke holes.
For shorter spokes it would be better to find a bike shop that has a spoke cutter and cut down 371mm spokes to the required length. That way the nipples in the middle of the spokes could be eliminated.
I’m interested to know how your project to make a 32" tyre goes…
Yah cutting down 371mm spokes would be better but this was a lot cheeper. Those spokes are $2 each + taxes + shipping + duties + brokerage fees + you still have to get them cut and UDC would not give me a bulk rate.
This way cost me probably less than half as much and if a spoke breaks at the elbow I can easily replace the broken bit without needing anything custom.
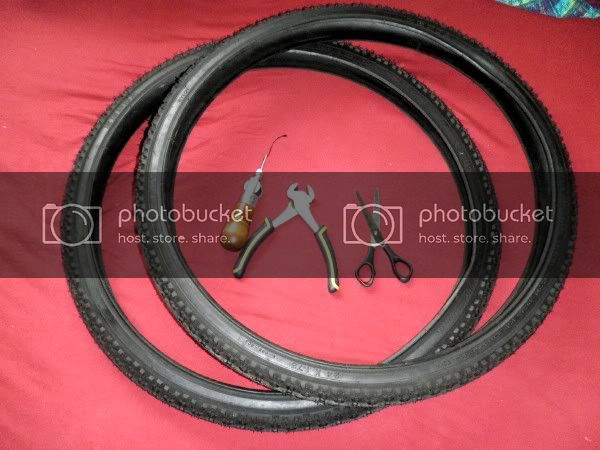
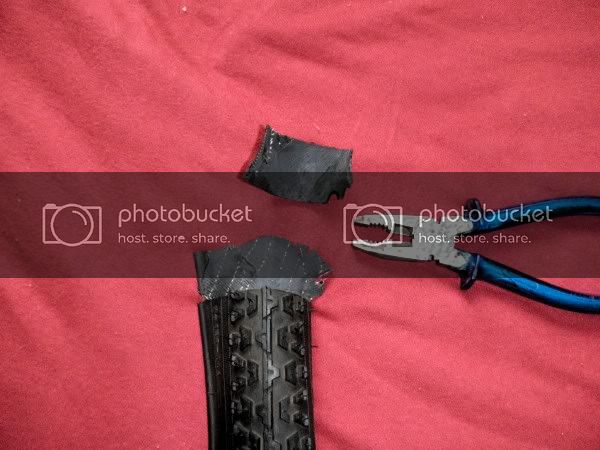
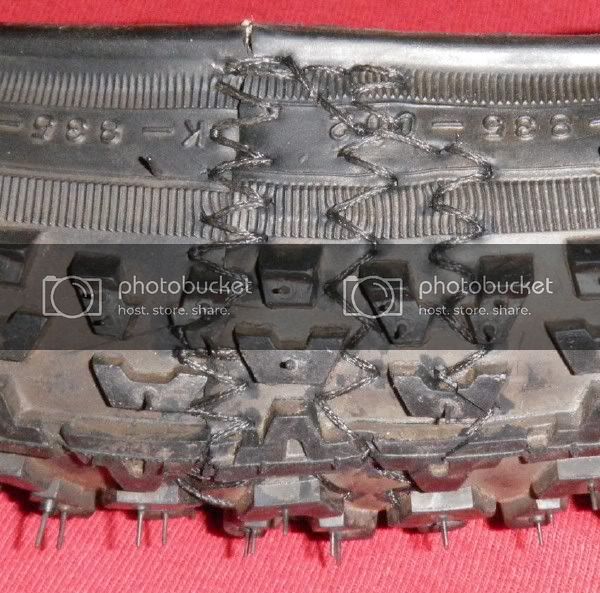
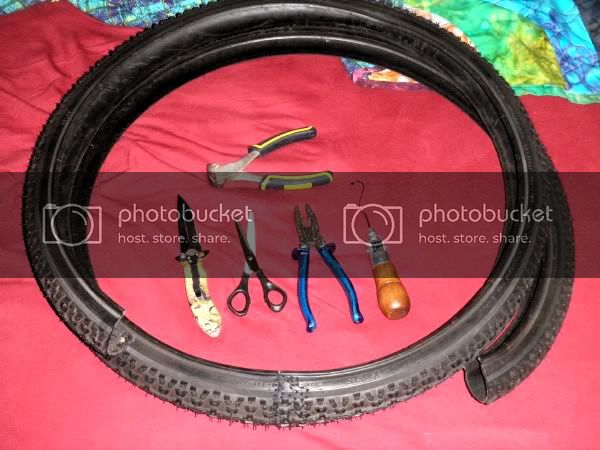
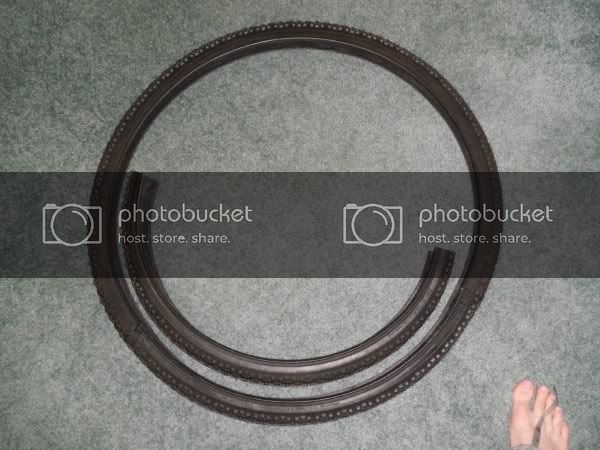
I started out with a couple cheep 24x1.75" tires from Canadian Tire and a couple tools. Below are the tires and the tools I started with; end cutters, scissors, and a sewing awl.
It sat like that for the weekend but I got back to working on it today. Stuck the tire on the rim and marked where it overlapped. I had the tire pulled pretty tight on the rim at that point and it might have been a mistake.
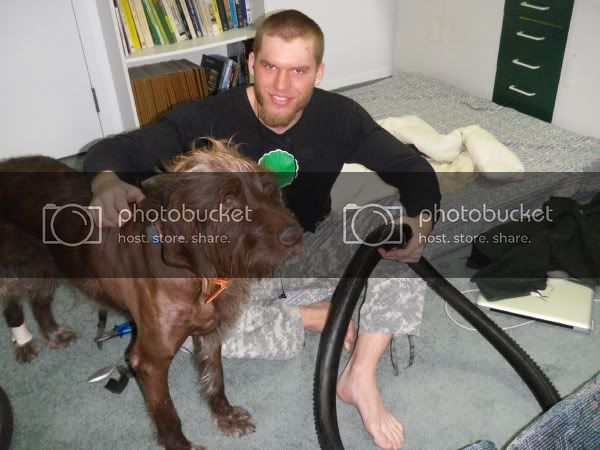
Here I am in my “workshop” with Bear the pudelpointer
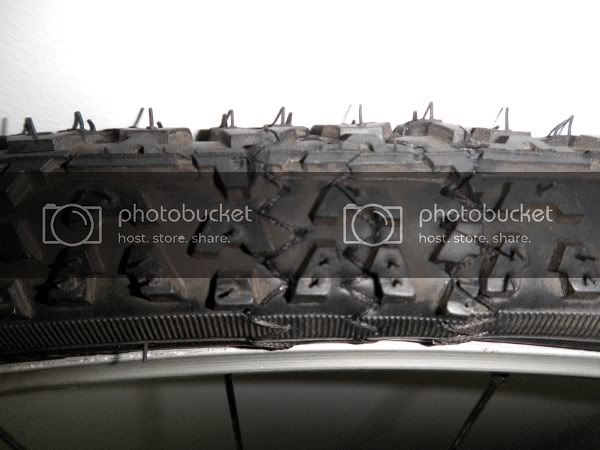
Mounted it up and inflated it on the rim. It was really tight and I actually had to use a tire lever to get it all the way on. I was a bit surprised to find that bead did not want to seat at the joints and there is a bit of a dip at each one. but all and all the joints look good.
It will probably take another month for the roads to clear of all the snow we have so I don’t plan on testing the wheel any time soon but will let you all know how it feels when I do.
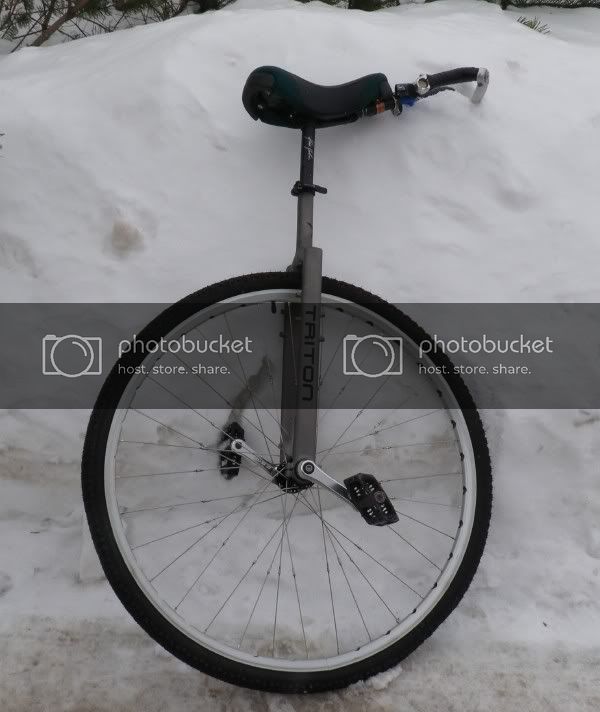
Oh and for you weight-weinies out there the wheel with tire and 29er tube weighs 2660g,
Actually his whole right front quarter was shaved for a shoulder surgery after hunting season ended this fall. The hair is still really short.
And I guess I should start calling this project 31 since that is what it measures out to with the skinny tire but in true bike company fashion I will still call it a 32 for no good reason.
Looking good! I really want to hear that this is ridable at good pressure without ripping apart.
Did you glue the overlap at all?
The tyres that I have cut up for this purpose haven’t had any obvious way to ‘peel’ off the tread rubber. It’s more of a painstaking process with a razor blade to cut back into the rubber.
Does the wheel roll or do the joins dip to make it bump? I think the difference in tread-to-bead ratios between different tyre sizes cause this problem (larger tyres would have bead length closer to the same length as the tread than on smaller diameter tyres). The joins may need to be cut at an angle?
It was snowing today but most of the ice is off the highway so I decided to take a quick rip and test out the wheel.
I am not really used to the big wheel with small cranks anymore but quickly got into the rhythm again.
I did not feel the thump thump thump of where I connected the tire but I did feel all the lumps and bumps in the pavement. Went about a mile, hopped around a bit to see if anything would break and turned around and went home.
I tried going through the deep slush ibefore the driveway but came off the front, I guess it was still too firm for the skinny wheel to cut through, I am sure the fat (29x3.2) wheel would have just floated over.
Gave the wheel a spin and it seemed to be a bit out of true but not real bad, all the spokes were intact though. I will have a better look at it tonight and touch up the true.
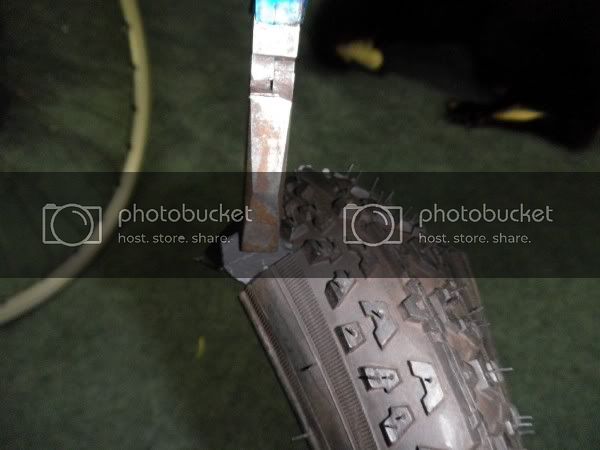
Hey Sam. When I made that test tire a couple years ago I was doing that painstakingly slow process of trying to cut the rubber off the casing without cutting the casing before I just pulled on it and low and behold it grudgingly peeled back without the need for a knife.
What I do now is just carefully cut into the rubber almost down to the casing, fold it and carefully cut just a bit more until I see the rubber change colour and I know I am through the tread rubber and into the casing rubber. I then use some pliers to peel a bit up at the edge then peel it back. It seems to peel better when you pull perpendicular with the threads of the casing.
I didn’t feel the bumps (or in my case dips) in the tire on my quick ride but our roads are quite rough and I was only using 40 PSI. I think that If I made the tire just a tad bigger to match the rim better I would not have so much of a dip at the seam
What tires are you using? I am assuming you are making a light weight 36" tire?
If I were to do this again I think I would go just a bit wider and use something with a folding bead.