I think this has come up before, but I am stuck on the crazy idea of trying to make geared cranks, and the more I think about it and look into it, I think it might be possible. Here is the (not to any scale) drawing I did with the idea.
For the gears I was hoping to use a planetary gear set from an automatic transmission, with the gears cut down to the thickness I would need (tricky because it would be hardened steel). I found one that had about the right gear ratio on ebay for ~$50 so I figure this would be the most reliable way to get the gears. Find a suitable bearing and figure out a way to hold it in place and I think it’s possible. If only I had access to the machine shop I used in college. Somebody talk me out of this, I don’t want another project before I finish the uni I’m putting together now.
The image is not coming through for me but the general idea reminded me of this video showing someone adding freewheel cranks to a unicycle to make a drift trike front end:
Sounds like a similar solution to outboard discs - To save us from using a special disc hub, and having to rebuild a wheel, we move the disc to the outside and bolt it to the cranks. If it works, you’re a genius, and I want some!
How would you stop the cranks going out of line with each other though? If one of them slips and the other doesn’t, you’d have wonky cranks. Not brilliant (I think I read there’s a similar problem with the Huni-Rex gearing system, the cranks aren’t attached to each other in any way so they can easily come out of line thanks to chain stretching and other such).
If a geared crank was possible, part of it would have to be held stationary or it would stay in the gear of least resistance. 1:1 Even if it was built as a 1.5:1 it would be 1:1 if nothing was held tight. So what would be held in this case? Or maybe I’m missing the big picture.
Ooops, I think I see in the drawing. The ears/tabs sticking out from the frame will be the attaching point?
Looks like a nice way to produce a fixed gear ratio without the hassle of a jackshaft or secondary axles.
Wouldn’t a torque arm perform the same function as the frame modifications and also if it is fixed gear, would you need the gearing to be integral to both cranks or could you do only the left crank and allow the right to carry a disc brake.
As an experiment - do it. If someone who has access to the tools doesn’t try this sort of thing, we stagnate on innovation.
Yea the outer ring gear would be fixed to the frame, maybe in a non-permanent way i.e. Hose clamp or something similar, the drawing doesn’t really show that. As for keeping the cranks in sync, there would be a few degrees of play, there’s nothing you can really do about that. I actually got the ideas for this looking at the patterson and hammersmidt (sp?) crankset for bikes. That wouldn’t really work for uni as it still has a solid axle that would mean making a fancy hub and figuring out a frame with 1 leg (lefty-ish). The ratio on these cranks would be pretty high, something like 3-3.5:1. The benefits I could see are the ability to pull them off or put them on about as easy as any other crank, and I would hope to have them able to mount without getting in the way of a hub mounted disk too. Like I said though, if I do try it out I’ll have to find someone to let me use a lathe and mill, I know a guy that owns a shop, but we’ll see. Definitely gonna finish my new uni first. I’ll start posting about that as soon as my last parts come in hopefully by next weekend. Yay 650b+.
I only had them on for Ride the Lights as they weren’t waterproofed and very much a temporary addition. I’ve since modified them back to mains powered and they’re back in the bedroom where they belong!
Fat tire Surly freewheel to go with my Surly Conundrum.
I’ll slowly be adding a Magura brake, Zero saddle, Nimbus square taper cranks, etc. Then comes the adventure of learning to freewheel down sand dunes.
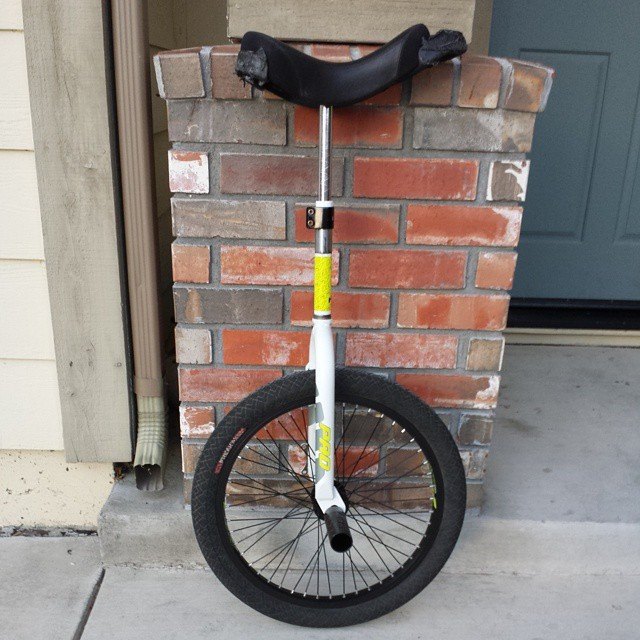
Not really a project so-to-speak (just finishing to put together a 20 uni for my nephew) but more of a “Bri moment”
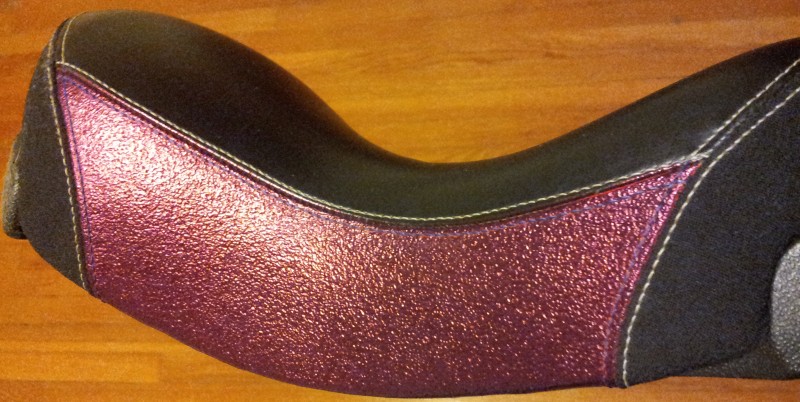
Got a black and red Torker saddle and tried to tone down the red sides by using a blue sharpie. I was expecting to get some dark result not completely black but beautiful blue either.
Ended up in a glossy purple finish when drying
I still have to check how well the permanent maker sticks to the side fabric and if some veneer will be necessary but still a fun moment to share.
Haha, nice! That may be the prettiest dx saddle ever! Still, when I look at it I can’t help but think of all the pain they caused me. I think they were pretty comfortable for my wife though.
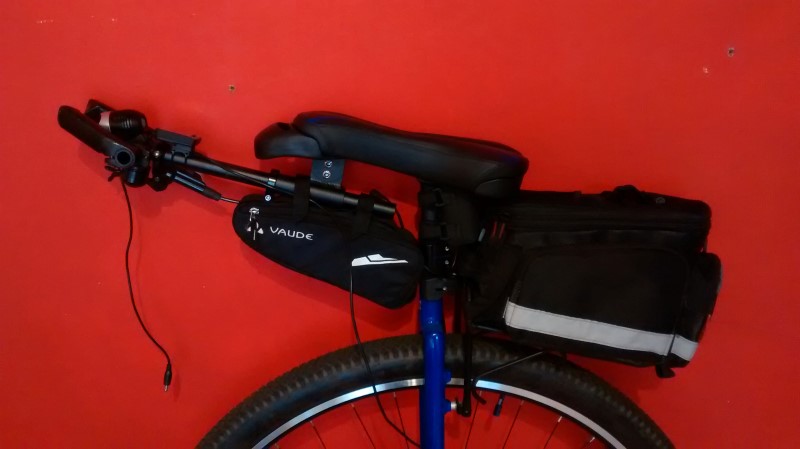
Peg unicycle and more adapters for attaching a unicycle saddle to a bike fork
Since I posted by Unicycle candidates for riding skateparks I’ve been wanting to try out a couple of the candidates I put forth, the peg unicycle and the drop plate unicycle. I’ve had my eye out for a cheap BMX fork and got a couple unsuitable ones from craigslist. When trying to take this project forward recently I discovered my BC wheel uses a rear wheel (where most use front) and that it’s difficult to find a wheel/fork with a 14mm axle so I went ahead and ordered a drift trike peg wheel and fork:
The wheel has a disc rotor mount and the fork has a mount for a caliper which is nice. This is the third drift trike front end I’ve converted to a unicycle. The first two were 1 1/8" (28.6mm) outer diameter and 1" (25.2mm) inner diameter and I checked the new one was 28.6mm outer diameter but I forgot to ask about the inner diameter which turned out to be 24mm. To get a seatpost to fit I’m using a 22.2mm one with an old 25.4-26.8 shim I hammered into shape and it works OK.
Like my other drift trike front ends I didn’t want to slot the fork in case I wanted to sell it later. I previously posted about an adapter I had fabricated for attaching a unicycle saddle to a bike fork. I came up with two other ideas for adapters.
[LIST=1]
File the lip off a standard 25.4/28.6 Nimbus double clamp. Fit the bottom half over the fork and the top half over a 25.4mm seatpost that has a 25.4-28.6 shim. This doesn't seem super sturdy but I have very little seatpost showing on my 3.8x geared unicycle and will eventually use this method there.
Start with a 1 1/4" scooter quad clamp. Fit the bottom half over the fork that has a 28.6-31.8 front derailleur shim and the top half over a 25.4mm seatpost that has a 25.4-31.8 shim.
[/LIST]
Until I get all the parts I’m using the filed Nimbus clamp on my peg unicycle with a PVC shim I previously made for fitting aero bars on my Shadow handle: