that looks really fun to ride
…as long as the cranks are no longer than 100mm.
…and as long as you have a friend you can ride with.
Hey Anybody out in Unicycle Land interested in this:
A 24" to 26" frame adapter(I will limit to muni frame and tires, more robust).
I guess I can call it a FRAME LIFTER
Purpose:
Allows a 24" unicycle to fit a 26" wheel by “raising” up the frame by 1".
(remember the 24" and 26" are diameters, the radius difference is only 1")
How:
1.) Remove lower bearing bracket on the 24" frame.
2.) Insert adapter bracket(2" longer) onto the 24" frame.
3.) Insert 26" wheel and tire.
4.) Re-insert original lower bearing bracket + longer screws(or shoulder bolts).
I have access to a 3D printer that can shoot carbon fiber material.
This material in “compression” is pretty much as strong as aluminum.
This is something that I have been thinking about for some time.
However, this would only make sense for single unicycle owner like myself.
That is I want to temporarily convert my 24" to 26" and ride it for a while.
At the same time, invest in buying a 26" wheel and tire combo…or find a used one.
I know most of you riders own at least 3 unicycles in different sizes and or different configs: pedal length, tire width,…etc. That is nice if you can afford and have space. It allows you to just grab and try different sizes.
So, this kind of “simple” modification will not be for everyone. It would be for someone that only has one unicycle and wants to “swap out” the wheel for a bigger. Perhaps, you picked up a larger wheel and tire from a garage sale somewhere or something. I also, just like to tinker and this adapter would be a simple enough part to make.
If anyone is interested and it is popular, I would be very motivated to buy my own 3D printer(Bambu brand approx $1000 or less) and print them for you. I wouldn’t charge much.
…slam
An alternative would be a 26" frame with a 24" spare wheel, though of course that requires already having a 26" frame. I would imagine frame lifters would come in handy for those on a budget ![]()
And those with lack of space.
I should just have one hatchet frame big enough for a 36 wheel and an extendable seat post so I can use the same frame for a freestyle uni wheel (20”)
I think this kind of exists with the Nightfox frame
1 Like
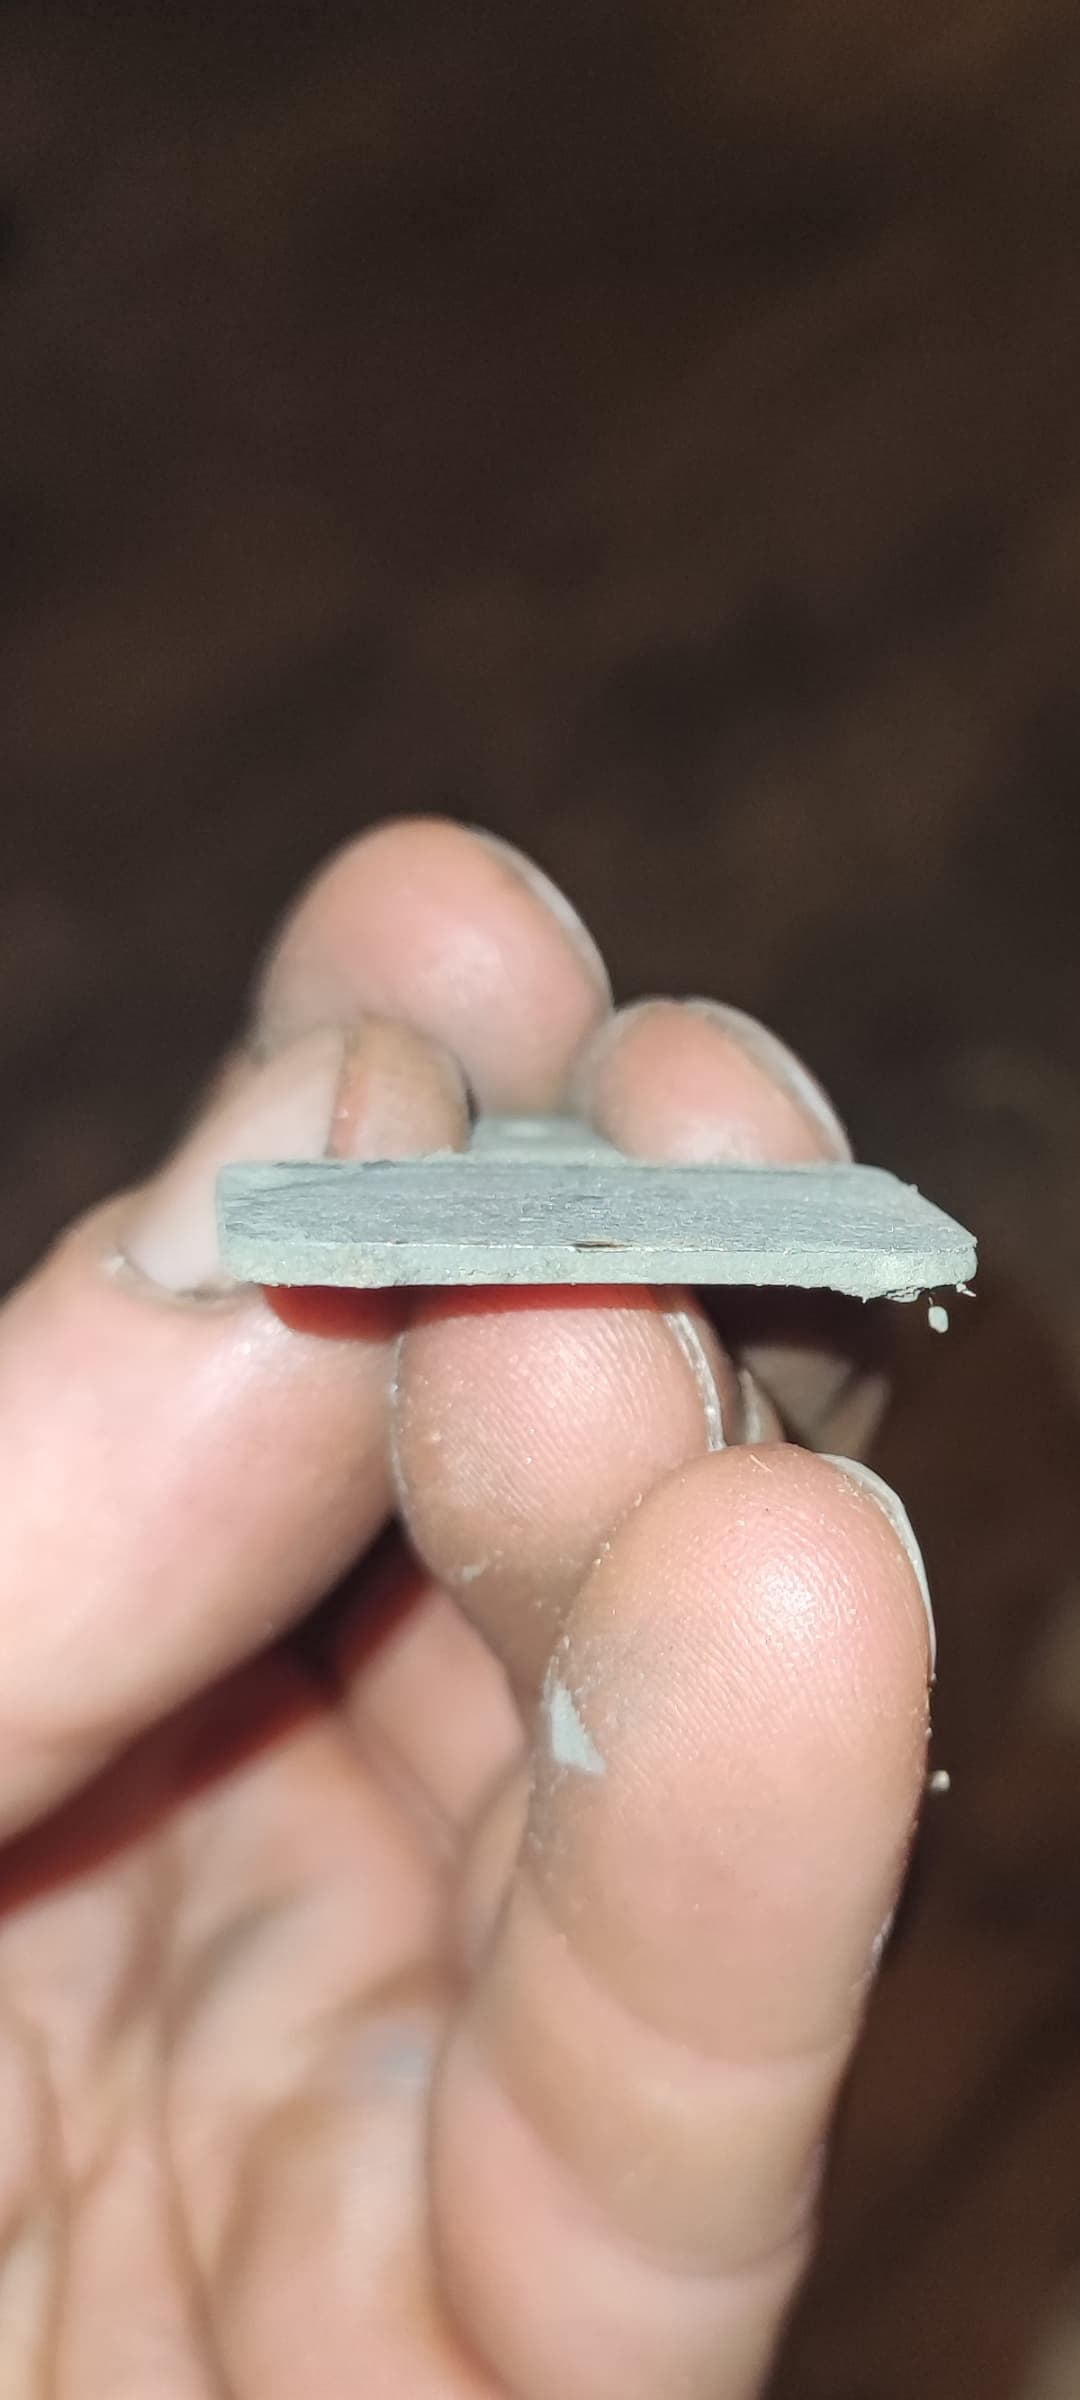
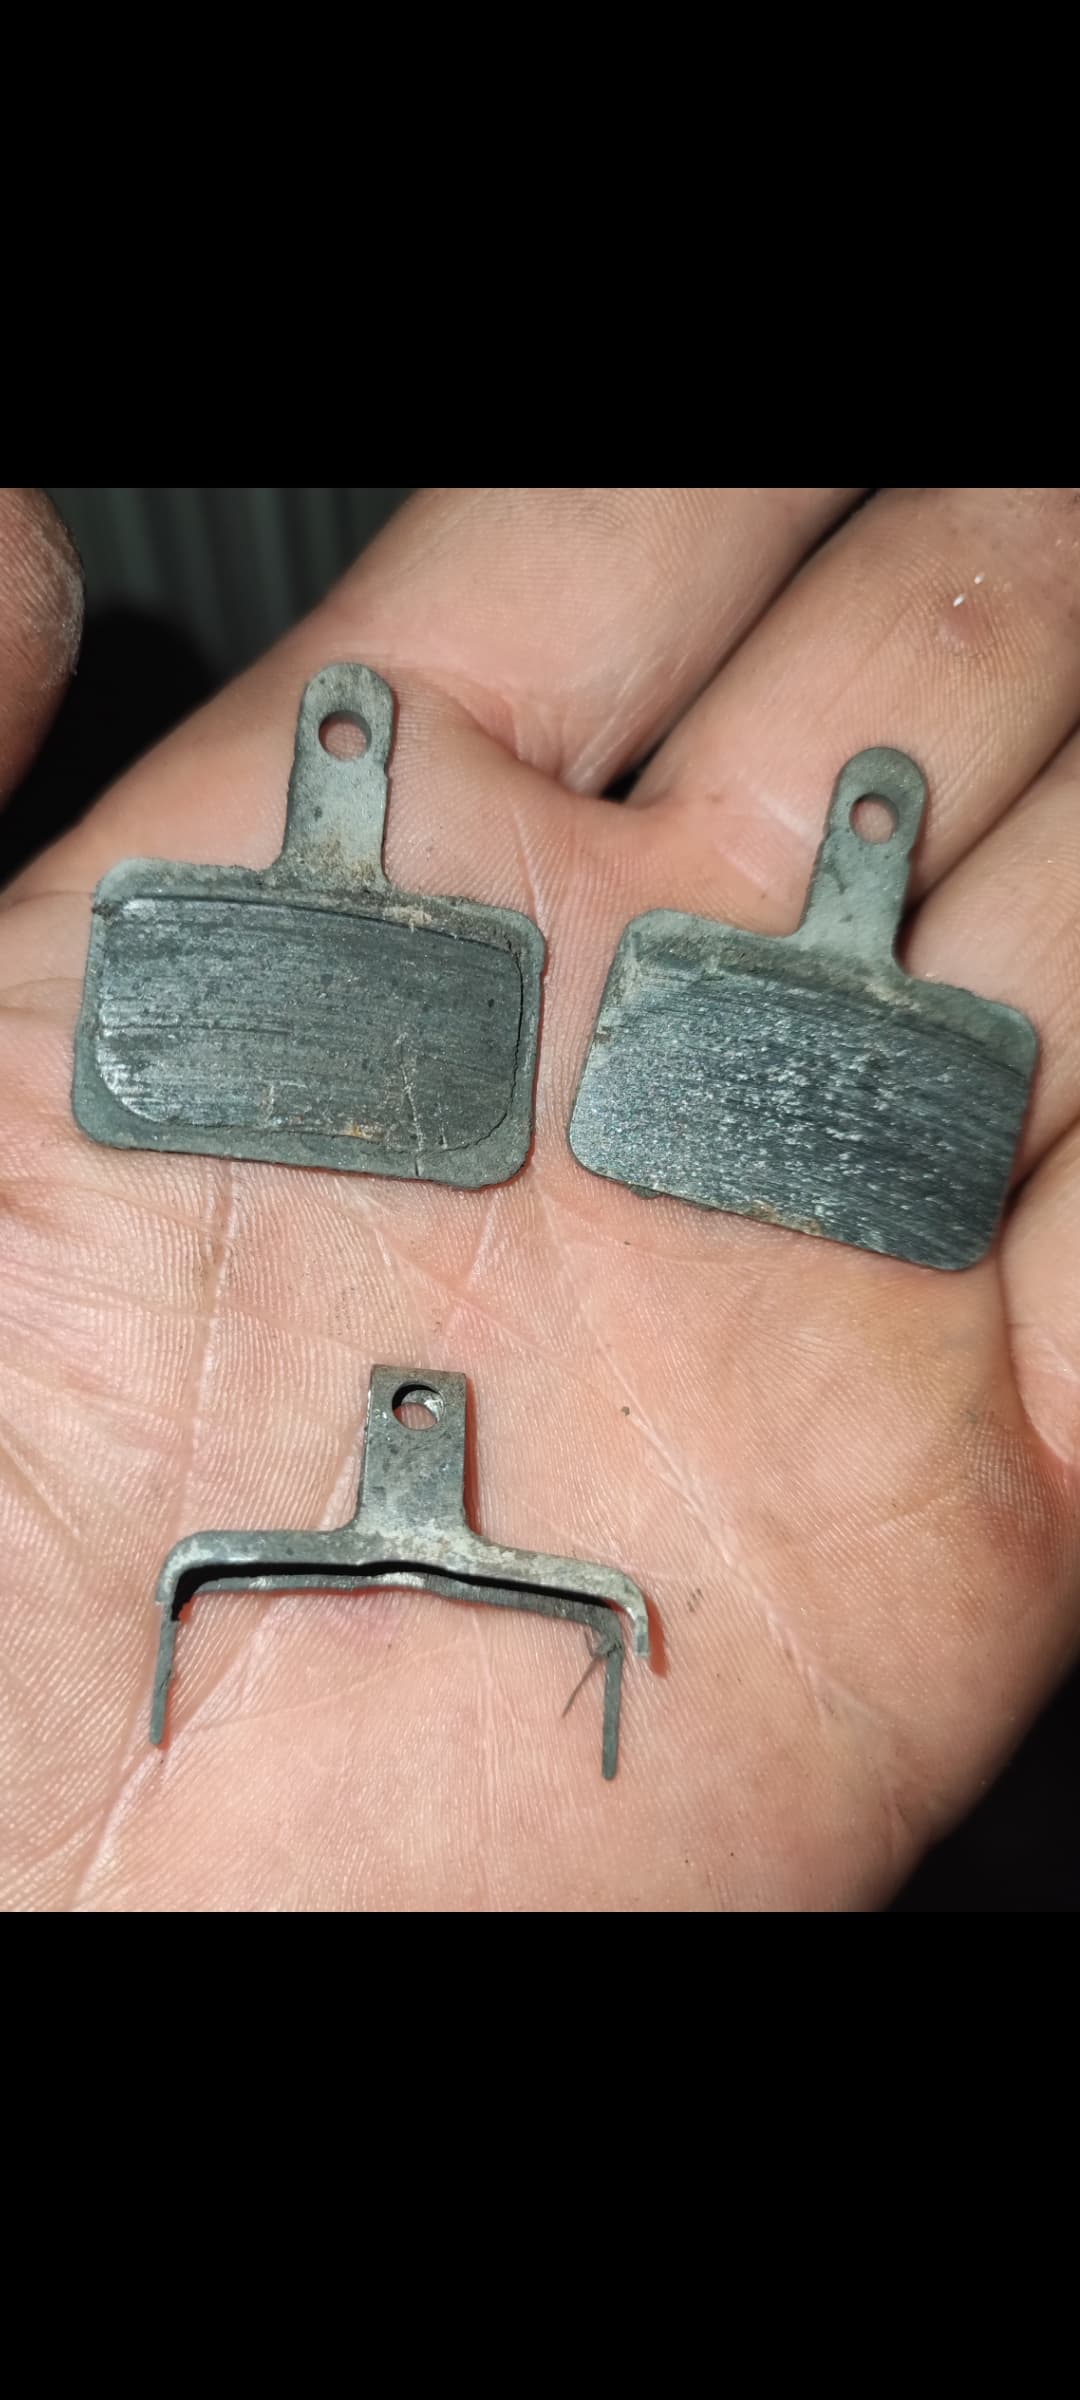
I think my next project should probably be replacing my brake pads. I think I got my money’s worth out of this set though!
I guess I should also check them a bit more often!
2 Likes
There’s something oddly satisfying to me about replacing wear items on a unicycle ![]()
2 Likes
From a freewheel rider :oof-gif:. I check my brake pads before and after. Here I was thinking I was pushing things by getting “close” with 1/2mm of pad left. You definitely got your money worth out of those. Please stay safe out there.
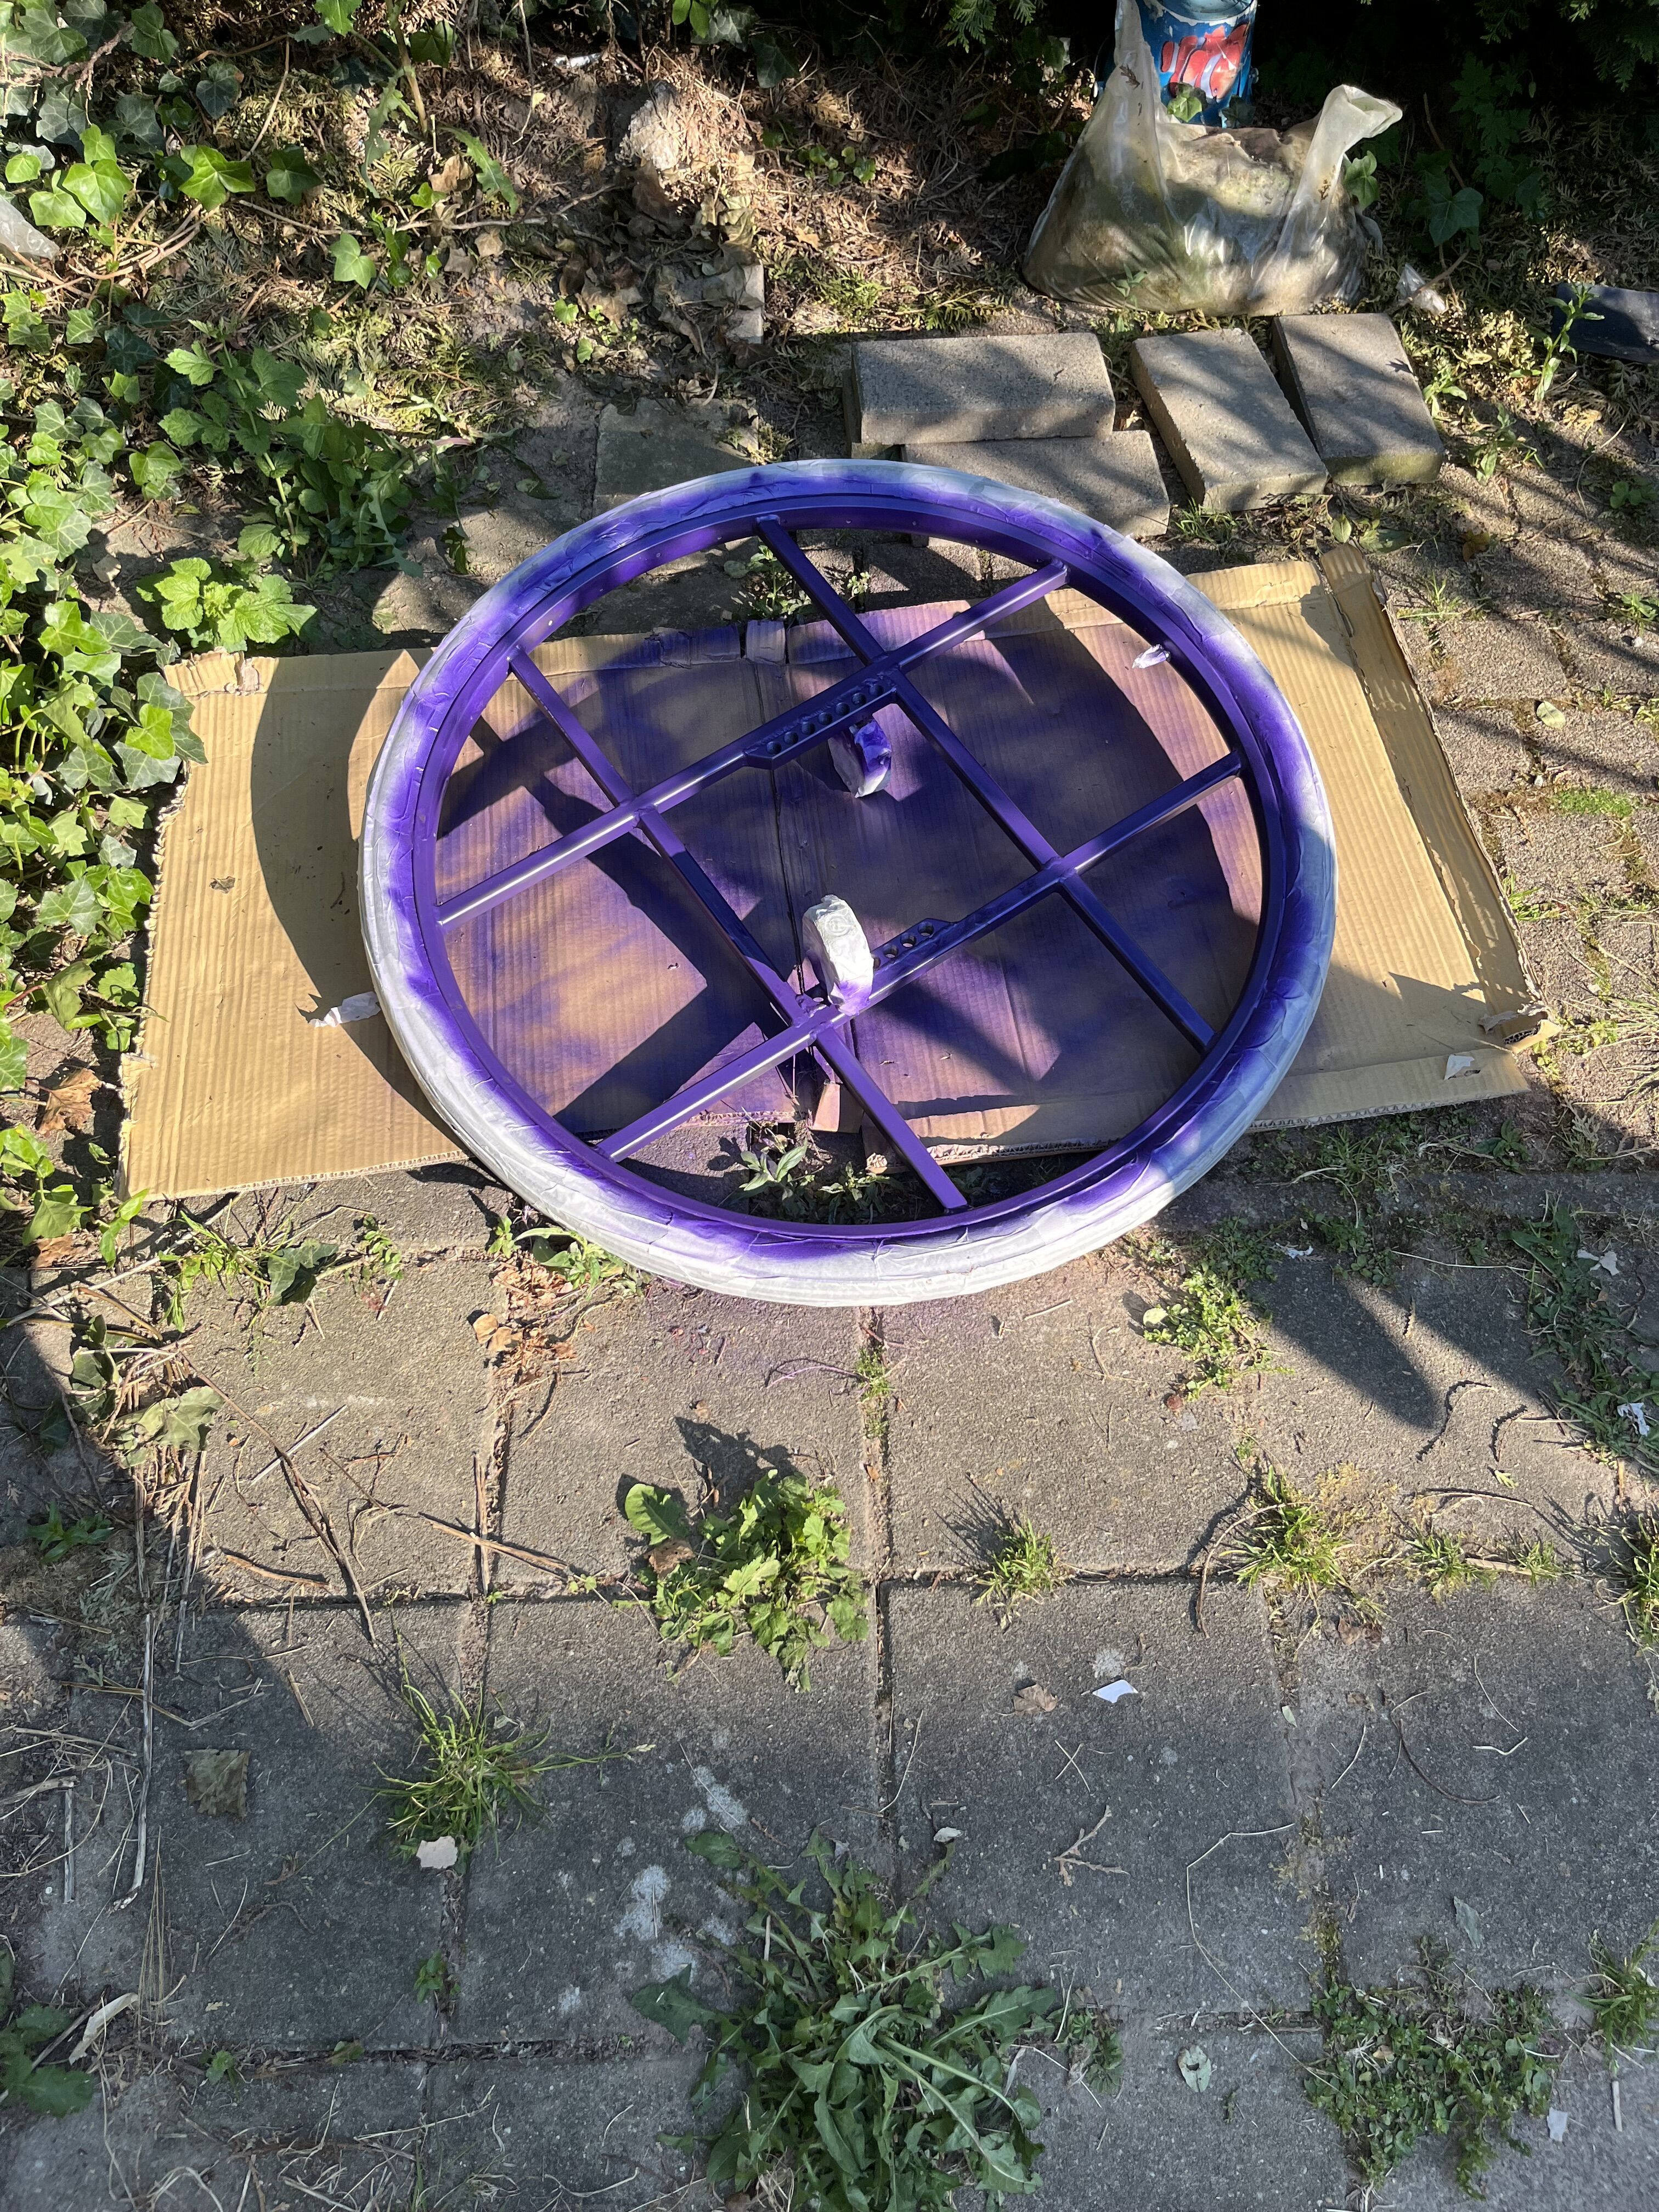
@Ulkicycling the preliminary look of the new wheel. It just needs a few layers to stick and be thick enough to see the iron underneath. This is the first time in my nearly 50 years I use spraypaint. Ive always been a model student who didnt spray graffiti everywhere
7 Likes
Hey, that looks promising. Have an eye on the pedal threads. You can test or tap the threads by screwing in a pedal. That removes the paint from the thread. Put the pedal in straight with caution to avoid taping a second skewed thread across the existing one. Before paint clogs the thread you can put some paper towel inside the holes. Anyhow a thin layer like now prevents oxidisation and the threads are a bit too wide.
1 Like
For the next layer:
there is one method to work “fresh in fresh”, you wait 1-2hours and do not let the paint cure. Just so much time that it is not dissolved and is dripping away when the new layer is applied. The new layer perfectly adheres to the previous one because both layers are sticky.
The second method is to let the previous layer totally cure. The same applies for old color. You have to use sand paper to create a rough surface where the new paint can stick on. But when using sand paper on one layer, you certainly remove too much and see metal again.
So I recommend method 1 “fresh in fresh”. Sure you can try it without sand paper on the next day, but that is not really fresh in fresh.
Method 3: Just do it, it already looks great, don’t worry.
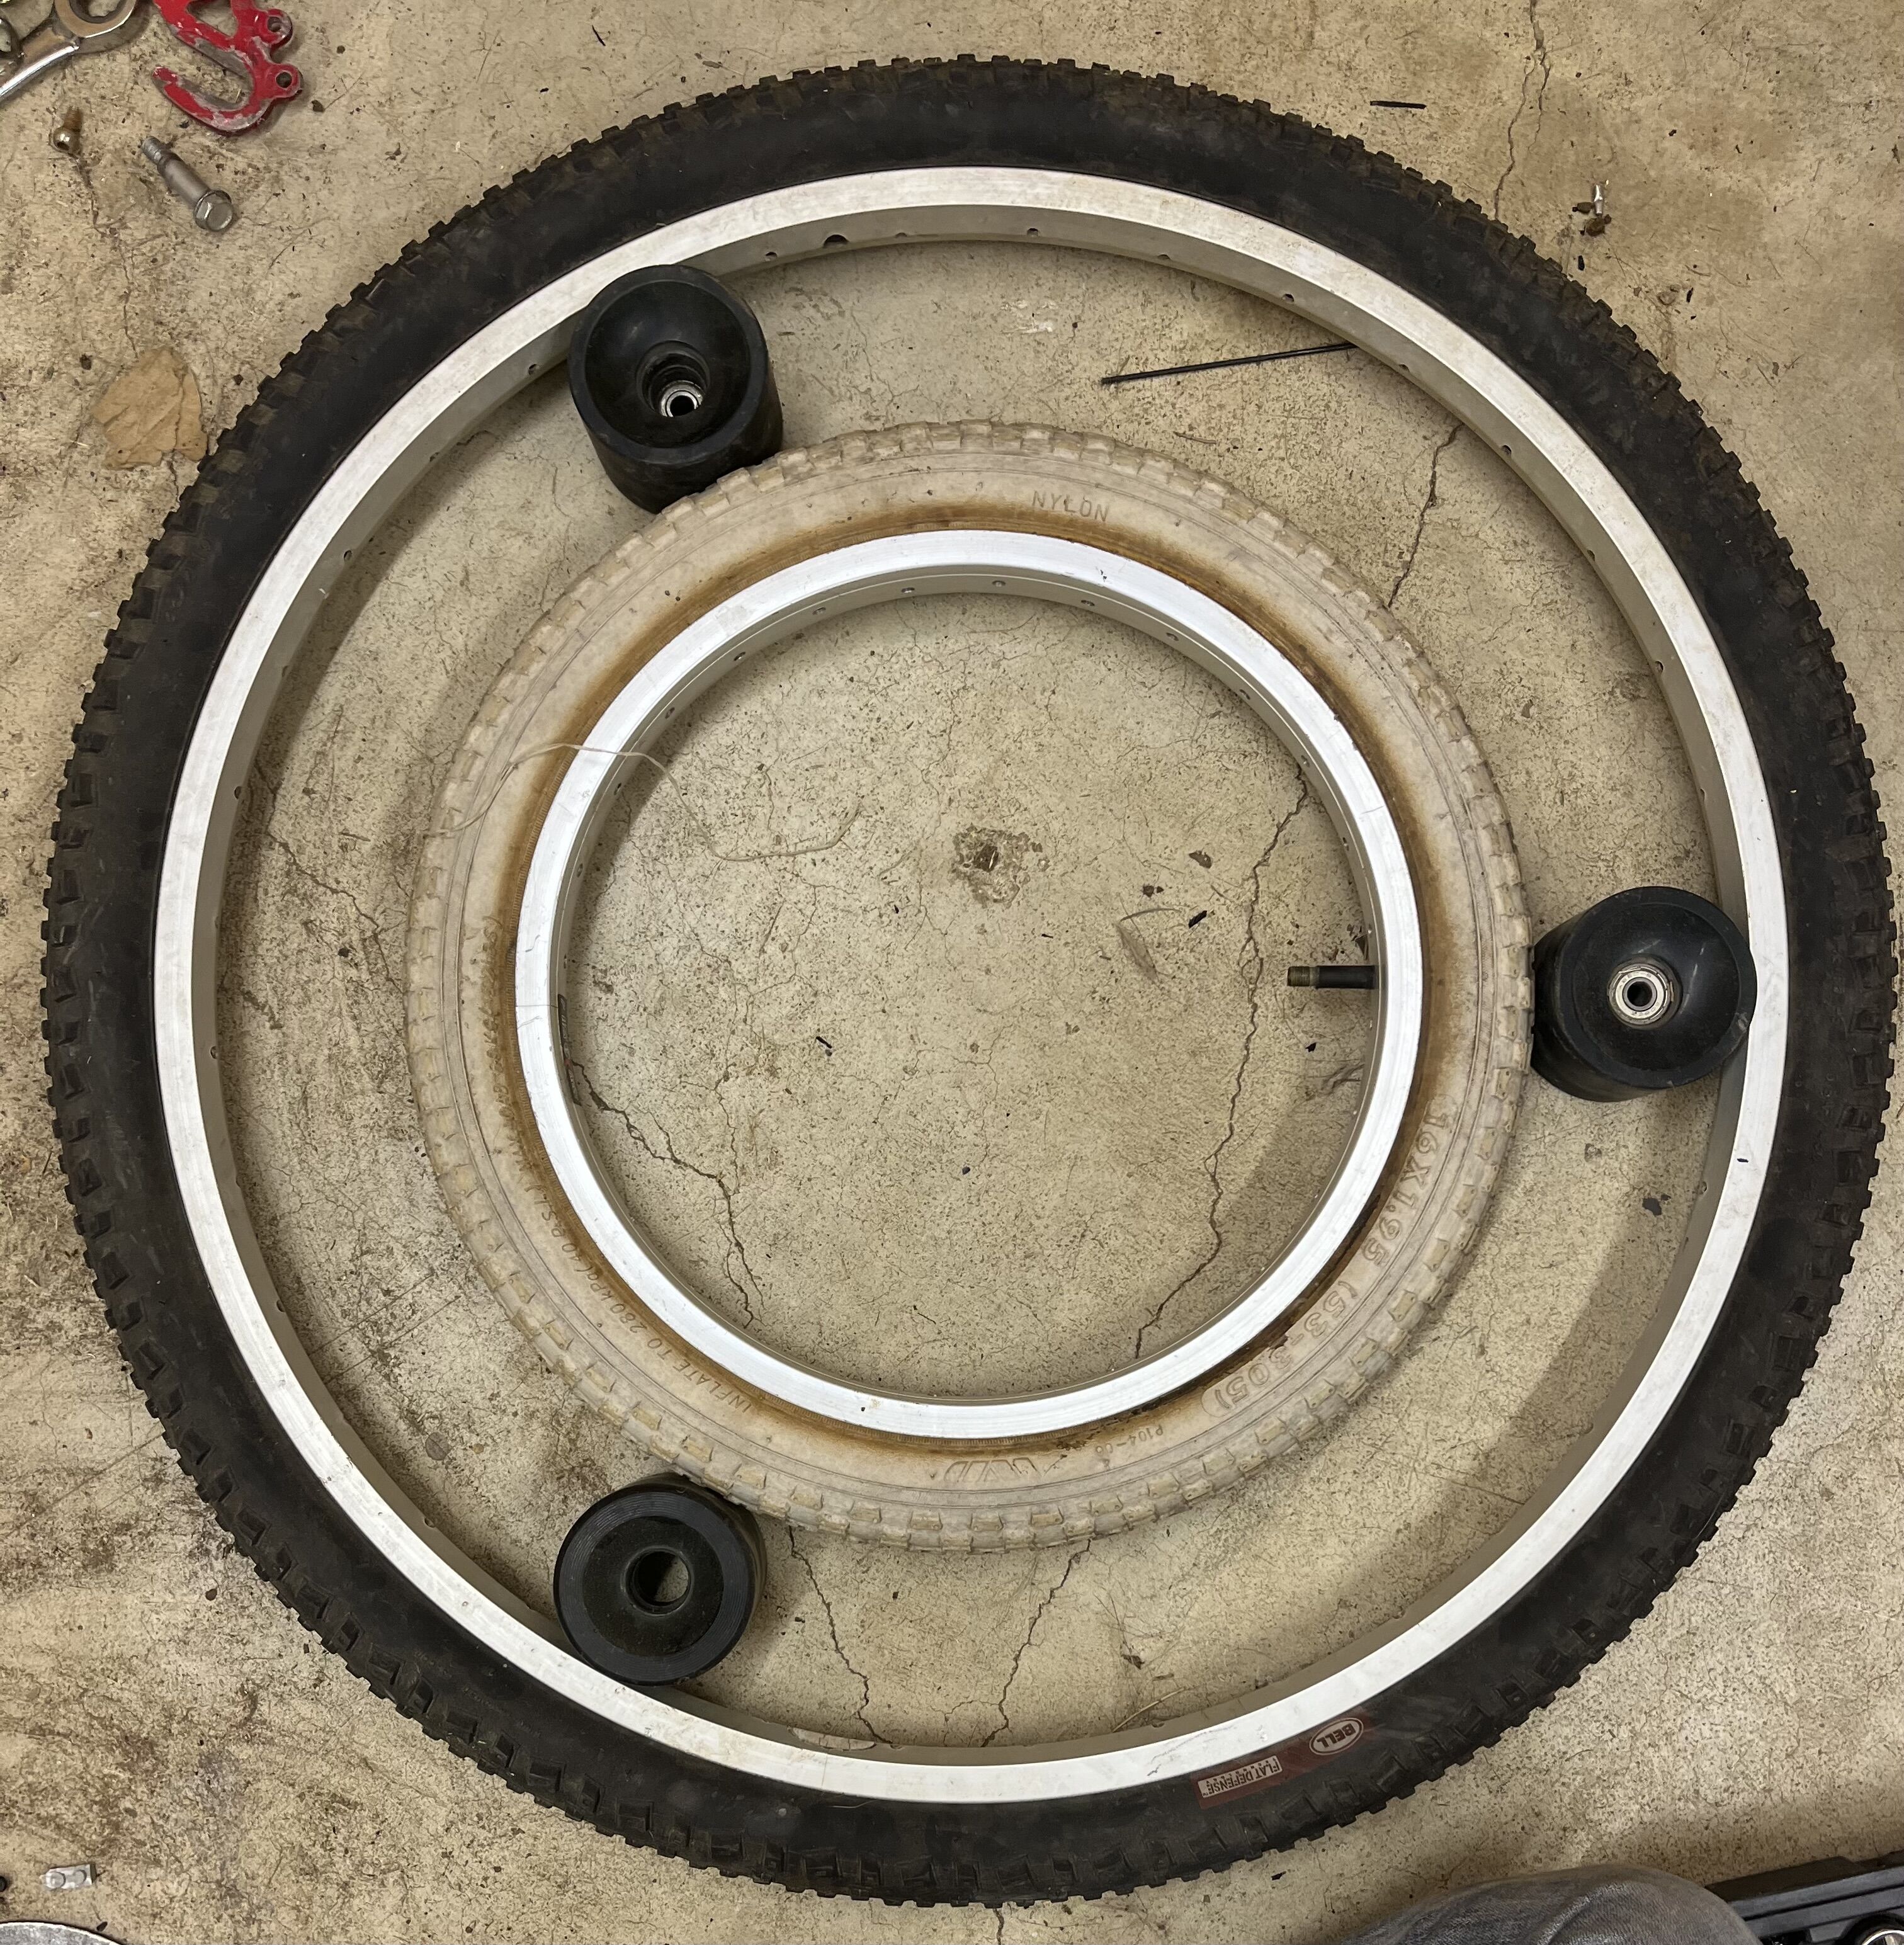
I recently decided to check my unis that get the most mileage, and I found that my Club 26" and Oracle 36" will need some truing. The tires give enough compliance to where I don’t really notice it at all while riding, but I imagine it probably isn’t ideal for tire wear. Plus just knowing the wheels are out of true will bother me ![]()
I decided to do the Club 26" today. After 3 years of use the rim was slightly out of true, but nothing too serious ![]() Before I picked up a spoke wrench I went around the rim with a tension meter and the tension was within a 15% deviance. While going around the rim I got a good look at the condition of the rim and spokes: no damage at all to the rim thankfully, though there’s some corrosion on the spokes unfortunately. Nothing too bad but it might cause some problems down the line
Before I picked up a spoke wrench I went around the rim with a tension meter and the tension was within a 15% deviance. While going around the rim I got a good look at the condition of the rim and spokes: no damage at all to the rim thankfully, though there’s some corrosion on the spokes unfortunately. Nothing too bad but it might cause some problems down the line
After going through the rim a couple times, alternating between truing and tension balancing, I have it as straight as an arrow and within a 10% deviance in tension ![]() Here’s a before and after in the Park Tool tension app. Should be good for another couple years of riding!
Here’s a before and after in the Park Tool tension app. Should be good for another couple years of riding!
3 Likes
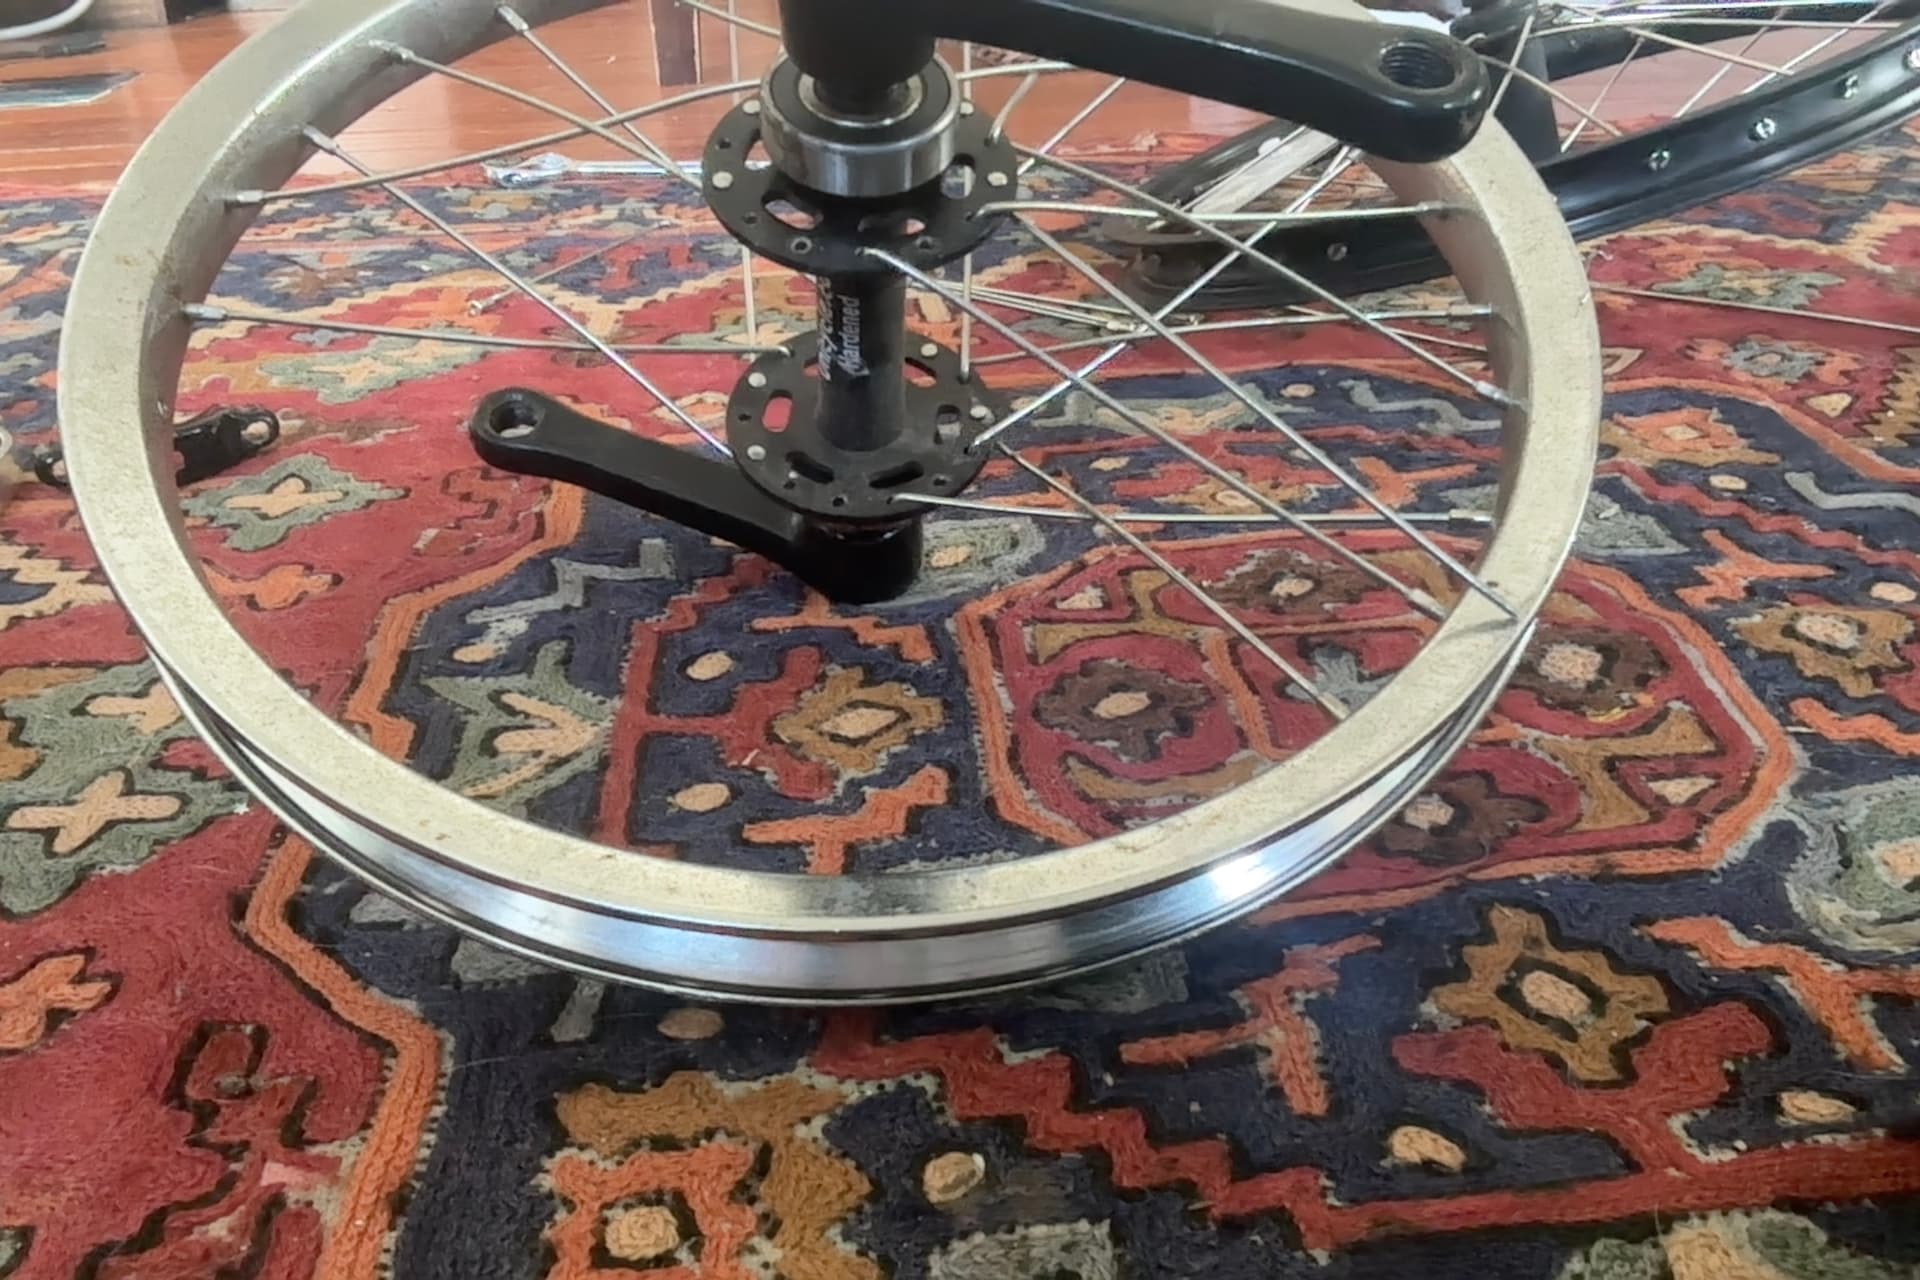
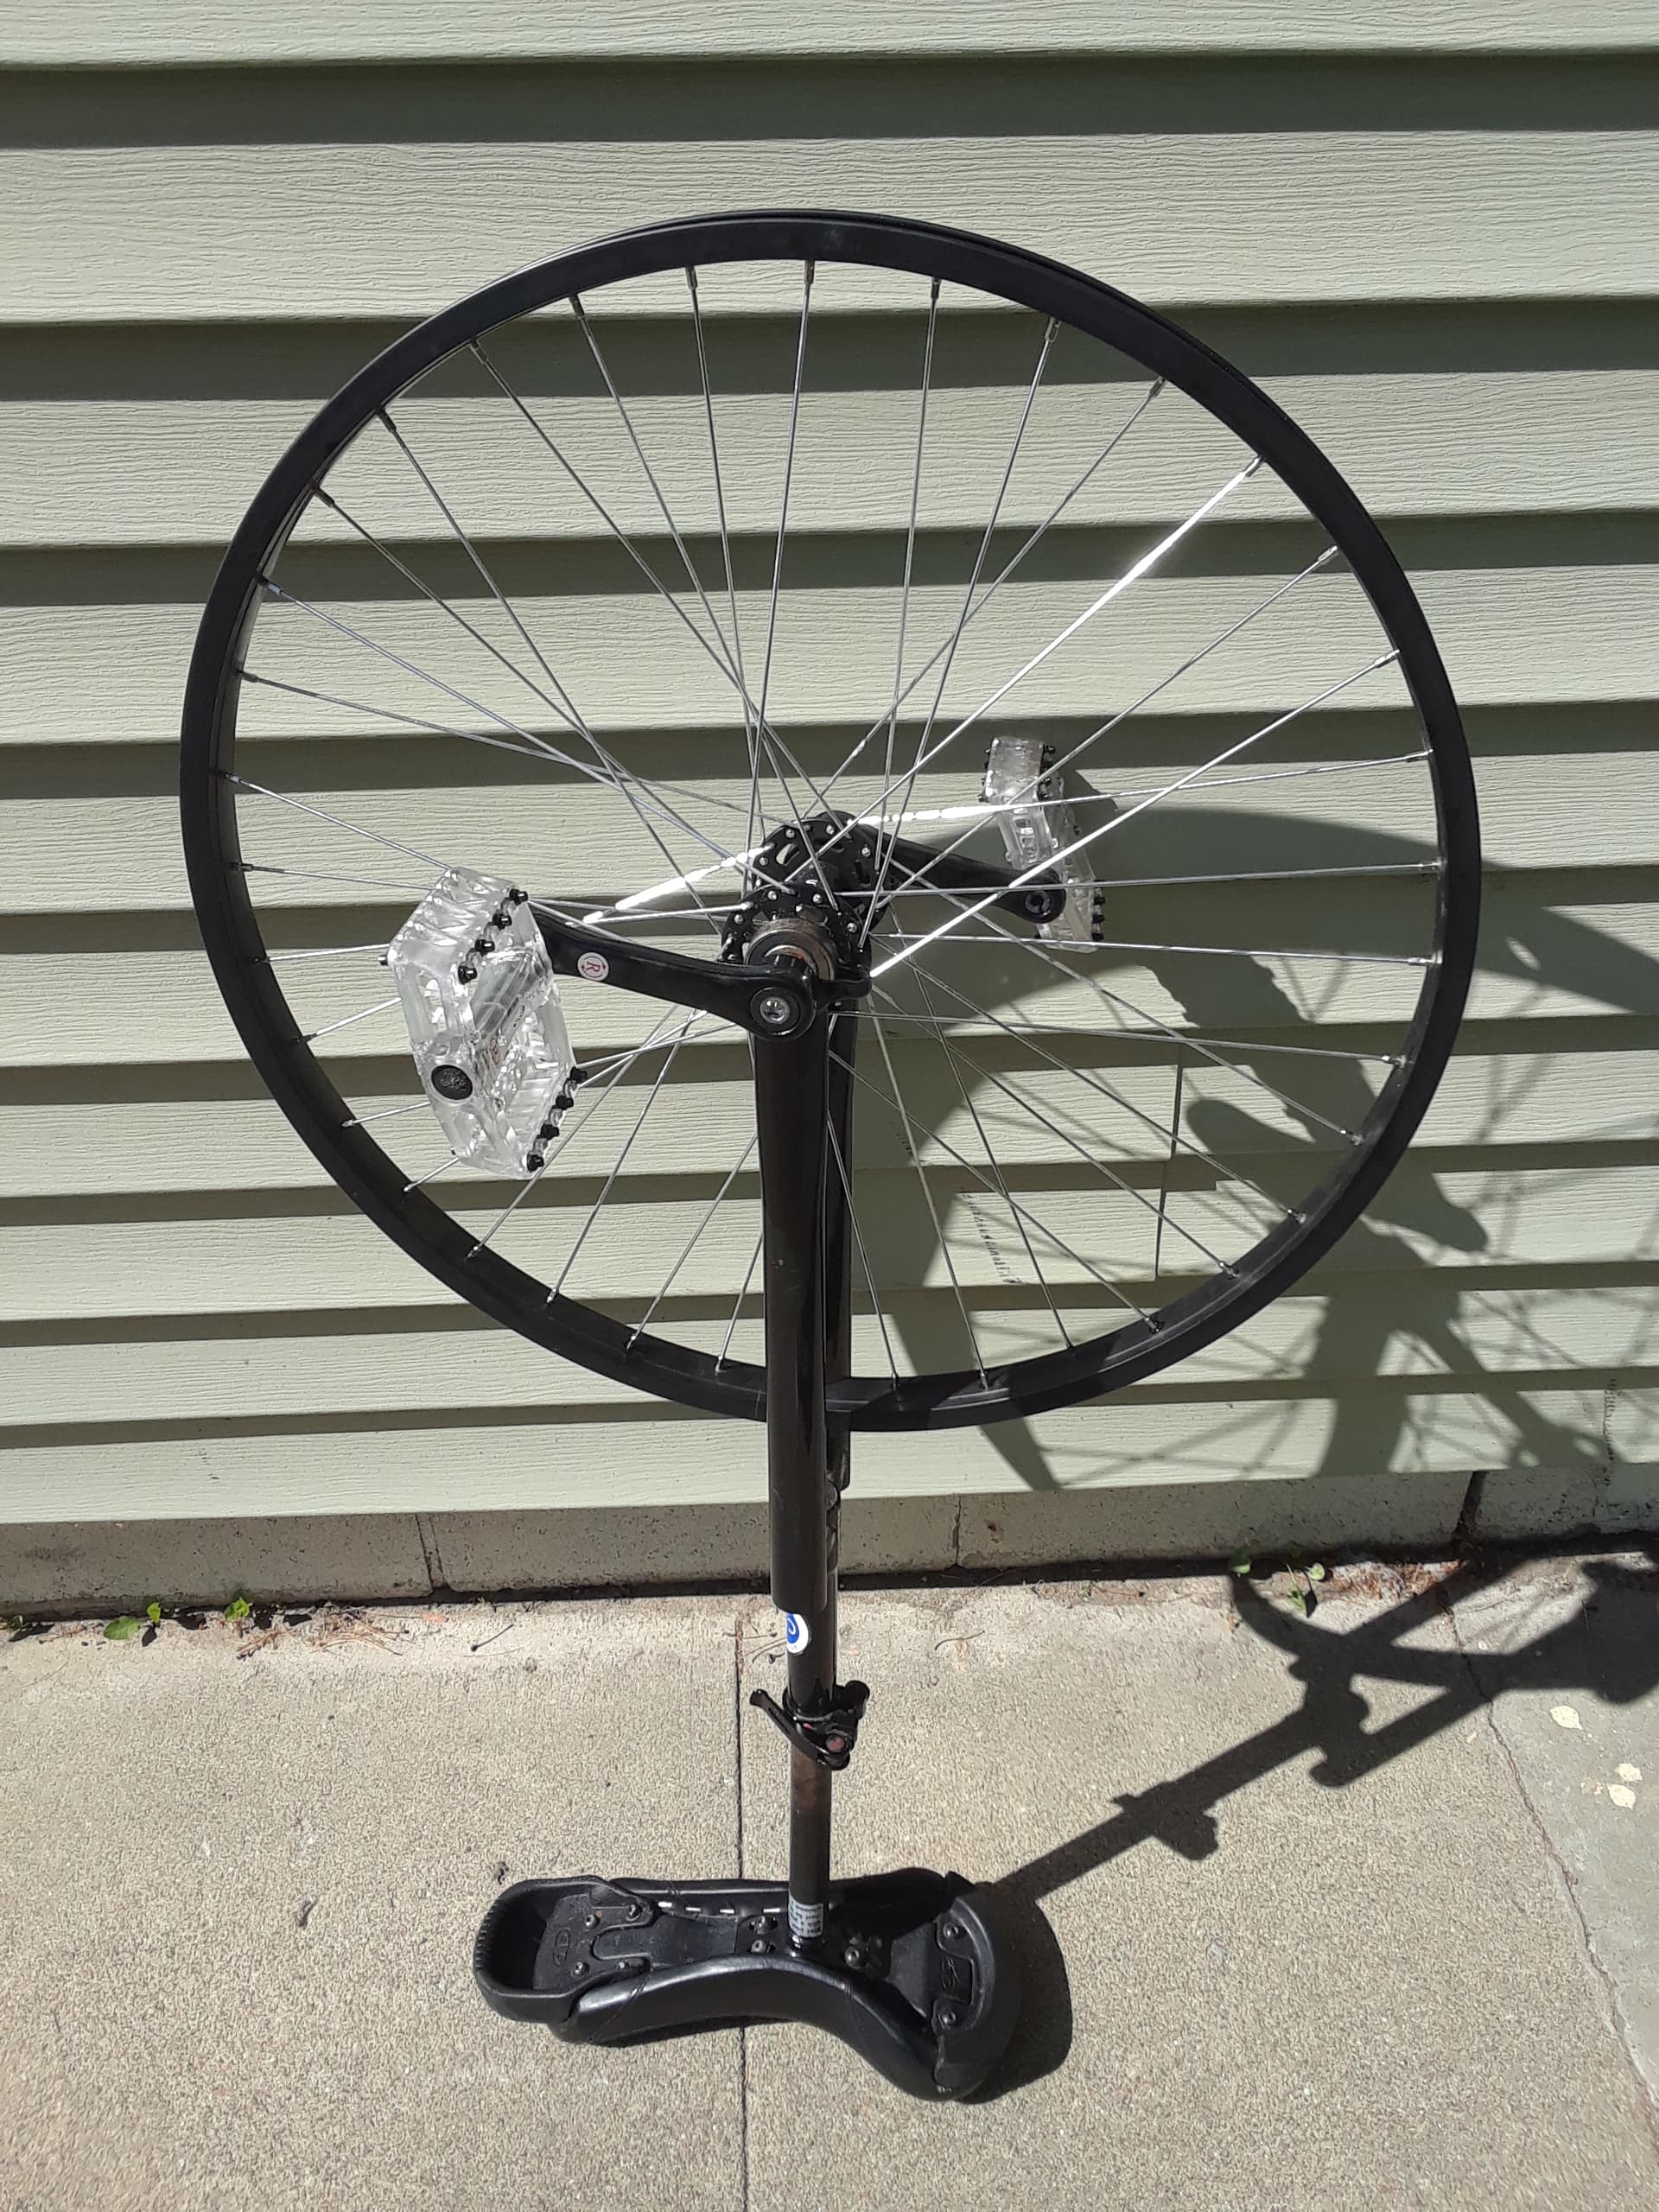
Freewheel wheel rebuild. I am replacing the busted hub on my 24" with a nimbus drift trike hub. The wheel still has to be trued

4 Likes
Are you going to put it in your 36" frame, or use a d’brake adapter or something on your 24" frame?
The plan was to use the 24" frame so it isn’t left unused. With this narrower rim i can also use my slick racing tire allowing for great speeds for the upcoming*** freewheel 100 km ride or something.
1 Like
Nice idea. Now the planets should be connected to the pedals and the sun to the saddle, where the pedals/legs are in the way now. So swap it: When you have the saddle on the planetary gears and the pedals on the sun, you have like 1:1 transmission pedaling backwards, what is essentially like a twice unicycle behaves. I like that!!!
As a twice rider I know that the friction makes some difference: I trained one foot riding on the twice and couldn’t do it on a normal uni directly afterwards because of the difference in friction.
2 Likes