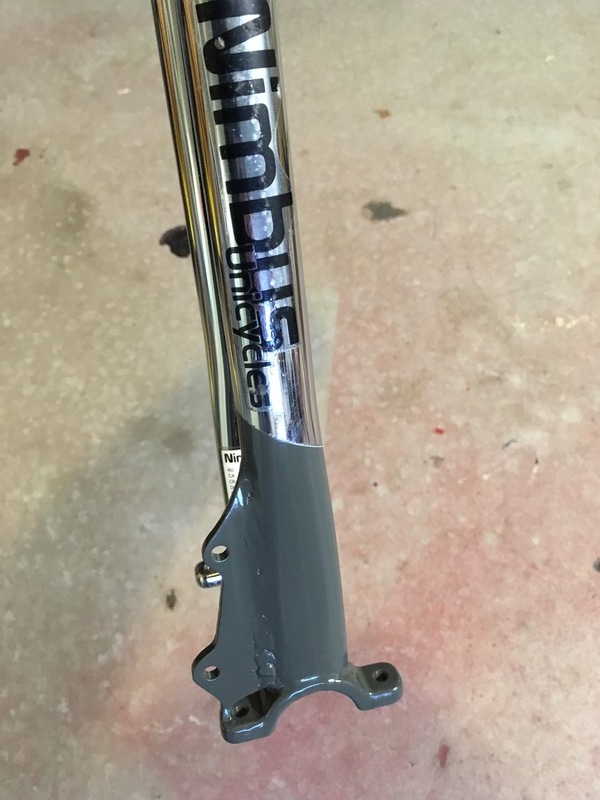
I got many of them at last unicon so to save space I didn’t bring a street frame and rode the ones I was picking up. Overall none were good though. The M4O has a super long neck so I couldn’t put my seat as low as I wanted to feel comfortable doing tricks, the KH double crown was really quite awkward to do spin tricks on because of the extra weight when spinning, the Quax Titanium looks like a street frame but cannot fit a fat tyre in it and the Black Domina 2 had a neck that was too short so my cut seat post was way too low
The koxx titania was my street unicycle of choice for a long time but it is quite brutal on the knees haha.
I have a KH 2015 frame for tricks and I have bent the neck of it forward from landing badly so it’s probably good that I don’t ride these too much.. That and I only am good at hockey so generally spend 90% of my week on a freestyle.
Thanks. I hope to collect all that I can so one day there can be a historical display of unicycling. I think I may need to collaborate with John Foss however
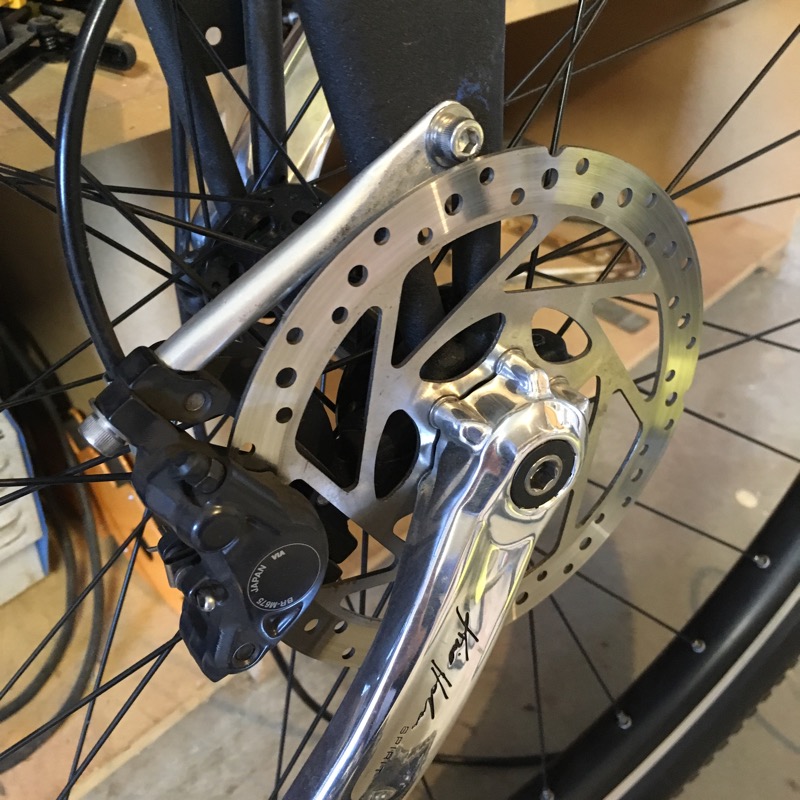
I decided enough is enough with my 36er brake howling and vibrating, so I fabricobbled a brace to try and stiffen it up. If this works I’m going to ditch the dBrake and weld a caliper mount to the frame.
Actually, if this doesn’t work then I’m also going to make a new mount and weld it to the frame. So I probably shouldn’t have bothered with this, and should have just fixed it properly instead.
Anyway, I’ve yet to try this out properly, but it seems to work when pushing it by hand. Here’s to smooth and silent braking!
I did something very similar with my Oracle and it worked great. It seems like the dbrake works OK with some brakes, not with others - it worked fine with my Oracle’s original brake, but I couldn’t get it to stop shuddering with a replacement brake.
I never had any problems after I added the brace, but I eventually switched to a frame with proper brake mounts, and I wouldn’t buy another uni with a dbrake.
Thanks, it’s pretty easy if you have the tools to hand.
I agree, from now on I’m steering clear of the dBrake. Mine was ok when I first set it up, but the vibration has been steadily getting worse. I’ve tried cleaning the rotor and sanding the pads but it made no difference. I’ve experimented with different tension on the bearing cap bolts but it made no difference.
Riding the brake to the bottom of a big hill while the dBrake approaches resonant frequency is not pleasant. I actually chickened out of a steep descent the other day because I didn’t trust the dBrake, which is what prompted me to (finally) take action.
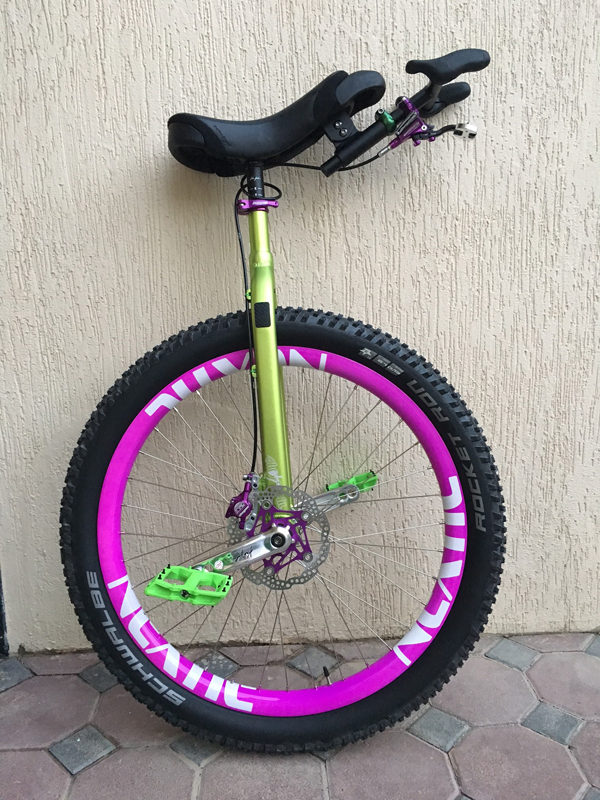
My new muni with Mad4One frame and Nextie Carbon 27.5 rim
Wheel built by me
Short ride and it seems to be fantastic … needs more road and dirt to get a better feeling
Gave my trusty old UDC cf base the third major overhaul.
Originally I build it with the oldschool bolts sticking out the seat approach (almost 7 years ago) and alongside the usual problems with it like hitting your fingers on those damn nuts constantly, I was 14 or 15, so my drilling and filing wasn’t all that accurate.
Then I used M5 T-Nuts everywhere except the back bumper and custom M5 allen bolts that use a 4mm allen key (did those by grinding the threads of M6 bolts using a bench grinder, and cutting new M5 threads, and no I don’t know why I thought that was a good idea either, but it held up surprisingly well, I think I wanted to keep the holes in the base as small as possible, and still use the bigger allen key).
I realized how stupid that was a bit later, and used M6 T-Nuts, still had the bolts sticking out method for the back though.
Now, recently I got fed up with my inaccurate holes, and T nuts spinning because the bolts never went in without fiddling a lot and so on, and since I obtained a KH Street saddle, I used parts of the steel reinforcement plates with the middle cut out, and speedholes added for extra lightness, to replace the T nuts, and in the back I welded two sleeve nuts to a strip of Volvo fender, to make sure they won’t spin.
I also ground down the front of the base to finally make the handle fit right, and sed a strip of edge protection stuff from a hardwarestore, and some clearcoat to make it pretty. Some stuff I am not happy with includes how much I had to elongate and enlarge some of the holes to get everything in the right place this time around, but I believe it will still be plenty strong.
I originally wanted to do a little step by step post, but forgot to take pictures…anyway, here is the final product:
Good job Finn carbon bases are a bitch. I did mine with tnuts and while they work ok I had to shorten my bolts which was done witha hack saw and it makes it impossible to get them as the threads arent smooth. I need to buy new bolts that are shorter. Also One bolt went in at a random angle and im fairly sure screwed the thread in a tnut. Basically I have just avoided taking my base apart for a good 9 months. Not looking forward to the day when I have to fix it all up..
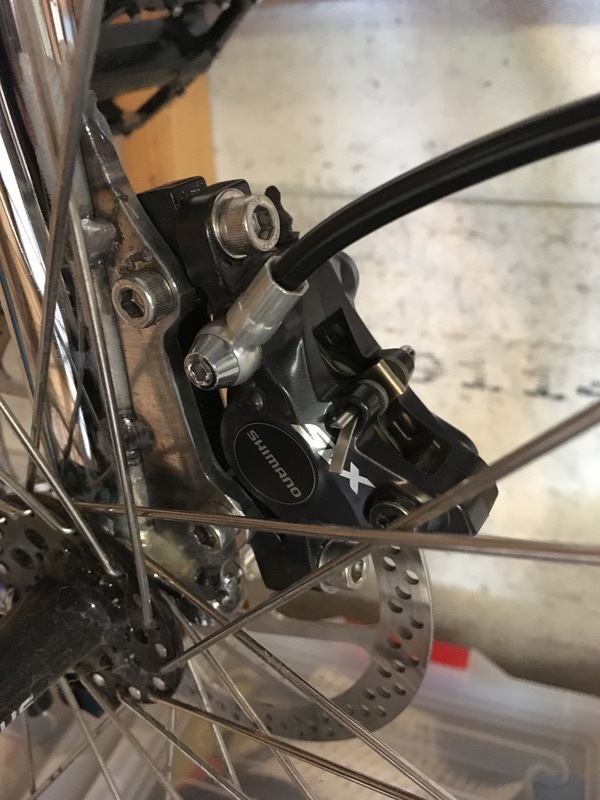
Stick welding is the cheapest, but less versatile than other processes. I did that brake mount with an old stick welder, because it’s what I had available, but it’s not really the best option for welding thin-walled tubing like using in bicycle and unicycle frames.
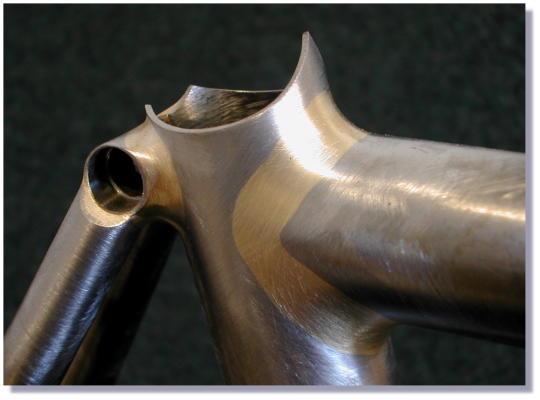
Lugged brazing can be very strong. This is how a lot of older bike frames were built. The lug is basically a socket that the tubing fits into, and then the brazing filler metal gets sucked into the very small gap between the tube and the lug via capillary action. Very strong but requires lugs and so not really suitable for hacking. Example:
Lugless brazing is also done sometimes. In this case the filler metal forms a fillet similar to a weld bead. The base metal is still not molten. You need a very tight fitup for a strong joint, and I understand there is some science to the fillet radius in terms of managing strength. Not as strong as welding at first glance, but there is less heat going into the base metal so it can be stronger sometimes. Example:
Fillet brazing can be done with a TIG welder, but usually it’s done with a gas torch. With an oxy/acetylene rig you can heat, cut, weld, braze (both fillet and traditional) and silver solder. It’s very versatile and a lot cheaper than a TIG setup with all the bells and whistles. TIG can be cheap if you have a more basic setup (scratch start or lift arc), but once you want to use a foot pedal, use AC with high frequency start (for welding aluminium) and have good adjustability it can get pricey.
My “new” $40 Craigslister!
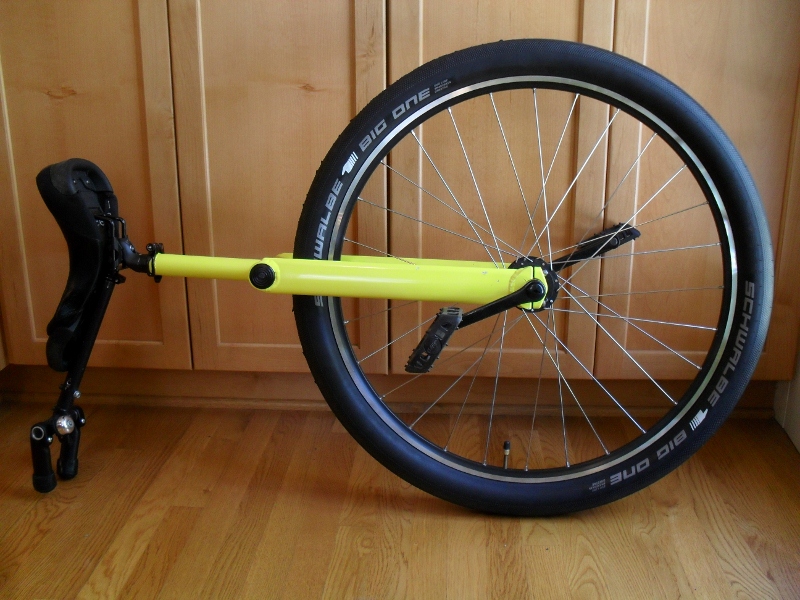
This was a one-off, aluminum 29er built by local shop with Alex rim. I replaced the bearings, then added handle bar, Schwalbe Big One, and rattle-can finish. Now it’s a fast, light road machine.