Greetings fire bugs !
Here is a little history and instruction on the game of flaming puck hockey and the puck itself.
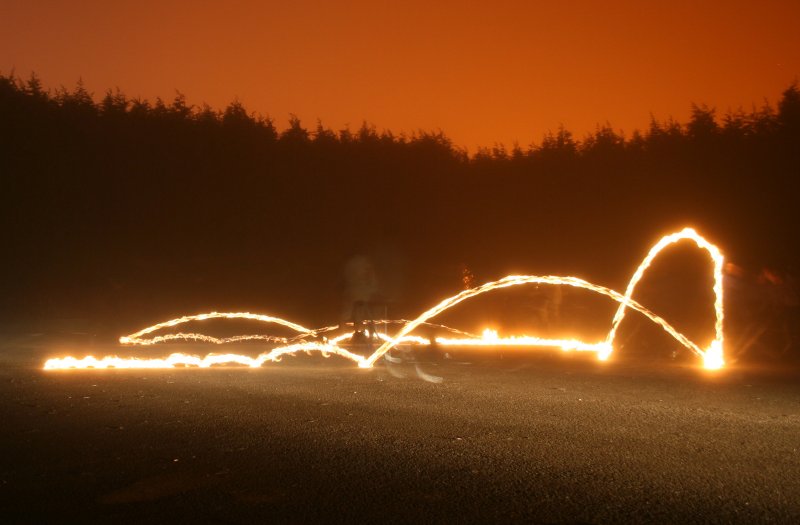
I have had many requests lately inquiring about how I created and make the “Bedford Ball of Fire” used to play “flaming puck hockey” so I am here to let people know about it and how to make one of your own so you and your friends can give it a try.
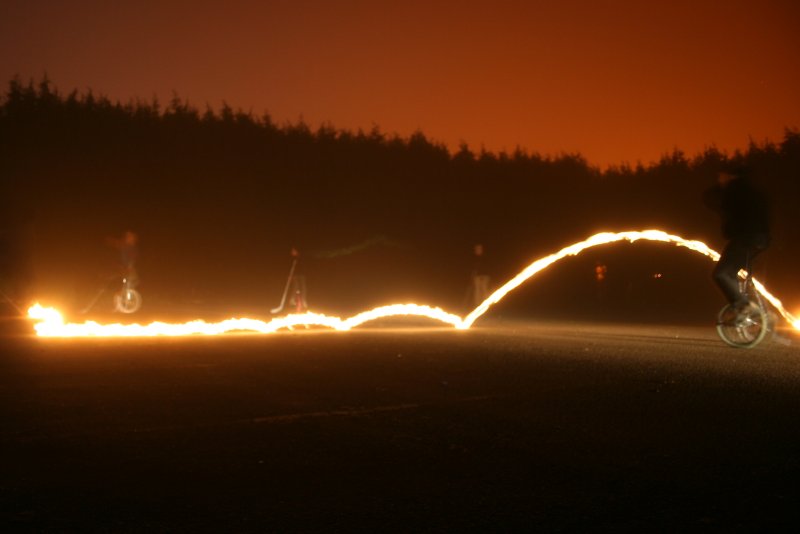
I first invented the puck and game of Flaming puck hockey about 7 years ago.
Since then it has been played at the 2001, 2002, 2003, 2005, 2006 National Unicycle conventions. 2002 was also a UNICON year and they happened back to back in WA USA.
It was a big hit at every convention and will be again in 2007 at the NAUCC at the end of July in Saline MI !!! Can’t wait ! Check their wedsite for more details at www.naucc2007.com
The way I would like to see the game played worldwide, at least for safety sake, would be with these few safety rules:
-
The “puck” MUST be kept on the ground at all times !
(It will deflect and become airbourne at times so always keep your eyes on the puck.)
-
The “nets” should be boxes about 12"/30cm high - 12"/30cm deep - 18"/45cm wide.
(I have been using plastic crates that fold up for the last 7 years. I have to replace them a couple times a year mostly from riders hitting, falling on or riding into them and breaking them. Do not use full size hockey nets with a net backing or wooden crates.)
-
There should be NO goalie and no ideling in front of the net.
(That way no one should ever be shot directly at with the ball of fire.
With the small nets, no goalie and no ideling, everyone should be much safer and it is still fairly hard to score.)
“RINK” notes:
The outer boundry should be marked on the ground with a center line dividing both halves.
You can use chalk as it isn’t permanent and washes away with water.
The “nets” should be about 3 feet in from the ends. The size of the rink should be at least 30’x60’. The rink size usually depends on what we can find at the conventions.
Whoever shots the puck out of the “rink”, the other team brings it in from the point where it left.
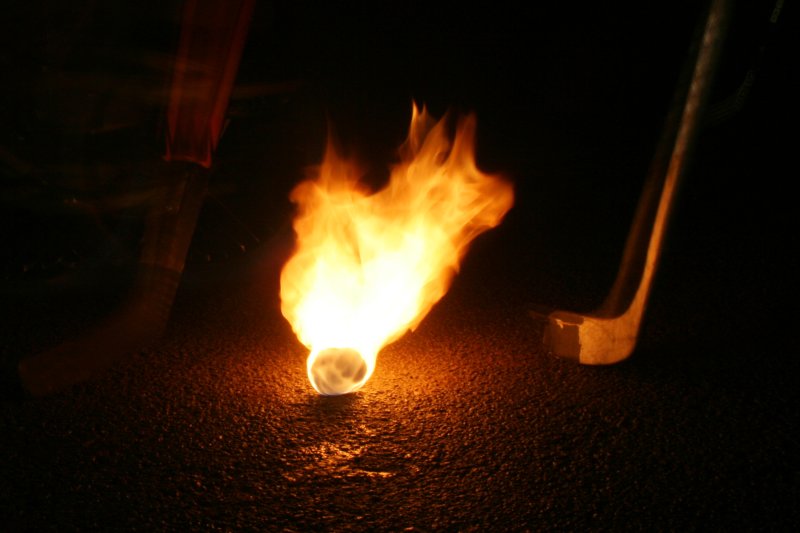
Lighting the “PUCK”:
There should be a person in charge of lighting the puck and shooting it in.
It should not be someone playing the game.
IMPORTANT NOTES !!!
The fuel used should be camping fuel, NEVER GASOLINE !!!
You can mix it 60% camping fuel with 40% BBQ starter fluid for a longer brighter burn time.
You should have a large neck metal can to soak the puck in.
Fill the can and drop the puck in to soak until the air bubbles stop.
You MUSH use metal BBQ tongs to lift the soaked puck out of the can of fuel.
NEVER USE YOUR HANDS.
Your hands will catch on fire if you get any fuel on them !
You MUST use a BBQ igniter to light the puck.
NEVER USE A LIGHTER OR MATCHES.
The flame that comes off the puck is huge and lights really fast.
You will be burnt if you don’t use a BBQ igniter !
I know from experience about the above two notes !!!
I got burnt, and it hurt ! …but only once !
PLACEMENT of CAN OF FUEL:
The can of fuel should be about 4’ from where you light the puck.
Remove the puck with the tongs, place it about 4 feet away and then light the puck with the BBQ igniter. Keep the igniter in the same spot away from the fuel where you light the puck.
The reason for doing it this way is to prevent the fumes that come off the fuel from being ignited. They are very combustable ! The can can catch on fire if it is too close to the puck when you light it.
Again, I know this from experience.
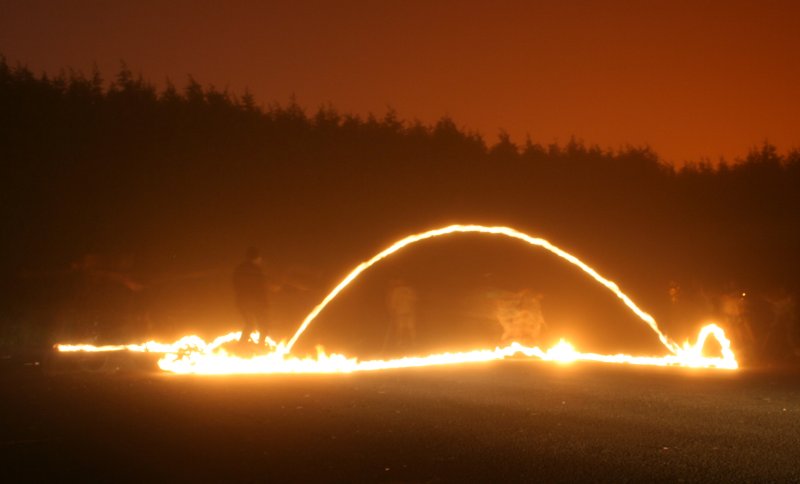
FIRST SHOT of the puck:
The first shot MUST be a hard shot to make sure the puck sprays off the fuel on the outer edges of the puck. If not the fuel will spray the unicyclists and cause bad burns. If you don’t get the fuel out of the outer edges of the puck, it will cause the stick blades to catch on fire. (See notes about sticks below.)
The first shot should be along the center line without interference from the players until the huge ball of fire dies down a little. Usually within about 30’ or so.
The shooter should also have his own stick.
Flaming puck HOCKEY STICKS
You should ONLY use plastic blades. NEVER use wooded blades.
The wooden blades will catch on fire as the fuel soaks in from shooting the puck. Wooden blades are also a hazzard to other riders who ride over them.
Wooden blades break easily when you ride over them. Plastic ones just bend.
Sometime the pastic blades catch on fire too so watch out.
Additional notes:
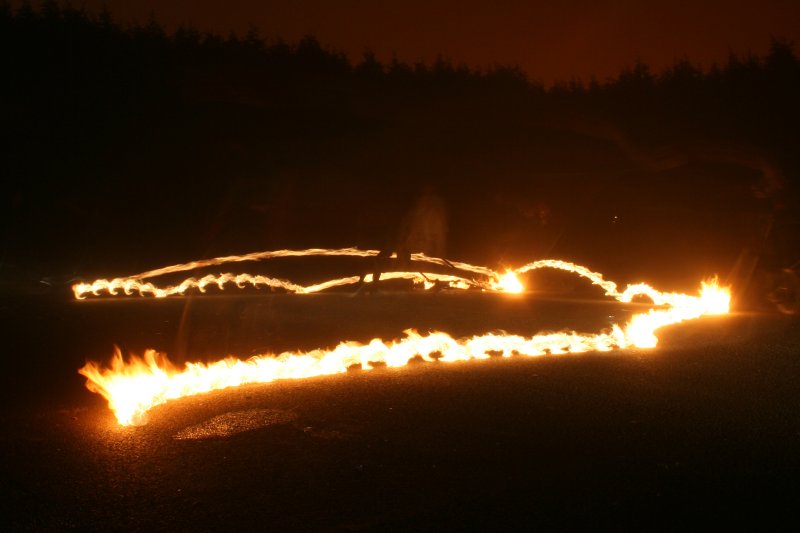
Flaming puck hockey is a lot of fun to play, but it can be dangerous too.
Always pay attention no matter if you are playing or watching the game.
Always keep the game under control and don’t get too aggressive.
Never play where the puck leaving the rink can cause something to catch on fire like grass, leaves, cars, your little sister, etc
VERY IMPORTANT NOTE:
ALWAYS HAVE A FIRE EXTINGUISHER ON HAND JUST IN CASE !!!
I have never had a real problem and I don’t want anyone else to ever have a problem either !!! (except the burn hand when figuing out the fuel / lighter issue the very first time.)
PLAY SAFE !!!
NEVER SEEN THE GAME… or want to see a great video…
To see an awesome video of the game at the 2003 National Unicycle meet in MN USA, go to:
Look for the video in THE DAN’S gallery. IT ROCKS ! …and so does Dan !
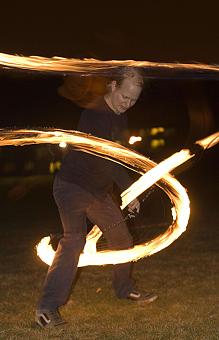
You will also see the FLAMING UNICYCLE in the same video !!!
NOT RECOMMENDED AT ALL !!! That was scary stuff !
(Check out some other outstanding videos by Dan while you are there too.
Here are my recommedations: His Music video, Le Goat, Jack’s Addiction, Mamma’s gone Banana’s, etc…)
If you want to see another sweet flaming puck video, you will have to get a a copy of the 2006 NAUCC CONVENTION DVD by Brian MacKenzie.
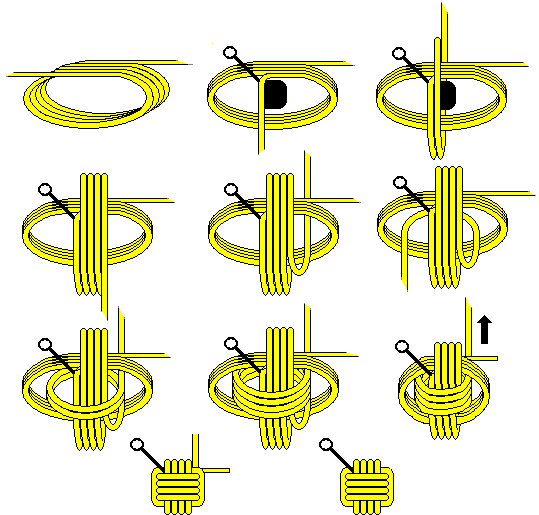
HOW TO MAKE A FLAMING UNICYCLE HOCKEY PUCK !
What it’s made of:
You will need some juggling torch wick. Most likey about a metre should be enough.
You will need 4 aluminum fasteners. (I will find out their proper name and length and post the info soon.)
-
Cut the torch wick into two pieces the same size.
-
Start with the two pieces on a 90 degree angle with both ends together forming a corner.
Pull one piece back and wrap it over the top of the other piece about half way.
-
Start wrapping the wick over one another, one fold at a time.
You will see a cude starting to be formed.
-
Keep wrapping until the wick makes a perfect square.
Make sure you wrap it really tight as the layers build up.
Whatever the width of the wick is will determine the cube size.
(I will get the wick width too and post it soon.)
-
Once the cube is completed, cut the last piece about a half wrap longer and wrap it under and tuck it in so there is no cut end exposed.
-
This is the hard part… You need to pierce the puck all the way through all layers so that you can get the 4 aluminum fasteners all the way through to hold the puck together.
I use a metal scriber, thin steel rod with a point and handle, to start the hole then use another larger diameter rod to open the hole a little further. It is hard and takes a lot of time to make the puck. Usually end up with blisters from making it.
- Once the hole is open, you need to get the fastener all the way through the hole and get the screw in the other end to hold them together. All 4 fasteners need to be installed.
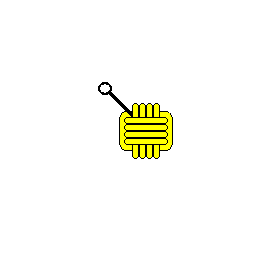
Once it is build, it lasts a long time. (I guess that depends on how often you use it.)
There are no sharp edges or points or any metal that will burn you so don’t worry about that.
(Don’t be stupid and pick up a puck that just went out either !!!)
NOTE: You really should have two pucks so one can be re-lite and put back into play after the first puck goes out. If not there is a little delay in re-lighting the puck.
Make sure you keep an eye on the puck after it goes out so you can find it.
Make sure you send the puck that is out back to the shooter before the next puck is put into play or you may never find it. A black puck in the dark is had to find !
If you have any other questions about the game, let me know and I will be happy to answer them for you.
Enjoy the ride,
Darren
www.bedfordunicycles.ca
P.S. Post your comments on THEDAN.CON’s flaming puck video here too !!!
Thank you !