I don’t start many new threads but I’m taking shipment of a 26" Nimbus Oracle (disc brake) Mountain Unicycle tomorrow and I already have a few questions. There is a lot of good info in the eagle has landed thread and in the Disk Brake 100mm hub thread but I wanted a place for new Oracle owners (I’ve worded the title to include the 24" Oracle kit as well) to discuss. I’ve also started a new thread over on the Unicycle Product Reviews side with info about the ordering process, my first impressions, and eventually a full review.
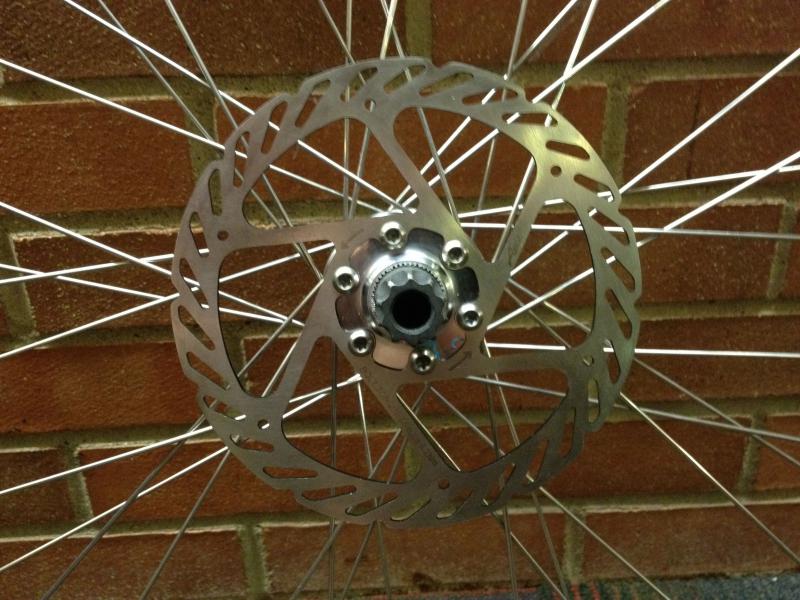
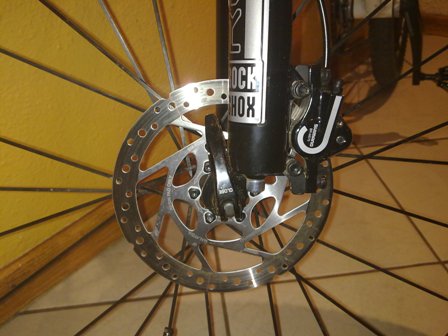
The first thing to go will be the Duro Wildlife Leopard 26" x 3.0" tire. Nothing against the Duro or UDC’s decision to use it, I just don’t need that much volume. I have already taken shipment of a Maxxis Downhill HighRoller 26" x 2.50" 1,265(g) Wire Bead TPI 60 with 3C MAXX grip compound. So my first question is about how to change out the tire. Specifically, the interface between the bearing housings and the d’brake mount. Roger provided a nice illustration of the side where the caliper mounts locks down tight to the frame so it should be pretty easy. I guess I’m just a bit nervous (not very mechanically inclined) because leaving a “space” and going “hand tight” has always been drilled into my head.
My next concern is about getting the rotor back in between the brake pads. I know from having my Impulse in the LBS that you should NOT pull the brake lever with the rotor out of brake. Is there anything else about the brake that I should watch out for? What other complications might I run across with a “simple” tire change?
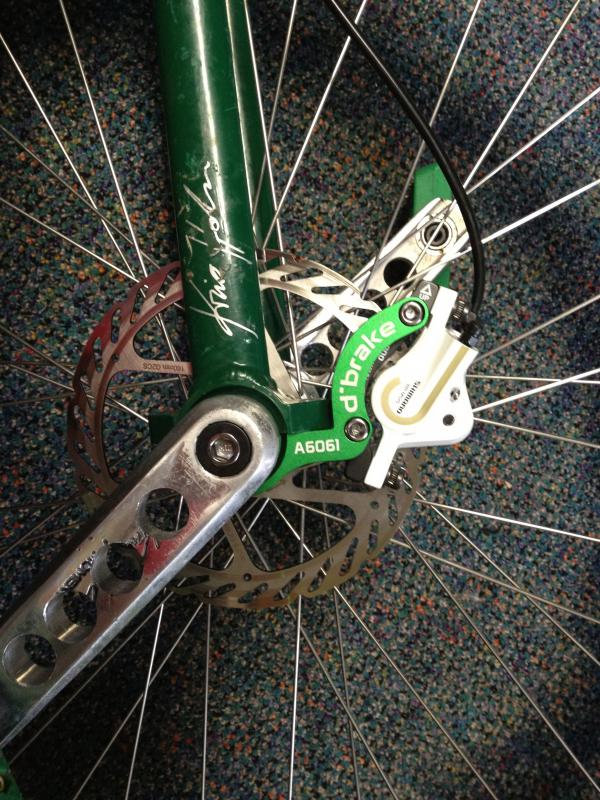
The nice thing about the D’brake adaptor is that you don’t need to remove the brake calliper from the adaptor to remove your wheel. Taking it off is strait forward as is getting it back on. you can tighten it to the same tightness as you would a regular bearing cap but you just don’t want a gap on the lip side.
My green D’brake mount has a fraction of a mm of play in where it sits on the bearing so sometimes I re-center the calliper over the rotor after removing and re-enstalling it but it’s usually not necessary.
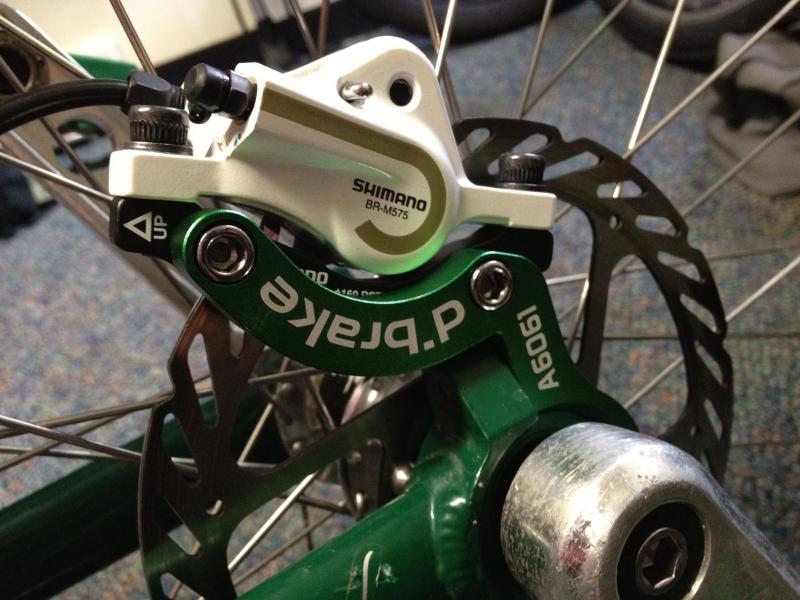
Wow they look great! Just a thought- have you guys put loctite on the disk bolts? It would suck for them to come loose and have to take off a crank and bearing…
I want to get one of those hubs but am pretty heavily invested in the crank mounted disk system. Some day I am sure I will be able to do a back to back comparison.
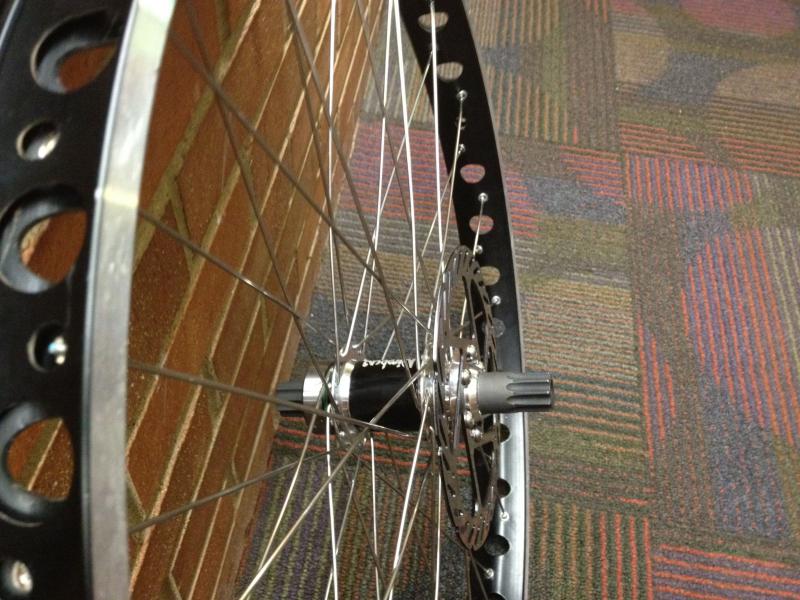
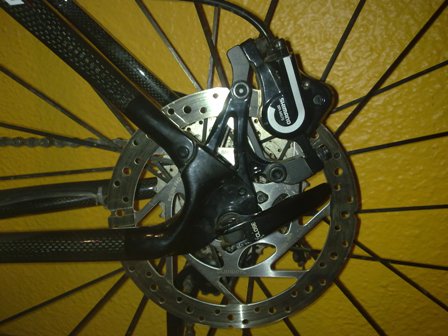
Actually you are running a rear 160mm mount which equates to a front 180mm hence why it isn’t biting the whole of the disc
You need a 160mm front mount or put a180mm disc on (former is the easier)
front Deore 160mm and mount
Rear Deore 160mm and mount (the adaptor you have which you can see fits the disc properly being on the back)
I have been running discs of all types on my MTBs form almost the day they became available so your set up looked immediately slightly off to me. You will be losing a chunk of power but for us that isn’t an issue but you will get accelerated pad wear just on that small contact point
I just want you to get the best out your new bits, hope that helps.
OK, now that I look closer I can totally see that the disc is only in contact with a small part of the pad. Will flipping the adaptor around fix that, or do I need to get a front adaptor?
No probs, I am enjoying tinkering with yours remotely until I can order mine
I see your edit with a ninja edit of my own
no swapping it around won’t help, that was my initially thought when I first saw your setup before you confirmed the arrow was the correct way.
You have two choices the easiest and cheapest is to get a front 160mm is to post mount adapter the other is to put a 180mm disc on which will gives more “power” and a bit more modulation than a 160mm but that will mean a new disc and pulling he bearing off that hub to do the swap.
As we don’t need more brake power get the new adapter (the link is to a UK site as that’s all I know) you might get a local bike shop to just swap it out for you if you get on well with them as they are pretty cheap
I think the front and rear difference is just to allow you to run a 160mm front adapter on the rear so you can use a 140mm rear disc (I do this on my SS MTB).
I just need mine now stupid payday being in the future
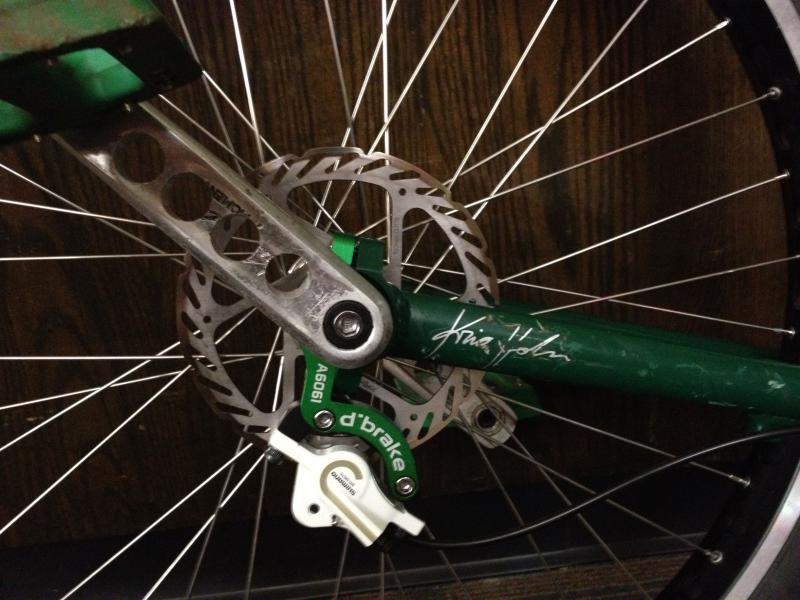
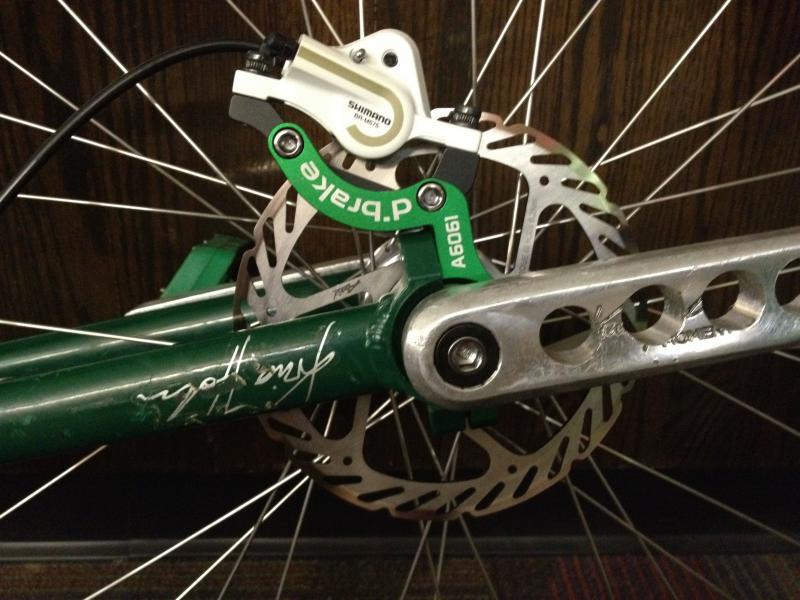
All these problems would be avoided if only they made the uni disc adapters in post mount, thus avoiding the need for another adapter for the vast majority of us who are happy to run a 160mm disc (and making no difference to the minority who want to run a larger one). Making them IS mount is a very poor engineering solution IMHO.
(I’ll keep repeating this comment until somebody takes the hint!)
I think to machine two posts and cut a thread in them would take a lot more machine time than an almost flat bracket with two counter sunk holes in it, not to mention how to make it look aesthetically pleasing.
I bet the IS design is down to cost, oh and there are some IS callipers out there
I want a KH with a welded mount personally I think these look untidy sticking out so far, tucked up on the leg is where it should be, but then we are back to economics allowing for this small subdivision of a sub-sect of all unicyclers, retro-fitable disc brakes are the only real option for a profit
But you wouldn’t machine two posts - you’d make something the same as the bit where you attach the brake to on the PM to IS adapter, which has two threaded holes. Sure you’ve got to machine threads, but that’s not the hardest job ever - anyway the alternative is having to buy parts which have two countersunk holes and four threaded holes in total! Realistically is the additional machining cost going to be more than the cost of a PM to IS adapter?
As for aesthetics, it’s hardly difficult to make it look better than two bits of metal bolted together! The 4 mounting points are exactly the same in both cases, and with an all-in-one part you’re not constrained by the bolts holding the two bits together.
I have had a few questions thrown at me about what disc brake sizes people should be buying so I thought I would try and put something concise down here.
The first thing to understand is that on a bike presumably to aid a smaller rear disc and maintain a good front to back power bias the rear disc mounts are 10mm closer to the axle creating a 20mm difference in the diameter of the disk for the same calliper adapter.
There are two calliper mount types post and IS the former being the most common these days, bike tend to have a rear IS mount and a post mount on their fork.
Apart from some early Oregons’ and maybe a prototype Qu-Ax most Unicycles use either a welded IS mount or a bearing cap mount.
If you can find a front IS calliper brake such as the closed loop Echo then you don’t need an IS to post adapter. There tends to be more rear IS callipers about as bikes still use IS prominently for the rear, if you want to use a rear IS calliper you will need to allow for the 20mm difference, so a rear IS 160mm calliper would be a front 180mm so if it came with a rotor it would be too small, a rear IS 180mm would be a 200mm front
However most calliper are post mount so you will need the correct sized adapter for the disc you wish to run. the adapters are offset front to rear so it is best to describe them as a 160fr/140rr, 180fr/160rr, 200fr/180rr as they are the same part for different sized discs depending on what end of the bike they are used.
When buying a post mount disc brake sans rotor this is easy as you can just buy the adapter and rotor that you need, when buying a disc brake kit with the adapter and the rotor if you buy a rear one you will have a mismatched adapter and rotor so would have to either replace the adapter or disc to suit. Buying a front kit will give you all the bits you need.
Another issue I read on here was that someone stated their Triton with a welded on mount had to use a rear type adapter as it had the bike rear size spacing. I am not sure if that is specific to that individual Uni or is a Triton “thing”. If it is relevant to all Tritons with a welded mount then they would have to use the rear bike adapter logic. Any Triton users want to clarify?
Here is a picture of my 26" Nimbus (disc brake) Oracle. I got a Fusion Freeride seat and a red cover. I customized (narrowed) the KH-T-bar according to Kris’ recommendations. I switched the Venture2 cranks with a pair of 165/137 Moments I had on hand and I traded the 3" Duro for a 2.5" Maxxis HighRoller 3C tire. Finally, I installed my freshly LBS refurbished SpeedPlay Drillium pedals. What do you think? Yes, it is way to clean in these earlier pictures. I have added some dirt and mud since then. It looks much meaner.
OMG. I’ve got to get one of these helmets. It’s red and it’s called the Oracle for goodness sake! It’s like Bontrager coordinated with UDC. I have been using my road (mirror installed) helmet for MUni. Not working! Nonetheless $180 is a little out of my price range. Anyone suggest a cheaper brain bucket? It does not have to be this pretty but must be light and well ventilated.