Schlumpf 2022 Build Questions

So the 24” fit my Flansberrium frame without any filing needed - :tada: @jaco_flans

This is the clearance I got with no washers or spacers. Yes it is very close but it does freely clear.

I will think about adding one washer to this for a bit extra - and that’s what I’ll opt for on my 29”

The 29 Flans frame needs about 0.3 mm of frame taken off just by the non disc fork. It’s marginal and will be easily lower that the engraving indents.

Yes this one needs cranks.

10 Likes

Here are the specs that allowed for this to clear with minimal washer addition -

While on that point, the more I look at the way the rotor locks into the hub, the more I’m convinced that this space is there so that the rotor can be spacer’d out from the hub to help with alignment. Of course we’d need a manual and assurances on this for sure, but when you place the disc on it clearly and precisely offers up movement inwards and outwards. As @Hammer said this is very clever!

So the recipe:

  • 203 Rotor
  • Hope Tech3 E4 brake on B type mount from Hope
  • 29” LightBicycle AM935 which has a 2mm off set
  • 24” KH Freeride - off set spoke holes
  • CX Rays spokes
  • 1 x spoke head washer on inside spoke hole on non-disc flange
  • 2 x spoke head washers on outboard spoke hole on non-disc flange
  • Sapim DoubleSquare nipples - not that I picture this helping with clearance issues
  • 29” Flansberrium frame - non disc side needs 0.3-5 of metal filing to allow for spoke heads to clear freely. Expected. Not an issue.
  • 24” Flansberrium frame fits like a glove no filing needed. I think this is due to the more acute spoke angles from flanges in such a small wheel.

I am personally a huge fan of the washers on the spoke heads and love the attention to detail Ryan from RyanBuildsWheels has done here.

Also it took a while to work it out, but he realised he could mount the axle splines in his truing stand and clamp them there, if the hub was in high gear, and it will turn. Never occurred to me!

It really shouldn’t go unnoticed that the CX Rays being bladed spokes, this does make their profile noticeable slimmer. When I mounted the rotor to my 24” with no washers at all the clearance was there, it cleared by what looked like 0.4mm so a bit to slim. I’d want 1mm to feel relaxed.
With round spokes this would have been more like 0.1mm (guess!)

I also wonder if bladed spokes have a better angle shape due to how they cross, it’s like they’re not forcing spokes out so much when they cross.

I had worried my going with CX Rays was purely vanity / wanting “the best” but it seems to have paid dividends.

Tomorrow I will carefully fit my cranks with some spacers and then hope this all aligns with what Florian advises in the manual that must surely be arriving next week :crossed_fingers::gear::smiley:

7 Likes

Thanks @mindbalance for the detailed info. As for Flansberrium frames, the current frames out there might need to be filed on the non-disk from what I’ve been seeing right now. I am waiting on exact info from Florian to correct this on the futur frames.

Felix did message me before filing down the fork leg. If you own a frame and need this done, message me first :slight_smile:

3 Likes

Thanks for the chime in Jakob :pray:

Yes I should have been clearer that I got the OK from you for my filing needs.

This point was in no way my casting aspersions or maligning Jakob’s stellar work - I was in the mode of trying to get the hubs to work, so clearance issue where small amounts of filing was needed felt like valid comment, but this is more a critique of the hubs being such a tight fit than any frame creator’s work. My guess is we could easily see KH and Nimbus frames landing with the need for some filing.

Flansberrium4Life :heart:

3 Likes

Be careful folks when mounting cranks. I was using a short L shaped hex tool to tighten cranks after grease and rubber mallet - applying what I’d term moderate force and got this happening to the bolt:

It still works and will no doubt back out but it is surprising how weak it is give that we have no harden pre-torque bolt.

And this was with 2mm spacers to shorten the gap on KH Spirits.

Has Florian dropped the ball here?

When tightening be warned even with the shifting rod pushed through the other side - it feels very close to the end of your Allen key head and it seems like it is spring loaded and under some pressure as you try and tighten cranks.

I’ve got it to spacer I think but will stop and check with a torque wrench from my LBS soon

We so need a manual for this point!!!

2 Likes

Did the new hubs come with the more beefy bolt which is purely for positioning the crank in place (to the required torque), after which you remove it and screw in the weaker bolt? I mangled a crank bolt worse than yours before realising the stronger tightening bolt existed.
https://www.unicycle.co.uk/schlumpf-pre-tightening-bolt.html

1 Like

Sadly no such bolt and I heard more recent hubs - as in the previous version no longer needed that bolt.

But again it would seem like it would have been a nice to have :cry:

Think my bolt is OK to leave and can be serviceable in terms of taking it back out.

How did you get your totally stuck one out? Just out of interest…

2 Likes

Yes, I used a next size up torx socket and tapped it in - I could send it over if you get stuck :wink:

2 Likes

Just found I posted about it on fb
https://www.facebook.com/groups/268679360444983/permalink/621980088448240/
But if its an 8mm hex bolt you won’t be using a T40

1 Like

Crank install update!

(Do hope people find this useful my constant posting of my build stages/report backs! :sweat_smile:)

I found the second crank to go on far easier and I also made sure to only use the supplied hex bit in a ratchet driver, about palm length so pretty low power.

I did however find the rubber mallet whacking easier with the second crank as this time I had the first crank as something solid to hammer down on to.

All this you need to follow at your own risk of course, but personally I feel however violent it feels whacking a crank onto your expensive hub’s axle, it is far far safer than using the clearly soft axle bolt to do the forcing on.

I’m thinking I probably should have used 3mm spacers all round - but I didn’t have them and 2mm looked right. Plus I didn’t want the cranks so far off the axle proper that the shifting buttons didn’t have some spongey play when fully depressed (as they should/need).

But 3mm would be optimal I feel.

I only of course realised all this when doing the second 24” cranks. The first one was very very difficult to get in with just the provided hex bit and ratchet driver, but I decided to do it little my little, and changed the position of the hex bit’s engagement into the bolt. Be sure the bit is place fully inside also as that helps avoid rounding out I think.

So now they’re all installed, and second crank was much easier than the first on the 24”. Basically if I were doing this again, I’d partially seat and tighten each crank (making sure shifting rod is clear when working on each side) and then - I’d use the rubber mallet again when the axle is resting in something hard pressing against both cranks.

Think of this as a crank sandwich, with the Swiss hub as the filling :yum:

And I would say give it several decent whacks!

It really helped make the distance for the second cranks on both these wheels easier and I think for the first cranks to go on as easily - you’d need to find a way to sandwich them on together so that you can have at it with the mallet and it not lose power on the task in hand.

Again. This isn’t the official manual - following my views could be wrong, but you really don’t want to go in with a full on torque wrench and round that bolt out, as this is sadly clearly easy to do. I didn’t do it, but came close as I was just using a short L wrench.

Rubber mallets to the rescue is what I say, until we find out that a pre tightening bolt should have shipped after all. I know I wouldn’t mind one.

2 Likes

That’s what my local uni builder advises to do for ISIS cranks, especially for Schlumpf hubs.

2 Likes

Well we have a manual but I don’t feel it answers the unanswered questions, and while it touches on some new aspects of the hub it’s not massively different to the old manual.

I’ve emailed now back a list of the four main areas that need addressing:

  1. Rotor Alignment Options
  2. Spacers on cranks
  3. Axle Bolt Rounding - (please don’t go for 45-55nm folks, you’ll have a dead bolt!)
  4. 180 Rotor Clearance Issues

I hope to hear back soon🤞(in a nice way, I’ll keep on chasing this until we do get clarity)

1 Like

i guess such very high torque is no more necessary with spacers, this was for < M0800 hubs generation without spacers

Totally, but it is in the new manual :disappointed:

1 Like

Just curious who feels they’ve been able to successfully build their schlumpf into a unicycle?

  • Yes - All Fine - using 180 rotor :ok_hand:
  • Yes - All Fine - using 203 rotor
  • Yes - but needed spacers for 203 rotor
  • Yes - but needed spacers for 180 rotor
  • Yes - but needed spacers for 203 rotor and brake filing
  • Yes - but needed spacers for 180 rotor and brake filing
  • No - with 203 rotor caliper doesn’t clear spokes without filing
  • No - with 180 rotor caliper doesn’t clear spokes without filing
  • No - Other Reason
0 voters

This rolls all the hub types in together I know, but I want to gage things as I’ve had a long reply to my long email to Florian - and I think it would be helpful to just assess what builds have been successful, and by which means achievable. I should point out that to make this a valid measure, you’d vote for this if you are 100% happy with how you’ve got your wheel built.

@Hammer @Becky98 @Joris - hope you don’t mind the tag, but it seems like you three are the outstanding builds which have reaches some level of success / assembly completion - but interesting to know how you’d class the status at this stage :gear:

Again, you’ll have already gathered I’m a tad obsessed with this topic and at the moment like a dog after a bone when it comes to getting some firm and clear answers :smiley:

1 Like

Still waiting for my hub, but I’ll try and vote as soon as my uni is built!

1 Like

Thanks Maxence - hope it arrives soon!

Here’s some snippet answers to my email from Florian. I don’t feel it would be fair or polite to copy the whole email on this public space, but the information provided is key and with the greatest respect should have been mentioned in the manual - so in the interests of us all knowing what’s what, I’m sharing:

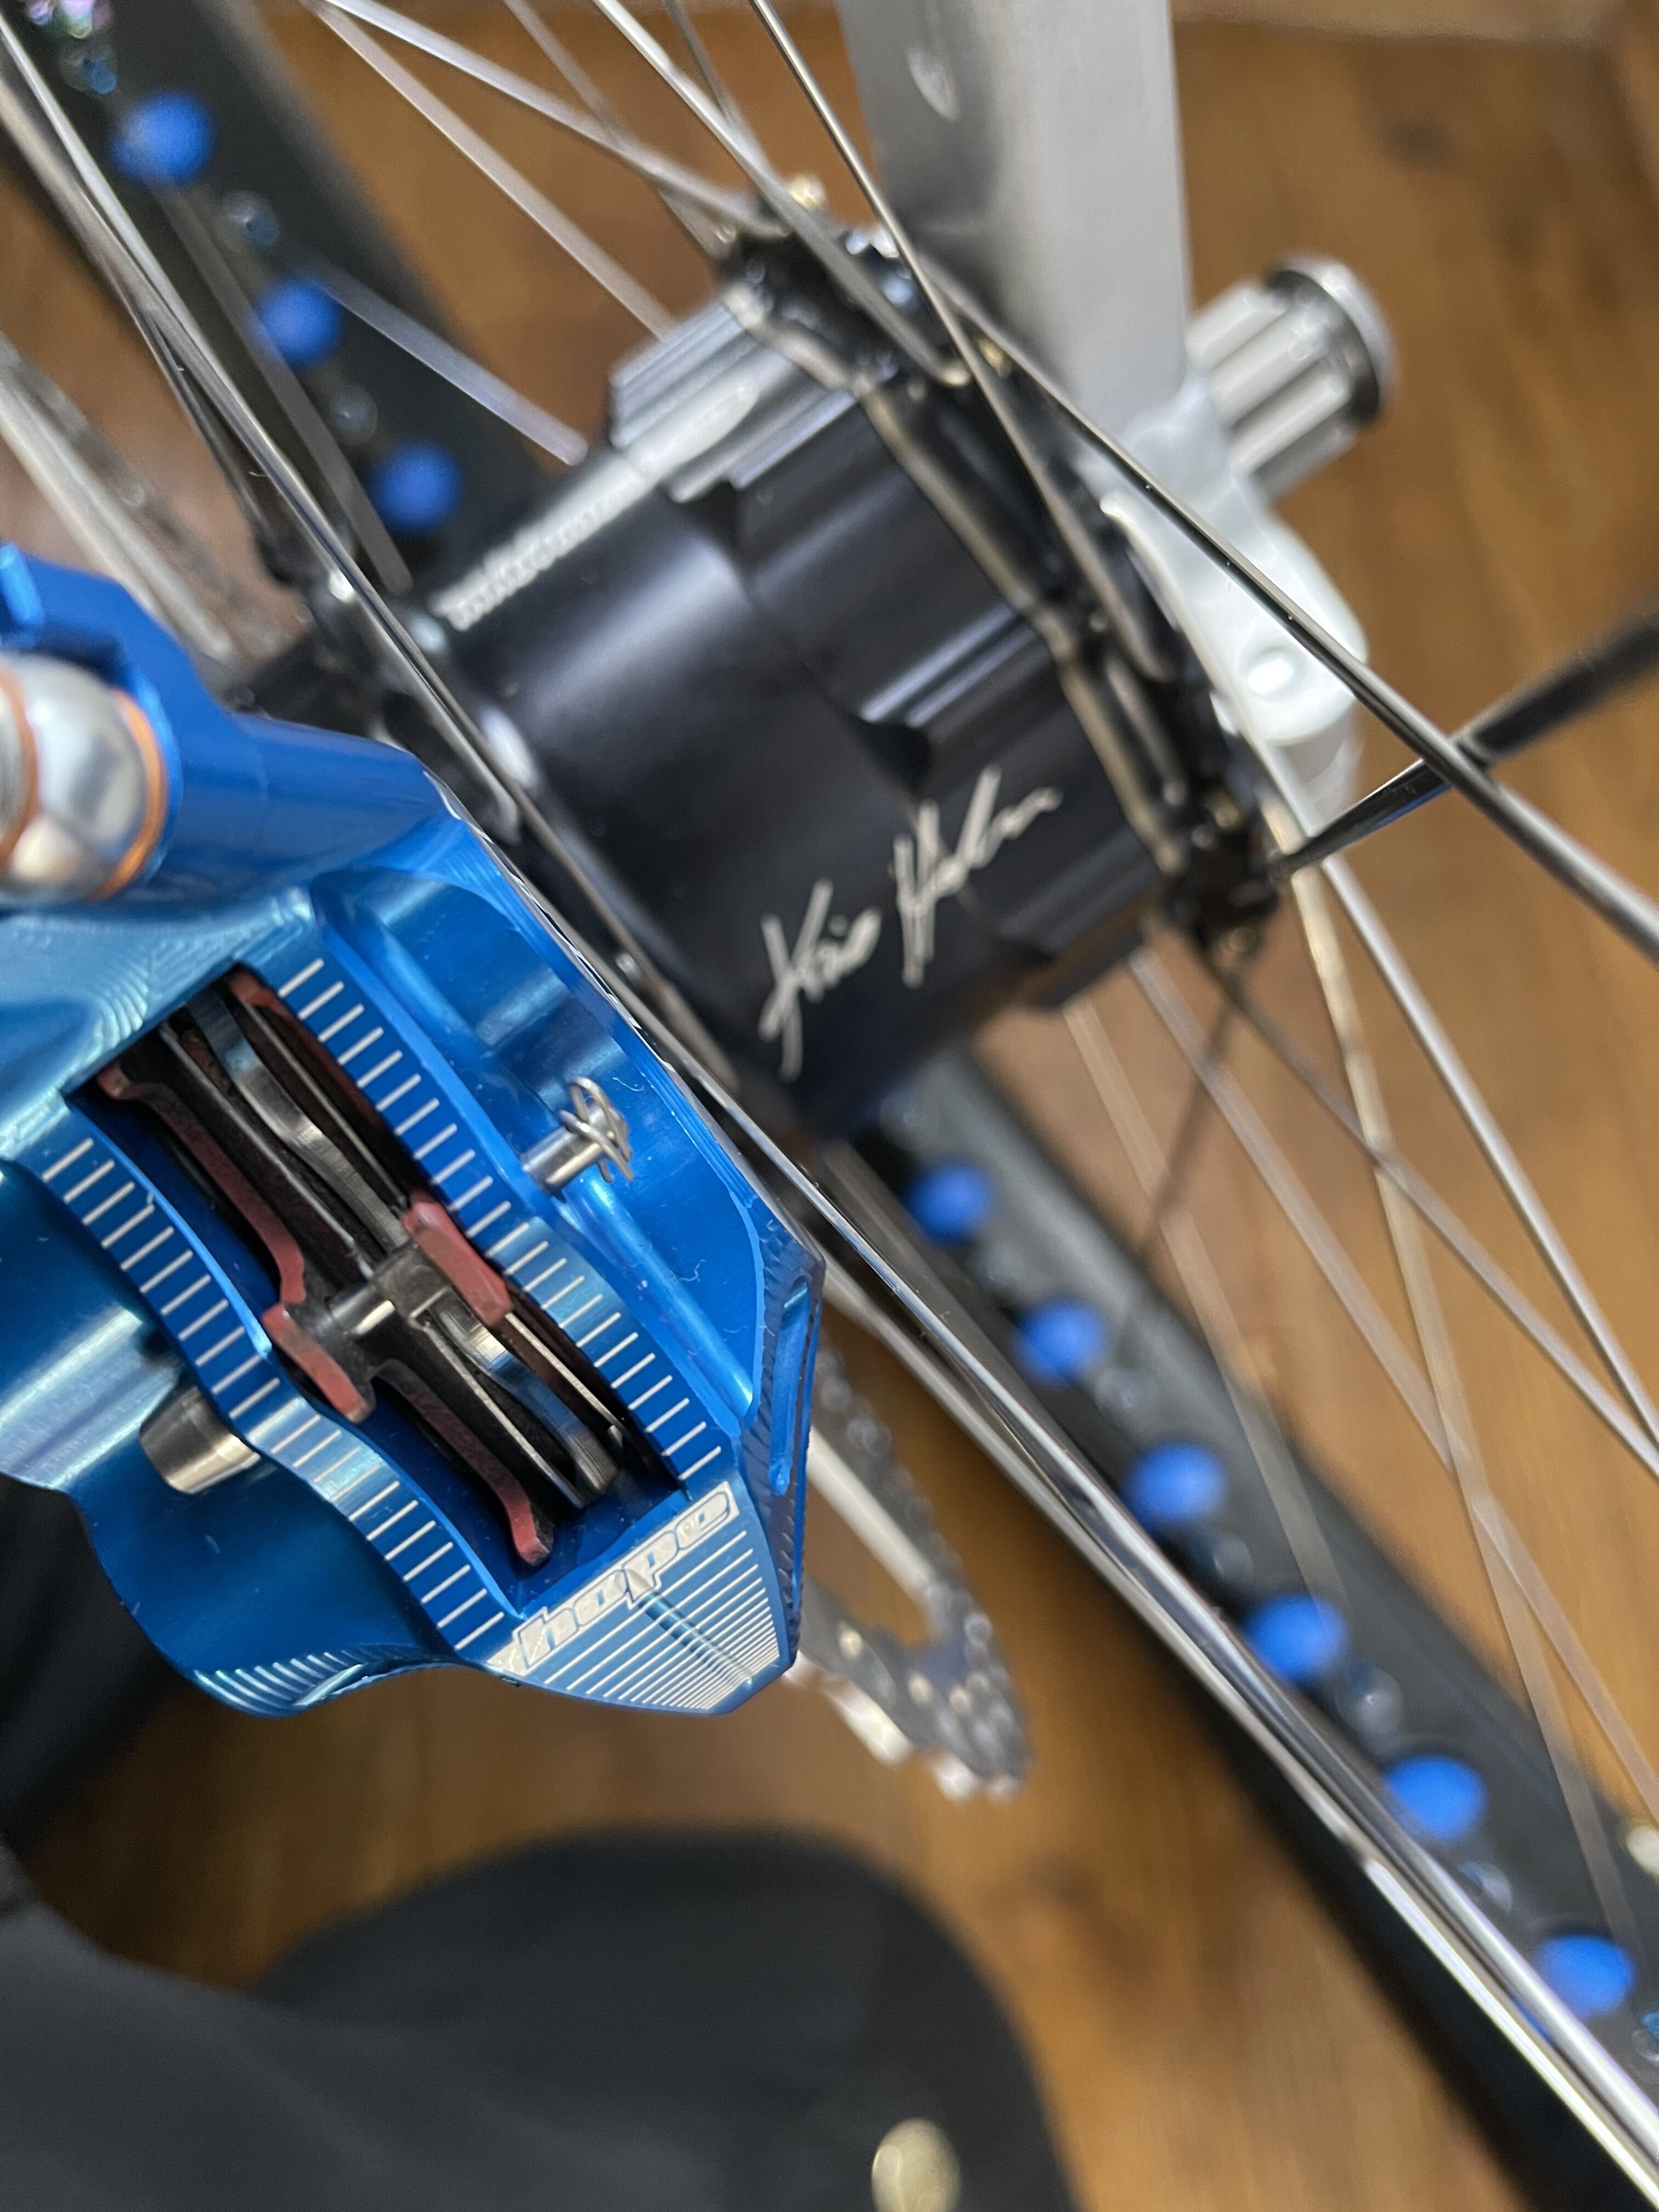
A) Rotor Alignment with spacers / washers

Answer:

Putting any spacers under the brake disc is of course possible. We have specially made a positive fit between the brake disc and housing, so that the load does not sit on the screws.

:information_source:Taking inspiration from what @Hammer did and with his advice I’m using these M4x12 washers :pray:

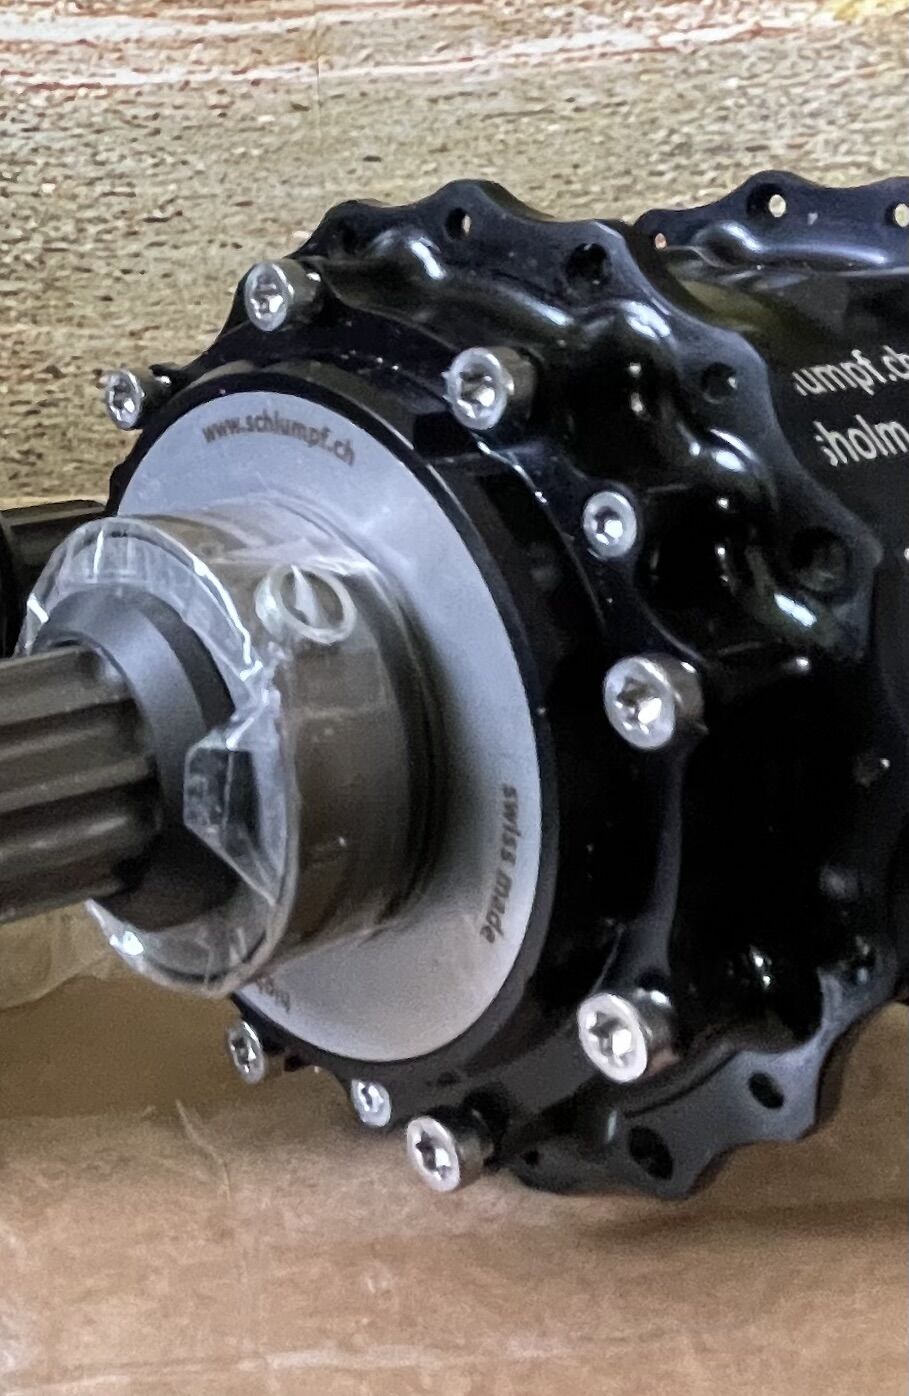
B) Axle Bolt Rounding

Response:

That the axle bolt made of one of the toughest materials available deforms is not possible. You should first push the shift shaft through so that the key grips in its full depth. With a good wrench and proper fit, 55Nm is no problem. We have over 30 years experience with this material and torques. 10’000s of bicycle hubs had even smaller Allen size and were tightened with 55Nm.

I’ll leave this one as it stands - as I need to follow up on this point via email as I did get deformation as I was using a palm length ratchet wrench using just my arm strength, so do not believe I was anywhere near 45nm.

(TIP - See above, earlier post: rubber mallets :smile:)

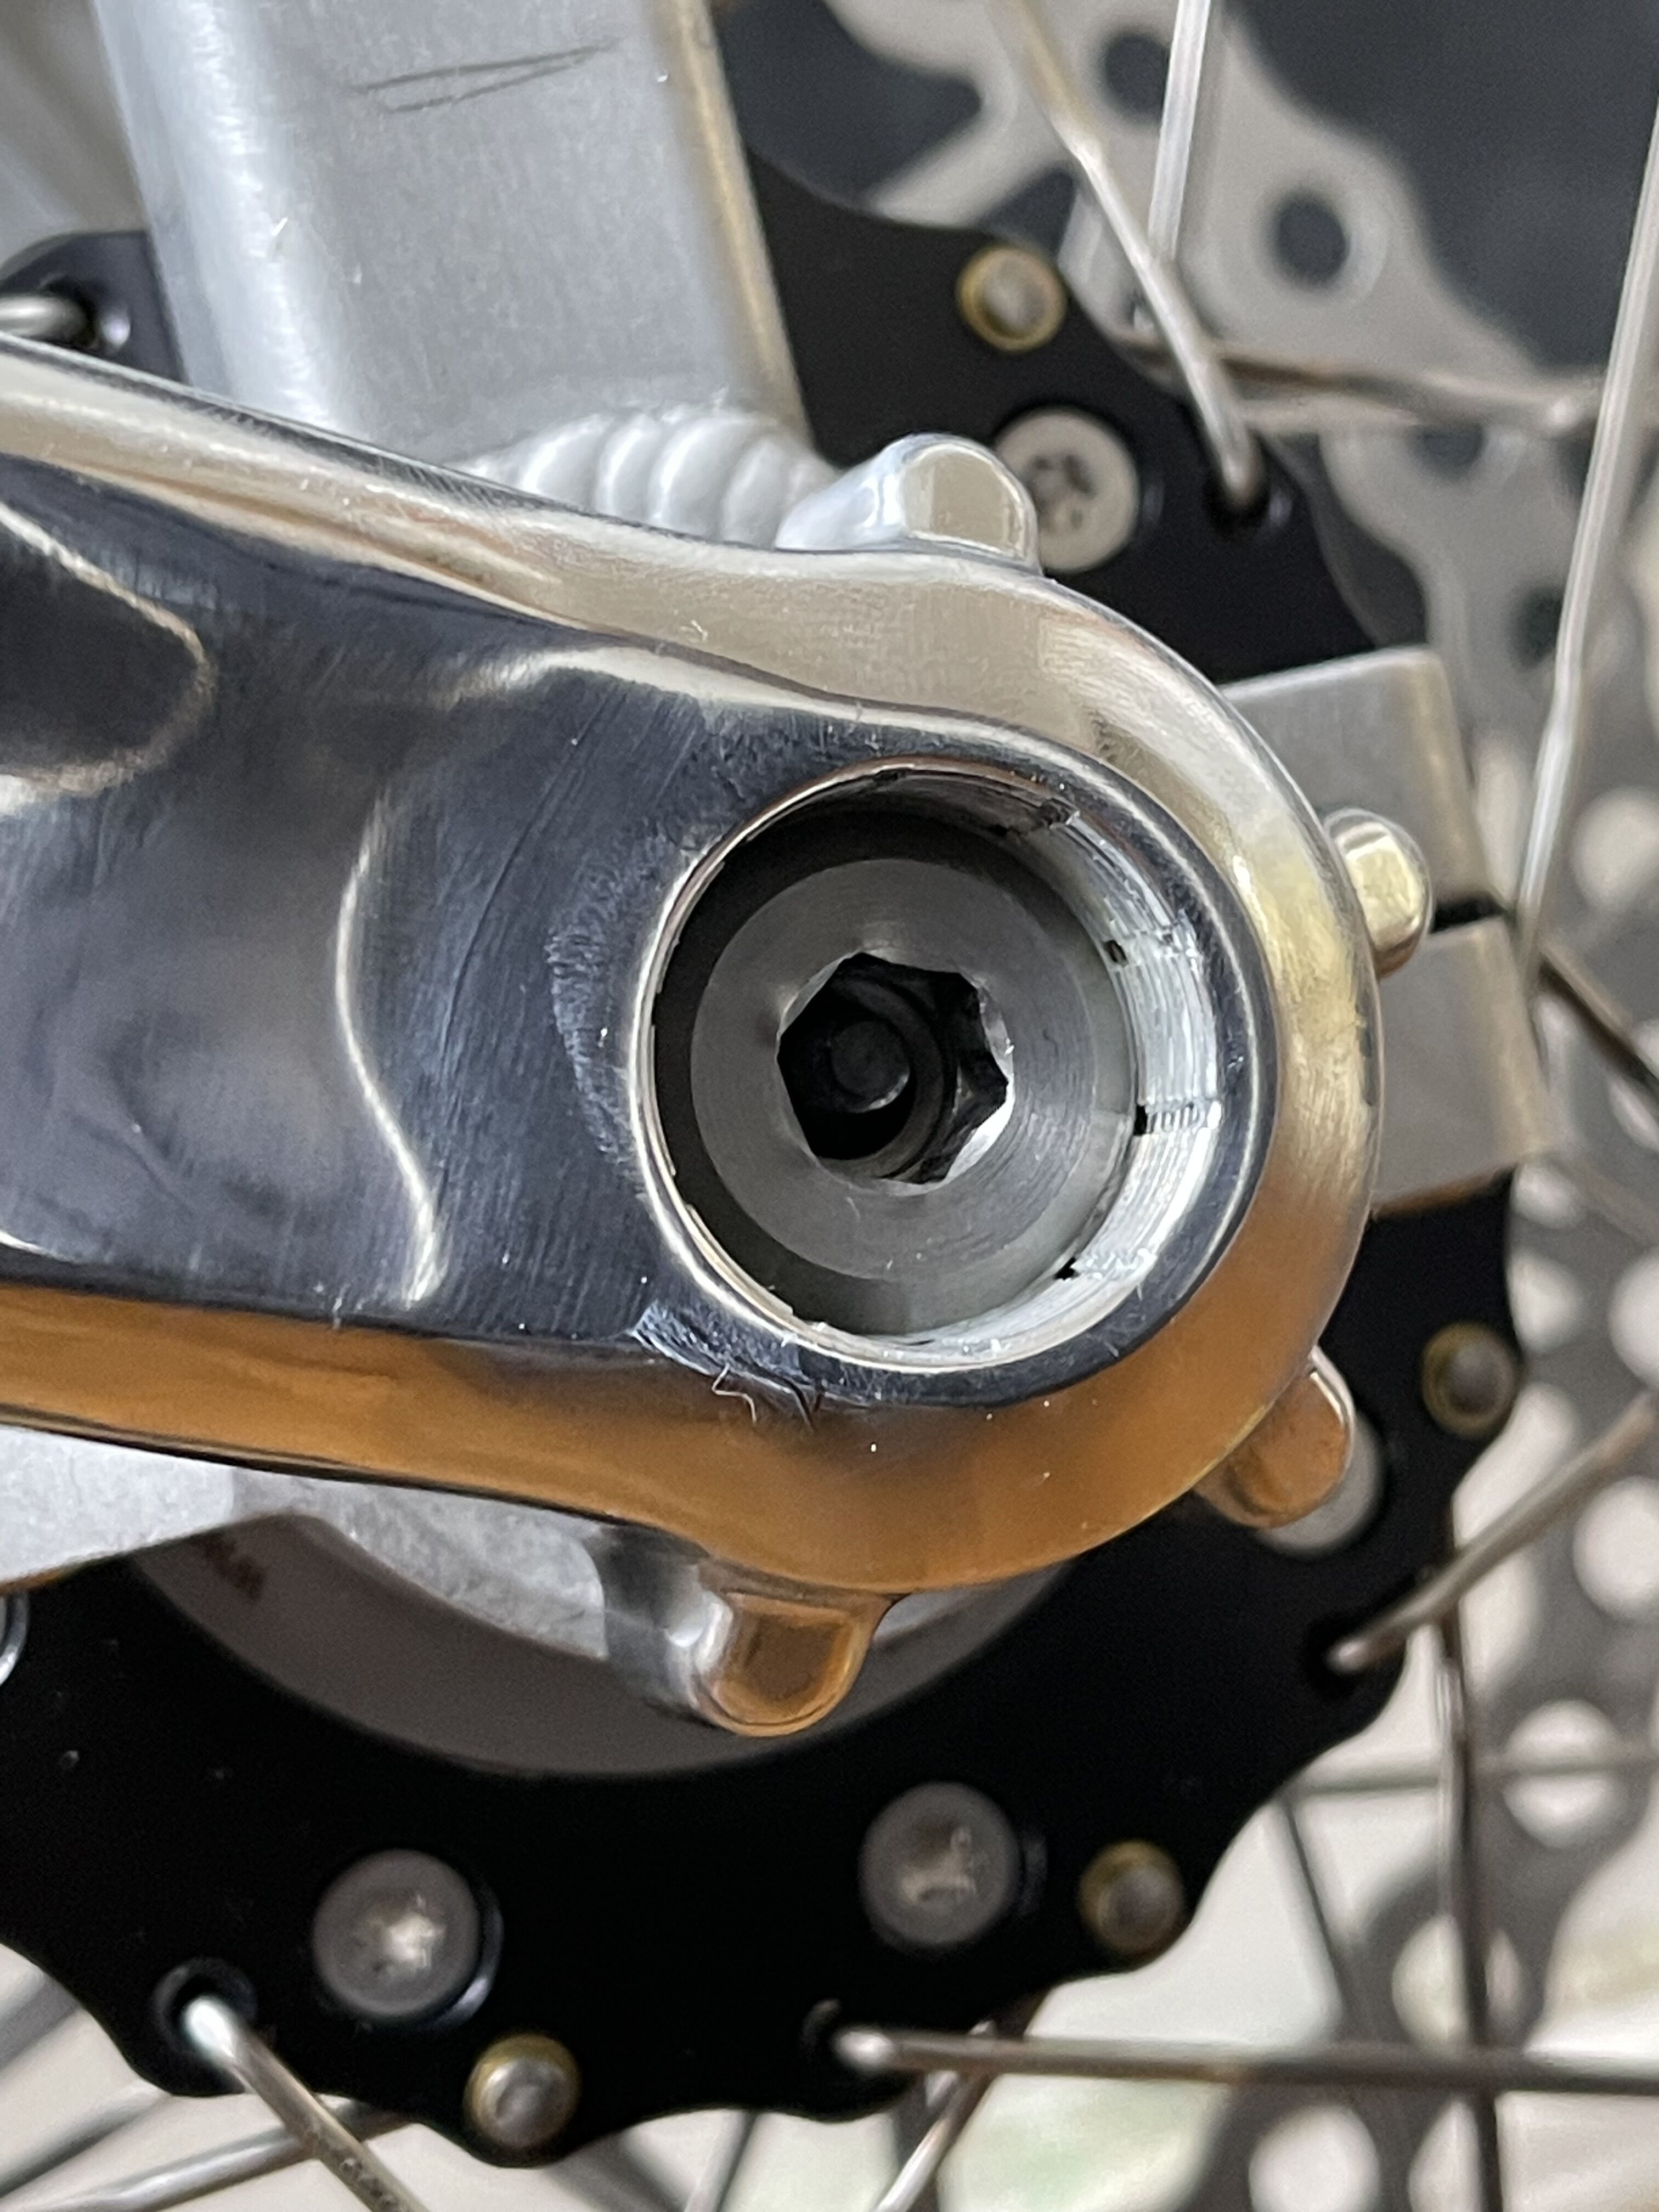
C) Spacers For Cranks

Response:

Why use extra spacers to contact the crank stop rings? We make these rings so that when the cranks are mounted repeatedly and get closer and closer to the center of the hub, they protect the ball bearings behind. Normally they have no function.

I think we have two differing schools of thought here. Meaning that with normal unicycles one has to have the crank make contact with the crank stop to form a tight fit. In the new hub’s manual the crank stops are labelled pressure rings, so I think the school of thought for schlumpf hubs is that the rings are there to protect the hubs bearings as and when a cranks gets close and presses it. From the previous versions of schlumpf hubs that never had these, cranks were having problems creeping inwards I believe - but of course there were no stops, so people just put them on, torqued them tight and hoped they’d stay put and not develop any play. (My old 200 series cranks as solid as a rock so it can work)…

But basically the answer here is that we can put spacers there but that that isn’t really the focus of these pressure rings, so there’s no aim to have the cranks touch.

Feels odd from the normal perspective of putting cranks on, but there it is. I’m more concerned about the rounding bolt issue getting cranks on than if at some stage cranks wear a bit and need more tightening or if spacers need adjusting / using more.

D) 180 Rotor Clearance Problems

For this one I’ve had some comments back but will need to put a pin in it as it’s a bigger topic that doesn’t feel fair to widely air on the forum like this. The gist is however that all rotors should work, but naturally it seems like 180s have serious problems and I’d not like to own a 160!…

But this one needs more unpacking to get clarity on… probably by third parties.

Right, that’s enough of that - I’ll probably start drafting up my own manual based off of all the points that have come up thanks to this wonderful little mono-mania corner of the interwebs :laughing:

4 Likes

A update from my side: I asked Florian about the spoke: it does not matter how they are put in since the hub is constructed stronger.
I will go back to the ‘natural position’ since the others did not fit to the bend in my spokes and would have made the problem worse. So lacing for a 4th time😅

Hope to be able to lace the wheel tomorrow so I can go into a workshop with the right tools and have it finished by the weekend (currently in the final 2 weeks of my master thesis, so it might also happen next week). And I definitely think I need to put spacers in for the disc.

3 Likes

I think not only the hub has a influence to the clearance. Bigger wheelsize will make the clearence smaller too.
I am still waiting for my hub. I ordered 7.march 2022, final payment 21.february 2023. So I am lot 2 and 125mm hubs will take more time anyway.

1 Like

Agreed, my 24” had the best clearance due to its spoke angles.

I hope with the wider 125 flange spacing you’ll find that for a 36er it’ll be on par or better than the builds done with 100mm hubs.

My gut says the 100mm 32h hubs going into 36ers could be the hardest to get clearance - but perhaps I’m simply over focused on this, and I should say: I hope I am totally wrong on all counts :grinning:

Here’s hoping your hub ships soon AWS and we can see it once set up in your amazing frame :eyes::gear: