56k Be Warned: Lots of pictures.
I’m sure there has been a write up on painting before, but hey, this is mine, and hopefully it will help someone else out there!
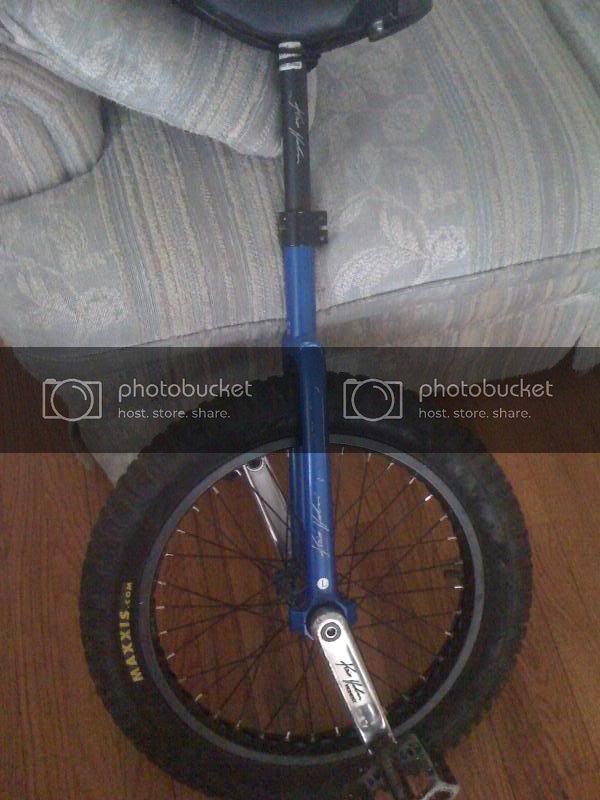
So, I was sick of that stupid blue look that everyone has on their unicycle. (Kris Holm uni’s)
I needed something custom, but I was on a budget!
Here we go:
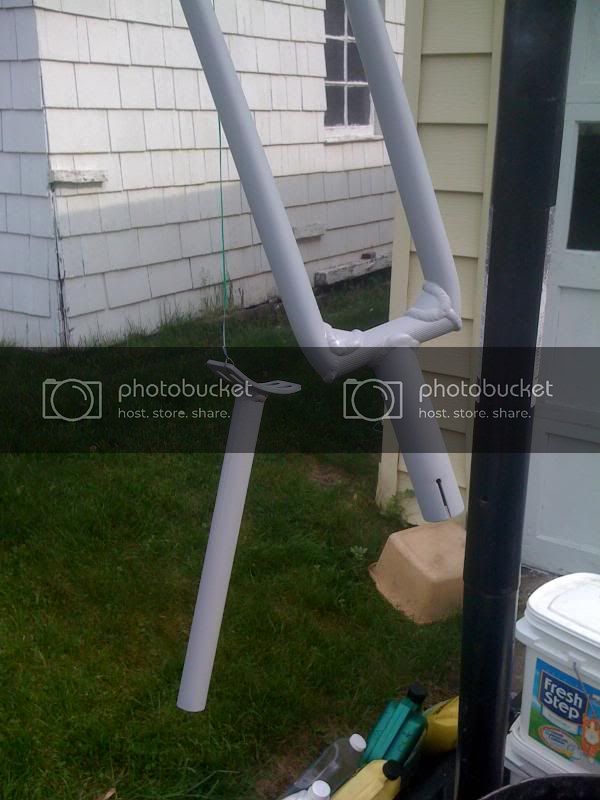
Step One: Take original unicycle, I took pictures of it to both compare and in case I needed a reference.
Step 2: Disassemble you unicycle. Be sure to keep the bolts, washers, nuts, and other small parts together so you don’t run into any issues at the end.
Step 3: Find some 220 grit sandpaper and begin the project. Start sanding everything you plan on painting. (Note: some people will tell you to remove all the paint down to the chrome, It’s kind of overkill. I’ve seen 80 grit take a frame down to chrome, and it’s very difficult to make it smooth from that point.) Once sanded with the 220 grit, go over it with a 400 grit, to smooth it out a bit.
Step 4: Primer time! That’s right folks, It’s time to go buy primer. I find lacquer paint is the way to go, as you can buff it without it dulling.(unlike enamel) So, if you’re going to buy lacquer paint, you might as well stay consistent. So I bought some lacquer primer. It’s about $3.00 a can from any wal-mart. Remember to wipe down the unicycle frame before applying the primer.
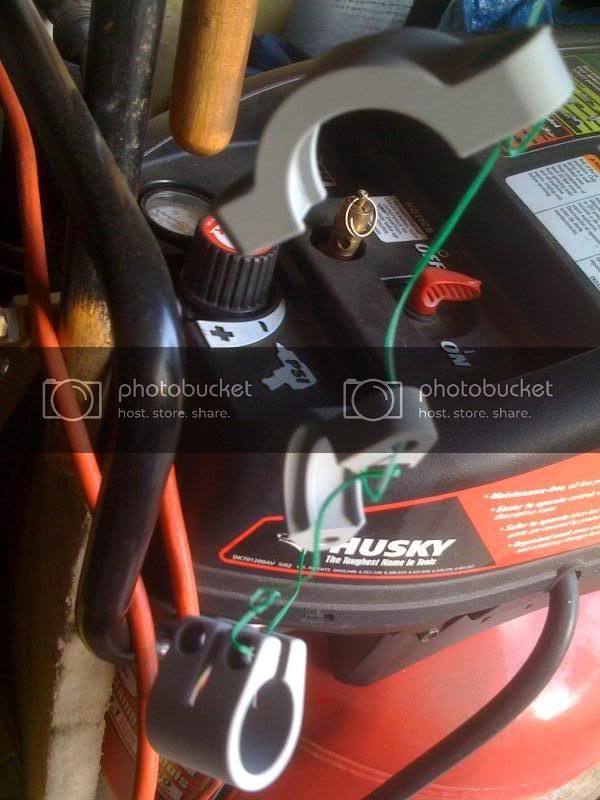
Step 4.5: I took a small bungee cord and just placed the hook in the hole on the bottom of the frame, then attached the other end to my basketball net. It’s better to use more light coats of primer, than fewer heavy coats. Read the can for instructions on how to actually primer.
Step 5: After primer has at least a few hours to dry. (again, read the can) Lightly sand the now primer coated unicycle. I would recommend a 1500 grit wet sand paper.
Side Note: Don’t forget the little pieces of the unicycle or you’ll fall behind!
Step 6: After the unicycle has had ample time to dry, make sure you clean it off, post sanding. I used an electrical cleaner and thick automotive paper towel for this. Make sure unicycle is completely dry and free off all foreign materials! You’re now able to paint!
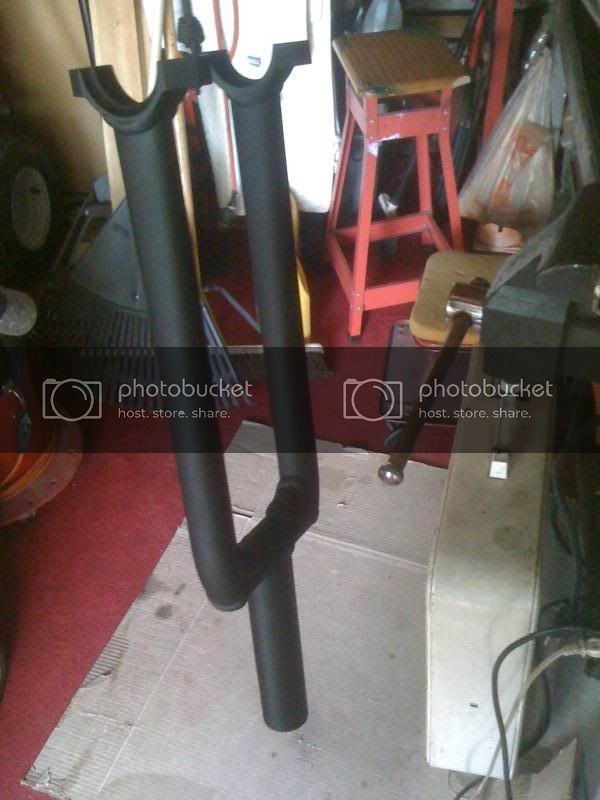
Step 7: My kit came with a special black base coat, which I applied after completing steps 1-6. Most of you will simple take the color you want to paint your unicycle and spray paint it. (again, I recommend you use a lacquer based paint) The same way you applied the primer. (Please: read the can. Spray paints are mostly similar, but can in fact vary!) Do this step until your desired look is completed.
Side Note #1: Here is where preference kicks in: You can wet sand the unicycle with the 1500 grit again, and then apply another coat paint. This will basically give you a smoother feel and look.
Side Note #2: If you want a two-toned unicycle. For example, you want a black unicycle, with a red swirl around the whole frame… You’d spray the top color first. So, Spray the unicycle red. (follow painting instructions) Once dry, you can apply painters tape in the design you want to STAY red. Once this tape is applied, you can spray your base color, in this example: Black.
Step 8: Clear coating! Once you’ve reached your desired color(s), you are ready to apply clear coat. My personal unicycle, again, a special kit, came with it’s own clear coat. If you are just using regular spray paint, simply buy some clear coat will work with [in this case] lacquer paints. (About another $3.00 for a can)
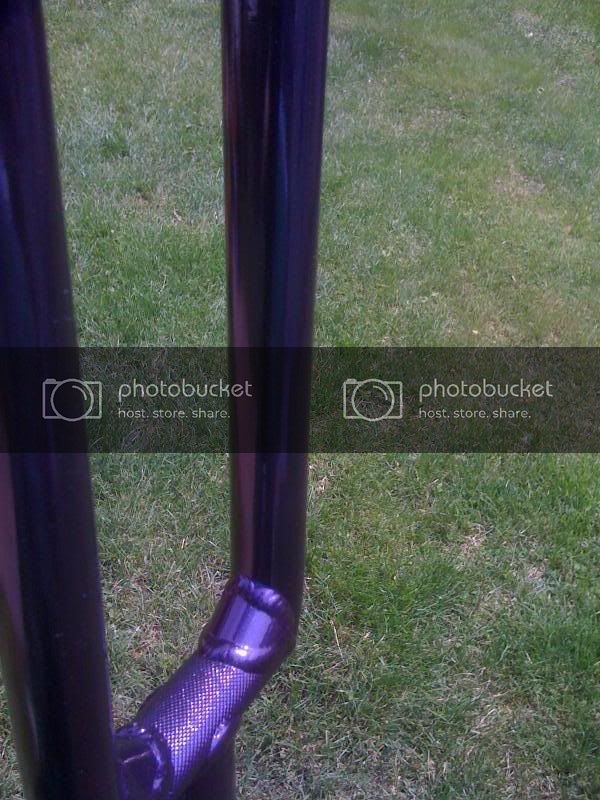
Apply clear coat until you’ve reached desired look.
Side Note: You can indeed wet sand clear coat as well. This will lead to a more shiny look at the end of the day, but it can be a pain. Remember, the more steps you add, the more chance of something going wrong.
Finally: I gave my unicycle about 2 days before I handled it fully. It was probably not necessary, but you don’t want to screw up anything. Once you are prepared to handle completely, reassemble the unicycle.
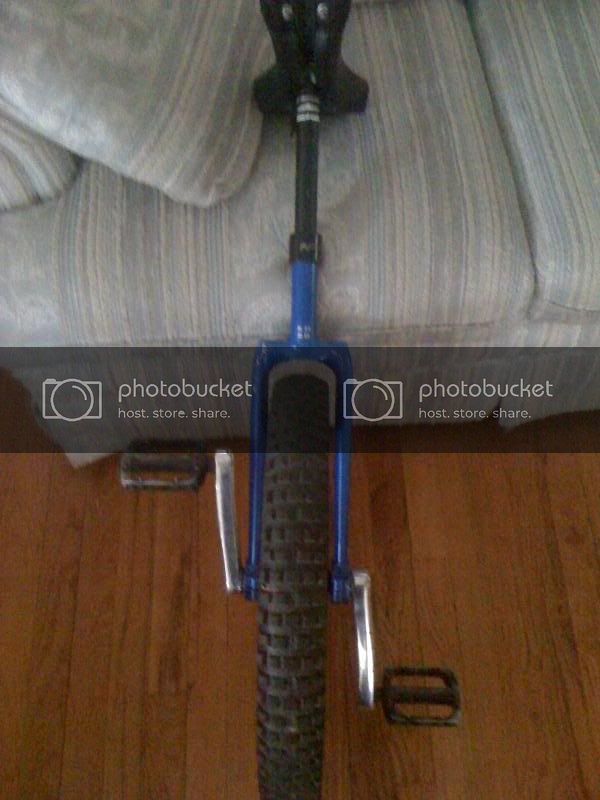
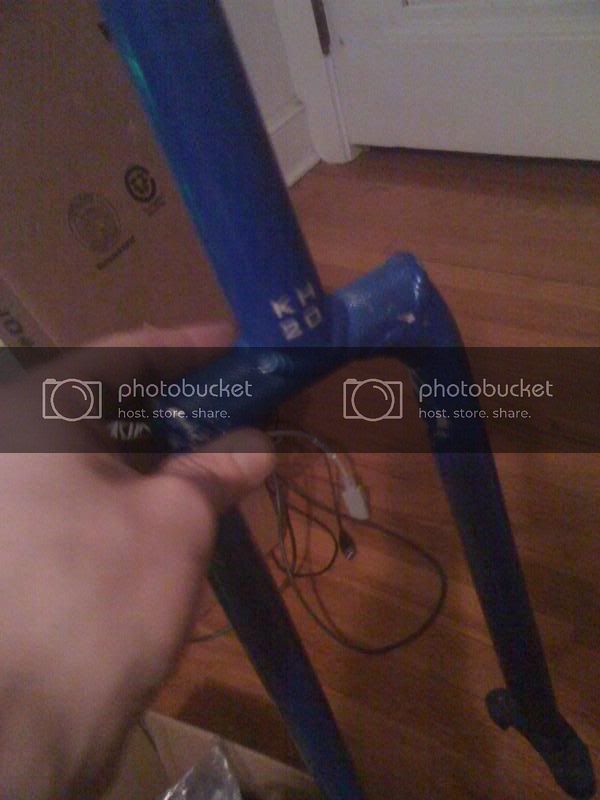
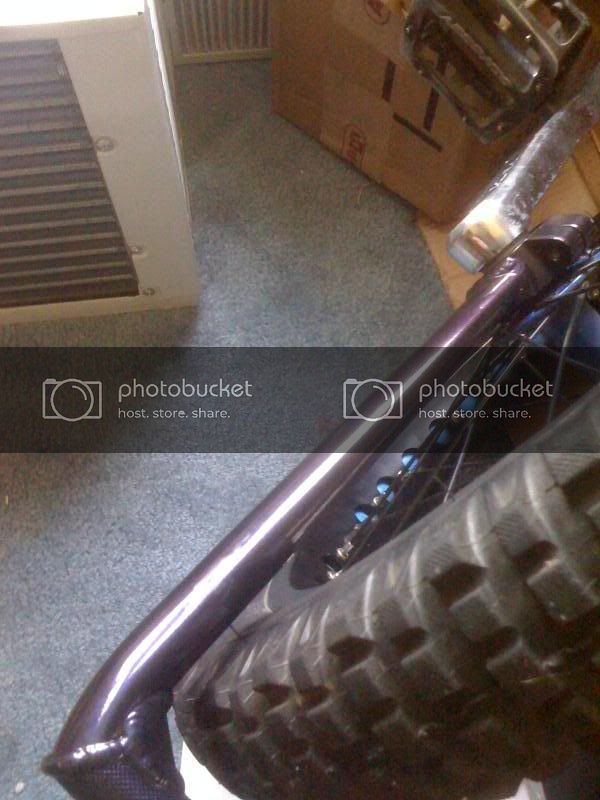
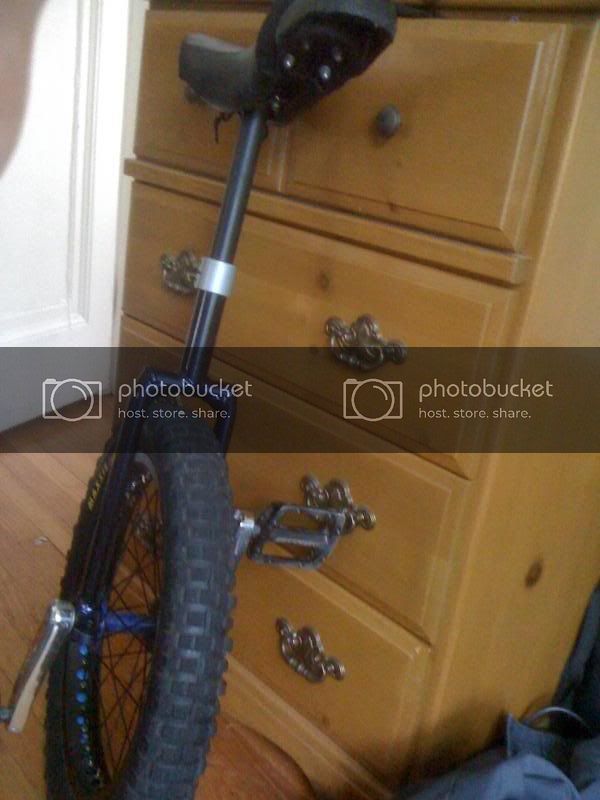
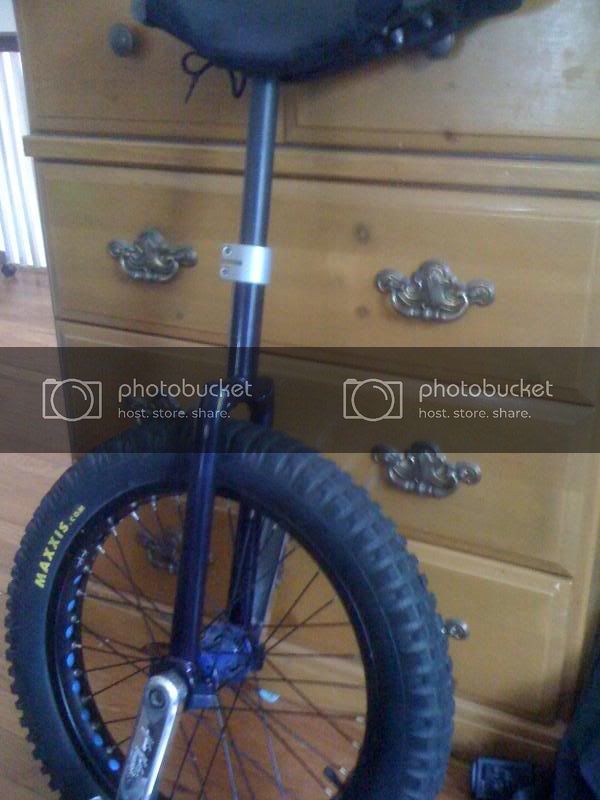
My final results:
A Kh20 unicycle, with a special paint that changes from blue to red as the sun reflects off of it different. My collar is a silver hammered paint and my seat post is flat black. I DO NOT recommend you paint your seat post. It will get scratched when you adjust it.
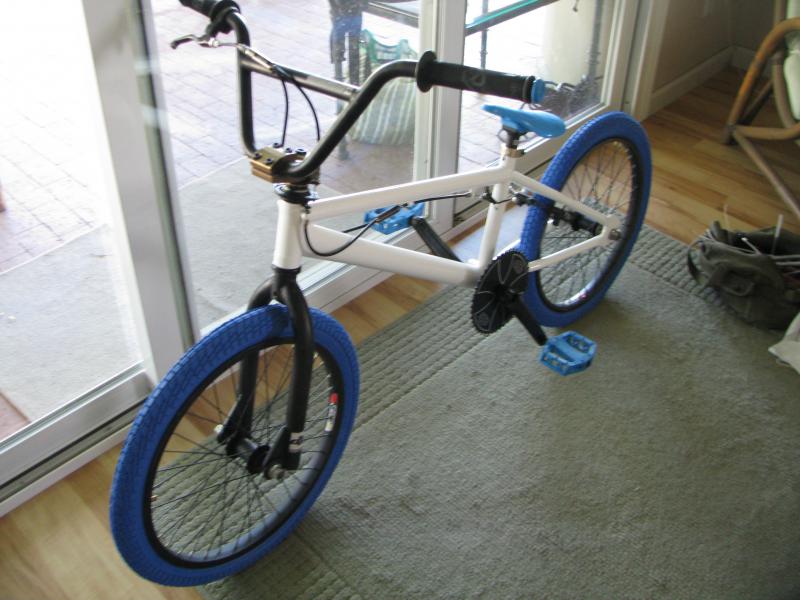
 Was tan and black Now it’s gonna be white blue and black.:D:D:D Will post pics when finished.