Freewheel Unicycling Megathread

So I got my hubs and promptly took the broken one apart.

Hub internals with comments
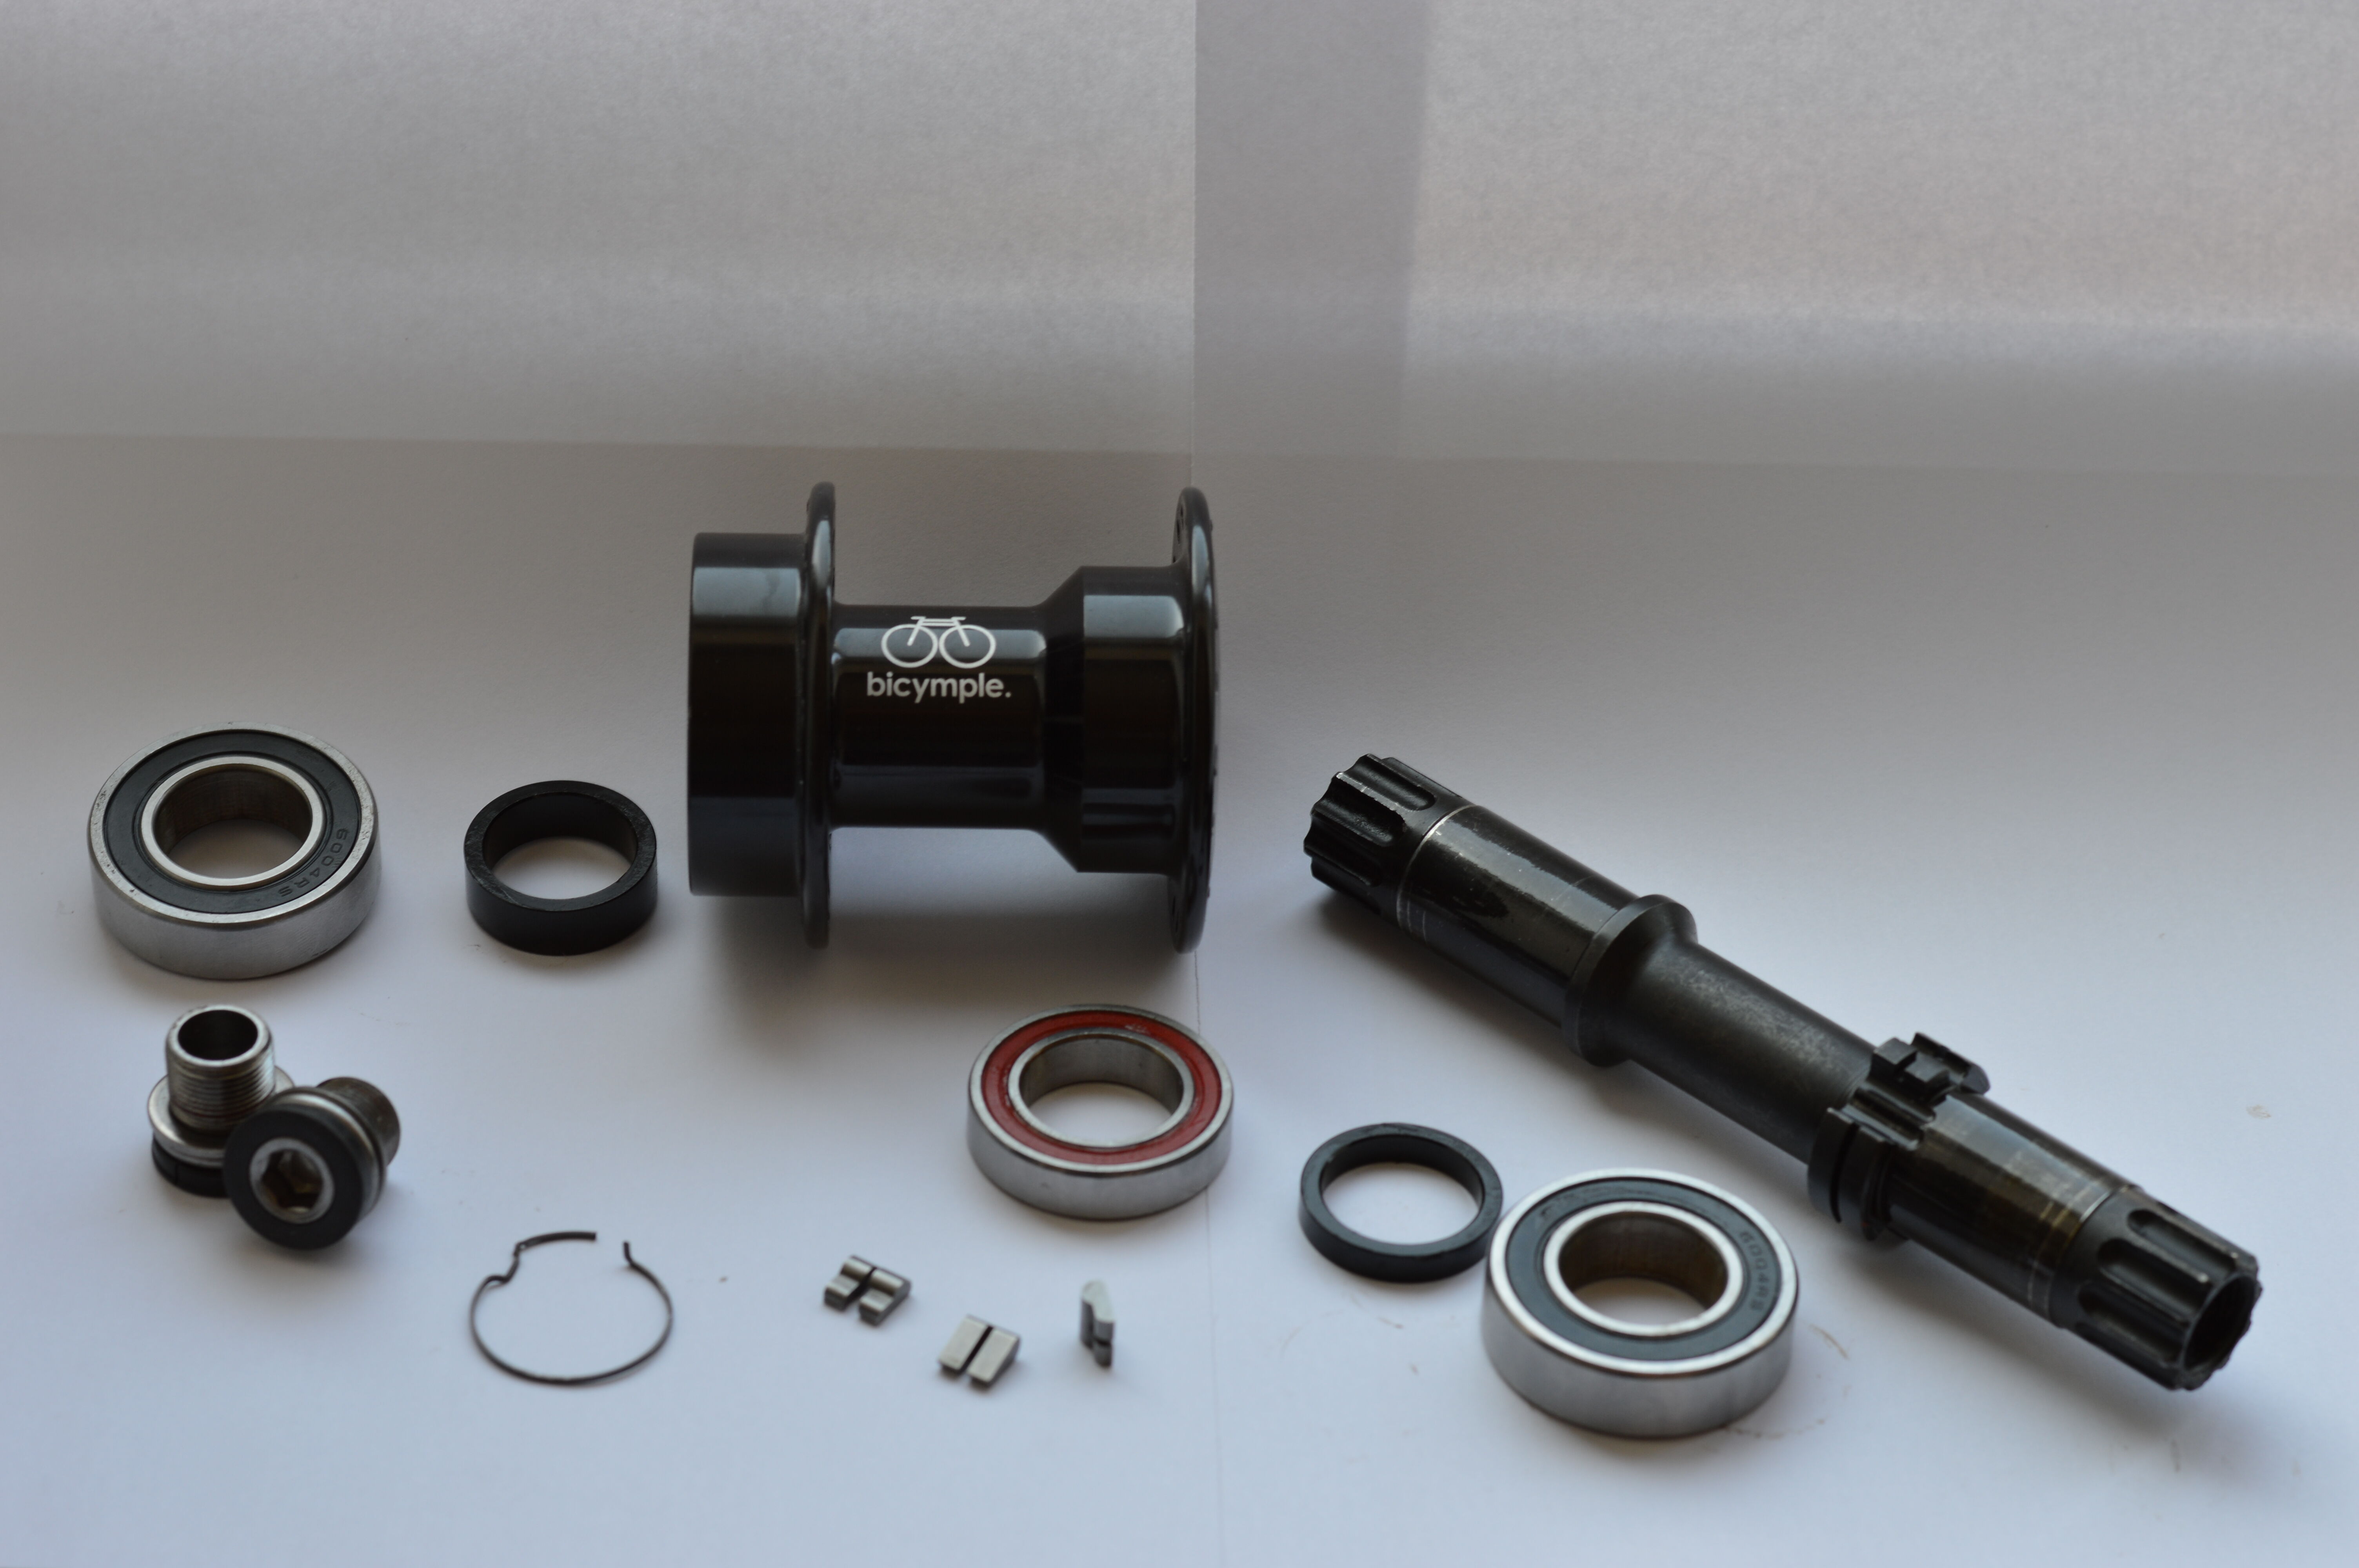

All hub components.

No grease has been removed from this hub. Like the Nimbus hub there is only a light machining oil present on most parts, with a light grease on the axle where the bearings seat.

From bearing to bearing, disk to clutch:
12mm bearing, 9mm spacer, 74mm hub shell, 5mm spacer, 12mm bearing - that gives us the standard 100mm bearing spacing, with the axle being 158mm.
ISIS crank spacers should be ~7mm, but this will depend on your cranks and their interface wear.

468.6g excl. ISIS bearings and bolts
592.5g excl. bolts
630.5g total


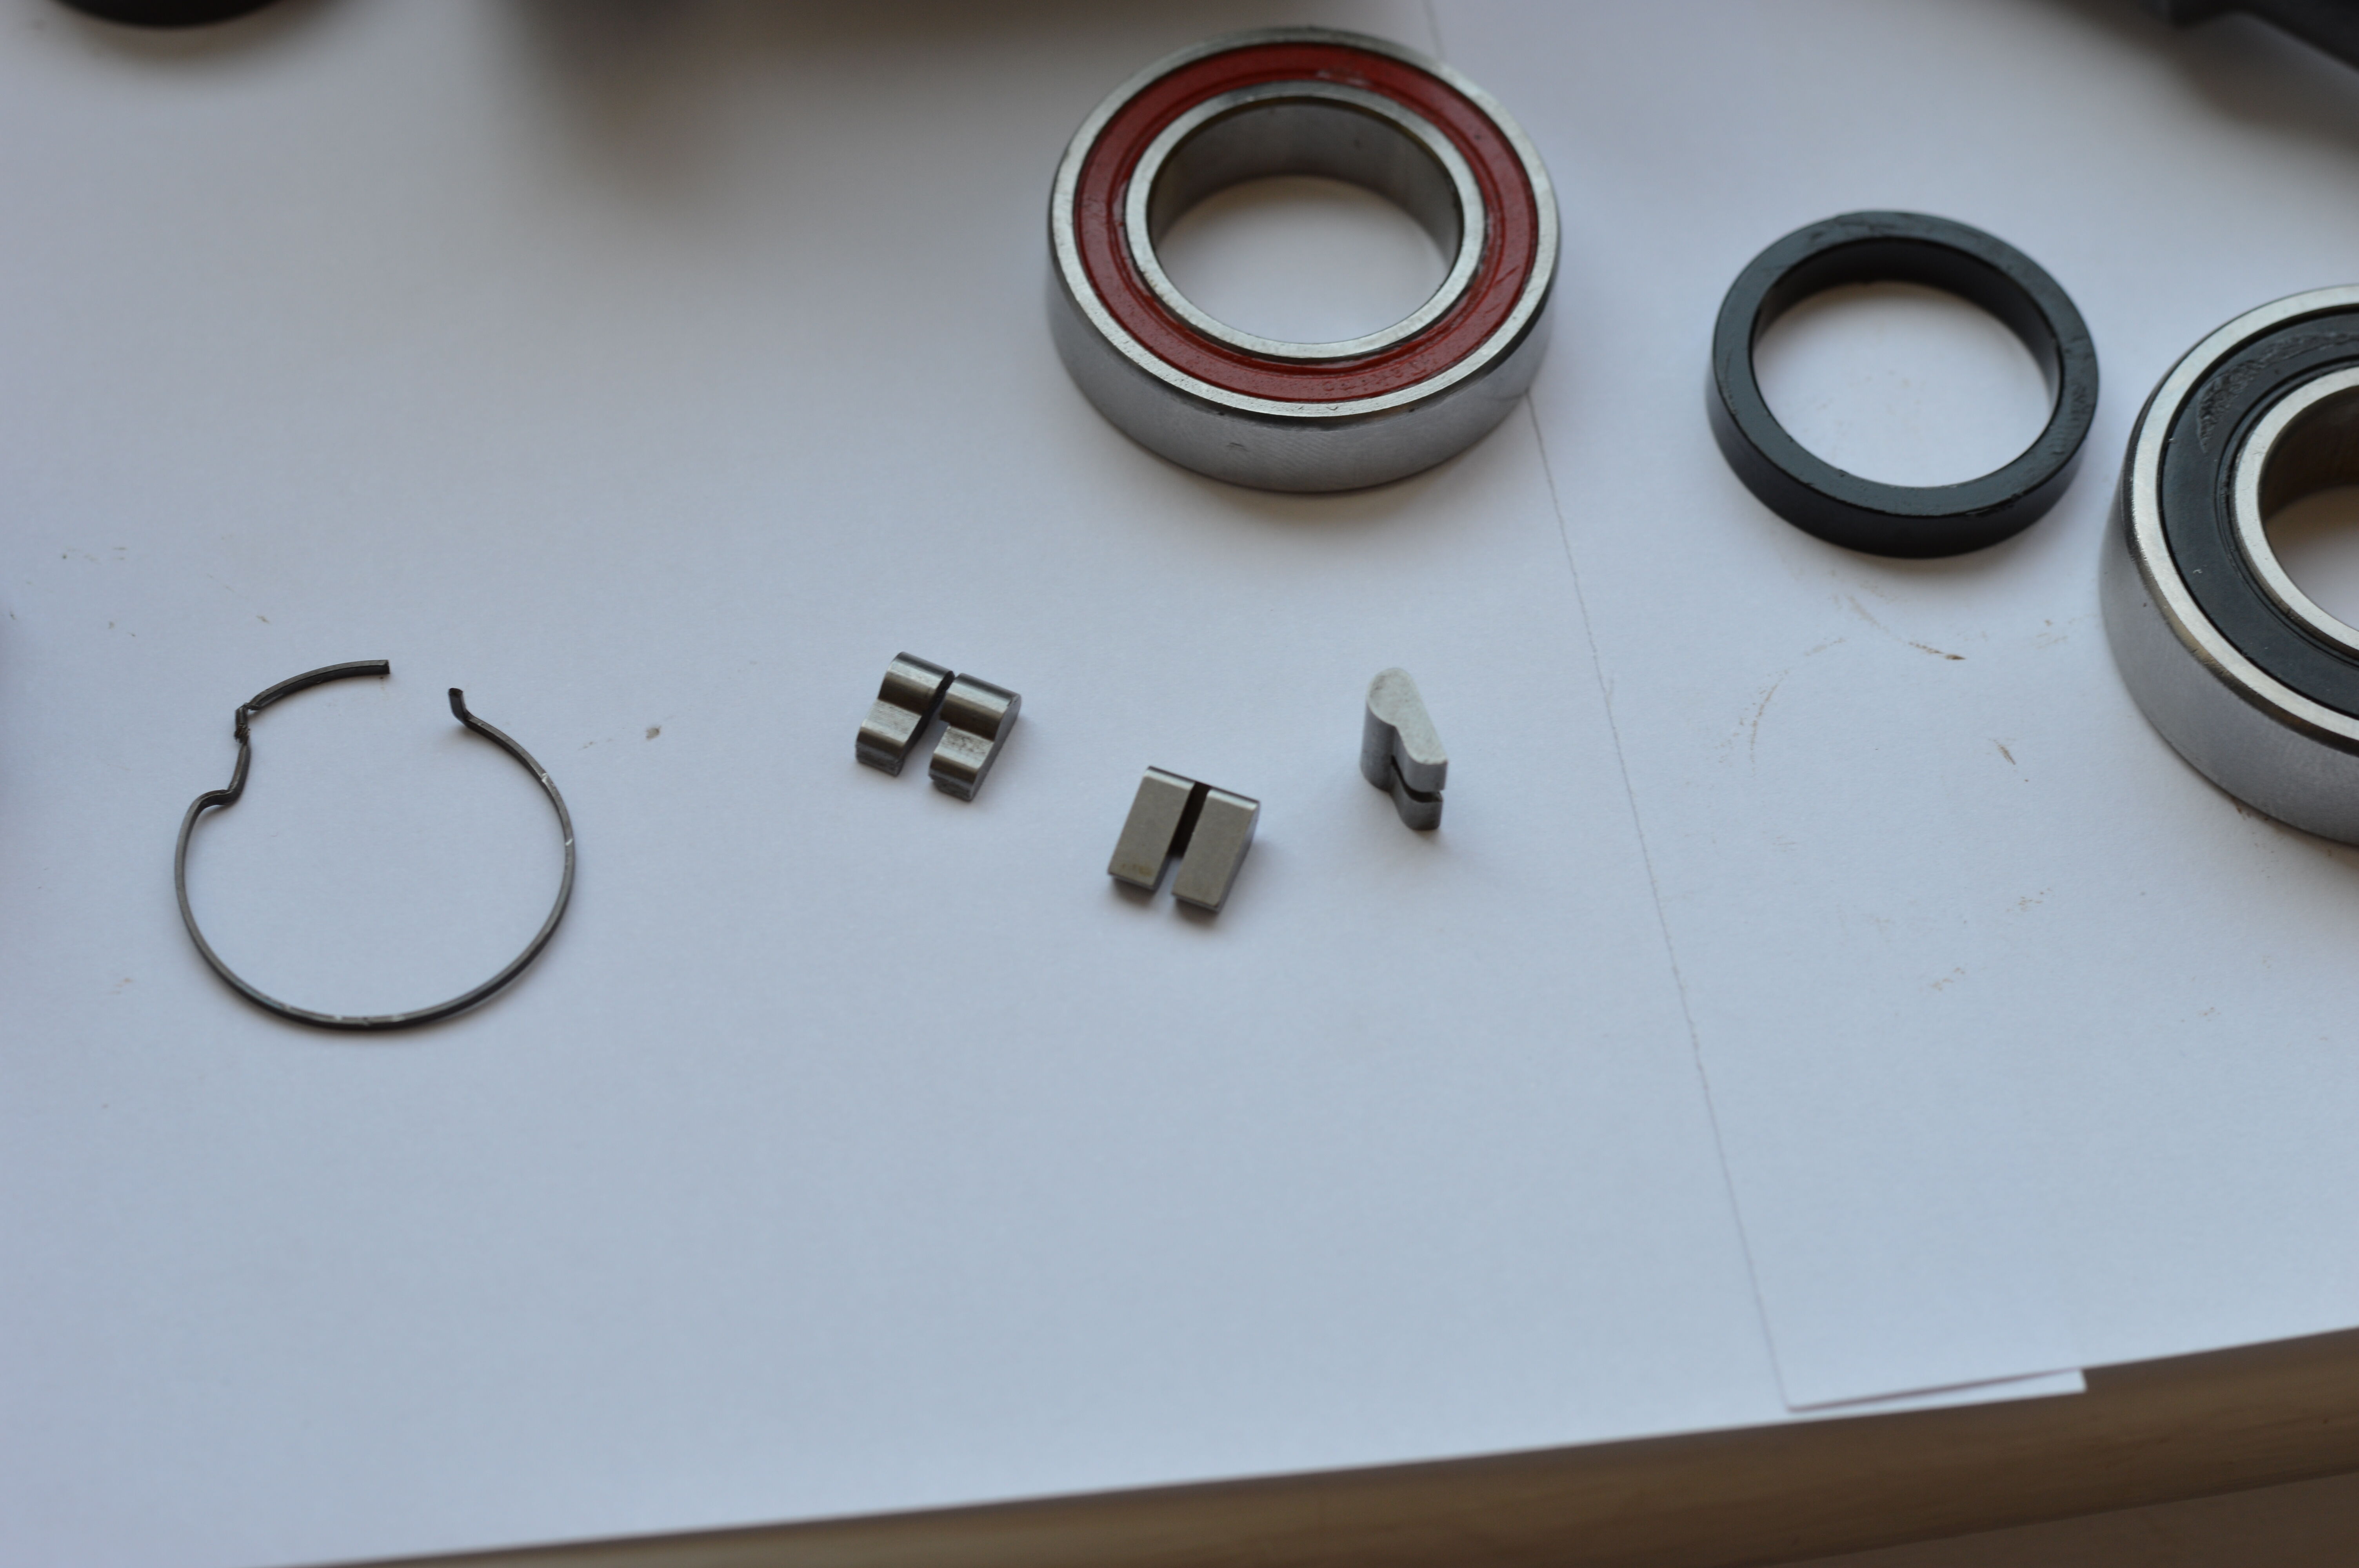
The three pawls (left one broken), and the broken pawl spring.
The kink on the left of the spring is not meant to be there, only the upwards kink on the right.

The pawls and spring appear to be the same as used for Shimano RS-113 hubs (R0-022X), or Campagnolo 3-FH-RE113 and 5-FH-RE114.
^ This has not yet been confirmed, but I need to buy replacements so I’ll let everyone know!


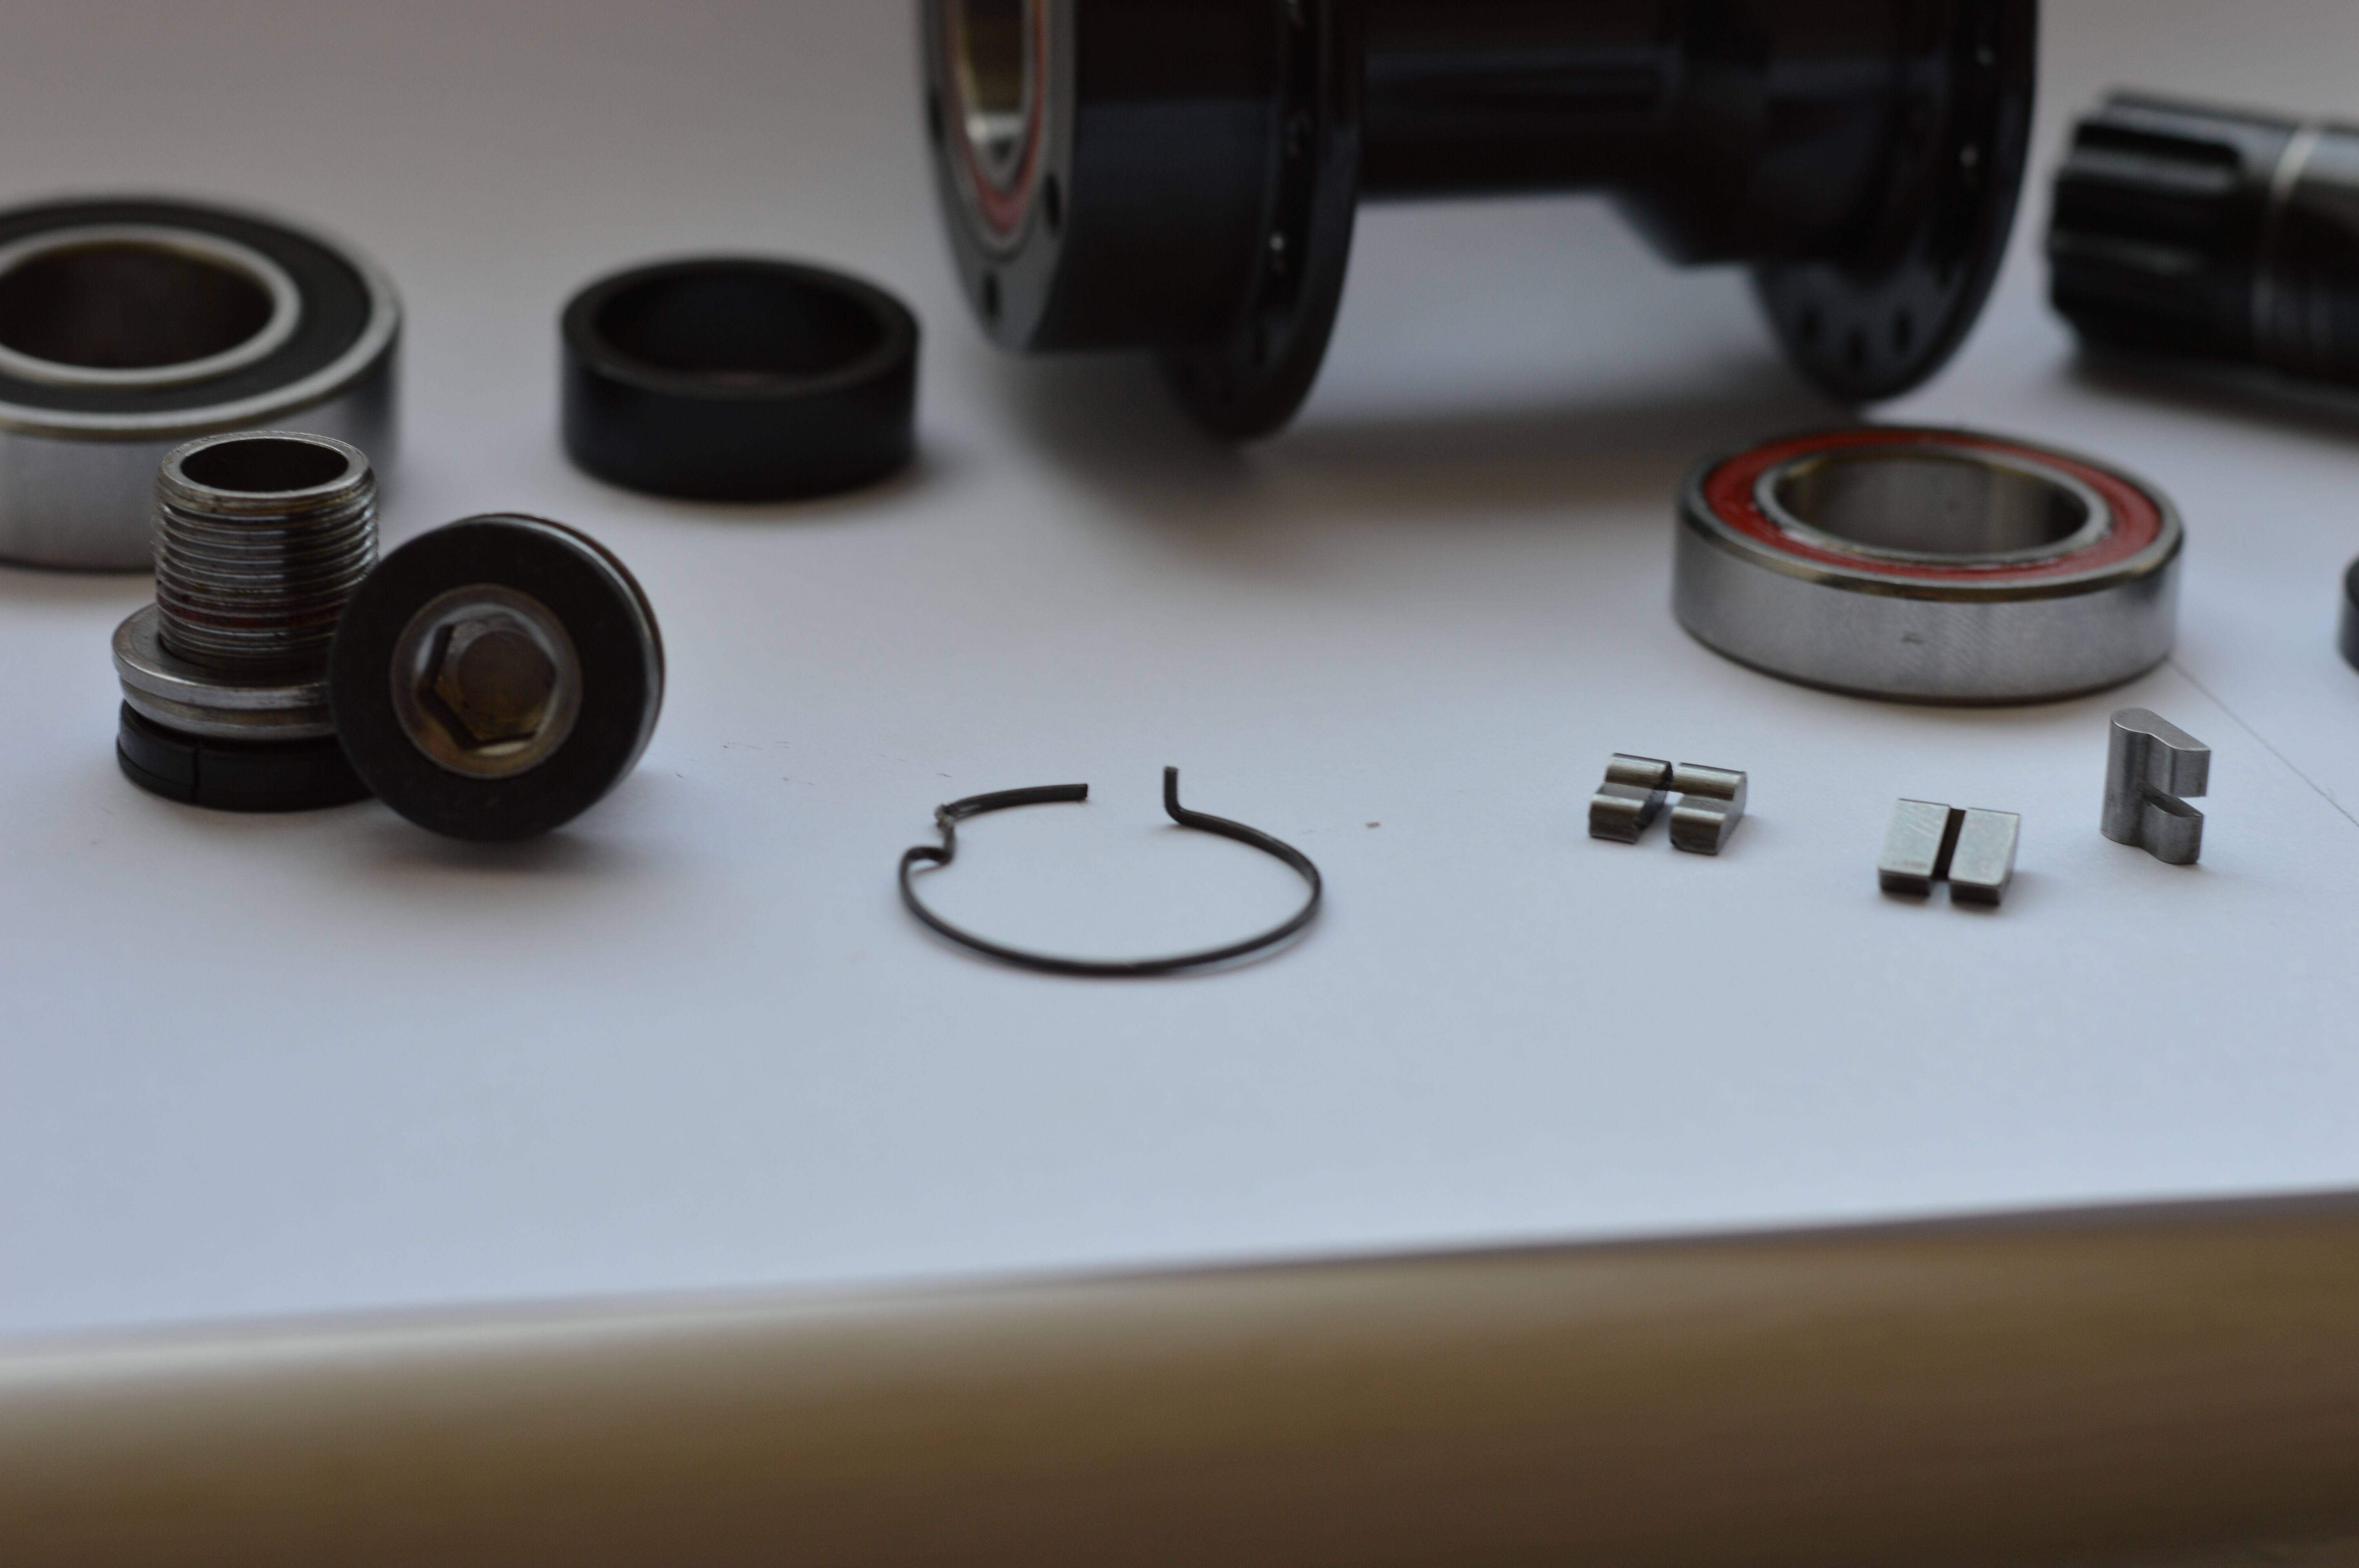
The pawl spring’s upward kink and the 12mm M15(x1) crank bolts.


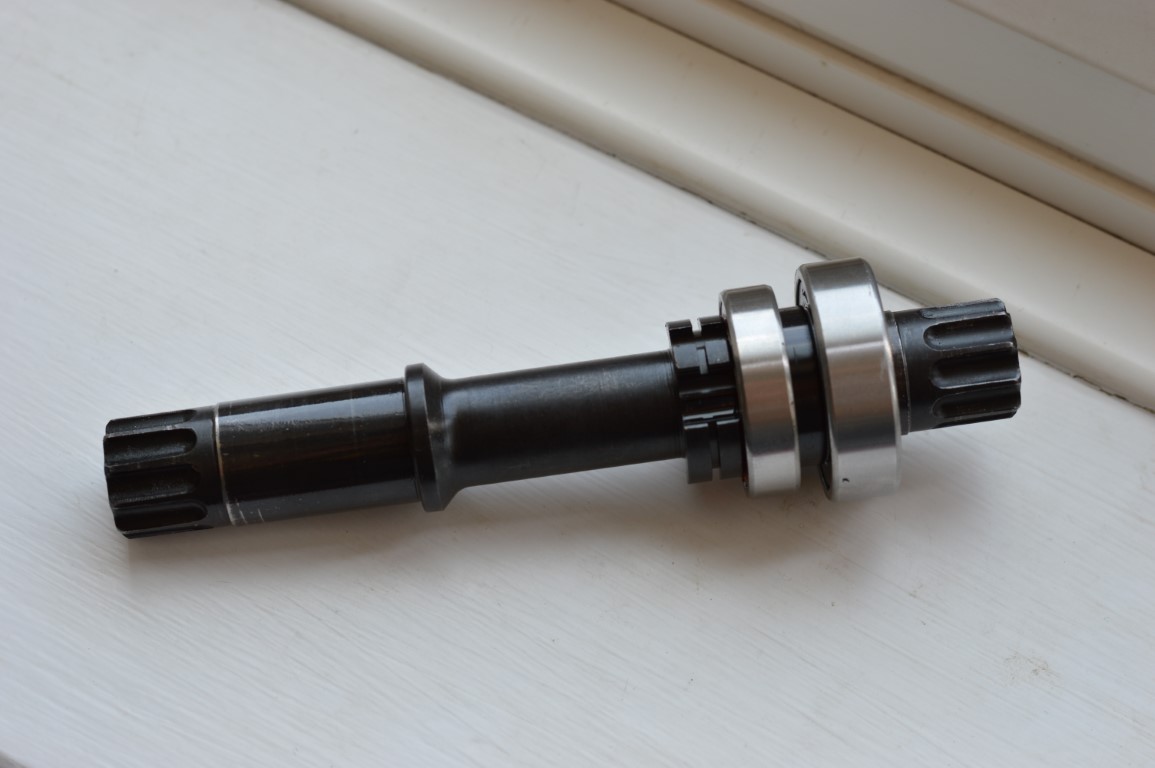
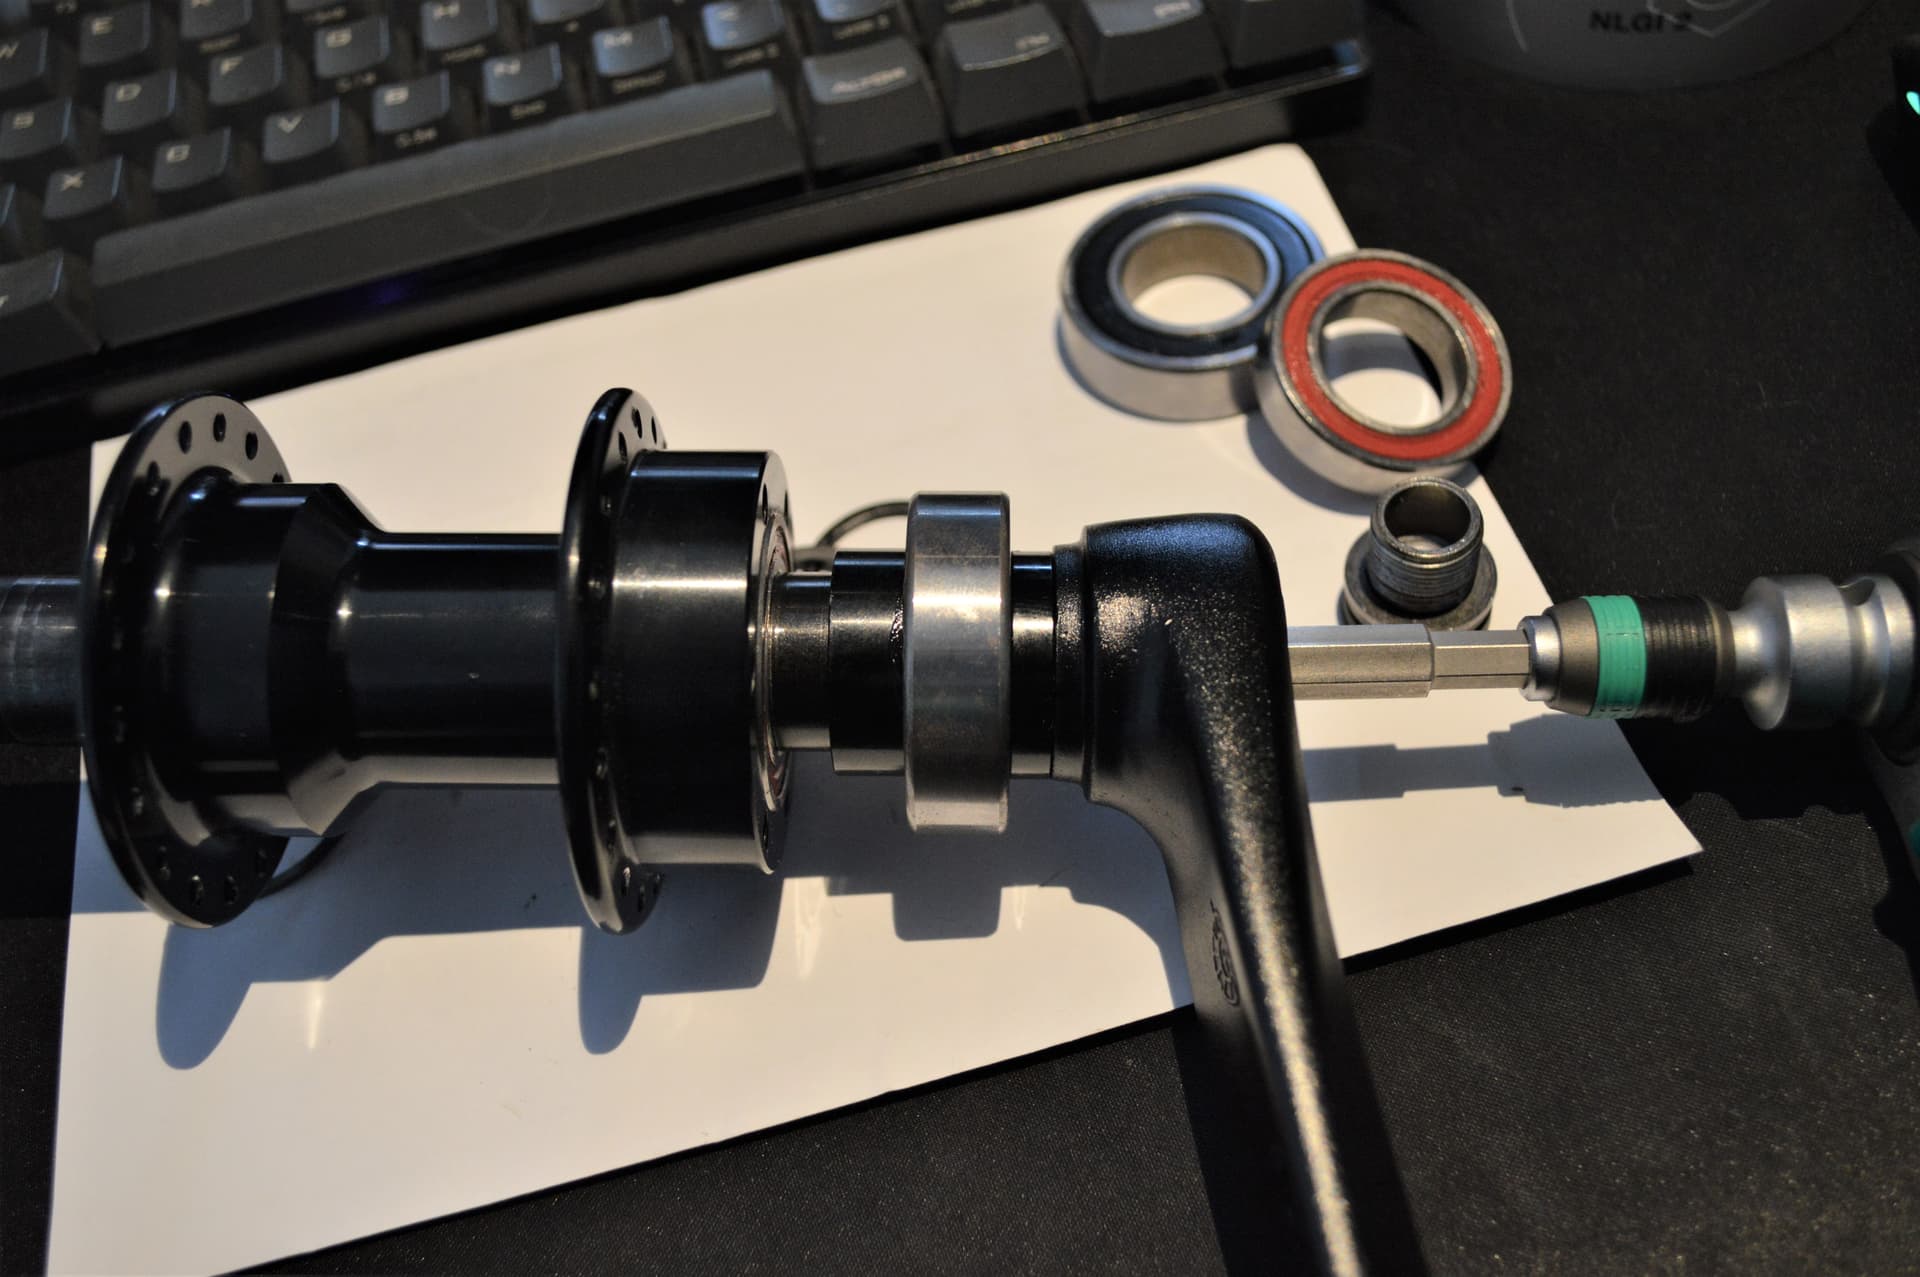
The axle (excluding pawls and spring) as it looks when you remove it from the hub. The standard 22x42x12 bearings we’re used to are a press fit on the shaft, whereas the smaller 22x37x9 hub shell bearing is a close running clearance fit on the axle.
In between the two bearings is a 5mm aluminium spacer.


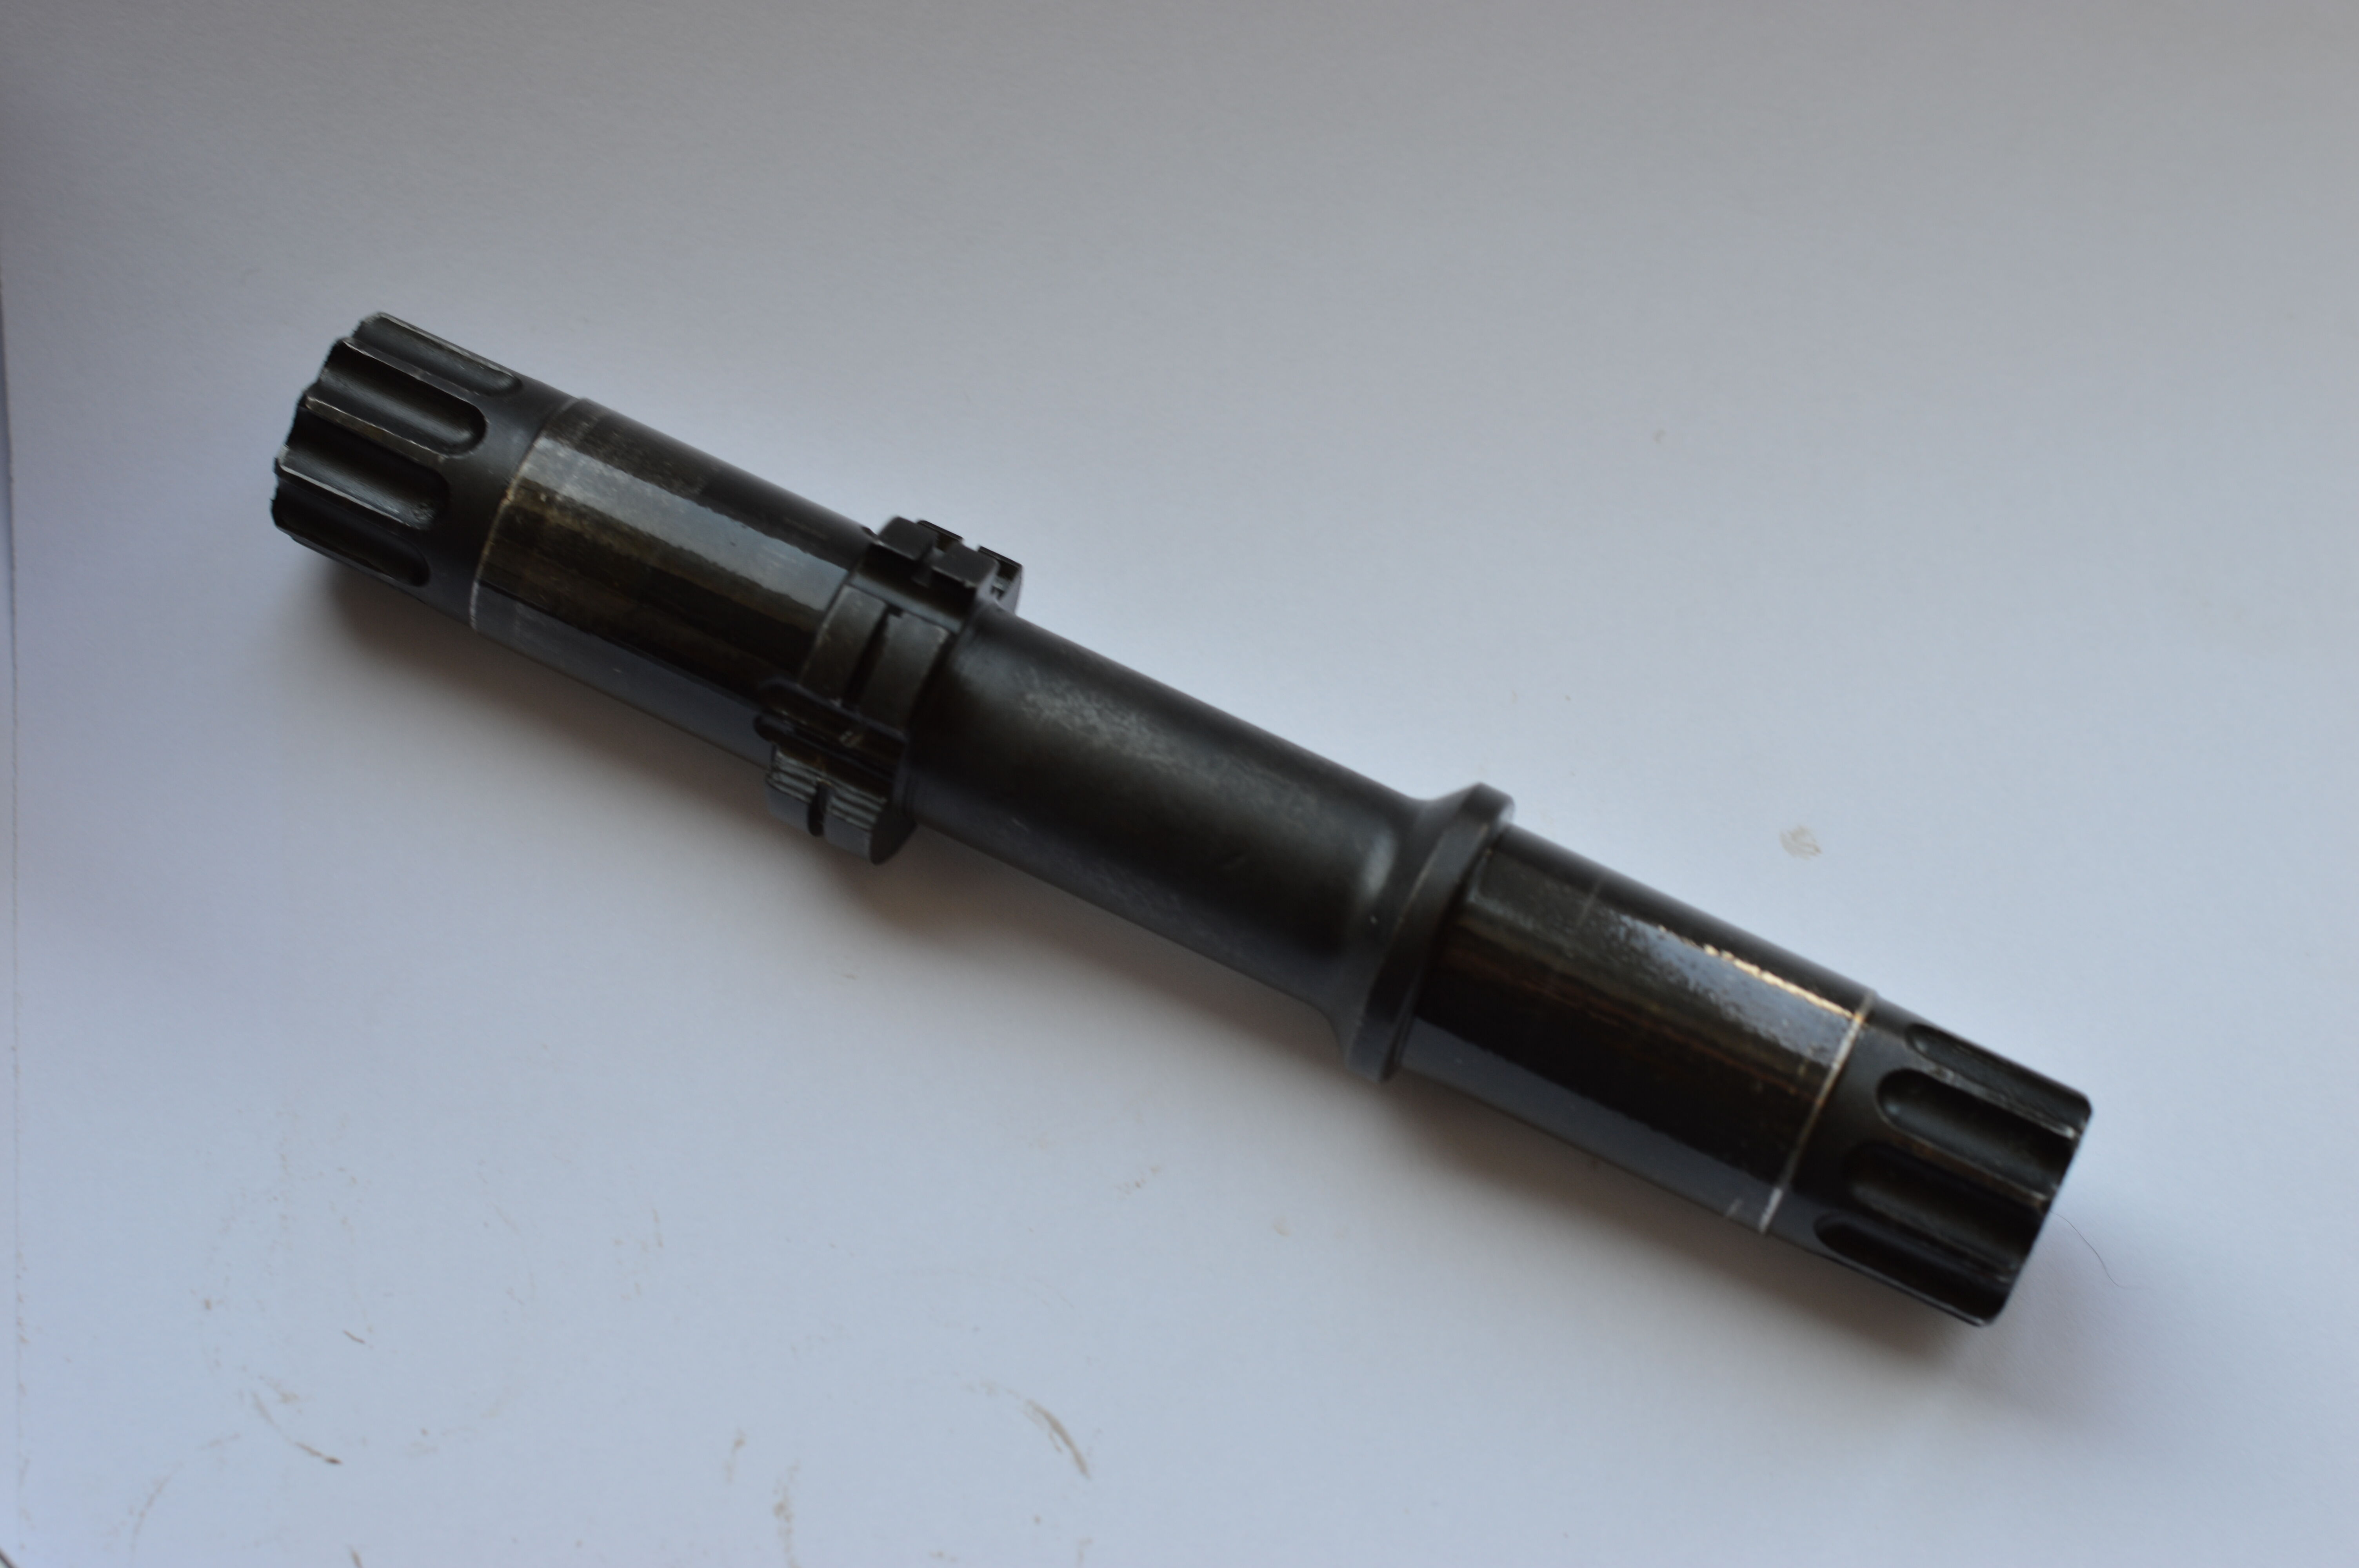
The axle with all other components removed.
Unlike the JR P-hub, the pawl holder on this is machined as part of the steel axle. With an axle of this size, a much larger clutch mechanism would have been required if it were to thread on. The JR P-hub already uses a larger clutch, despite the axle being 5mm smaller in diameter.


The pawl holder with one pawl installed. The top cut-out is for the kick-out on the spring to locate in.


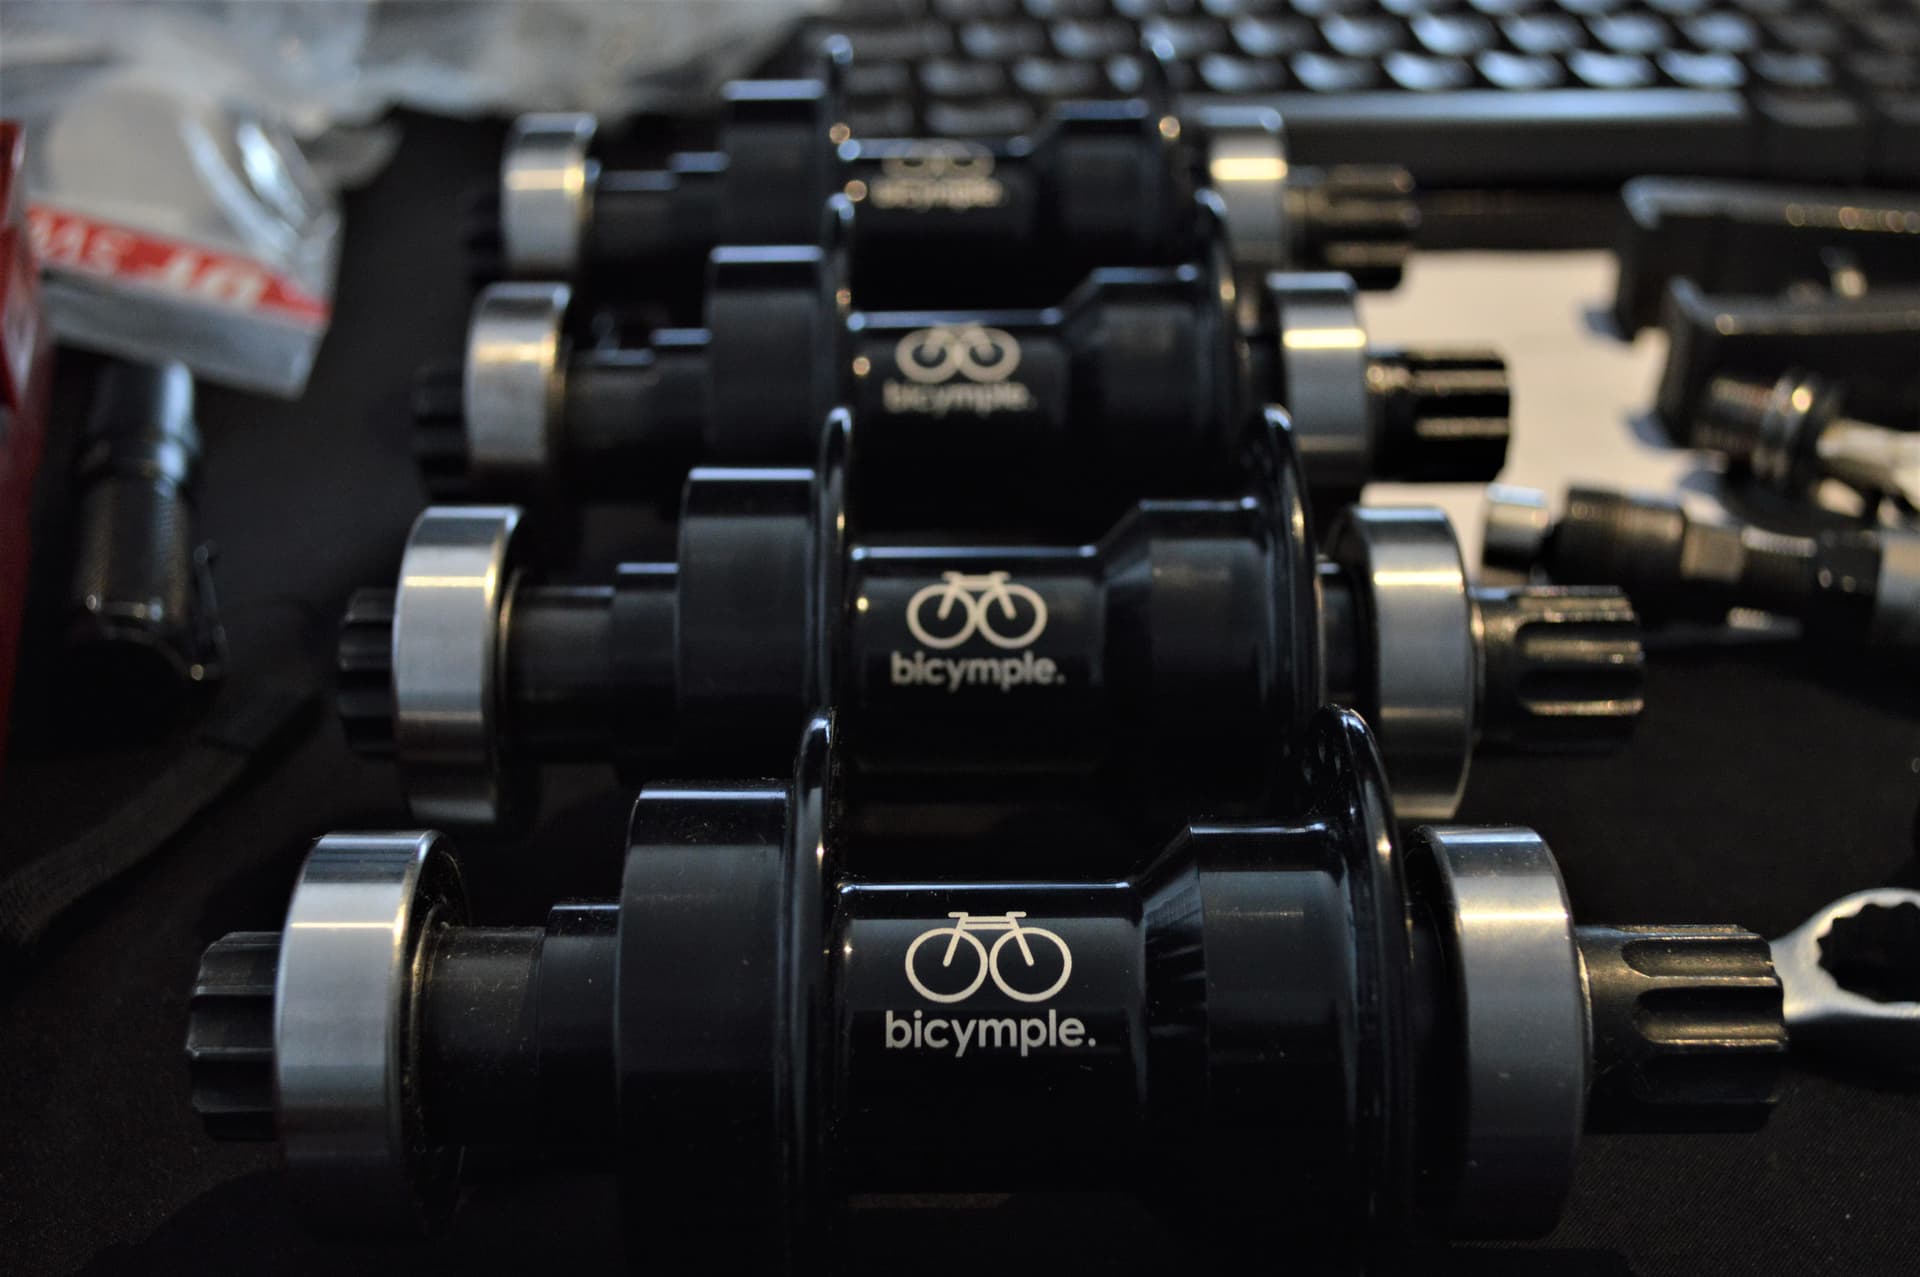
I do love their logo.

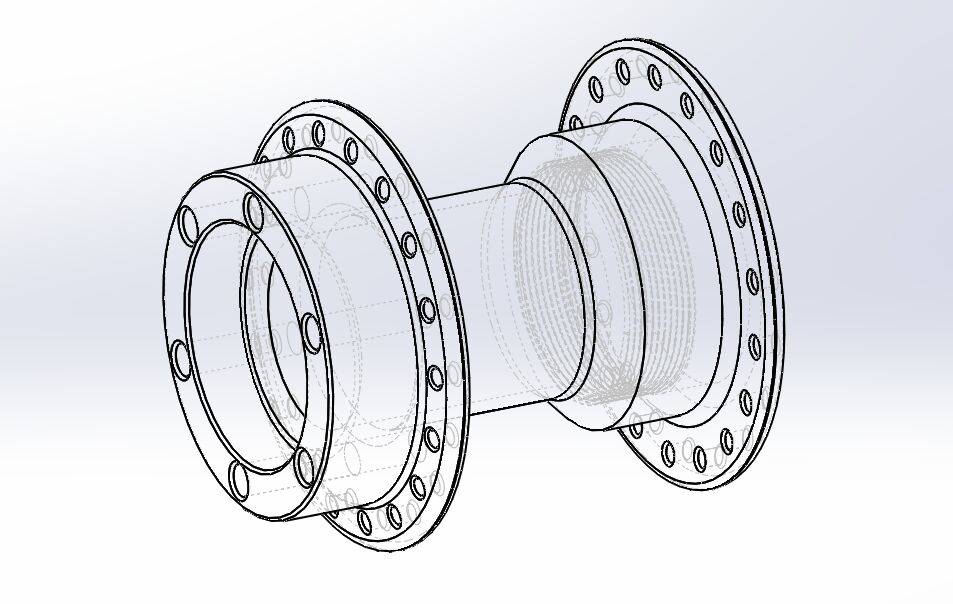
The flanges are slightly tapered in towards the centre of the hub which is nice to see, and the monolithic mount for the disk brake isn’t going to break off any time soon!

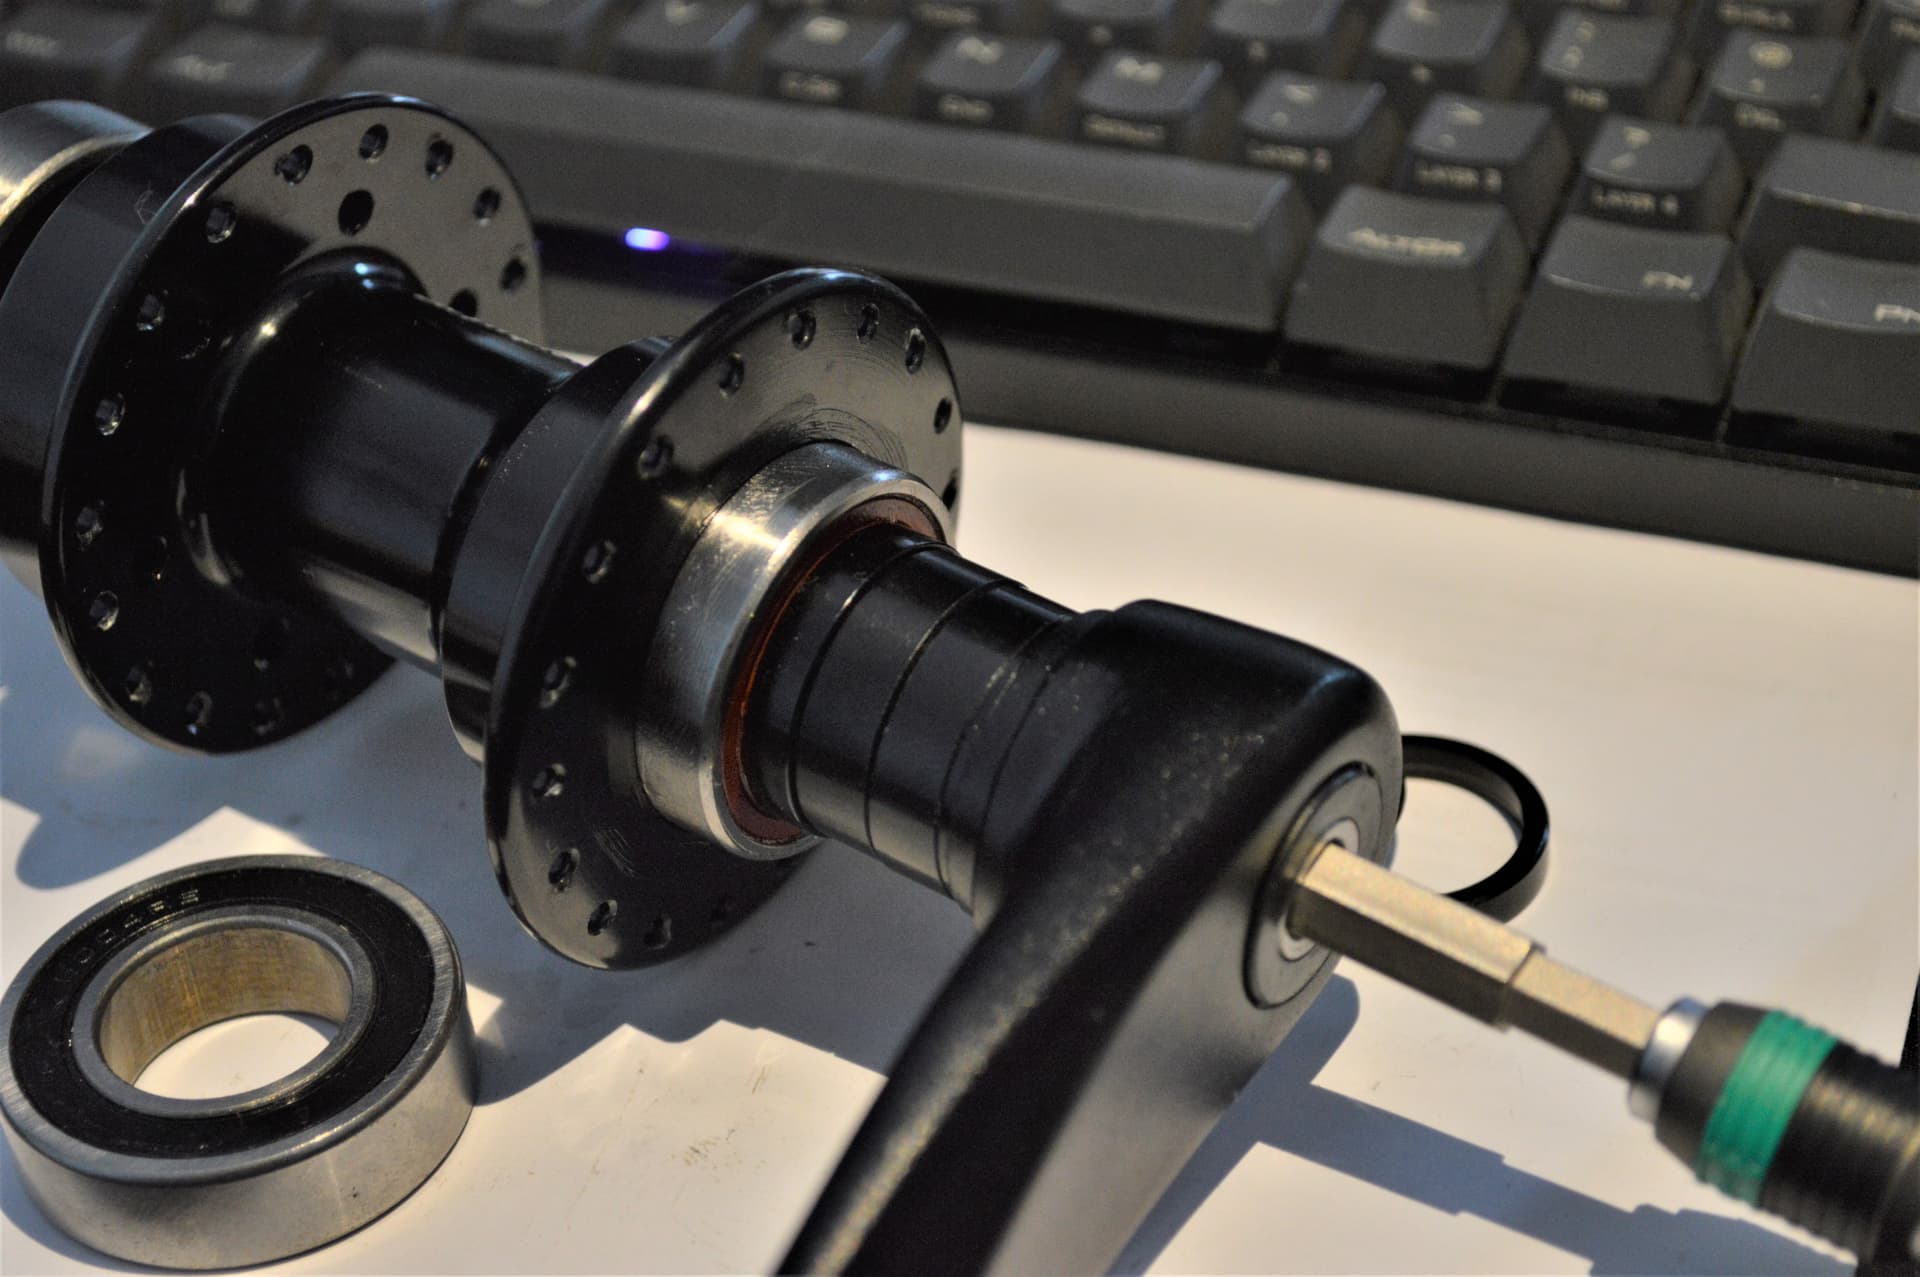
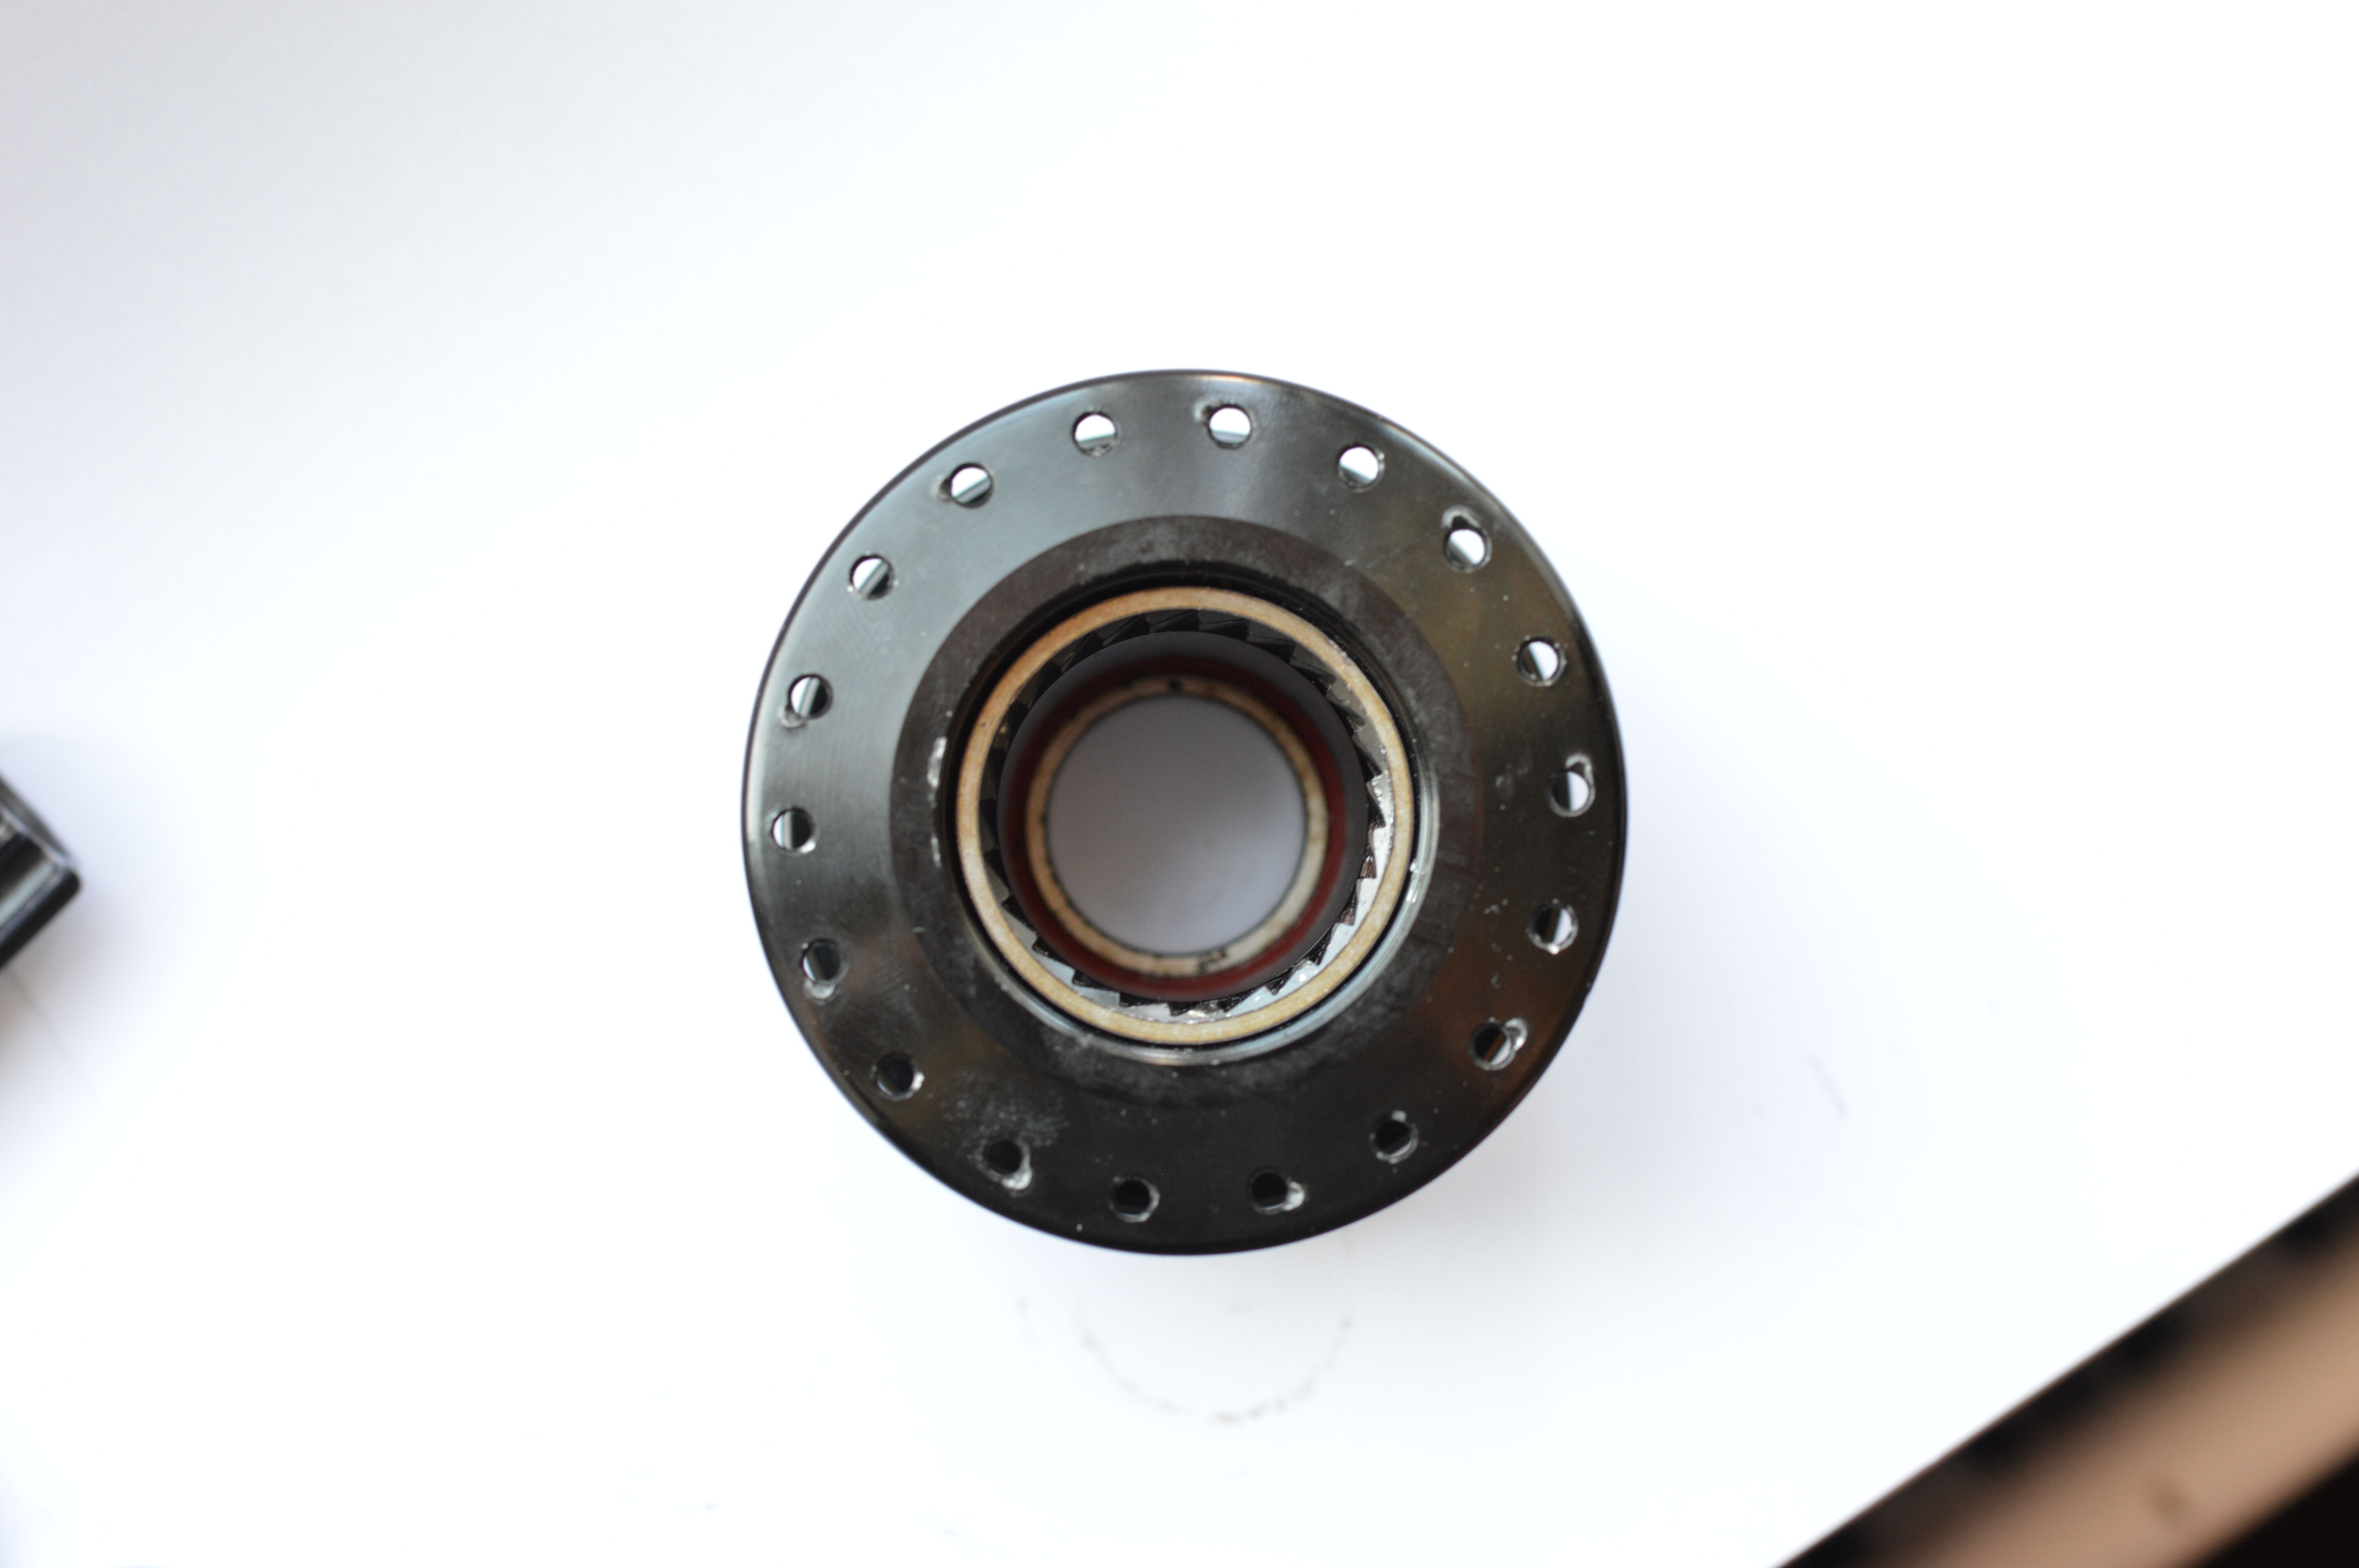
On the disk side, the spacer between the two bearings is 9mm. putting the disk interface exactly 15mm from the frame bearing centre.


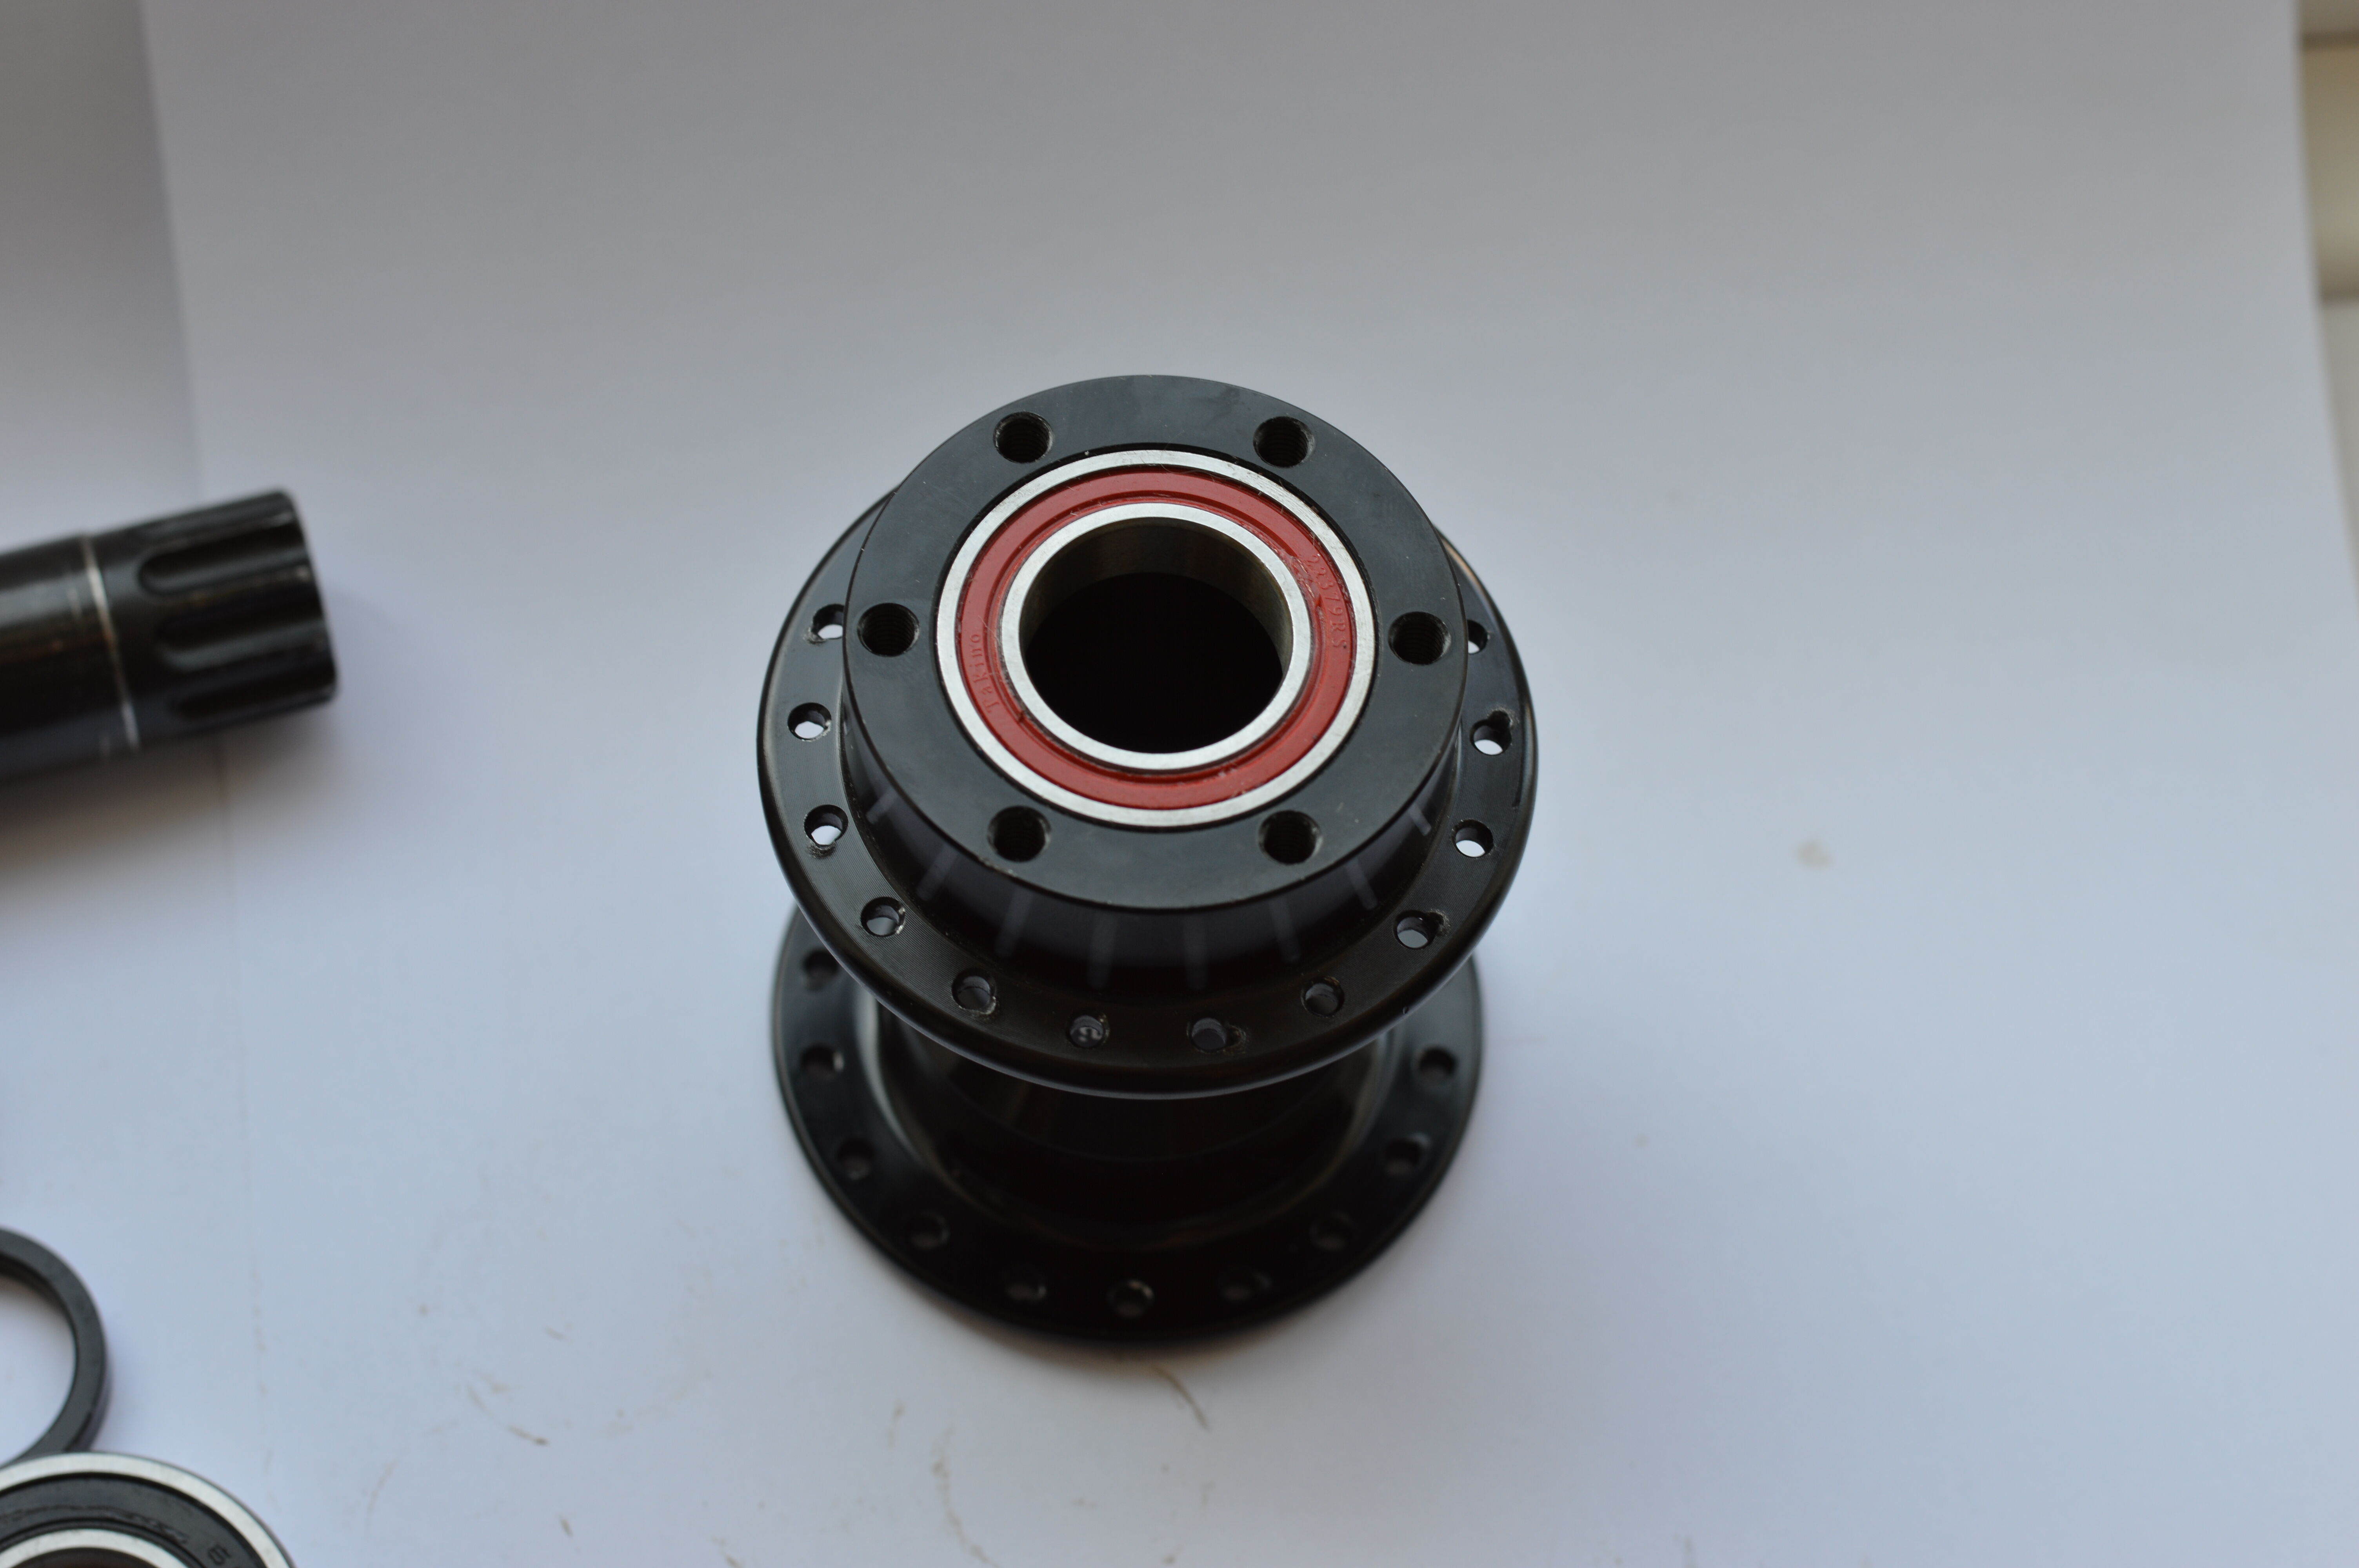
The disk side 22x37x9 hub shell bearing. These bearings are press fit into the shell and are not trivial to remove (which is why this one is still installed…).

The bolt holes for the disk are entirely threaded through holes to the inside of the flange, so there’s no risk of your disk bolts being too long!


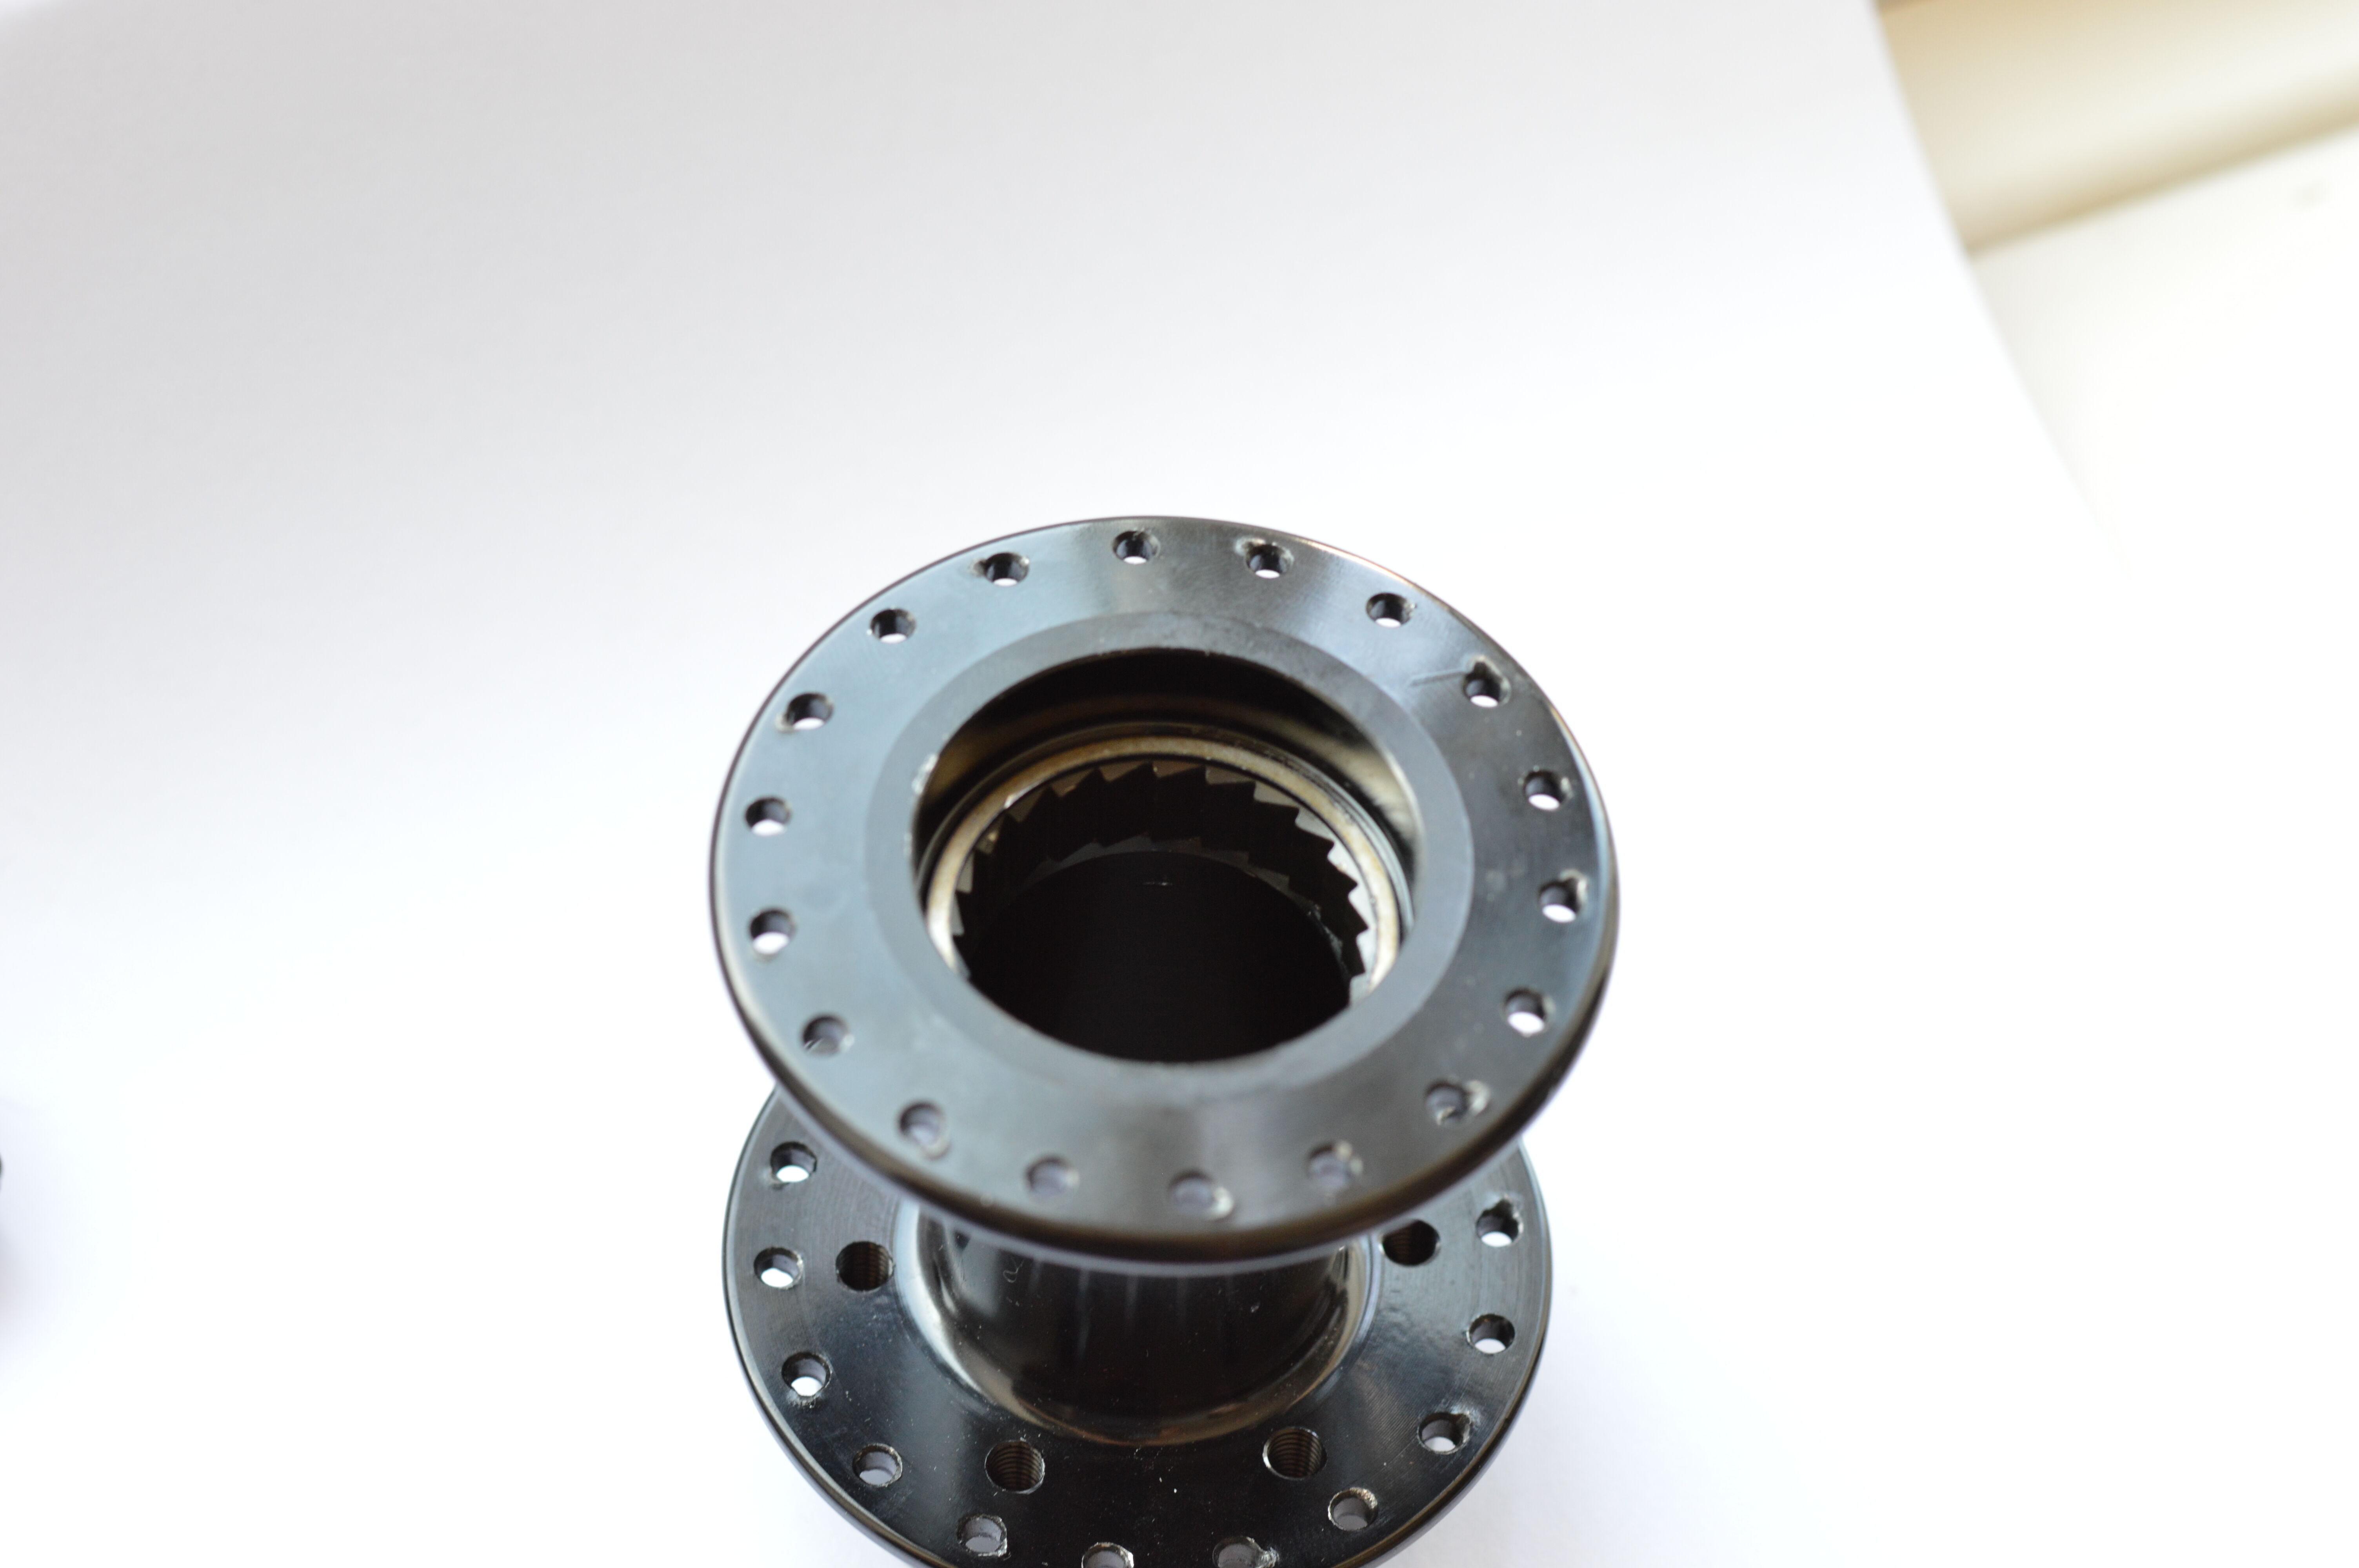
The 24 point ratchet ring. This appears to be a standard 35mm threaded unit, approximately 9mm deep.
On top of the ratchet ring (visible) there is a 35x31.35x1mm steel spacer.


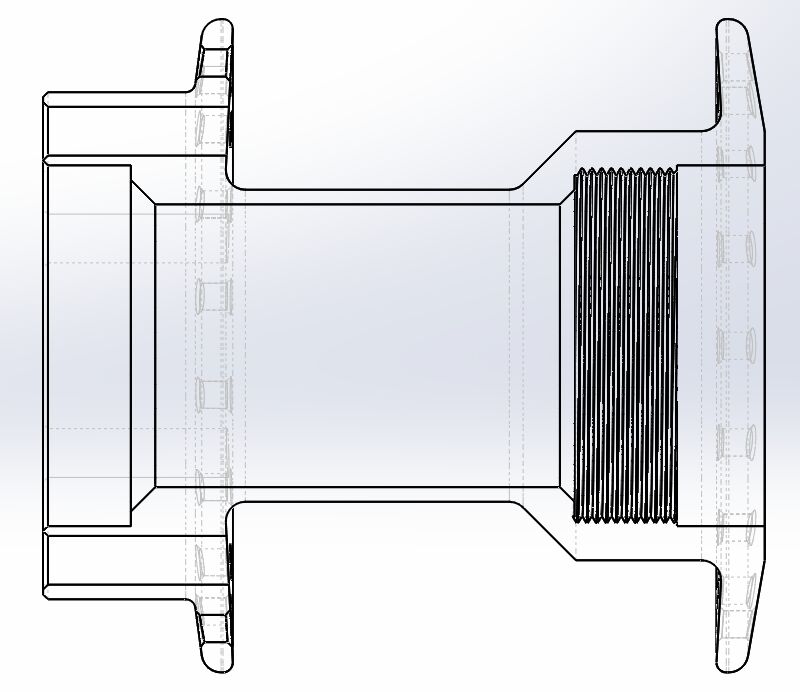
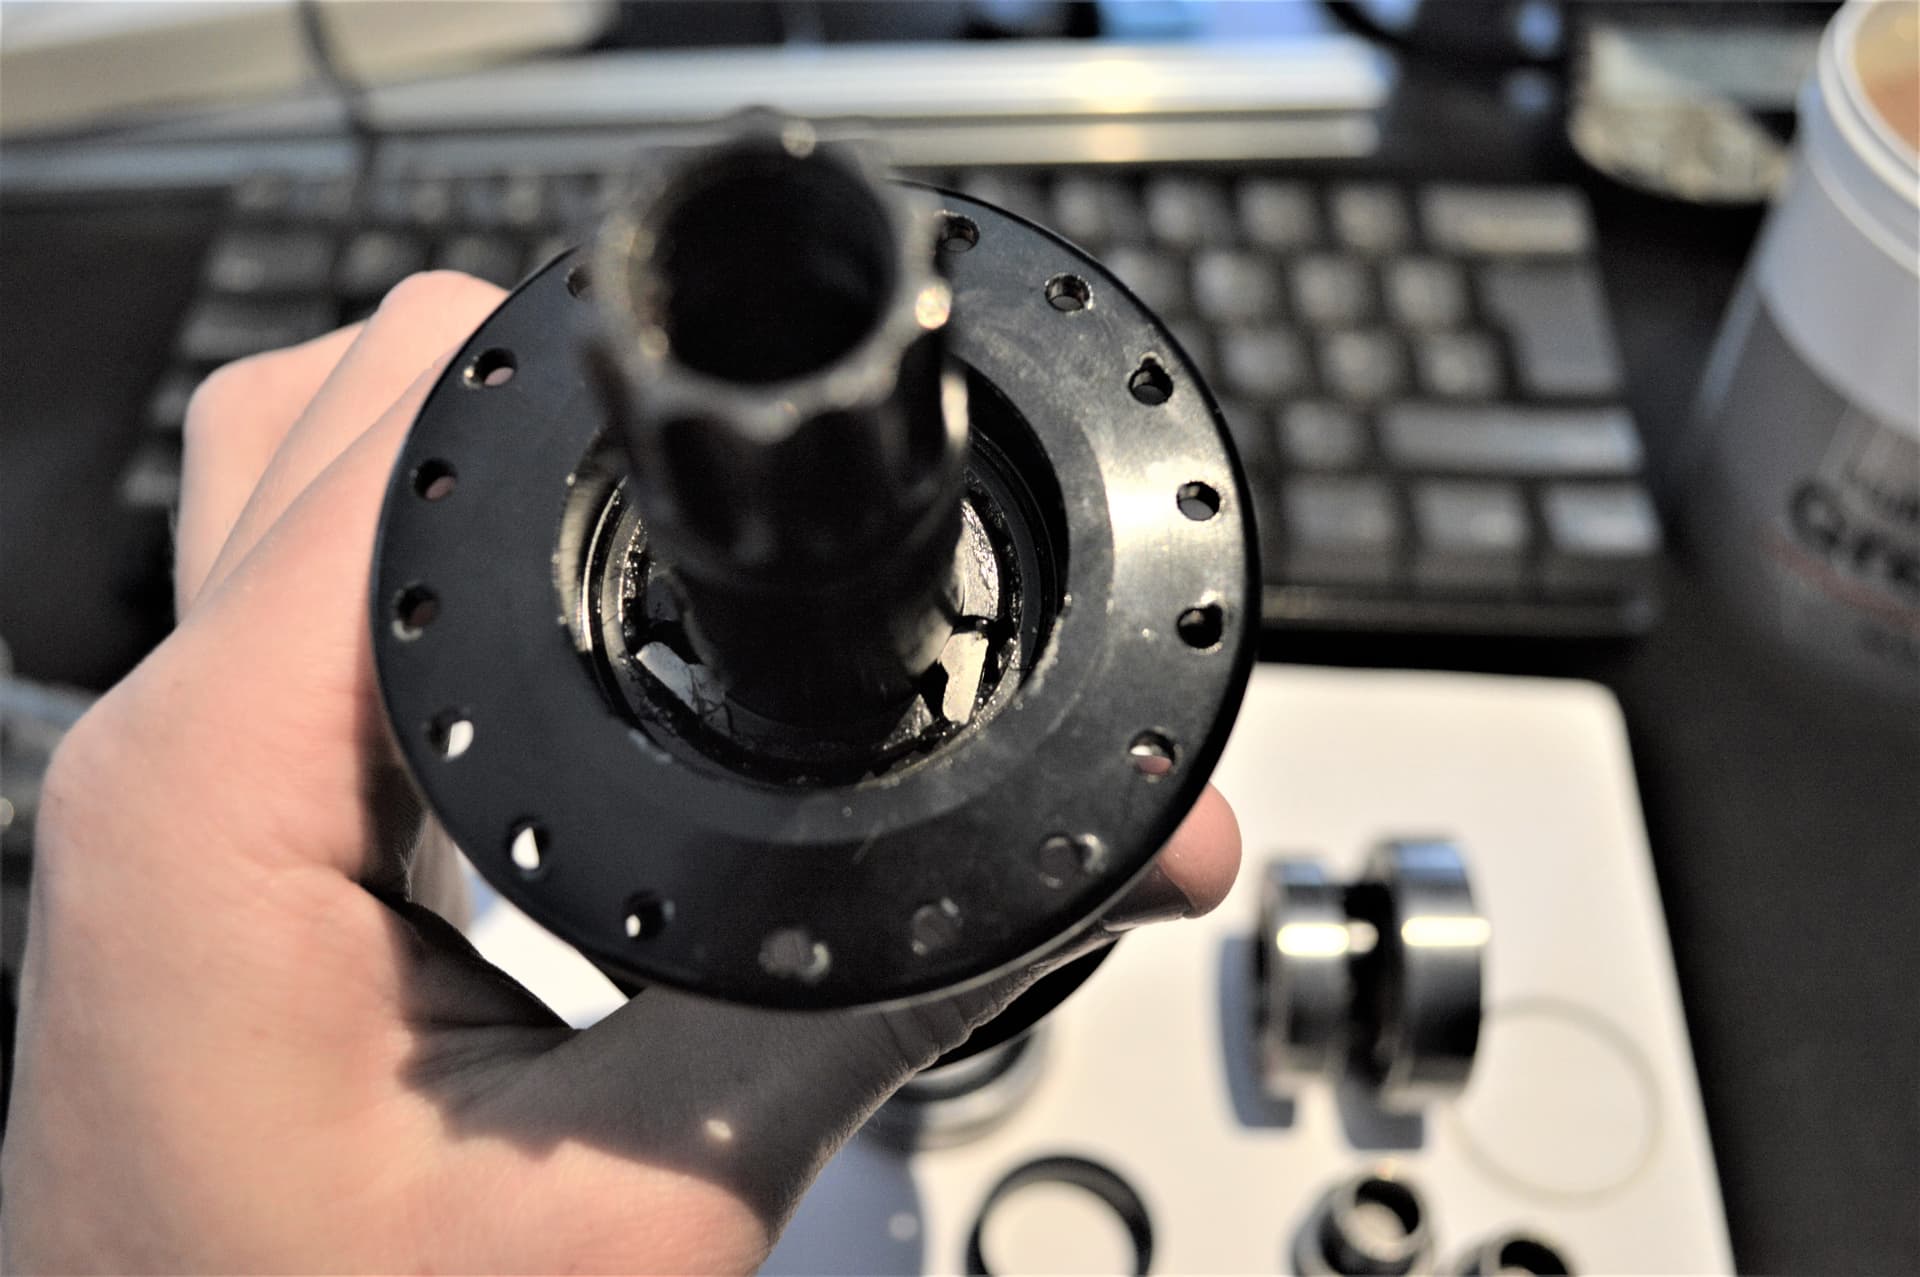
Looking straight down from the clutch side shows that the shell has a large central bore of ~29mm.

With a shell diameter of 32mm, this gives a wall thickness of 1.5mm for the main body.

Unlike the Nimbus hub shell with its notorious splitting on the chamfer, the chamfered part of the hub shell up to the larger surrounding clutch area is almost entirely over the straight bore.


So the broken one requires a new pawl and spring, but it seems like both should be relatively easily available. I’ll confirm when I’ve acquired the right parts.
The ratchet ring is also somewhat marred, but I’m undecided as to whether I’m going to attempt to replace it.
Normal replacement of these parts will be a bit of a faff as the hub shell bearings are not easy to remove, and cannot be removed with a puller (you have to push the clutch side one out with the axle from the disk side).

I’ll post up some reassembly pictures when I get to that point as the process of operations is slightly different to ensure no damage is caused to the pawls.
I’m pretty confident that this hub was broken by someone trying to reassemble it following the bearing coming out, by just pushing/whacking it back in (take note @muni_ben - always use spacers).

4 Likes

Bicymple hub shell:

Some assumptions were made, but it’s mostly correct.

5 Likes

For a bit of piece of mind, I had a stab at simulating hub stress when powering uphill.

I’m sure my numbers are wrong, but it doesn’t look like there are any serious weaknesses in the hub design that’s likely to cause it to split in half (like the Nimbus hub seems to like doing).
I don’t know how much force is realistic for a unicyclist to be able to create pulling up on a seat handle, but doubling some random figures I found for cyclists on 175mm cranks still gave a safety factor of well over 2.5 so I think we’re safe there.
I also assumed that the wheel is laced from only one flange, and I guessed at the aluminium alloy :joy:

As a side note, I’ve not got a lot of idea what I’m doing with simulations, so if anyone has experience and can tell me what I’m doing wrong, please go ahead.

1 Like

That’s a very pessimistic guess…

The hard thing to get right with something like this is of course fatigue (which is extra difficult to do with aluminium). On a highly critical machine part you would do a simulation like this, then take an educated guess at which loads occur in what frequency and “add up the damages by each event” over a lifetime. On bike hubs (and maybe I’m underestimating how much development some brands do), they probably just have a maximum stress they try to stay below that they learned from experience.

2 Likes

Oh absolutely, but it is also worst case stress through the hub. The wheel would also never be entirely stationary with maximum force being applied to the hub through the clutch…
Solidworks can do all sorts of fatigue analysis, but I don’t even pretend to know how to do that and get results that actually mean something.

It’d be fascinating to talk to people who design really high performance parts to see what lengths they go to in simulation.
I also suspect that in the bicycling world (and definitely the unicycling world) for things like hubs they go on their gut, basic design sensibilities, and lots of testing of prototypes.

It looks like for some bike hubs, the disk mount holes are assumed to be fixed, and they apply a load of torque via the spoke holes on the flanges.

image

Right, without much information available on exactly what sizes of components bike hubs use, I took a punt on a DT Swiss 3 pawl system service kit.

It’s not the right size (both the pawls and the spring are too small).

Time to try something else.

2 Likes

Perhaps, but the flanges are more substantial than many unicycle hubs (which rarely fail these days), so I doubt they will be the point of failure on these hubs.

Ding ding ding!

We have a winner!

The Bicymple hub takes 3 Campagnolo pawls (FH-RE113), and one Campagnolo spring (FH-RE114).

The pawls are 100% identical to the originals. The Campagnolo spring is slightly thinner gauge, but perfectly sized and functionally identical.

Reassembly guide (how to not damage your hub) coming soon.

2 Likes

Right, reassembly time.

So if your clutch side bearing comes out (to the point where the clutch is no longer engaging), either accidentally, or on purpose as you’re looking to service the hub/repair the clutch, you must remove the clutch side bearings before attempting to reassemble things.

Hub shell and axle with no bearings, but pawls and spring installed on the axle. The disk side shell bearing is still in the hub. If you want to grease everything up, now’s the time.

When you insert the axle into the shell, you’ll find that the pawls do not automatically seat themselves - this is why you have to remove the bearings. Otherwise you’re very likely to break the pawls in half trying to press them into place.
Using a small tool, poke the pawls until all three are seated correctly.

Then I would next recommend installing the disk side bearings (preferably with a disk installed) to ensure the pawls stay in place while you install the clutch side ones.
I do this with a crank and an increasingly large stack of spacers.

Disk side bearings installed:

Then repeat the process with the clutch side bearings. It’s slightly easier to do one bearing at a time, but you can seat both at once if you don’t have enough spacers…
Don’t forget to also install the thin steel spacer before the hub shell bearing.

And we’re done (disk side bearings removed again):

7 Likes

(https://www.facebook.com/unicycles/photos/a.10159401710754181/10159491310754181/)

Some time next year… I guess a carbon 36" rim might be my next upgrade then.

4 Likes

How do you get from freewheeling to hopping?
At the moment i try:
soft braking, take pedals to hopping position, lean back and break until stop, close the brake, get out of the seat and start hopping at the moment when the wheel stops.
For me its just possible to hop with one pedal near the front position.
Are there any other methods ore tips?

1 Like

I just hop while freewheeling but I’m not that good on the brake so when I get too fast I just hop off and try not to die.

1 Like

That’s the way to go. Like on a regular uni, you have to put your pedals to a hopping position - or, at least, it’s much easier this way.
Now that you can hop when stopped, just try to hop when brake coasting. That’s pretty fun and useful!

Once you’ve mastered the brake coasting hop… Would you dare to try without the brake? Just coast with your pedals at hopping position and try to hop. That’s way more harder than brake coasting jump, though. Note that you’ll have to know how to coast without the brake before trying this :wink:

1 Like

Hopping while freewheeling is not very usefull for waiting at traffic lights. Your second variation can be helpfull.

At lights I do just as I do with a fixed wheel, but with 3 and 4 swapped:

  1. Try and speed up/slow down so that I get to the lights when they’re green
  2. Utilise a suitably positioned lamppost etc. to hold onto.
  3. Get off and then mount again
  4. Attempt to standstill/hop
2 Likes

@muni_ben sent Mimo a bicymple hub:

Excited to see the possibilities here

5 Likes

just came on here to post this!!

1 Like

@unicyclemos, what got you interested in giving this a try?

I built up a ludicrously heavy brakeless freewheel trials out of junk parts for the last SFTU London group ride imagining this kind of riding, but nobody got further than a few metres of coasting.

2 Likes

Mimo is a wizzard. He talked about wanting to try a freewheel the last time I met him, but (as usual) I underestimated what he would be able to do with it.

4 Likes