Flansberrium G-700c P-Frame Gravel Tourer Unicycle - Project ⚙️

Hello uni-friends :wave::gear::star_struck:

Yes, this is a long title but I’ve decided to start this up as I gear up the building and decision making on this one - and decided this needs (will need) its own place on these hallowed walls of uni-forum-life!

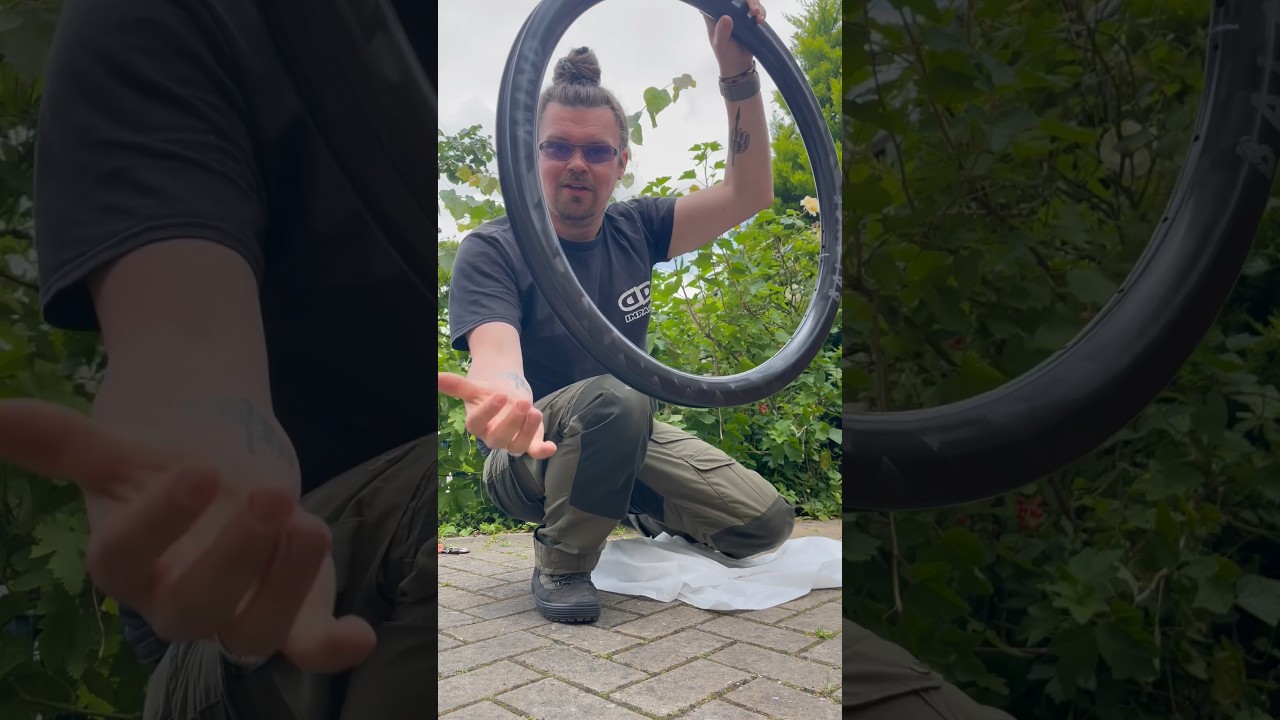
For context, I’m pretty sure it’s been made clear in other posts I’m getting Jakob from Flansberrium finesse fame, to build me a P-frame which will use this 700c rim:

And as discussed here:

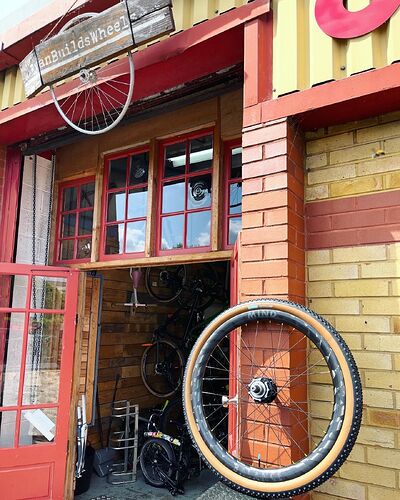
This frame will be somewhat similar to this - given that this is the magical wheel/uni that started me on this project:

And this means I can go a few routes:

  1. A direct colour copy of Simon’s orange and green unicycle as linked above (it works, it’s bold)
  2. Choose to go raw and clear coat - see those welds
  3. Pick two different colours
  4. Select one uniform colour for the whole framework (bags etc to off set)

Putting number 1 aside as while not a bad option I feel like I’m being unimaginative and wonder if I can find something nicer / more me - or more unique.

Option 2, while tempting from a simplicity stand point - feels a bit basic and I think having a killer colour would overall be ideal given this will be a touring / gravel unicycle - it kind of needs a firm identity - much like how Simon’s design and colours (1) stand out and say: I’m here.

Option 3 is where it gets very tricky - picking colours that will work well together isn’t as easy as it sounds.

My main area of thought is to get with two shades of green - darker and light tones - think a pea green and olive green. The idea here is that the bags will be likely also a shade of green, perhaps some camouflage tints here and there and for bright colour spots, I’d opt for orange “accents”.

So far I’ve got these vibes in mind:

&

Or…

&

But this is still an uncertain area for me right now - it could work well as lots of tents and hiking gear use these kind of tones, but it is hard to tell for sure how it will look in the metal.

I should now add that looking at this bike and its colour - we’re where I’d like to get this unicycle frame:

But finding its “Hazy IPA” colour is hard going.

I have however come across these two - which have a complex metallic finish but I feel an advantage in being semi-gloss (gloss feeling a bit too much I think):

&

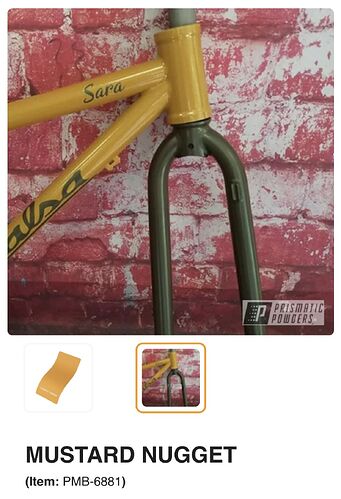
The mustard colour here is really nice I think when you see it on a frame of a bike like this:

And my idea would be if going with option 3 (two colours) would be to have the above green on the forks, this mustard colour on the P-section and then we can picture olive green bags etc.

However, it starts to get into my dilemma area as while I dig these colours…

  • Will they work in the two-part set up?..
  • Do I find a darker green?
  • Do I flip what colour goes on the fork and P-frame section?..

Ahhhhh - my brain spins (as luxurious a problem this is to have!)

I feel I could be picking two colours simply because I have two parts to the frame and that’s what I’ve seen done before. But does it make it better?

These last two colours could work well together and it is at least a “bold” choice - however there’s the other option of number 4 - pick a single colour for all sections of this frame.

So now Dear Reader - picture the entire frame just in the Mustard Nugget colour - this kind of feels more professional and ‘clear’ and there would be zero distractions. It’s bold, it’s a mustard coloured frame which likely works with yellows, oranges, even turquoise pallets for accents.

The bags (likely from Alpkit) being olive green would be the change in colour but perhaps this would also look more balanced, more symmetrical and perhaps more “natural”. More effortless in terms of design choices. Less is more?!?

It’s also more inline with the look of the bike linked above. That is one colour and the black and brown components really sets it off nicely.

I’d also try and get Jakob to cut his Flansberrium vinyl logo in a dark green - which would look nice too!

Of course there’s the other way to go about option 4 - and that is to pick a simple, non-metallic or complex colour, and just go bold and be done with the dilemma:

Anyway, it’s a tough one and of course highly personal to me - Felix - but naturally I want to get it right / decently thought through - hence this opening post on the odyssey of building up this special gravel beast!

For those that read this thanks - and any comments please chime it. Primarily I’m simply glad to have got this deliberation out in the open; out of my head - and over to the uni-inter-webs :star_struck::pray:

3 Likes

I’d go one great color on the whole frame, maybe the mustard yellow with the rubicon green as accents on certain components or graphics, it looks like a great color that isn’t too flashy, but not subdued either. It would work great with olive green bags too.
Just my personal taste, but Simon’s scheme just doesn’t work for me (I actually like the bold colors, but not their distribution).

2 Likes

If you want to know what colors look good together, check out a Color wheel. Canva’s Color Wheel makes color combinations easy.

Booo. People talk on forums. That’s what the damn things are for!

9 Likes

+1 to this, a new unicycle is an amazing thing and especially if you can make it custom.

Standard stock unis are amazing and have their place but the ability to fine tune it to your riding is one of my most favorite parts.

I love the mechanical simplicity of a ride, yet how many factors there are to tweak and play with.

4 Likes

I really like the mustard and olive combo!

Seems like you got an exciting new unicycle project, I love the custom builds and going the extra mile for a good paint job too!

3 Likes

Thanks all for the positive input. It’s appreciated.

The main meal - the rim has arrived this lunchtime!

How will the spoke access holes be cut it?

1 Like

This is a fully tubeless rim - meaning it doesn’t need tubeless tape and can take tyres on without anything added.

Nipples are dragged in with a magnetic insert via valve hole and the wheel is laced externally only.

It adds to the time it takes to build the wheel and is perhaps more painful should a spoke / nipple break - but it makes for a cleaner and more airtight tubeless set up process.

3 Likes

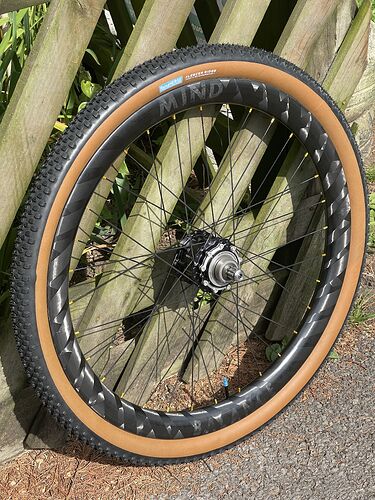
Wheel Building Weekender workshop - and the result was I built up this 700c WG44 rim with a 32h Schlumpf hub.

I don’t think I’d use the no access hole rims again as it was very tricky to lace the spokes into place without the nipples dropping into the rim and then being very hard to extract.

Plus I’m not currently planning on using this tubeless and have the Rene Herse Fleecer Ridge 55mm tyre using their TPU inner tubes.

It’s going to be fun to test this in my 29” frame before a P-frame arrives


8 Likes

Well after two 20km sessions on this wheel - I think I can declare myself a fan of narrower tyres 55mm / 2.1”

It wasn’t all sunshine and roses as it took a good bit of effort to get accustomed to how it reacted in low and high gear, but after battling those learning curve challenges yesterday - out of the tunnel of darkness, I saw the light :star_struck::bulb:

I got caught in a massive downpour and oddly enough the rain distracted me enough to stop worrying about things.

A trippy experience riding in high gear through the rain. A special kind of fun!

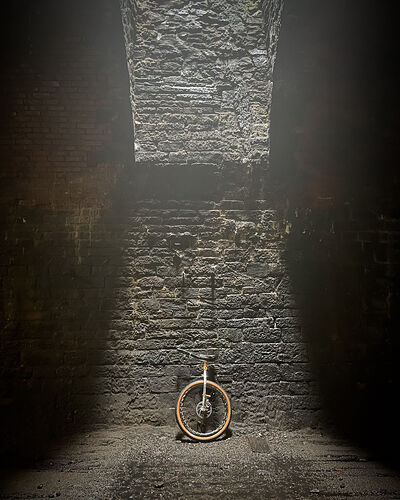
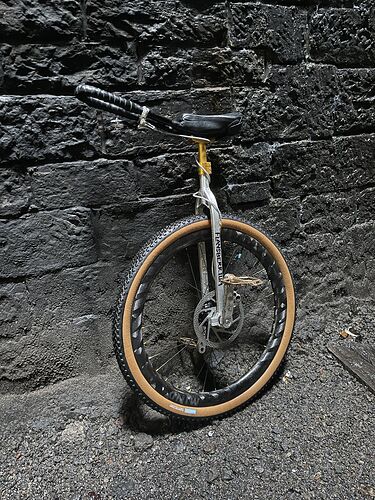
Got these atmospheric shots while pushing through the very dark tunnel near Bristol:


19 Likes

That first picture is mind-blowing! :exploding_head:

3 Likes

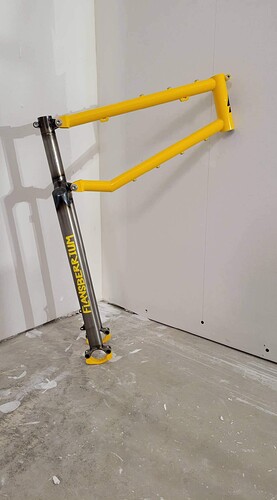
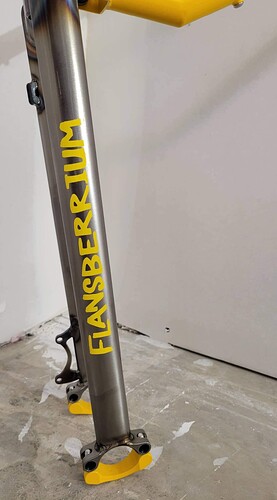
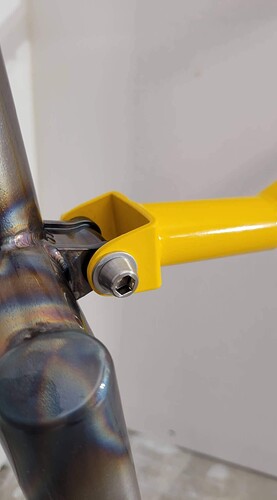
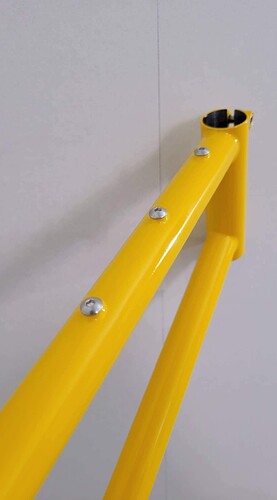
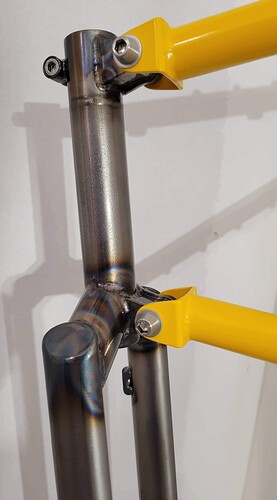
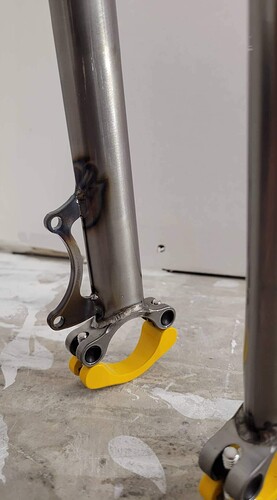
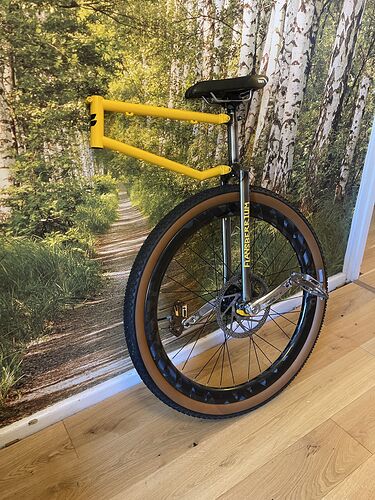
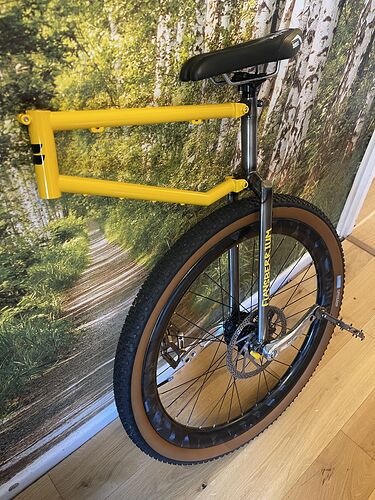
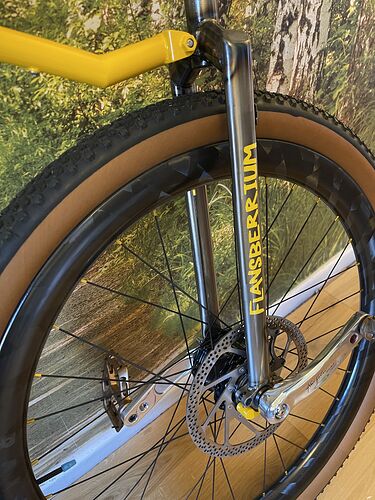
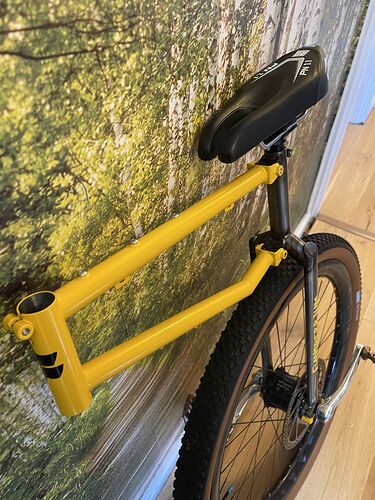
@jaco_flans frame for this project is complete and it’s gone way beyond my already high expectations of his handiwork :star2::muscle::pray::sunglasses:

So glad I opted for Bad Boy Yellow and the main frame in clear coat raw.

Paired up with either camo or brown custom bags and other bits it’ll look amazing - and ride like an epic touring gravel machine :star_struck::gear:


12 Likes

Not sure about the yellow bearing clamps, but all in all very nice. Now to find a yellow tyre…

I love everything about it! I think the yellow bearing clamps tie the entire package together. And, I love the choice of raw clear coat!

2 Likes

Frame has arrived and now the slow process of building the beast starts - bars, bags etc.

Sorry to tag drag you into this @toutestbon but I hope you won’t mind me asking what kind of stem you used on your set up - in conjunction with the flip up Airstryke aero bars?

Was it an adjustable one or fixed angle? Wondering what the minimum width is for the aero bars attachment points the the bar that will be the “handlebar” at the front of the stem section.

Lastly any updated views on using the Apidura rear saddle pack? I am torn between that and the ones from Alpkit -

The inner frame bag will be a custom made Stringray from Alpkit as it will be the neatest option but for rear back I do like the look of Apidura 17l

1 Like

You can start with an adjustable stem to find the best position for you. Once you’ve found the right position, a fixed stem is more reliable.
@jaco_flans made me a 22.2mm bar with a 22.2/31.8 spacer of 12 cm. To use the airstryke profile design extender, it’s top-notch.

The choice of panniers depends on what you want to put in them. It’s best not to think too big too soon. The more you load, the harder it will be to handle your unicycle.

2 Likes

Thanks so much for your input on the bar options @toutestbon :pray:

Progress update here:

It’s a true gem. Still lots of bits to figure out in terms of stem, main bar, aero bars, brake and then bags etc. But had to share the main beast as it is set up and looking now.

Huge thanks to Jakob and all those in the unicycle community who have helped me shape this creation and inspired me along the way!


10 Likes

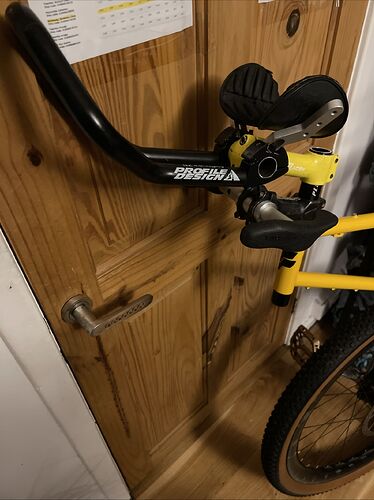
Anyone have any experience with the Profile Design aero bars slipping - as in you just can’t clamp them firmly enough?

I got a second hand set of older style Airstrykes for £20 and I think one side will need a thread repair job via helicoil - but all the same the ability to tighten it and not have it slip seems like you have to put a ton of force to the bolts and then when your elbows are on the flip out rests and you hold the bar it seems to put the whole thing under a lever action that just asks for it to slip upwards.

Perhaps it is just the bars I got and the newer style have better clamps but it is odd.

This is just a temp set up as stems are being replaced with nicer items - I’ve gone for a double stem set up here so I can set the height of the aero and main grips individually as due to the face the Airstrykes I got don’t allow for stacking with risers

Carbon assembly paste should help. If it helps enough I don‘t know.

2 Likes