The rail spacing and so forth that connect the seat post itself to the handle are standard (8mm) for all bicycle rail type posts. You only need to make sure that the post fits your frame and is a rail type post. The post attaches to the bottom of the handle and the seat attaches to the top of the handle with the standard 4 bolt design.
You don’t need a rail adaptor if you are buying a T7 handle, it has one built in. You just need the handle and a rail seatpost.
Bike rails: There are actually 3 rail sizes for bike saddles (8mm is the most common) and no actual fixed width! Bikes get away with this because the rails flex when fitting, unicycle rail adaptors can not.
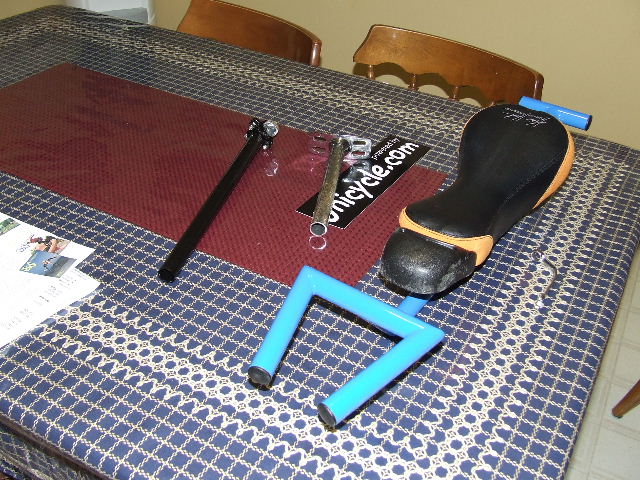
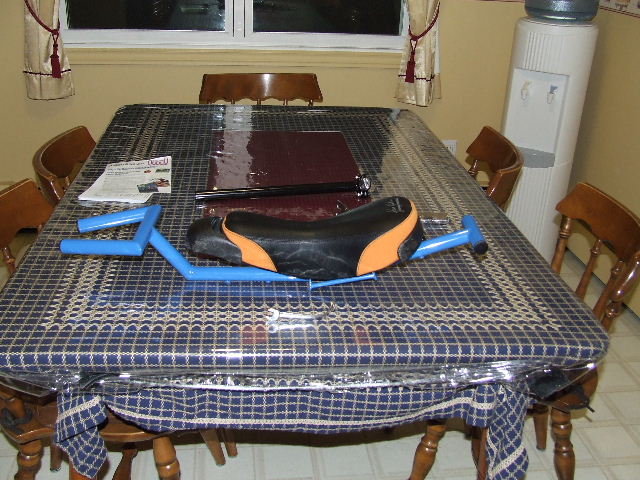
Removal of the original seat post from the KH Freeride seat. That required a 10mm wrench and removal of 4 acron nuts.
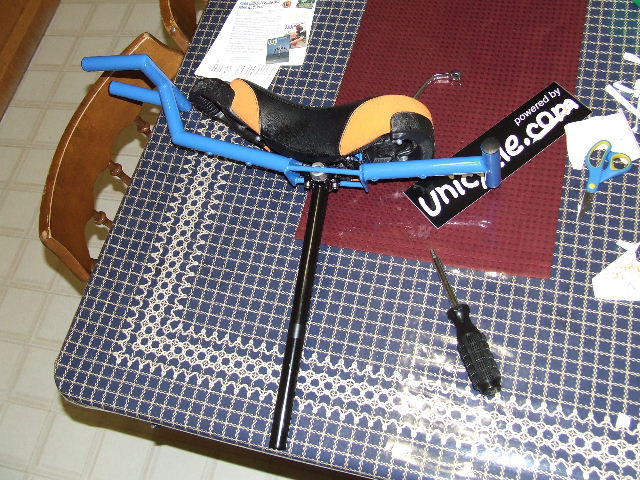
Position the seat onto the T7 bar and tighten the 4 acorn nuts.
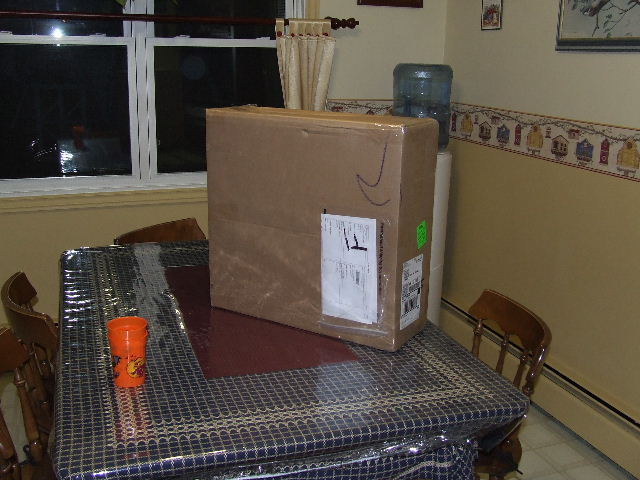
Measure original seat post length and cut new rail post seat to same length. Note the rail post does not come with the T7 bar. You need to order that separately. My Bedford 29" required a 22.2 rail post. After shipping, taxes etc the rail post cost me $42.00
Attach the rail seat post to the T7 bar. Tightening the rail post required an allen key wrench.
Turn the seat upside down and adjust the seat with the allen key so the seat front has a small angle to it. We well adjust this angle to suit our riding preferrence later on.
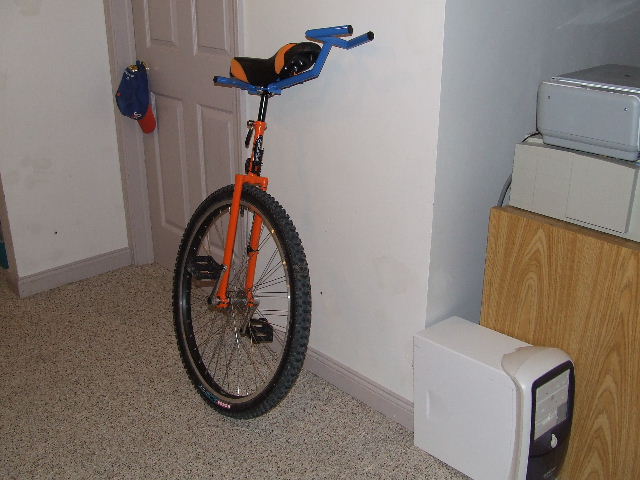
Insert the rail post back into the unicycle and adjust the height of the seat to your personal preference.
Adjust again the pitch of the seat (not the height) to suit your riding comfort. I suggest you bring the allen key with you so you can adjust it after your first ride.
Take a moment to check the tightness of the for acorn nuts (under the seat) and the two allen screws (to adjust the pitch). Try not to over tighten, just snug.
For your first mount, I suggest you brace yourself again a wall so you can recheck height and pitch of seat.
Wow, I really like the idea of being able to change the pitch of bar and seat together.
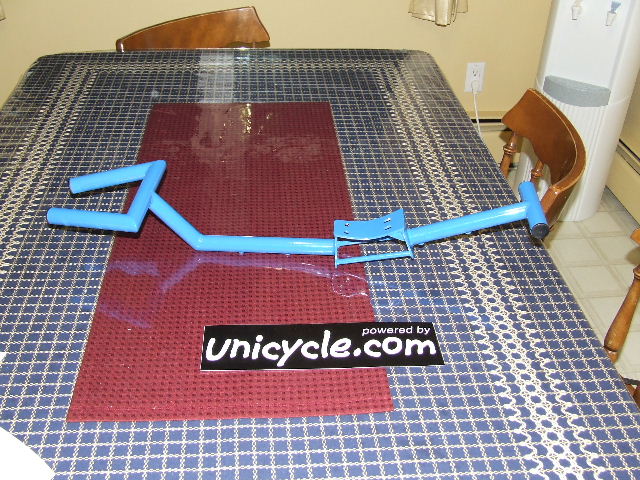
Under the bar in the front and back are 2 thread holes for connecting stuff (like water bottles).
The width of the Tbar in back and handles in the front have been design so they don’t get in the way of freemounting or dismounting. I’ll test that theory tomorrow.
I love the look, but the color doesn’t match my uni. Take care of that after I rack up some kilometers.
For the price I thought I might get some handle bar grips, oh well, I take care of that later too.
Well lets see whats next, guess I’ll move my cyclometer to the bar and get a small red led for the back.
It’s raining cats and dogs, expecting Noah to come by any minute to collect two of each animal.
Ok, so I broke down and rode anyway last night at 10:00pm.
It was zero degree’s perfect temp for a unicycle ride.
I dawned on my helmet with trusty helmet mount light and off I went.
For my first mount I used the side of my car to steady myself and get the jewels and feet positioned properly.
I went with have the pitch of my seat raised in the front slightly so I could sit more to the back of the seat.
Off I went. Travelled two blocks then placed my left hand on the bar to go up a hill. My right arm usually make a pumping action while going up a hill so I settled on on hand on bar the other not. No incident.
Next I traveled 5 km’s again left hand on on off the bar. Could not bring myself to have both left and right on bar at the same time.
Typically when I ride my left arm tends to lean towards the front of the unicycle and the right trails behind the unicycle. Not sure why.
Freemounting
Ok this was interesting. I had my backback on with a medium load. Now that my seat has a pitch to it the back end of the seat is lower and less curved. Typically I place the crank at the 5 O’clock position to freemount. Now I had to place it at the 3 - 4 O’clock position to mount. It took me 3 - 4 attempts till my comfort level and correct pedal position for mounting. If my legs are tired then it takes even more attempts. If I get lazy then I use a wall, post whatever is available. Best statement I can make is the handle is not an obstacle for freemounting.
Dismounting
Normally when I dismount, I reach behind to catch the bumper of my seat. Now I can reach behind and catch the T part of the handle. Again the handle bar does not hinder my dismount.
Bunny Hopping
This was kinda wierd. I was a bit concerned to hop due to the rail post seat. In the back of my mind was “Did i tighten the rail post enought”. If it wasn’t tight enought the seat and post would tilt all the way up and I’d UPD. Nope not a problem. I’ll keep an eye on it.
I could barely notice the bar during my hops.
More info to come as I start racking up the kilometers.
Especially for up hill climbs and starting up to pick up speed.
So far I only hold the bar with left hand, never with both.
My right arm always wants to act as a balancing beam.
I have resisted the temptation to mount my cyclometer on the bar, for now it can stay on the fork tube. Mostly because my left hand likes to rest in middle of the bar where I wanted to mount it.
UPD and Bar The front bar in the handle grip section has two marks, if I had handle bar grips this would not be and issue. When my front bar hits the ground it changes the pitch of the seat and bar. This is due to my seat post rail is not tight enough. I originally expected this to happen. So I tightened it some more.
Bunny Hopping Bunny hopping and holding onto seat handle no problems. Bunny hopping and holding onto T7 bar = problems. The extra mechanical advantage/leverage from gripping the T7 bar makes the post move and changes the pitch of the seat (Again this is probably due to the post not being tightened enough).
It would be interesting to here comments from others regarding their seat post.
Using the KH post I have not had problems in either of these situations. The Kh does not rely on friction to hold the angle correct, to rotate the seat I would have to snap one of the bolts. Personally if i have to bunnyhop, and when mounting, i hold the saddle handle, having that much of a lever for my hands throws my balance.