Corbin mentioned on his website that he went to 0% infill to save on plastic for testing, but by default you’d print with an infill, from which you can select a variety of styles to suit the part that you’re making.
1 Like
Yup! The PETG version finished and now I’m on to strength issues…new blog post coming soon.
Okay! part 2…strength. This isn’t going to be easy to do.
Too bad you can not print HDPE as the store bought handles are made of. It is hard to beat HDPE tor strength and resistant to impacts. I’ve made a few crude handles by reforming HDPE pipe. I’ve never broke one.
2 Likes
By HDPE piping, are you meaning PEX?
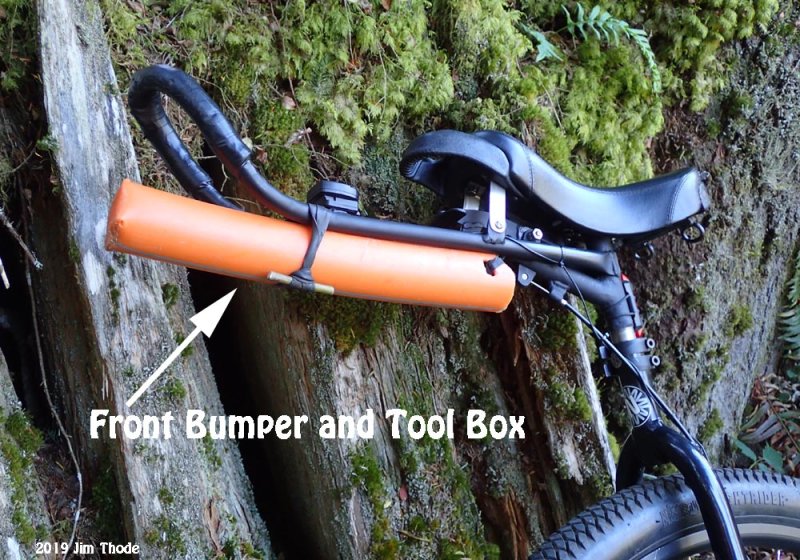
No, the HDPE pipe I have used is black water pipe and larger 2" diameter fiber optics conduit.
Here is a section I used as a bumper and tool container:
1 Like
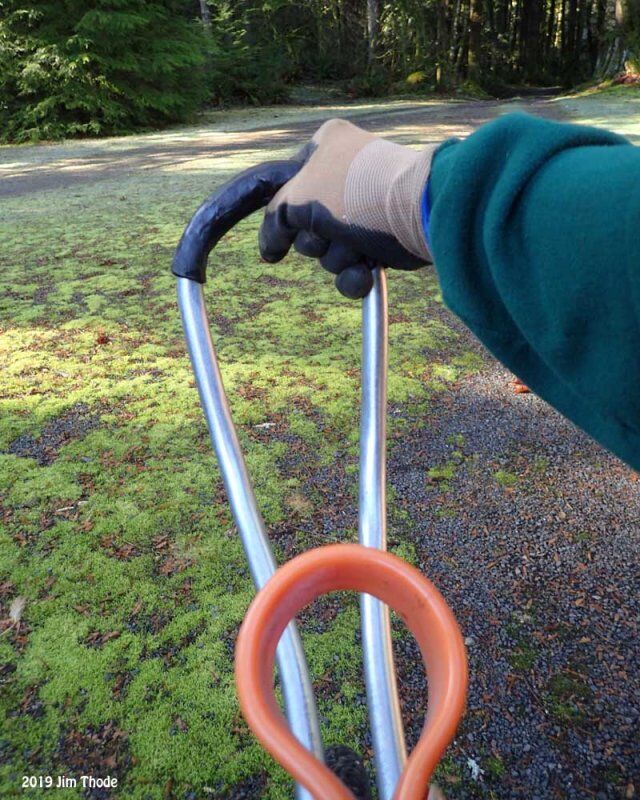
Saddle bag hoops for y’all:
4 Likes
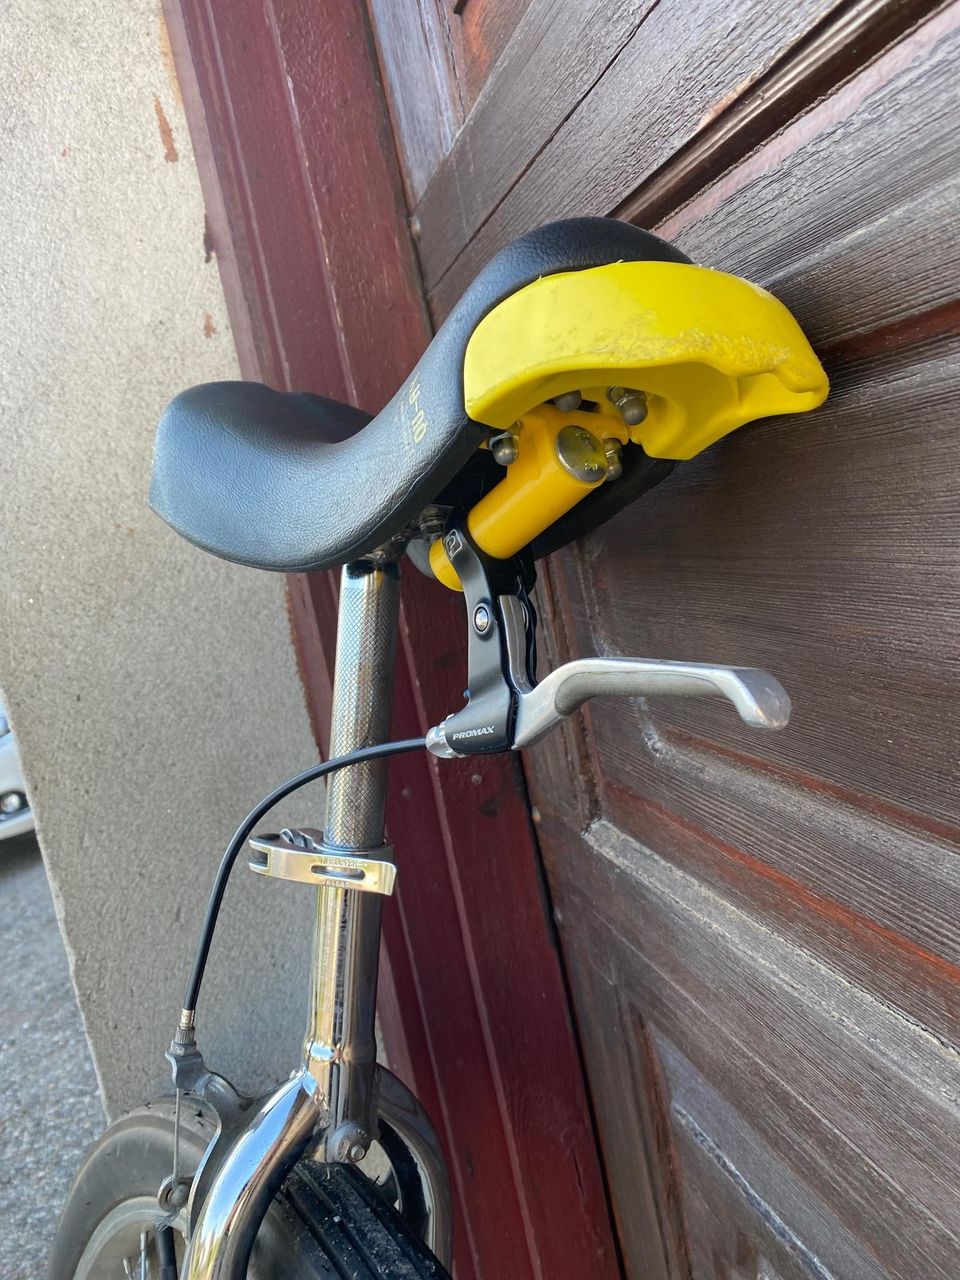
Brake lever mount:
1 Like
Presuming that’s your design, how’s it been holding up?
Even the cheaper metal ones with the two bolt mount seem to have a lovely habit of flexing (on the mount), which I’d instinctively have thought would be likely to snap the layers where the bolts go through there.
I actually ended up never using that one. After first versions I made without the steel bolt snapped, I just used the metal mount from one of the other unicycles that I rarely used. I made this version before I sold that unicycle, to be able to sell it sort of as a “complete unicycle”. At that point I had also changed the saddle on that unicycle to one of the cheap qu-ax saddles with slightly different bolt layout and that why I never used it.
I did print a new one with different bolt spacing to fit the qu-ax saddle and as expected it was a bit flex in it.
I don’t know long it lasted since I sold the unicycle. (I did inform the buyer that the 3d-printed mount probably would break at some point and I recommend him to upgrade with a new saddle and brake mount.)
Don’t know why I didn’t design it with four mounting bolts in the first place, I was probably just lazy ![]()
2 Likes
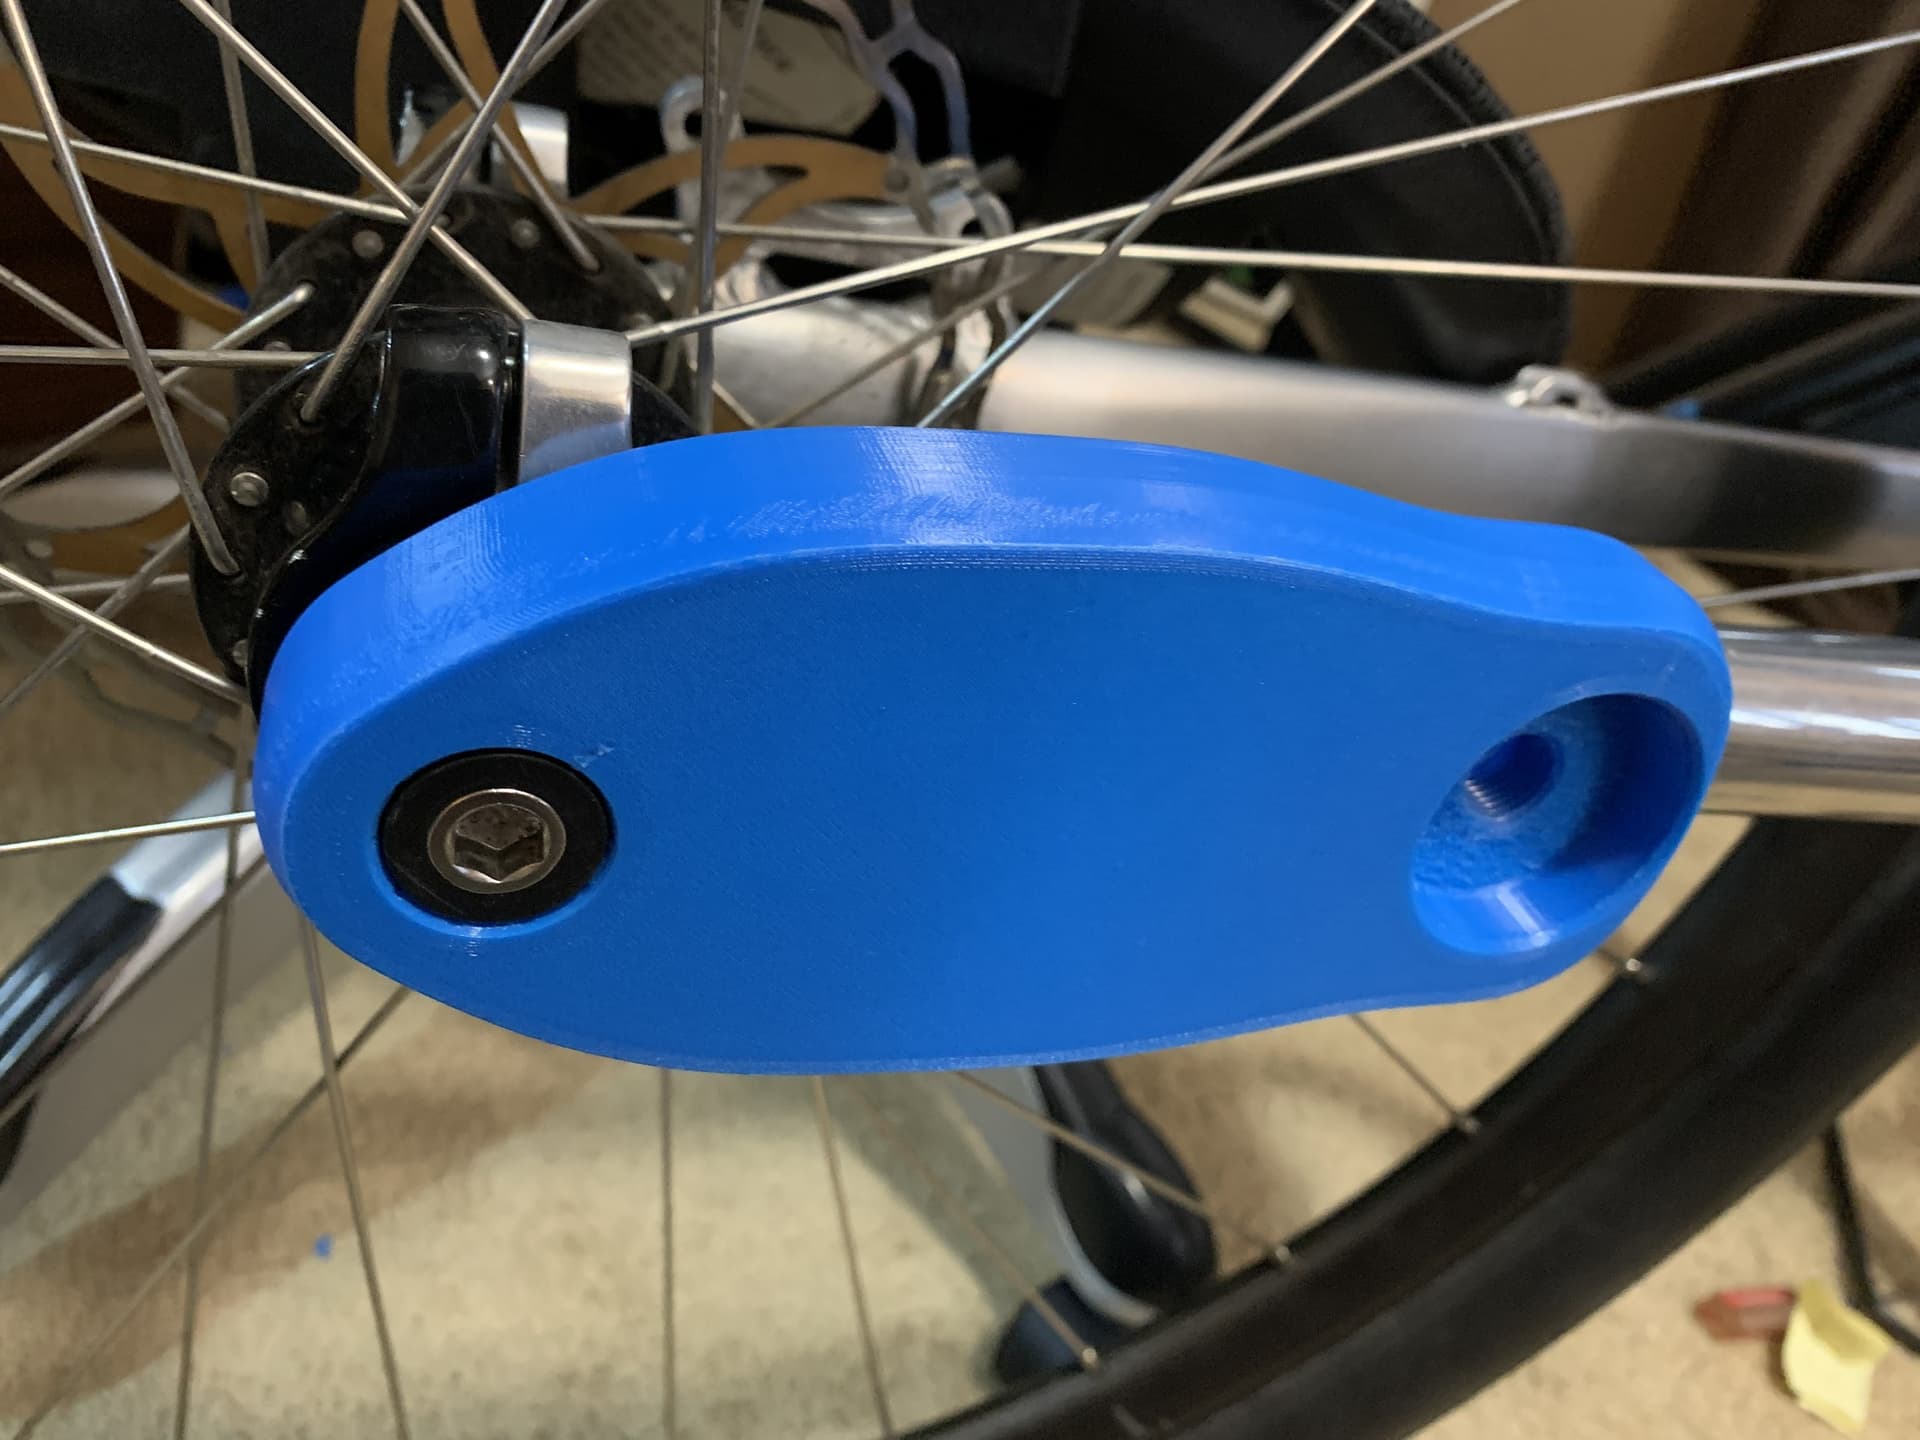
There’s now a v2 designed for rail mount saddle bags:

It’s not yet been tested carrying a bag, but from me scientifically trying with all of my might to snap it, so far I’ve failed so I’d guess it’ll be good for all small-medium rail mount saddle bags with velcro straps
5 Likes
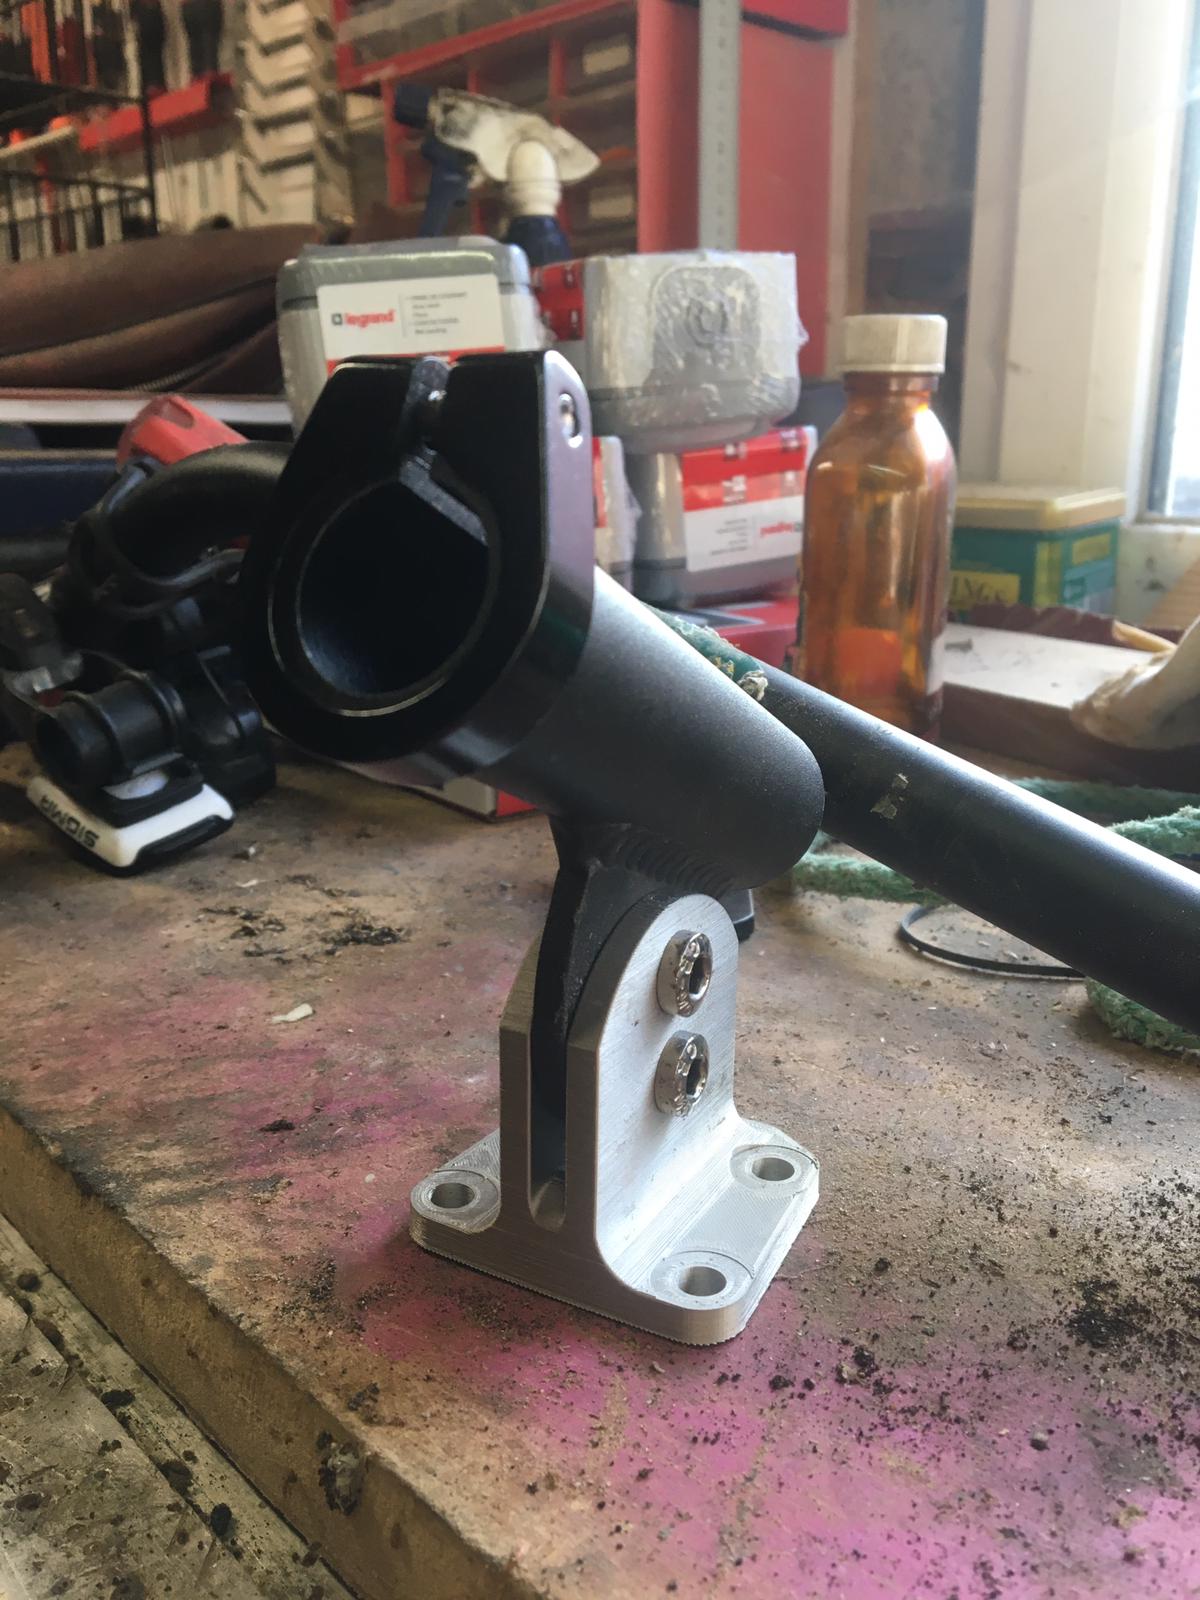
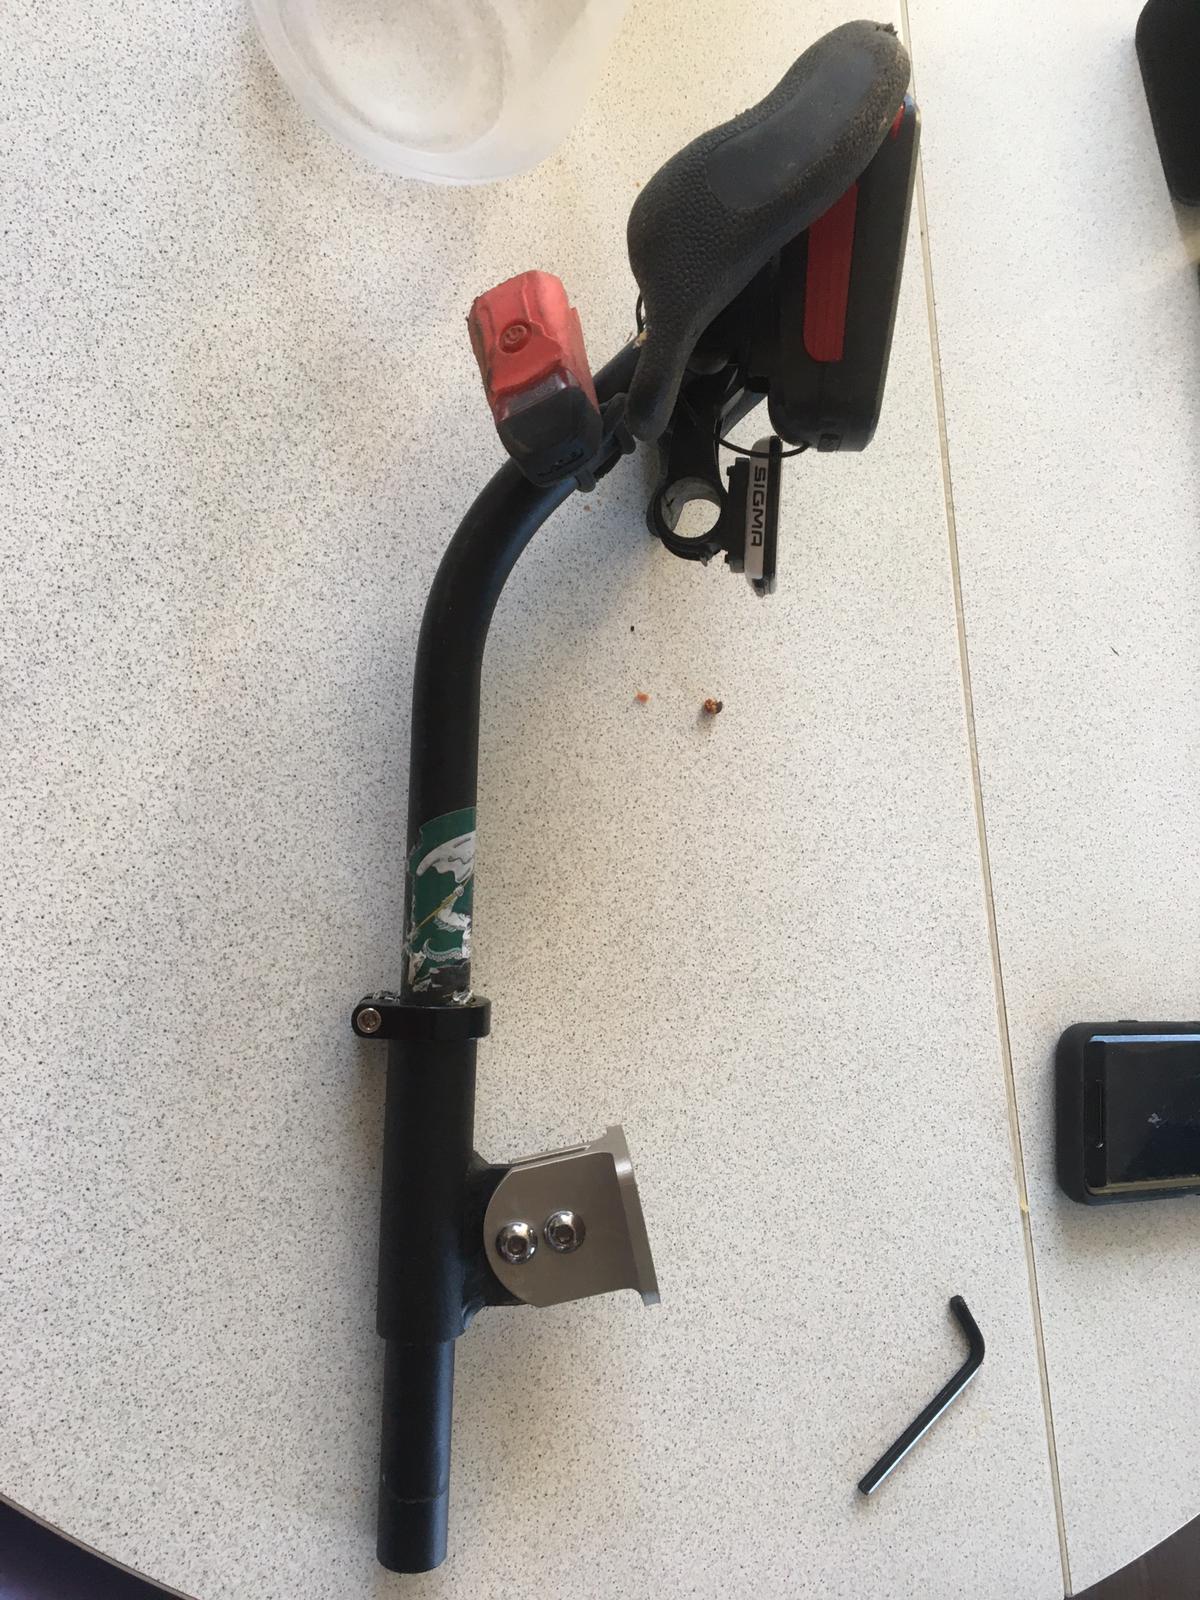
I found a use for my 3d-printed brake mount yesterday, but not exactly in the way it was intended to be used.
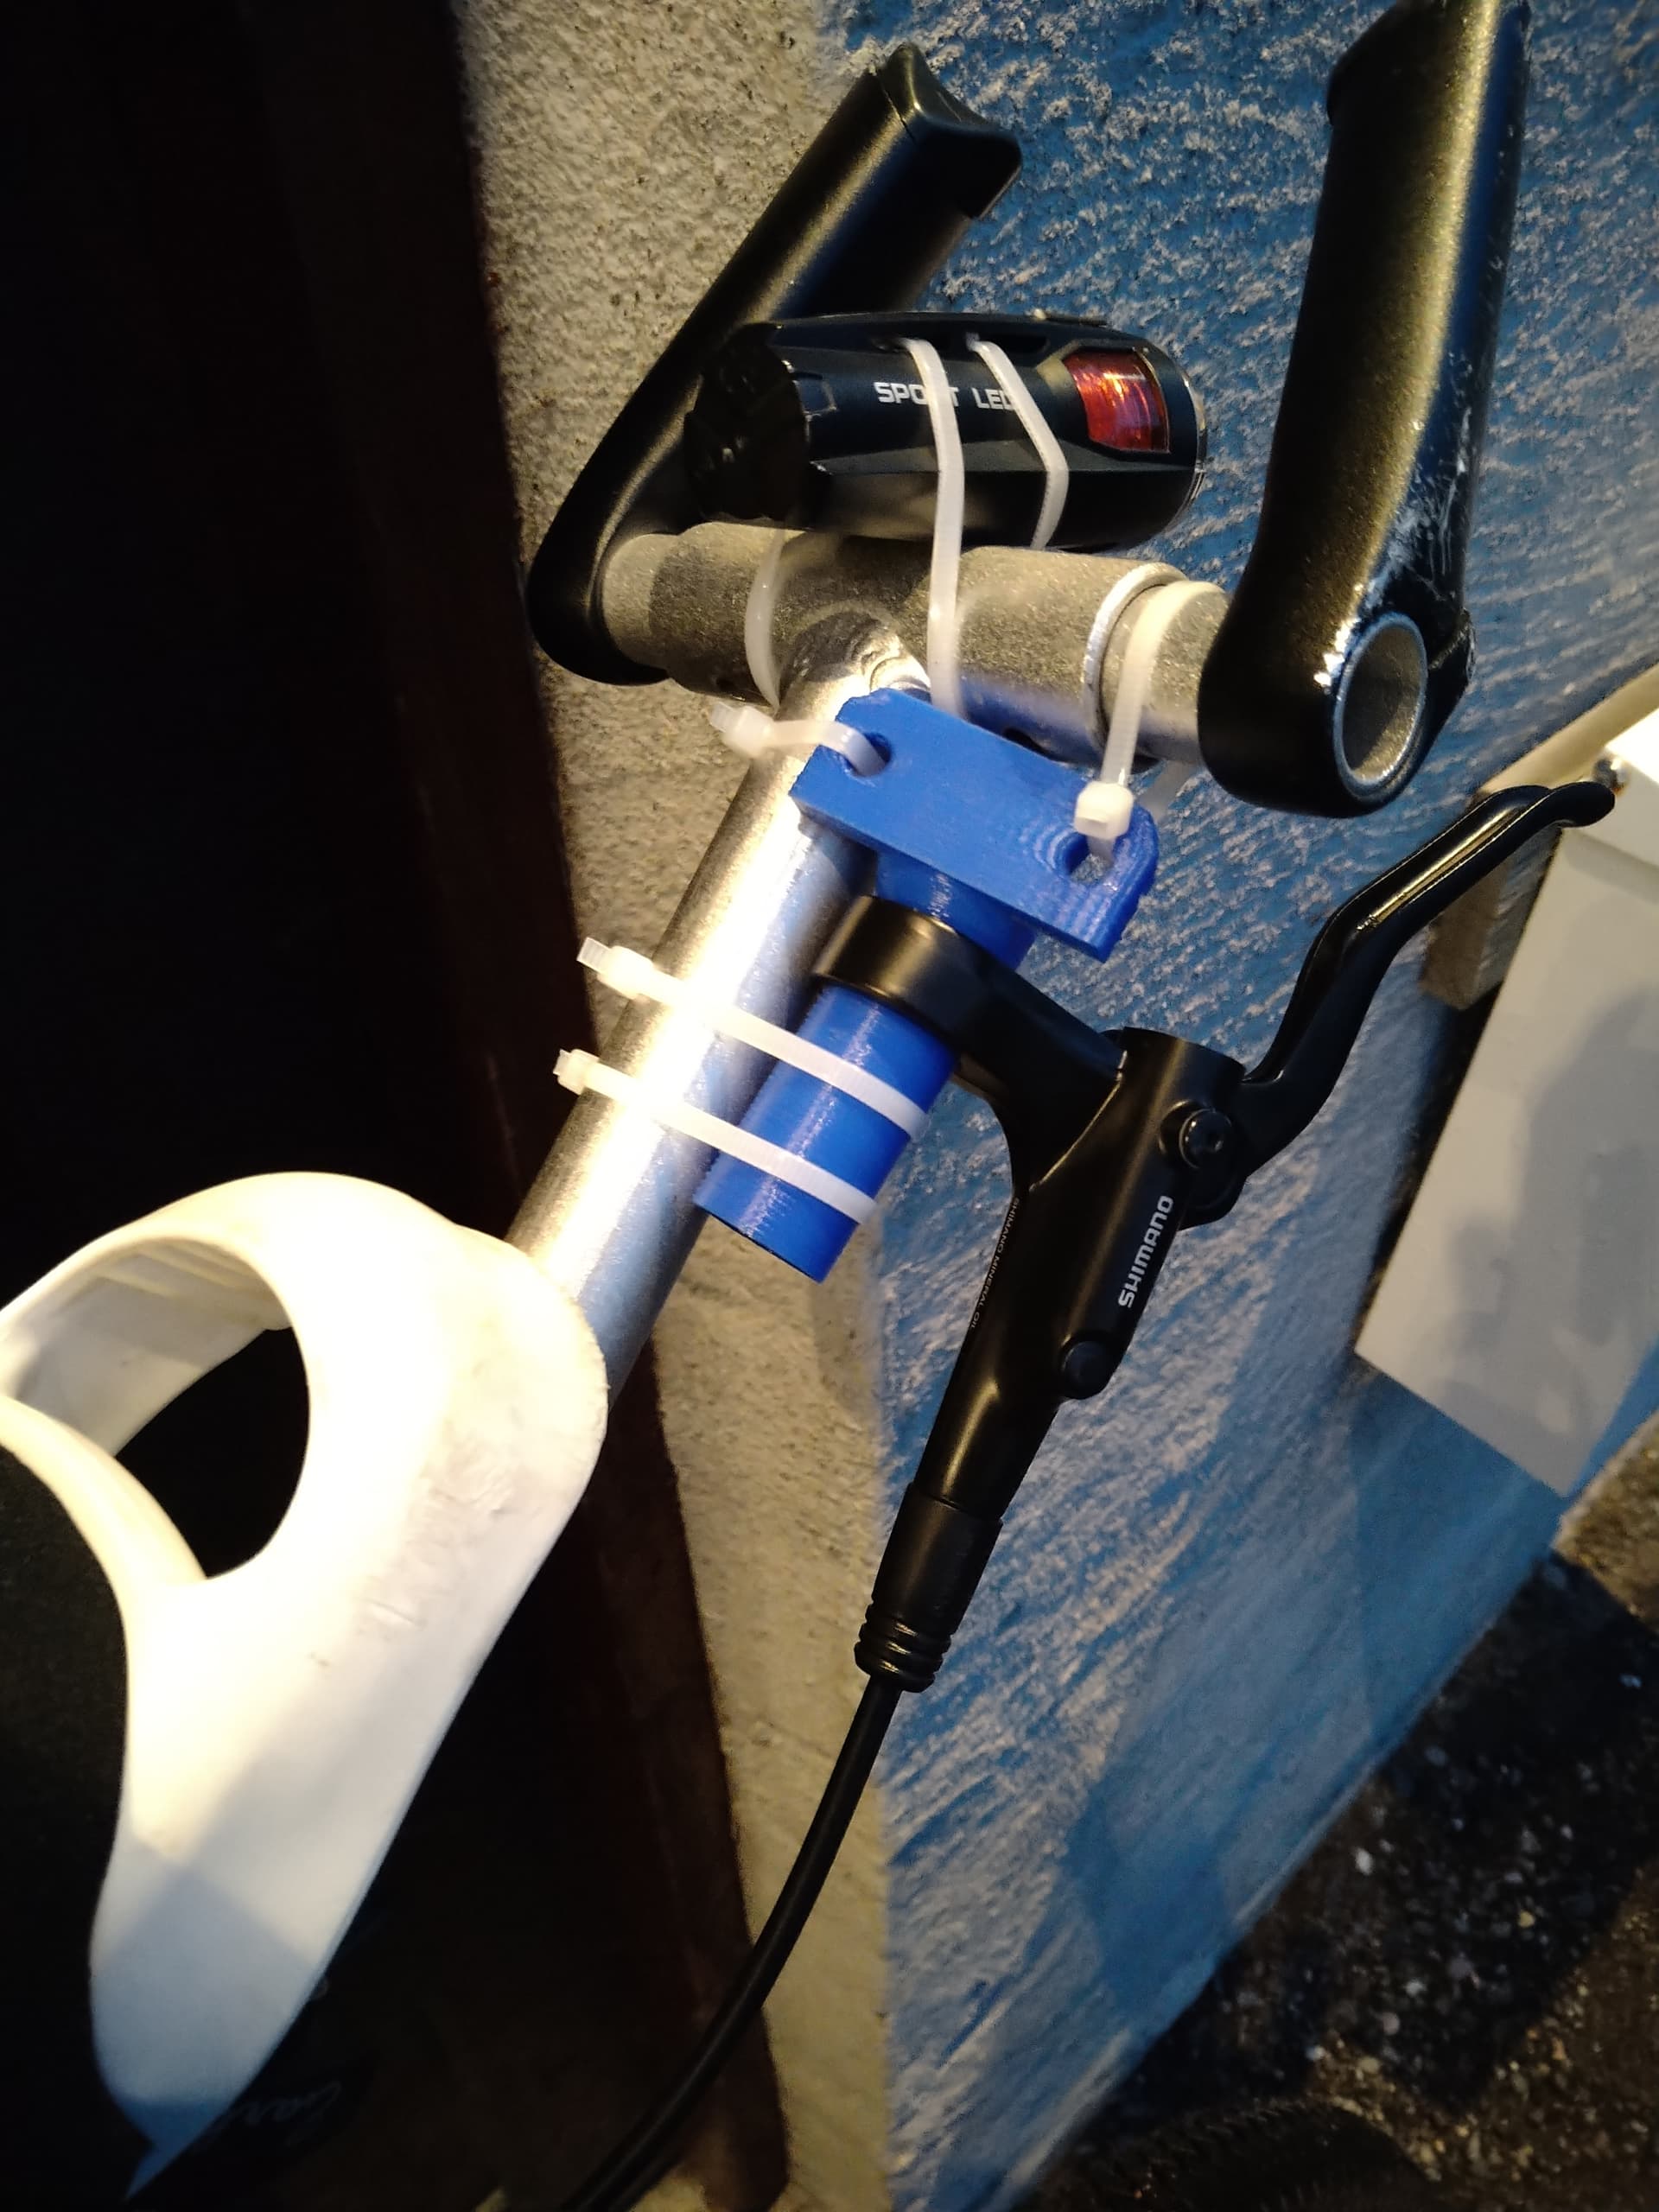
The brake lever does not physically fit on the home made T-bar, and I was planning to mount my brake lever using an extra bar end. I didn’t have any laying around and used the 3d-printed brake mount as a (hopefully) temporary solution. It actually worked better than expected, not as much flex as I’d thought.
3 Likes
All bagged up
1 Like
I’ll be riding my 36er with saddle bag attached via these hooks in the morning, I’ll let you know my thoughts.
![]()
![]()
2 Likes
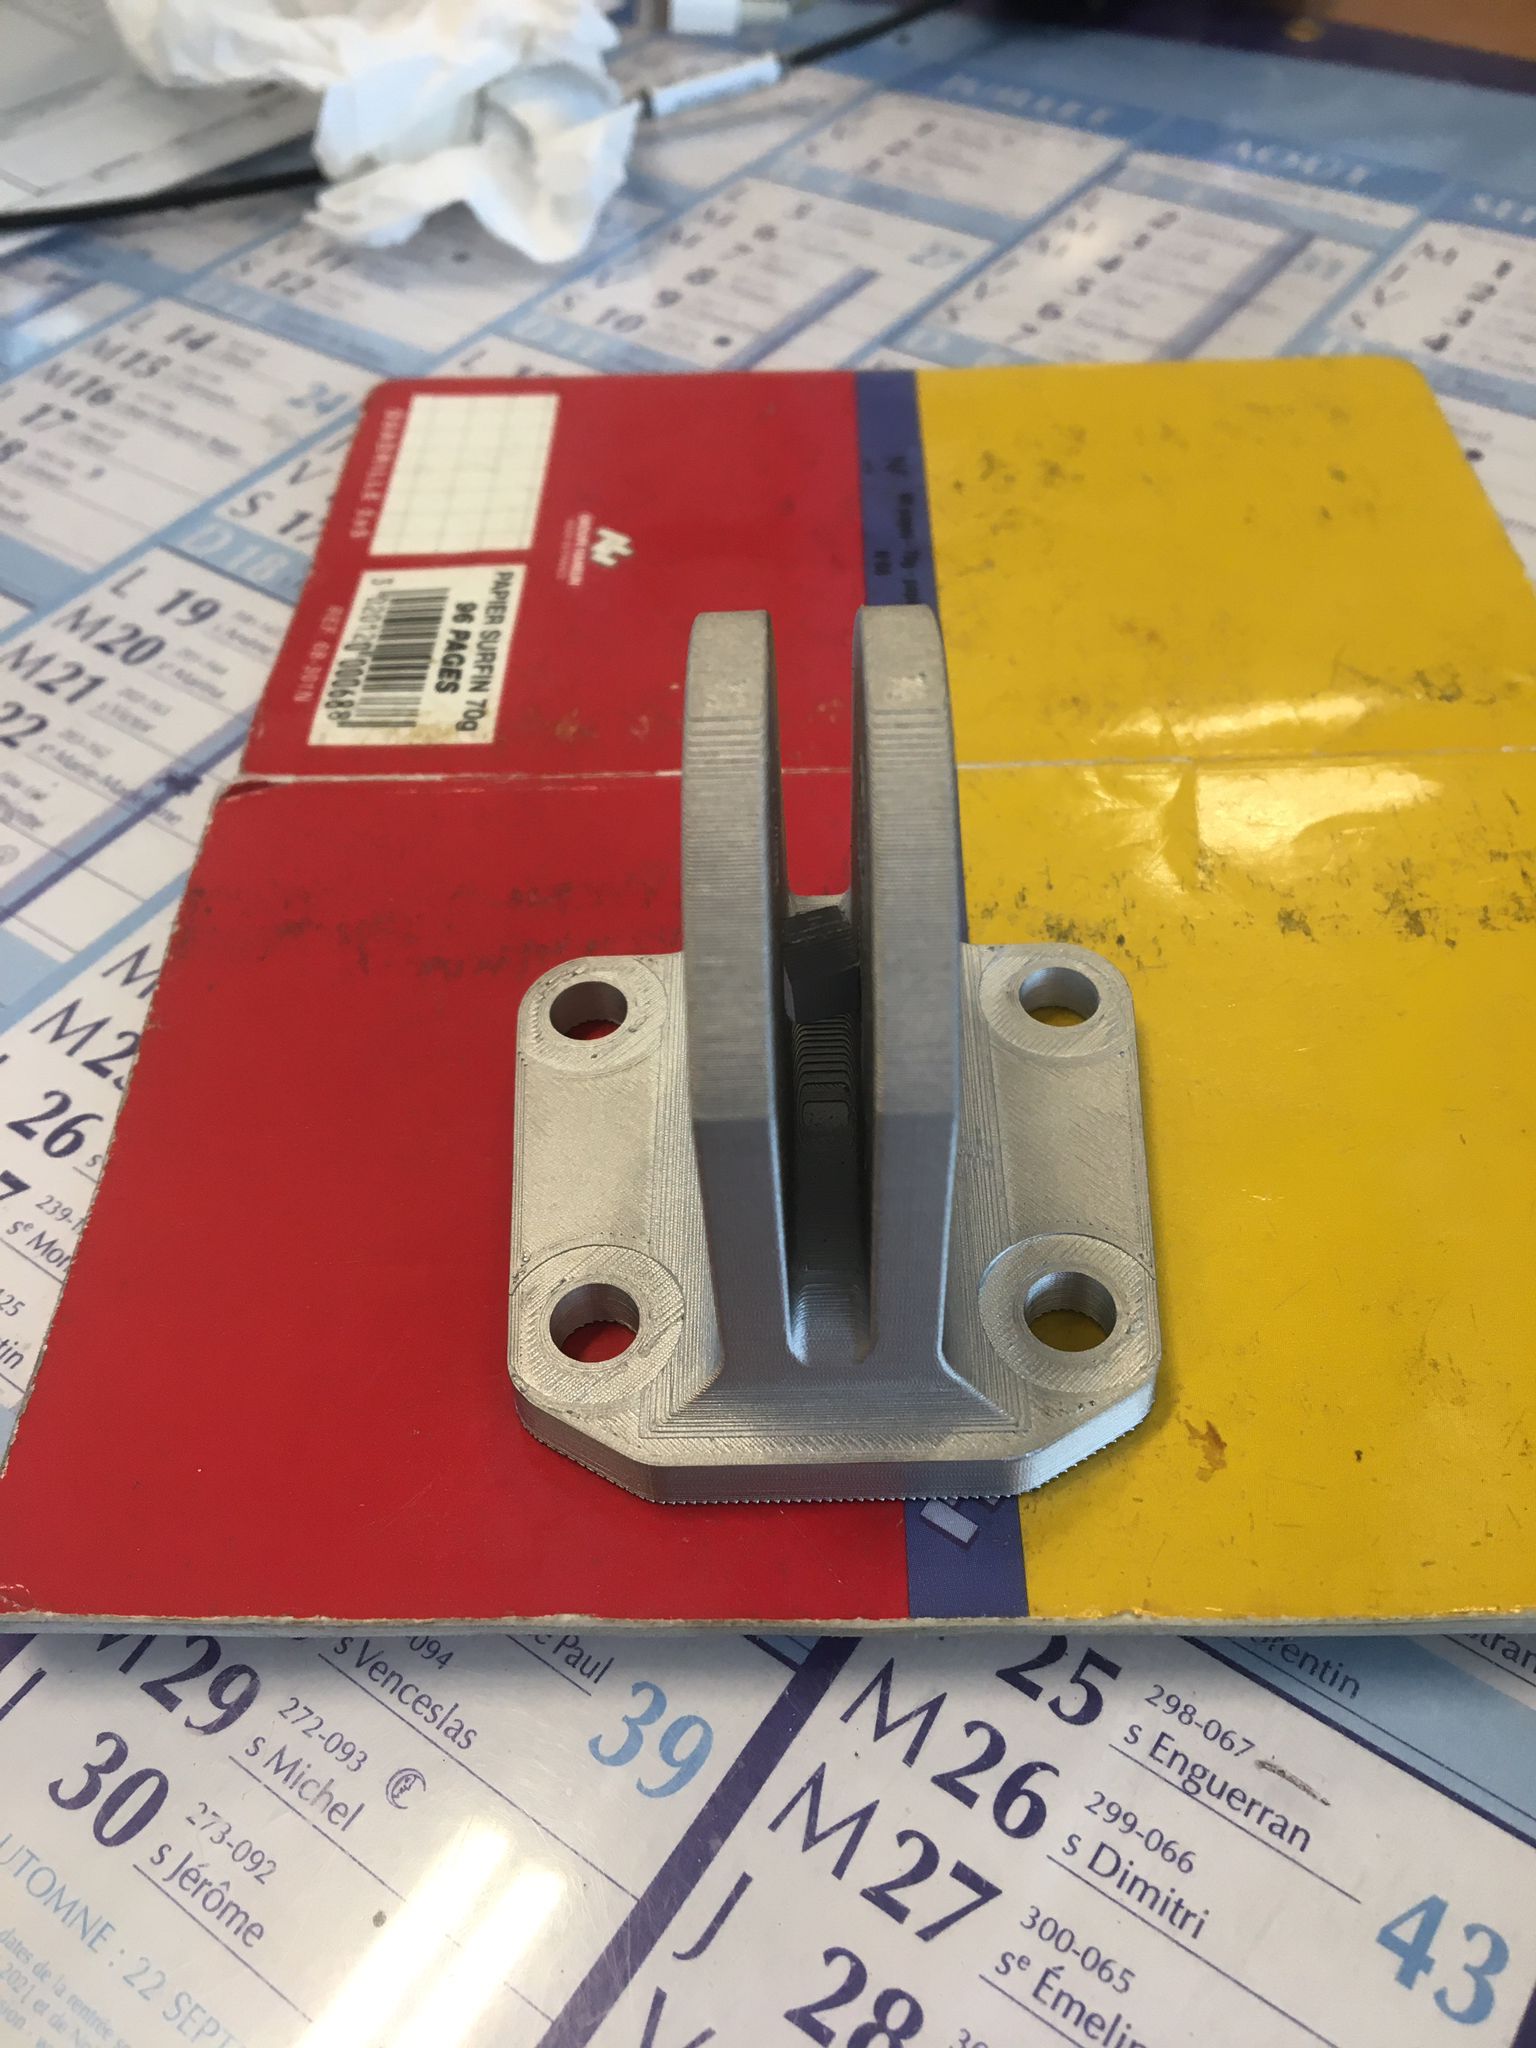
A few months ago, I broke one of the two squares on my t-bar. After a few months of waiting, the modified version I designed has been printed at work, in steel.
Here are a few pics of it.
10 Likes
Wow, I couldn’t imagine the things I’d try and print with a metal printer.
Awesome!
1 Like
Amazing. Mine bent a bit from a UPD within about a month of buying mine, but I think the bit that goes between them bent too.
I wanted a crank that makes my stance width narrower, so I designed and printed these cranks.
(These are specific to the pedals I use)
I thought I’d give plastic FDM 3d printing a shot since that was available to me.
Fusion 360 file
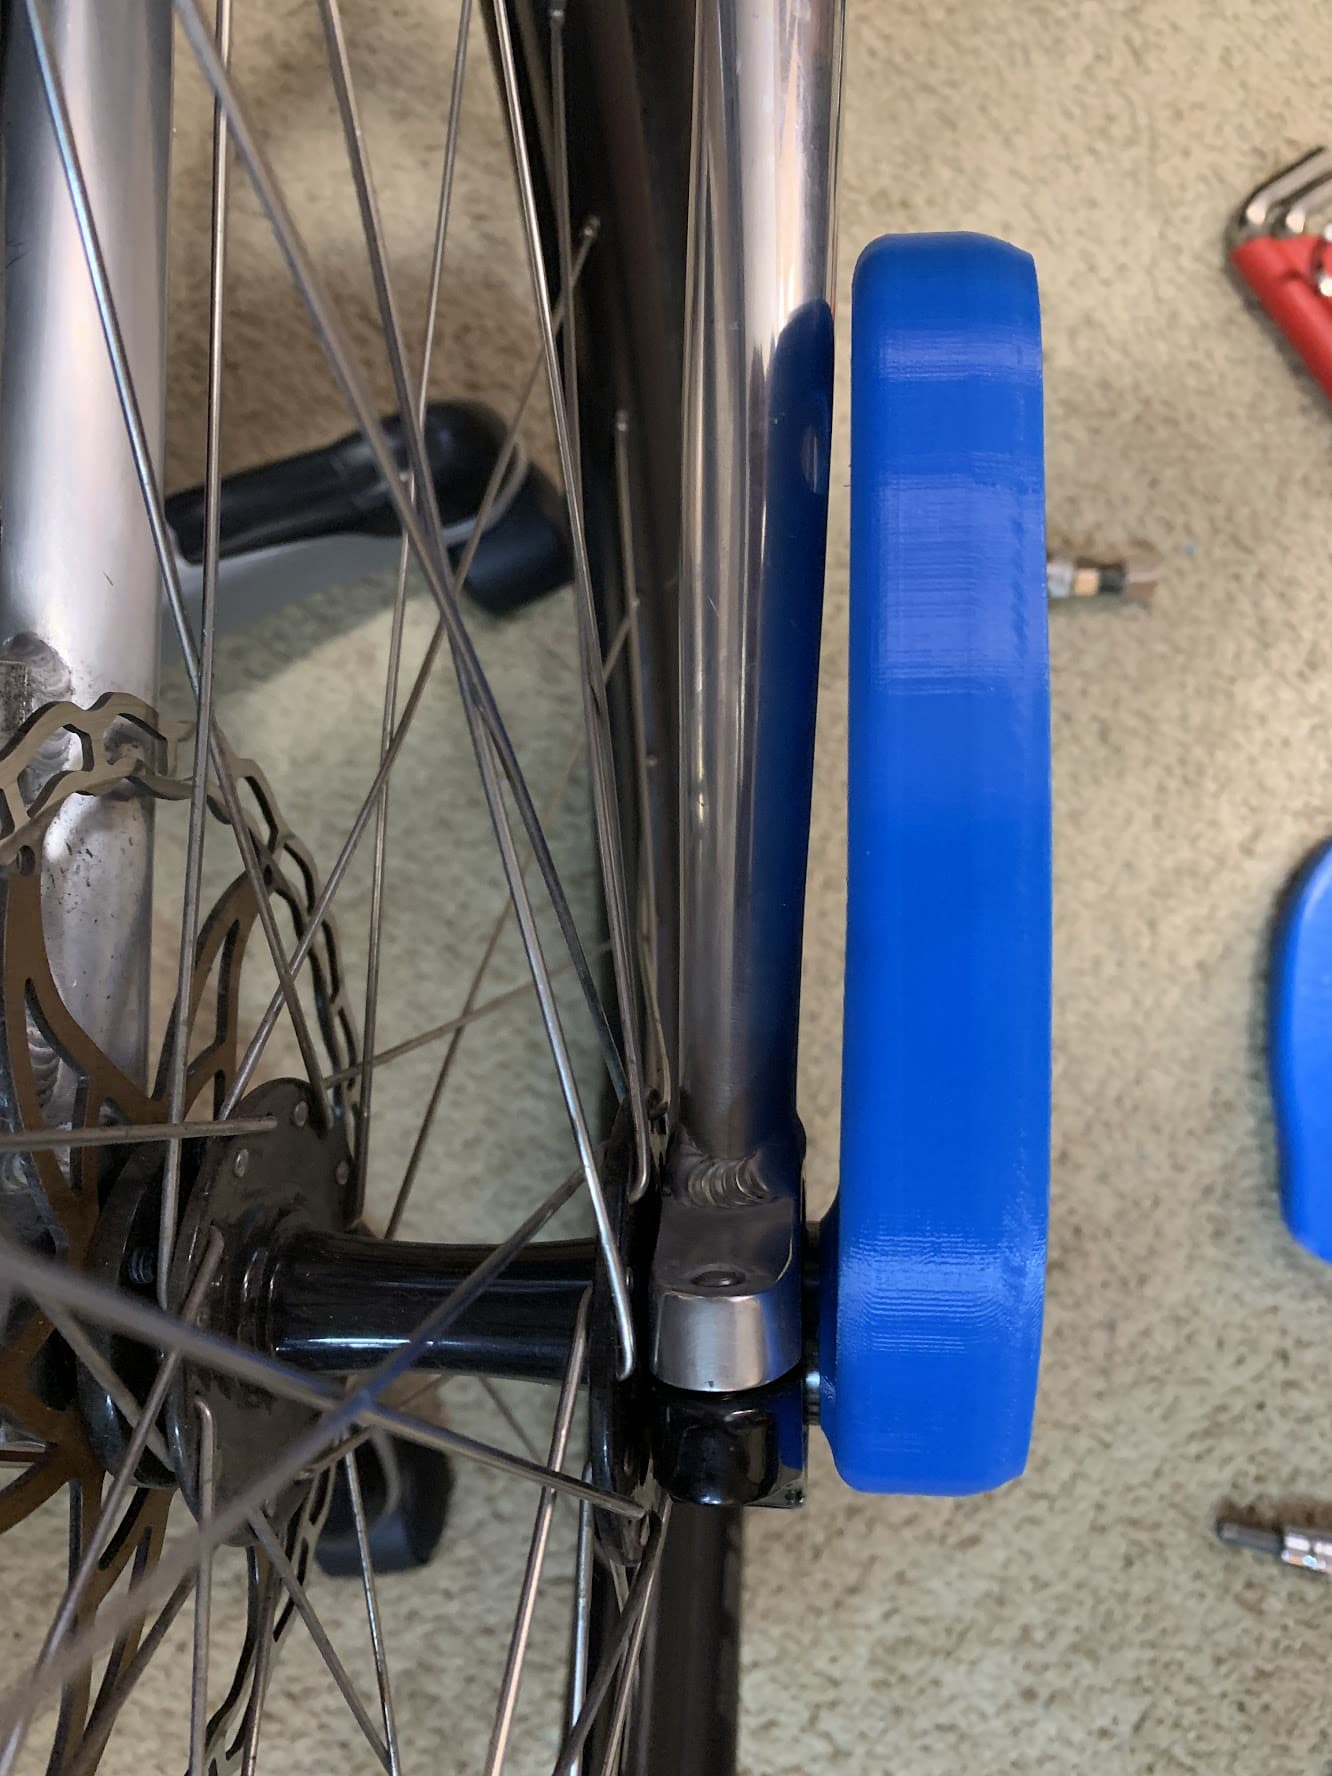
Reason is I have a power meter pedal setup that adds about 16mm width to each side.
(It is designed for road clipless, and your shoe is on top of the pod. But, my platform adaptor makes it so your foot is on the outside of the pod)
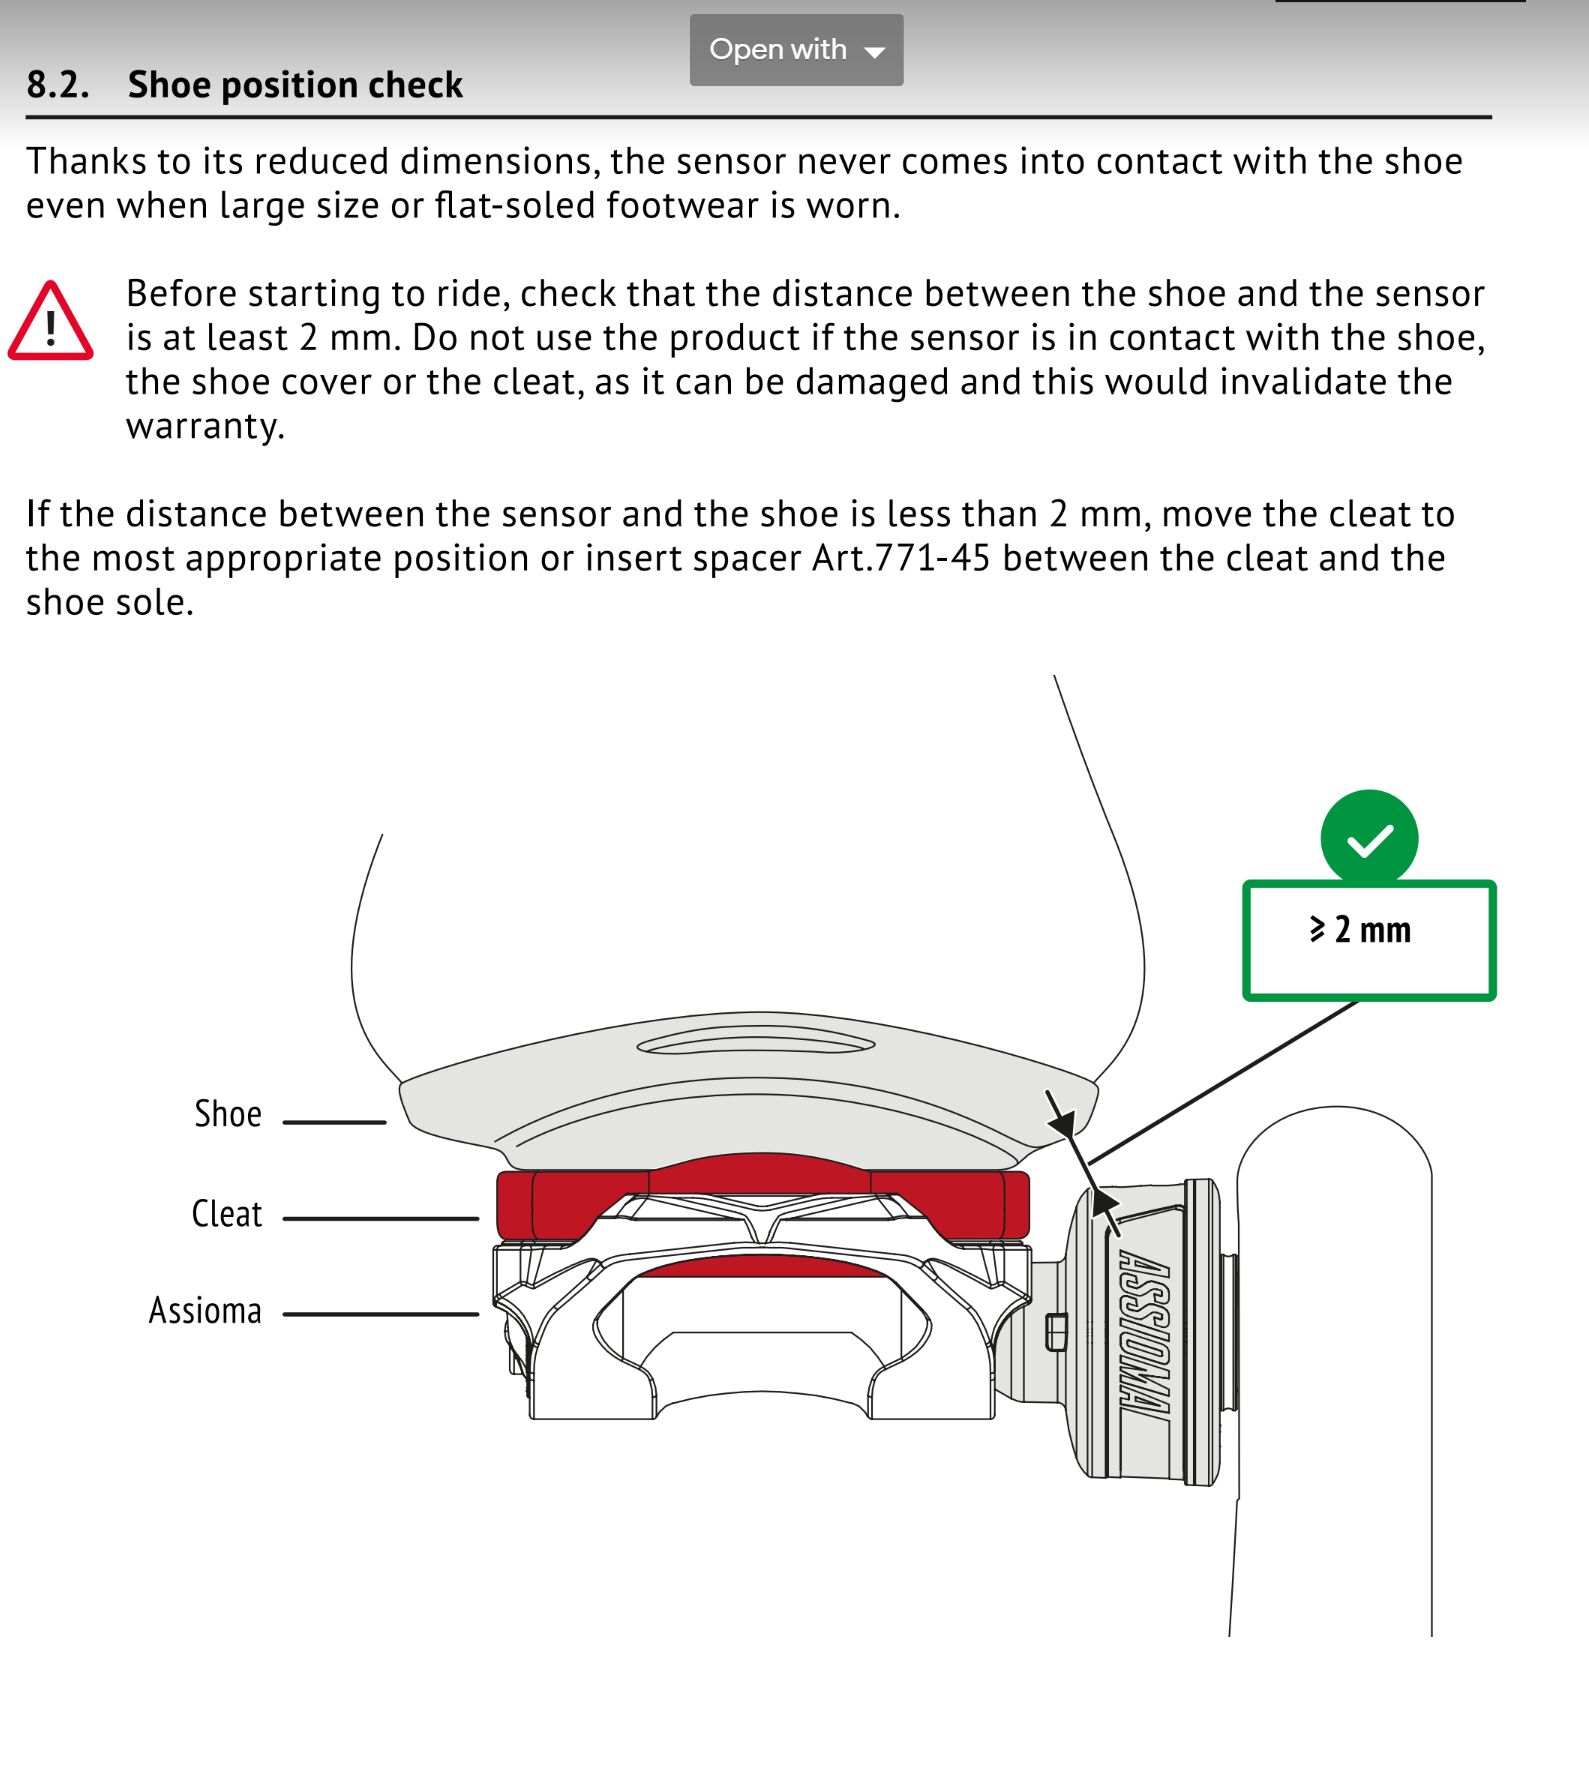
Picture from the pedal manual:
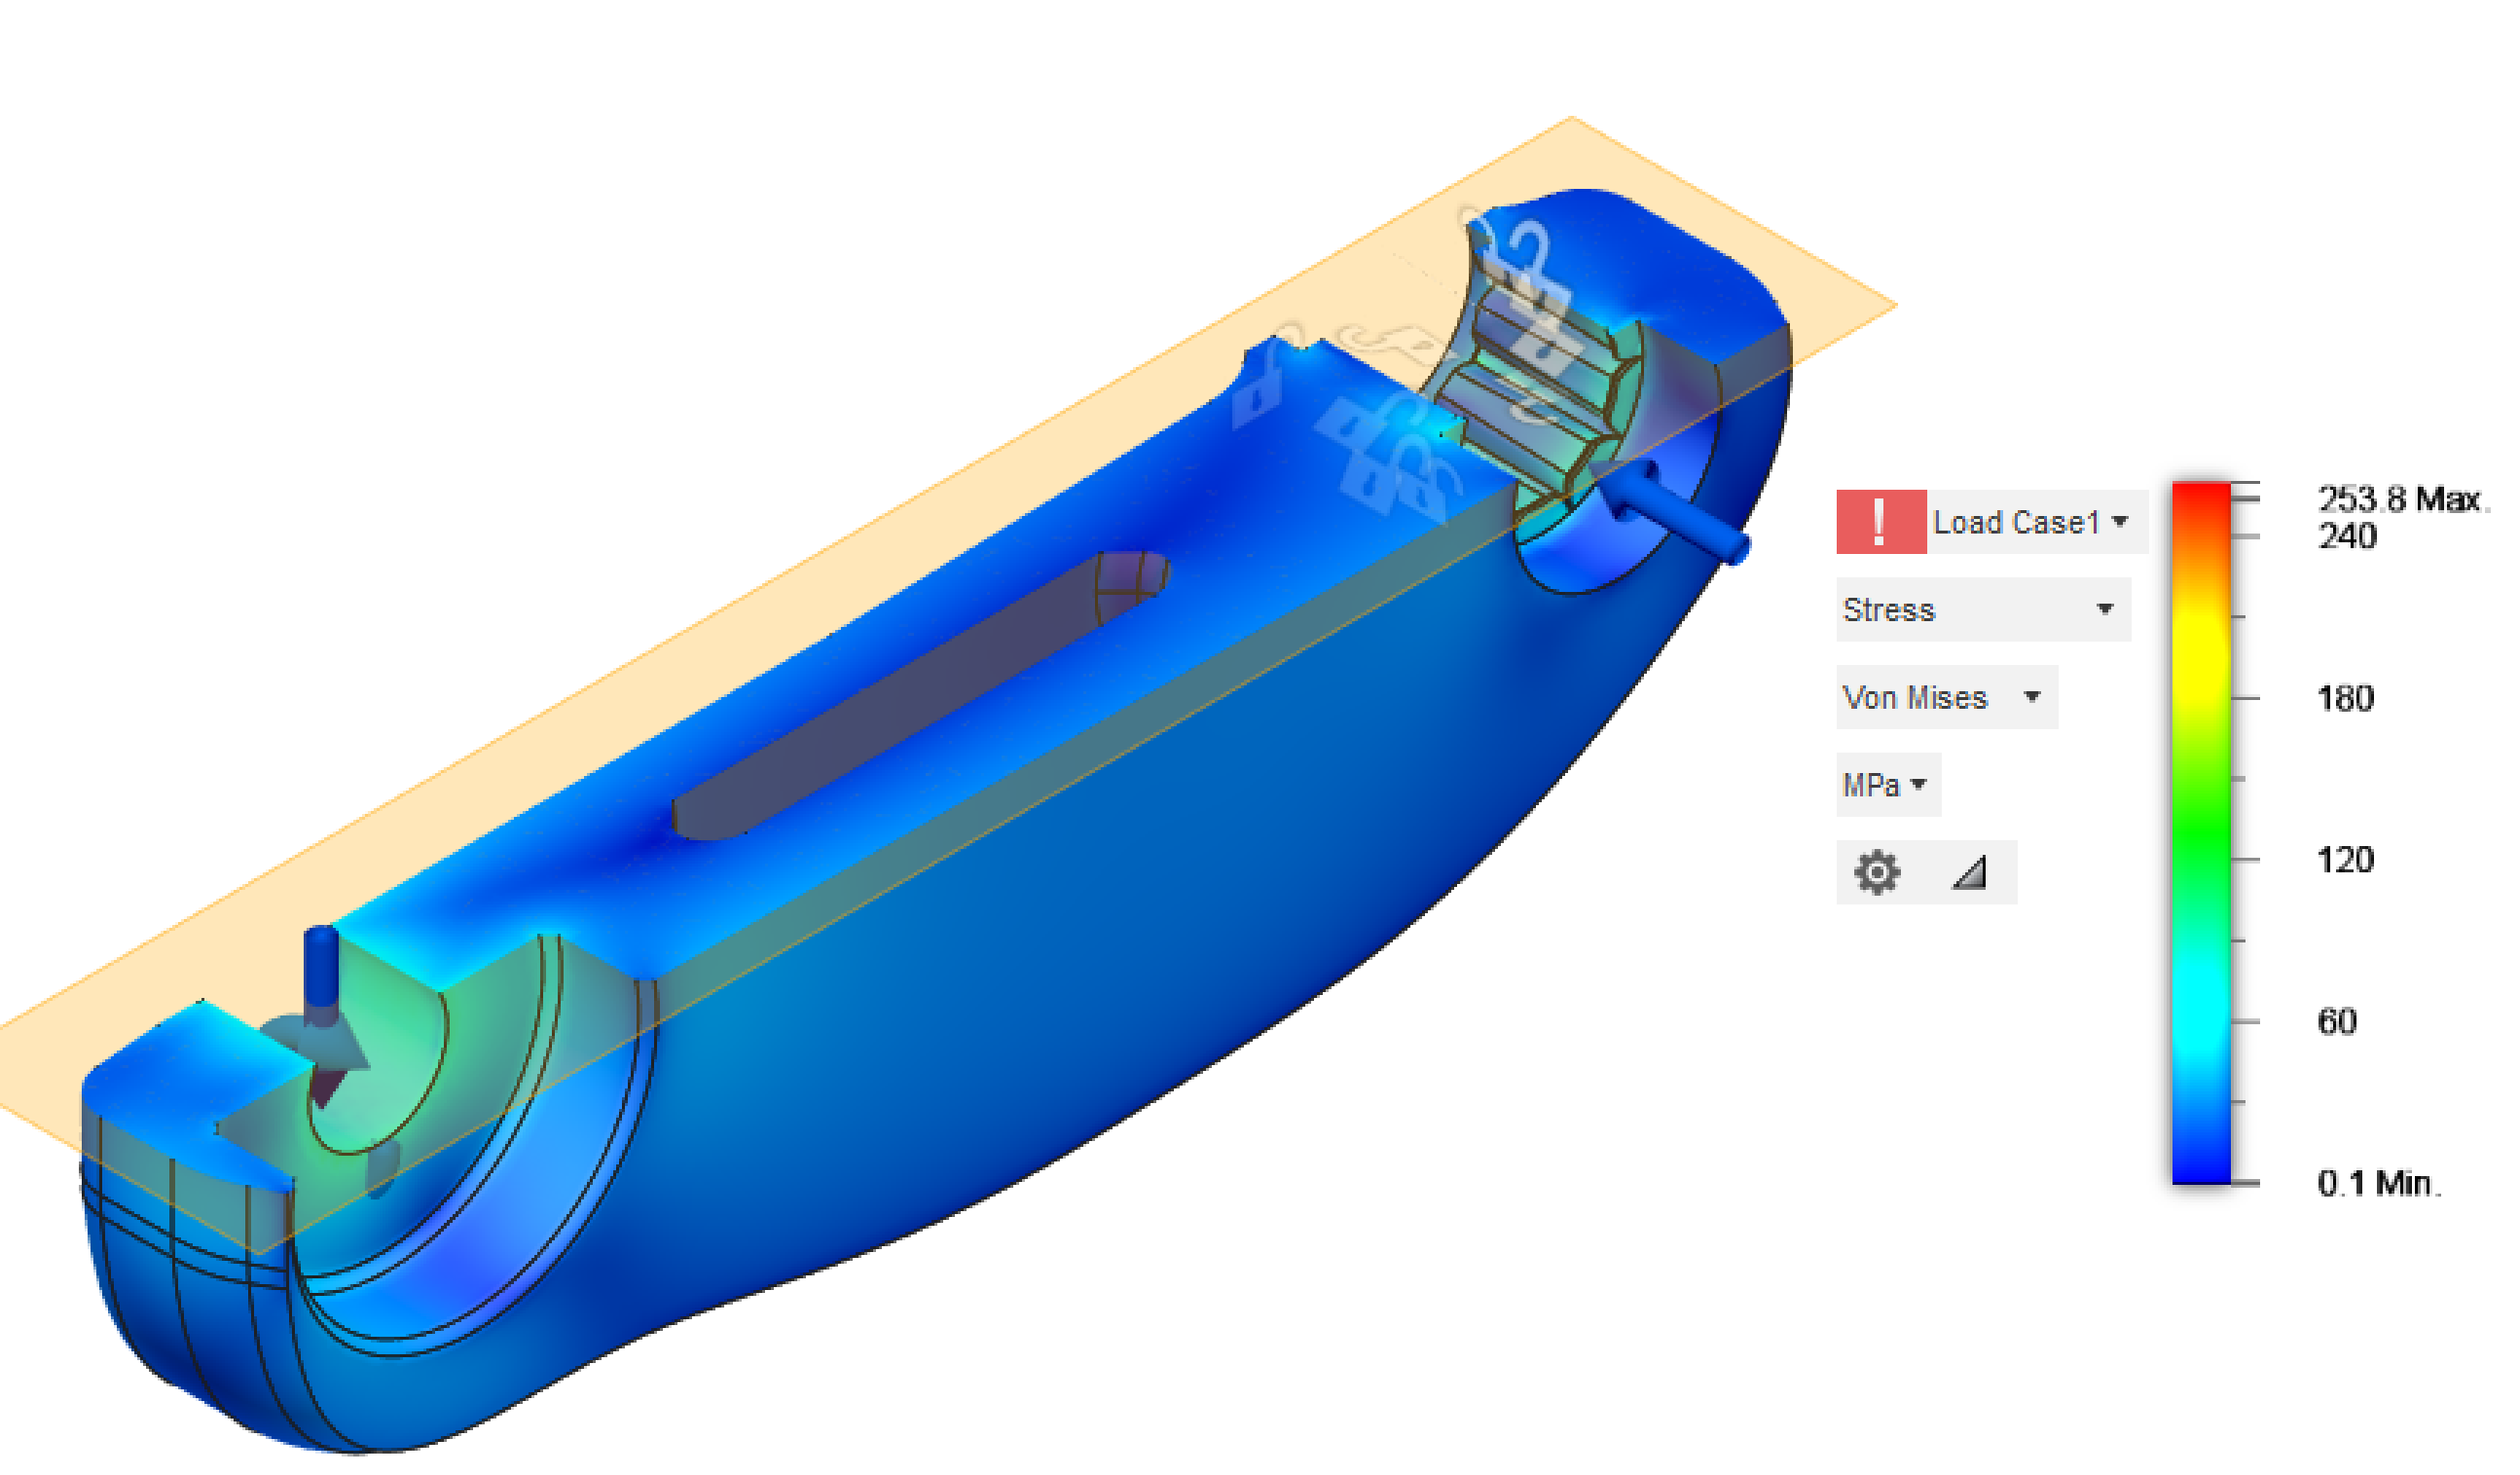
The bending and crank arm strength seems alright if there is enough material. I aimed for them to be heavier than my aluminum cranks. This version is 237 grams per crank. (200 lb-force and 66 lb-feet moment at the pedal thread hole; 4000N bolt axle bolt compression ~= 10Nm torque)
The problem is the ISIS interface and the pedal thread interface.

About 3 Nm is when the splines plastic deform and press fit onto the axle. After the crank bottoms out, 7 Nm causes the spline to start to be compressed and deformed by the bolt. I stopped there.
I think if the pedal thread area fails, then using a pedal thread insert might help spread the load out a bit more.
To make the ISIS interface better in case it doesn’t work, I have no ideas right now.
I would like to make a test rig to test the cranks, but need to figure out how to do that. I’m thinking of a metal crank on the other side, secured with some wood structure. Then use some straps and my body weight hanging from the pedals.. Otherwise, I might just try riding them ![]() I’m kind of scared of what happens if cranks break while riding though…
I’m kind of scared of what happens if cranks break while riding though…
More photos over the last few years as I tried to make these pedals work:

Edit: Also, I am wondering if I should send the file out to see how much a machine shop would charge to make them if they are able to… The ISIS interface seems like a problem though. (Or metal 3d print..?)
5 Likes
Maybe you could consider doing what Mad4one used to do and have 10 round steel pins to form the Isis interface. I would expect that to develop some play (if you are using plastic) very quickly too, but maybe less quickly. Certainly a possibility if you have them machined (which is likely why mad4one did it that way), but it had some “downsides” when they pushed getting them lightweight.
I am not sure how much you want to move the pedals in. I think on a lot of unicycle cranks you could get away with machining away 5mm or more around the threads, at least if you want to use it on “only” a road uni. If you start with Mad4one agile, which are already 3mm slimmer than normal “0 Q-factor” unicycle cranks, that would give you at least 8mm each side. I’d need That would likely be a lot cheaper than having a complete new set of cranks made.
1 Like