KH Fusion Street gel modifications

After trying to find a more comfortable seat than the KH street gel, it turns out that the Street gel is one of the most comfortable and best saddles there is for trials, yet still it wasn’t comfy enough for me.

I was thinking of getting the most comfortable seat- the KH Freeride, but it turns out that they’re not as good for trials riding and are heavier, and it seems to me the only thing better about them is the centre channel (and stiffer foam I think).

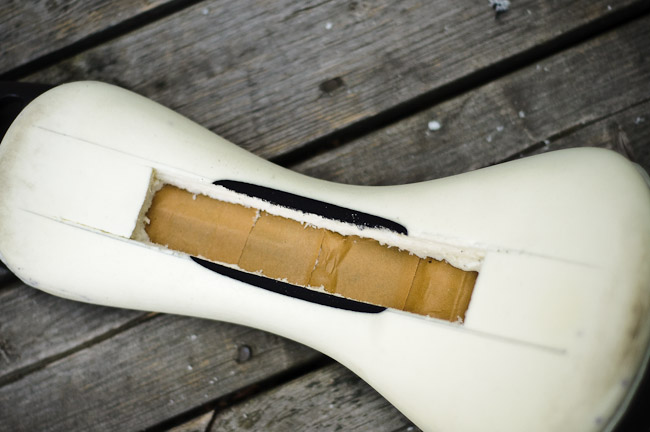
So I decided to cut a channel down the centre of my Street Gel using nothing more than a Stanley knife, and scissors.

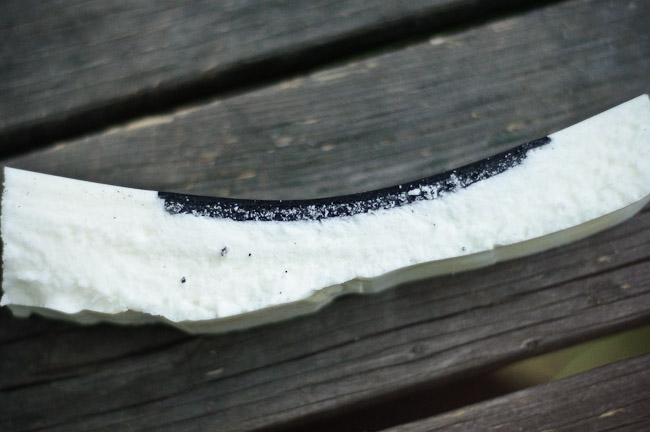
I just used the knife to cut two (sort of) parallel lines from the front, through the gel insert, then all the way to the back. I cut the foam right down to the plastic base and removed it (by hacking it with scissors and then tearing it off). This channel wasn’t as wide as the gel insert so parts of the gel insert (which is only about 1cm deep) were still there on the sides of the channel. Those bits of gel were pointless there so I removed them and the foam under it.

Seriously, this job was done completely hacked and terrible by me, the cuts were not sharp, but bits of foam were torn away, and the lines are not straight but wobbly. Trying to chamfer the edges of the channel at the top with scissors only resulted in more foam being torn and hanging off.

But…

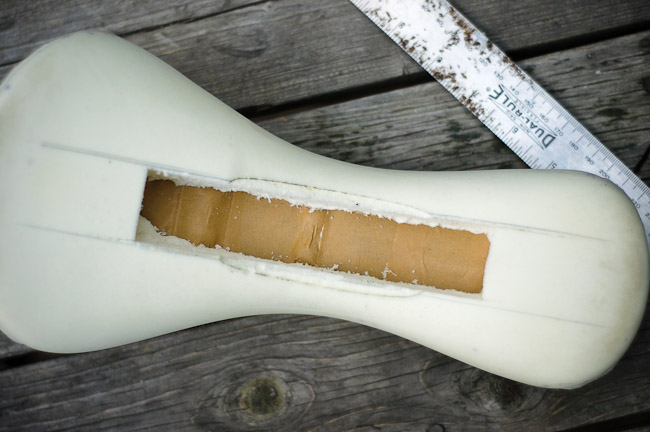
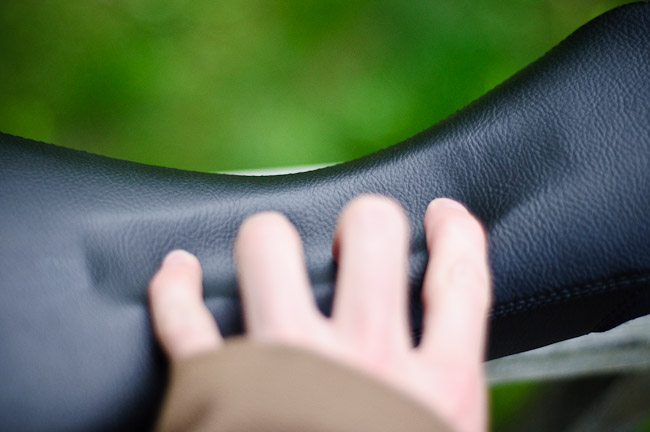
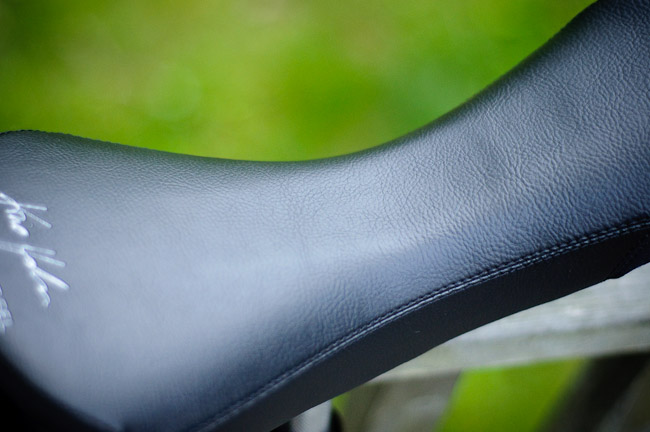
Because the black KH cover is so thick and just tight enough, when you put it on the seat, it actually looks quite good- the lines appear straight and the channel is nice and smooth.

Here are some pics (I’m only pressing down since I can’t exactly sit on the seat and take a photo showing the cover settling into the channel):

This worked really well, and now the seat is so comfy, I can ride for hours on it now.

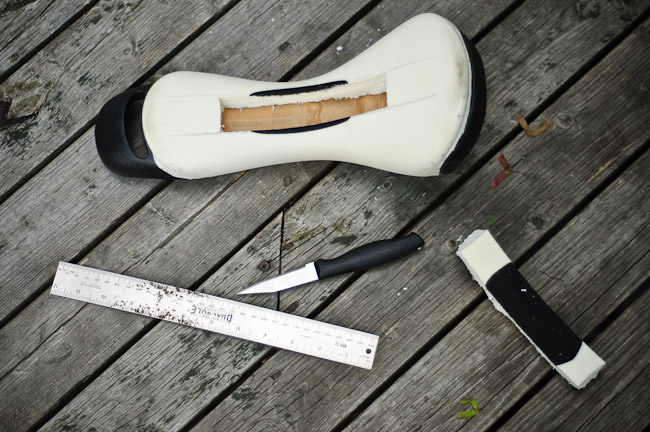
Another thing, that was more painful than annoying, about the Street seat was the pointed corners on the rear bumper sides. They rub against you’re inner legs and hurt (a lot) when I hop SIF.

So, using a hack saw, I removed the corners of the sides, just enough to remove the vertical side, no more. It was easy, 5 minute job, and was finished to a much higher quality to that of my channel cut-out above.

It now does not at all hurt a bit when I hop SIF.

Here it is:

I’m just sharing these two mods with you because they’re relatively easy and simple to do, and so, so effective. Riding with an uncomfortable seat really deters you for riding for long periods, so for me these mods were worth it. Oh, and it saves a few grams :D.

Thanks for posting that. I’ve been wrestling with a similar problem. I have a KH Street gel and love everything about it except for the fact that I find it painful if I’m riding a lot. That’s a big exception.

I’ve been debating ordering a Nimbus seat since for whatever reason I don’t have a problem with those. Maybe it’s a different year model, but the Nimbus seat I’ve been comparing it to has a bit more padding and is a bit more curved.

If I can get the courage to hack apart my lovely seat I might just try what you did. I guess I could always stuff the cut out part back in if I had to!

Any chance of a photo of the cut out seat without the cover?

Did you cut right to the very front and very back or did you leave a bit of a foam there? I suppose there would be no reason to go right to the ends.

How wide would you say your cut is? 3/4 of an inch? Wider? I suppose a photo would make that clearer.

Please excuse my ignorance, but I always assumed that the gel was kind of, well, like gel stuff contained within some kind of shaped plastic bag. So cutting it would leave it free to ooze out and end up being totally deformed. Obviously that is not the case, but if you’ve got any photos of what it looks like under the cover I’d be interested to see them.

STM

Kirs has done some similar mods to his new seats.:smiley:

Based on a destroyed 2005 Koxx saddle from the same factory, the gel is a hard jelly - I’m imagining like an extra large gummy bear (or even better, the inside of a jelly baby - I can be very cruel to jelly babies…) - that sort of texture. You’re probably thinking of breast implants?

Assuming you mean Kris Holm, no. The 2009 street saddle has no groove.

Yah, but the fusion freeride does and I think perhaps the next mod to the Street saddles will be a grove as well.

Yeh, the gel is not liquid, its clear, and it is actually like a gummy bear!

Well for me, it was either modify the Street seat, or get a new seat costing around £20-£40. So I modded my current seat.

As requested, here are some pictures from under the cover:

This is where the gel insert was:

Thanks. Good grief that is scary looking! I think I’ll close my eyes and go for it. :sunglasses:

At least the cover hides it and it works. lol.

Oh, and another tip if you’re going to do this-

Use the Stanley knife like a saw, so don’t jab the knife into the foam and then pull the knife back to cut it because you will just tear the foam, not cut it. So you should rather jab the knife into the foam, then start moving it up and down and pulling it back, in a sawing motion.

Its like cutting a sandwich, except it’s not a sandwich you’re cutting.

And I only found this out on my last cut of the foam, that’s why mine looks extra horrid.

A serrated knife should produce a cleaner cut… Grab mom’s bread knife or a tomato knife. Use a sawing motion to plow through it - gently.

-M

You don’t have to be a mind reader to know that. But that’s got nothing to do with this thread! :slight_smile:

Ah, thanks for that. Yeah, I get the gummy bear likeness now.

STM

Alright, I had a go at it. I took the advice and tried a serrated knife. Worked fairly well. (Kind of like carving a pumpkin!) I used a metal ruler to guide my cutting and drew out some guidelines before. I just kept drawing the knife along the ruler, cutting a tiny bit more with each pass. As you can see, I didn’t go right to the front or back. I figured there’s no need to go that far and it will only weaken the remaining foam.

I haven’t really had a chance to ride it much yet. From the bit that I did, it seemed a fair bit better. It’s not like riding on air or anything, but it seemed to do a better job at putting pressure where it should be. I’ll get a better idea over time. I might round the edges a bit more in the middle.

As it is now, if I ever want to, I should be able to just place the cut-out piece back in place and add a bit of tape.


@sean,
Nice job! I wouldn’t worry about rounding those edges, there’s not enough structure there for them to make any difference. I’m glad the serrated knife worked for you!

Oh, and I agree with leaving the ends to help keep the rest of the seat foam in place.

-M

That’s a nice clean cut (unlike mine!).

Are you like a pro photographer, because those pictures are really good.

Ha, no… although sometimes I wish. Just an amateur who enjoys photography.

I think if I was doing it again I might start with a narrower slit (perhaps 5-10mm narrower) and then enlarge it if necessary. I might also move the whole cut further forward, cutting less from the back and more from the front. Of course, I can always do that myself by placing a piece of the cutout back in.