This topic is a translation of a message I have posted on the French forum a few days ago: Les pédales automatiques, pour qui, pour quoi ? - Matériel et entretien - Monocycle.info.
![]() Before going any further, here’s a warning: this kind of pedals exposes the rider to bigger dangers than flat pedals. Don’t try them out if you regularly fall.
Before going any further, here’s a warning: this kind of pedals exposes the rider to bigger dangers than flat pedals. Don’t try them out if you regularly fall. ![]()
What are they?
A clipless pedal is a pedal the shoe can be attached onto. The connection is made through two elements:
- A cleat under the shoe;
- A cage on the pedal.
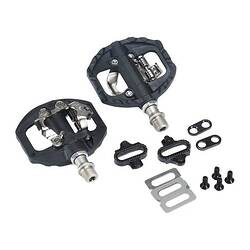
Example of clipless pedals with their cleats
There are lots of different pedals, and lots of different standards. In this topic, I’ll focus on the most common standards. The idea is not to detail each and every standard here. There are plenty of articles on the web to learn about those. So, the most common standards are:
- SPD, standing for Shimano Pedaling Dynamics: Shimano has developed this standard for off-road and mixed rides;
- SPD-SL, standing for Shimano Pedaling Dynamics - Standard Look (in reference to the French company Look, the first one to introduce clipless pedals): another standard from Shimano, for road riding;
- Crankbrothers: from the eponymous company, for off-road and mixed rides.
I have to mention 2 other kinds of pedals as they can be useful for some people:
- Single sided clipless pedals: one flat face, one clipless face. Great for a versatile uni ;
- Magnetic pedals, such as Magped: a magnet under the shoe holds the foot fixed onto the pedal, without it being totally stuck.
What is their purpose?
The best advantages of clipless pedals are the following:
- The shoe stays on the pedal way better than with flat pedals: IMHO, that’s the best argument. As the feet are held onto the pedals, they don’t slip off the platforms when there’s a bump in the road (hole, root, rock, …). The faster you ride, the better the stability is increased.
- More power: as the feet are held in the cages, it is possible to pull on the feet when they go up. This way, more power is transmitted through the pedals to the hub. This increase in power is particularly important when climbing a hill or accelerating.
- The feet are always in the same position: little advantage for common riders, but great advantages for switchable-hubs riders (Schlumpf or Flik Flok hubs). As the feet are always at the same place, it is easy to consistently get the move to shift. No need to replace the feet to be sure you don’t miss the buttons.
- The pedaling can be made more fluid, which lead to less fatigue at the end of the day.
What are their disadvantages?
First of all, that’s what everyone always says about clipless: they are more dangerous than flat pedals. People are not completely wrong. In case of a UPD, if the rider isn’t fast enough, they will badly fall being stuck on the uni. Wrist and chin can be damaged. The faster you ride, the more danger you go through.
In addition, if the pedals or the cleats are badly adjusted, knees can hurt. Pay attention to your settings: feet should be in a natural position on the pedals.

Secondly, you need another pair of shoes for those kind of pedals. Those kind of shoes usually are not great for walking because they are quite stiff. If the unicycle is used for commuting, you’ll need a second pair of shoes at the finish - or opt for enduro shoes, a bit less stiff but better for walking.
Thirdly, as there are multiple clipless standards, you may need multiple shoes for different pedals. Typically, SPD-SL pedals - for road riding - use 3-screw cleats whereas SPD & Crankbrothers pedals use 2-screw cleats. Thus, it is impossible to use SPD-SL-compatible shoes for SPD or Crankbrothers pedals. But it is possible to use Crankbrothers-compatible shoes for SPD pedals and vice-versa - if you put the right cleats. In short, if you want multiple unis with multiple standards, you may need multiple pair of shoes.
Fourthly, it is mandatory to regularly check the cleats. They may unscrew and detach at the worst moment. This may be really dangerous and make the feet hard to disengage. I have experienced this and I highly discourage it!
Last but not least, using flat shoes on clipless pedals is pretty unpleasant. The metallic cages are usually felt through the shoe and there is a loss of grip because of that.
That’s why single-sided pedals can be great, because you can chose which face you want to use, depending on the shoe you wear. But you have to find the correct face when you get on the uni, which can be tricky ![]()
Who are they designed for?
As stated in the first lines of this topic, this kind of pedals introduces a new hazard. It is strongly advised not to be a beginner to try them out. If you don’t fall on your feet for at least 95% of your UPDs, then do not try them or you may hurt yourself pretty bad.
As a reminder, it is forbidden to be attached to its uni for team sports - uni-basketball, uni-hockey. It is therefore forbidden to ride clipless in these disciplines. In addition, metallic pedals are forbidden for track races, which rules out clipless pedals which generally have a metallic cage.
To conclude on what they aren’t designed for, disciplines which are centered around figures - freestyle, flat, street - require for the riders’ feet to be free. Clipless pedals don’t meet this requirement so they have no advantage there.
So, those pedals are great for riders on big wheels who’d like to gain some speed and power. Whether you’d like to use them for road-riding or off-road riding, they can be a major benefit on condition you are able to fall on your feet in most cases.
If you like to ride fast but are afraid of your feet slipping of the pedals on any bump, then this kind of pedals is designed for you! If you like to ride uphill or enduro but you don’t have enough power for hard uphills, then this kind of pedals is designed for you!
How to start riding clipless?
First thing first: find a good set of pedals. As far as I’m concerned, a good clipless pedal is a SPD pedal with a platform, such as Shimano SPD ED500. You should avoid pedals without platform, such as Shimano SPD PD-M520.
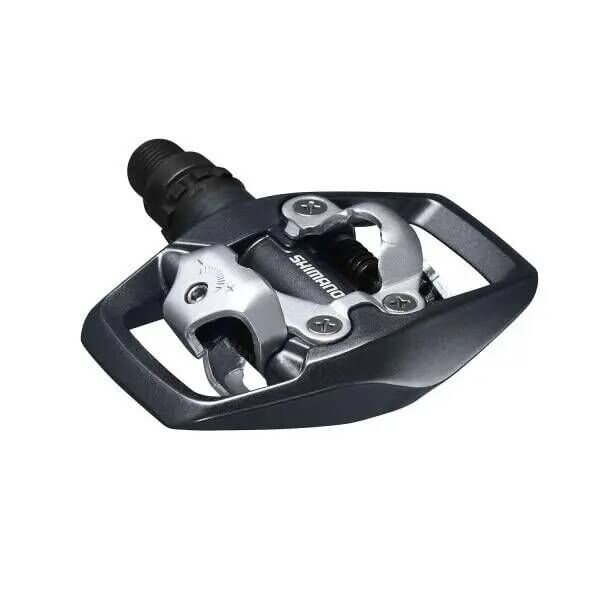
Shimano SPD ED500 pedals
The additional area on the pedals let you place your feet before clipping into the pedals.
I would strongly advise not to start with road pedals - SPD-SL - as they are harder to unclip. These would make the practice even more hazardous.
Next point, time to set the tightness of the spring. The tighter, the harder to unclip. So, to start, please make them as loose as possible. You’ll usually need a little Allen key. Nothing too hard!
Then, find clipless-compatible shoes. You should not go for high-end shoes in a first time. If you don’t like the feeling of clipless, you would have thrown money away. Low-cost shoes are usually good enough to start practicing. Take care when choosing your shoes they are compatible with your pedals - remember: 2 screws for SPD or Crankbrother cleats, 3 for SPD-SL cleats.
Last material point, you need cleats. They may be sold with the pedals. In that case, you should check the cleats you got. Some are easier to unclip than others. If you go for SPD, I advise you to get Shimano SPD SM-SH56 “multi-directional release” cleats. They are easier to unclip than Shimano SPD SM-SH51 “single directional release” cleats.
Now you’re fully equipped, time to put protective gears on: helmet - full-face if you have any -, gloves, knee-guards, elbow-guards. Then, find a soft ground. You’ll probably fall on your first attempts, that’s normal, but it’s better if you don’t break yourself at the start! If there’s a wall or a bar on which you can lean to get onto the uni and train to clip and unclip, that’s even better!
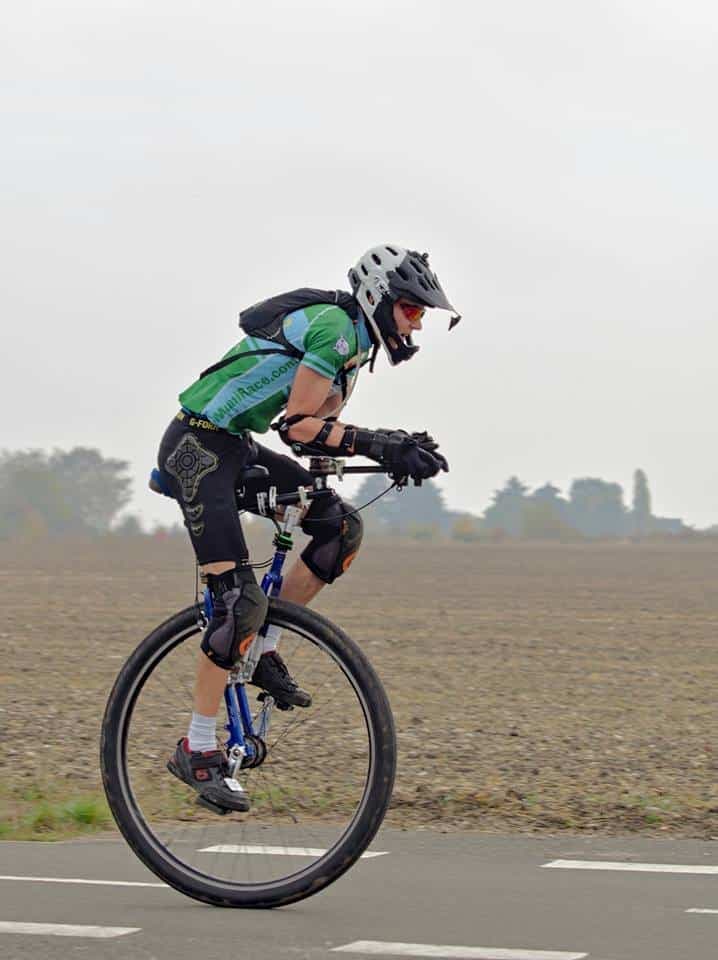
This guy is fully equipped to ride clipless
You now have your clipless pedals, your shoes, your protective gears and your training ground. It’s time to train! Lean against the wall or the bar and get on your uni as you would get on flat pedals. You should feel nasty protuberances under your feet. That’s totally fine. Those are the cages which are not positioned in the right way. Move a bit one foot while pushing a bit onto the pedal. You should hear a CLICK meaning your foot is now locked in the cage. To release your feet, move your heel to the outside. You should now be free to remove your feet from the pedal. Try to do the same with your other feet. When you’ve repeated these 2 moves, you can clip one feet then the other. Congratulations, you are now fully clipped! Try and unclip both of your feet, one after the other. Get off your uni and rest a bit. Not too afraid to continue? Great! You can get back onto your uni and start repeating the clip and unclip moves. These moves should become natural so using these pedals is not a danger anymore.
Now you feel confident enough, time to ride a bit! Get on your uni, clip and ride. You should feel the pedals go up when your feet do so. Get back to the wall, unclip and get off your uni. Rest a bit and repeat.
Not 2 tired? Feeling confident to try and unclip in the middle of nowhere, without any support? Get on your uni, ride to the middle of your training ground, stop, unclip and get off your uni. Be aware that’s the time when people usually fall ![]()
Repeat the exercise a few times until you feel confident you are able to unclip without any support. You can also try and get on the uni without support. To do so, get on your uni as you would do on flat pedals and try to stand still or hop while trying to move one foot and pushing on the pedal. At one point, you should clip. Repeat with the other foot and you should now be fully clipped, ready to ride!
It’s now time for your first out-of-the-training-ground ride! Be aware it’s still a bit more hazardous than with flat pedals. You’ll need some time to adapt to these pedals. So, don’t try out hard trails or to go too fast. Take your time and go on easy trails and roads. Once you are confident you have the reflex to unclip, you can try harder trails and ride faster.
What’s next?
Now you often ride clipless, you may feel your feet occasionally unclip when you don’t want to. It’s time to think about tighten a bit your pedals. Later, you may even go for harder-to-release cleats, such as SM-SH51 or change of pedals and go for road pedals. Be aware you won’t gain much and dangers are way greater. This optimization should not occur before you are already an excellent clipless rider.
As far as I am concerned, I still ride with my good ol’ SM-SH56 cleats and that’s perfect for most cases.
What about magnetic pedals?
Let’s focus a bit on magnetic pedals.
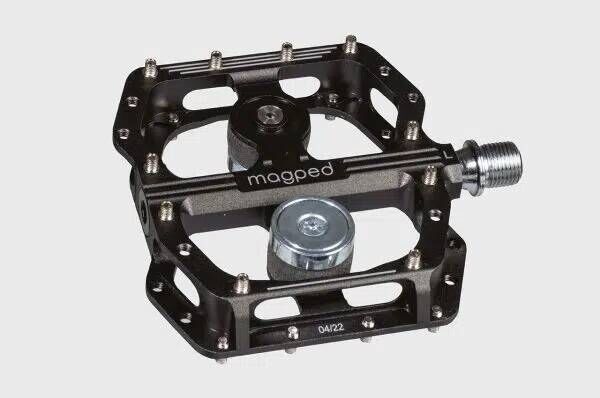
Example of magped
Halfway between flat pedals and clipless pedals, they can be a good point of entry towards clipless. The rider can understand how the feet are held onto the pedals and how to unclip them. But the feet are not totally locked, so it’s impossible to pull on them in uphill sections or when accelerating. Then, a lot of the advantages of clipless are lost. BTW, the magnets are pretty heavy. If you’re looking for light pedals, go on your way!
Let’s conclude on an advantage: magpeds are to be used with metallic plates whose fixations are the same than SPD cleats. You can then have a single set of shoes for both kind of pedals; you simply have to swap the metallic plates for the cleats. You can also use the cleats as metallic plates, but that’s a bit less performant than metallic plates.
Conclusion
Has this topic convinced you to give clipless a try? Great!
Has this topic convinced you this is a bad idea for your to give clipless a try? No worries! This topic has not been designed for everyone to break their collarbone ![]()
Any question? Please ask them here ![]()