Tirving had me build a black cock that will fit into his KH T bar holder. I know it was WAYYYY easier to build than the rail adaptor based cocks. Tim really likes it and it gives you the adjustability of the KH T-bar system to dial in the hand position. I made up a few extra of these if you are interested in trying one out, Search Tirving’s posts for some pics of this. I think Mbalmer also rides with one of these KH bar holder based black cocks, though she tried to hide its black cock-ish look with some girlie streamers or ribbons I recall - (but IMHO, it still looked like she was happy to see someone).
Ok, so for those of you that are looking at this and wondering why . . . . . .
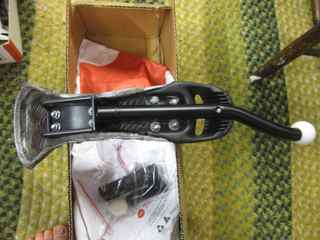
Both the white delrin/nylon ball at the end, the bolted connection through the lift handle (think frenum piercing??) as well as the rubber grip are designed to be removable to slide a brake lever down over the shaft. (all threaded fasteners are welded into the bar “flush” so they don’t keep you from sliding a HS33 brake lever down over the bar). This positioning of the brake lever protects the lever blade from UPD damage and also puts your hand in a position to activate the brake with your pinkie and or ring fingers. This grip eliminates the need for a KH spooner because you are using it in more of a bike handlebar grip “position” . . . . if that makes sense.
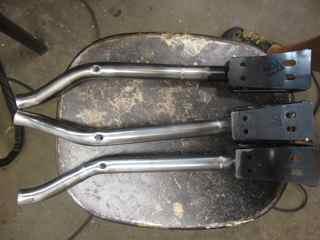
There is a fair ammt. of labor to make these up as I customize each one for rider handedness and rider hand size.
I’ve been riding with a similar setup for a couple thousand km, and I have to say it is inherently a design for failure.
The problem spot is at the seat rail to rail adapter interface. The addition of the long lever arm to the front of the rail bracket transmits a lot of torque to those rails, ultimately leading to broken rails. They’re just not thick enough to handle the stress.
I’ve tried welding some cross-braces between the rails, and even welding the rails to the rail adapter. There is no fix that lasts for more than a few hundred km, or a few hard drops.
Yesterday was the failure of my 2nd rail adapter, even after having beefed it up with lots of ugly welding. I am now completely done with this design, as much as it saddens me. I’ve already taken a couple 10 mile walks to a trailhead… not again.
I’ll get some pictures and post them soon for illustration.
Yes, pics would be great.
I’ve been using this on fusion freeride saddles and CF saddle bases for several years and about 20 of these are now out in use with local riders and have just seen one come back to me with bent rails. I’ve experimented with reinforcing the rails with custom plate steel gussets and it fixed this problem by effectively shortening the rail length at each end. Since this hasn’t happened but once, I haven’t seen the need to reinforce the rails on the rest of the ones I ride.
Also, the bent rail problem is much less likely when the shaft is solidly bolted through the lift handle reinforcing the saddles existing stiffener plate. Later pics will show this detail, which is one of the last fabrication steps
Brycer
I don’t see any bolts in the pictures you’ve attached. Could you illustrate? I don’t understand how the rails are reinforced in this manner.
In my design, I cut the brake extension off and welded my shaft / handle assembly directly to the vertical plate. The only bolts were between the stiffener plate and the seat.
On this subject, there is a reply over in the Trading Post forum that wins the award for the funniest post of all time. Not many things make me literally laugh out loud each time I read it and there have been several. Ready for a giggle? Do yourself a favor and read the thread from the beginning to put the whole thing into context.
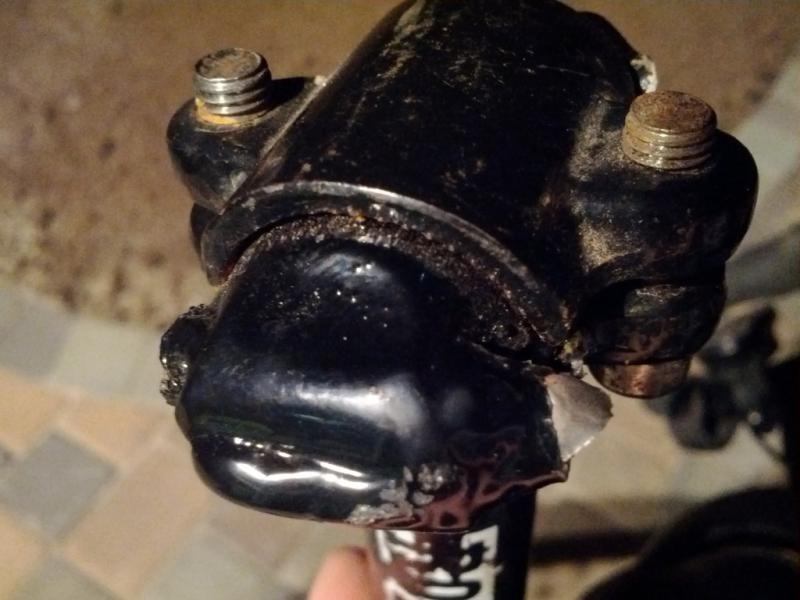
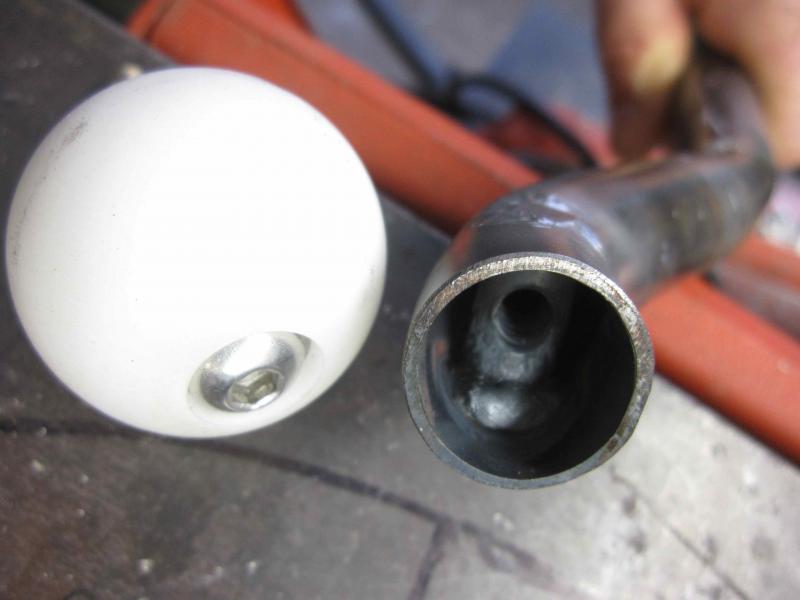
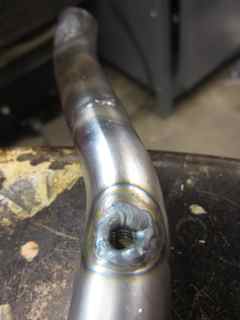
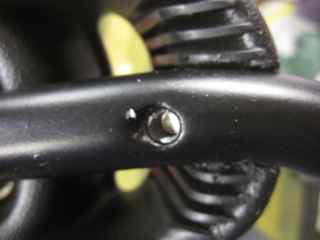
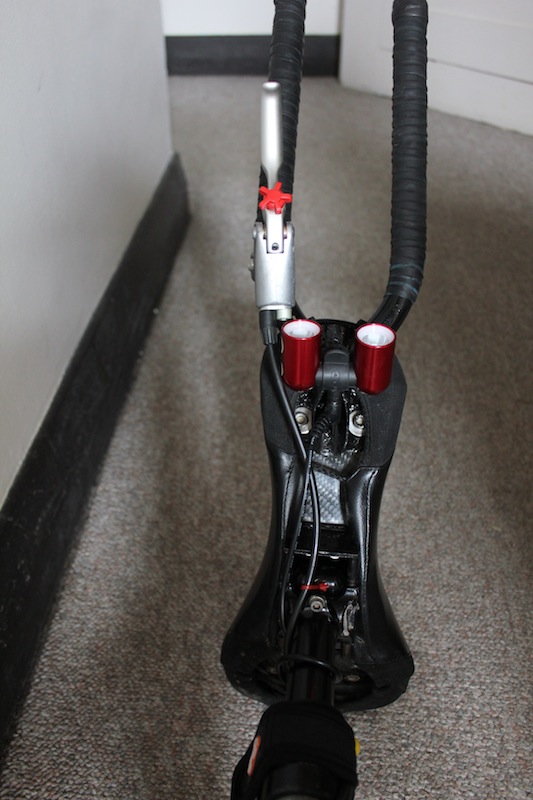
Ok, I do see how your bar could bend the rails with that description. The stainless bolt head visible in this pic goes through a drilled hole in the lift handle and into a steel threaded barrel welded at an angle into the Black Cock shaft. This solidly connects the black cock with the saddle stiffener and creates a much stronger handlebar than one that is left un-bolted. The bolt head is countersunk into the lift handle so it won’t snag on anything. The layout for this connection took me a while to figure out, but it works great.
With the red and white color scheme, that one looks more like a doggy dong to me.
As intrigued as I am by your design, I’m going to stick with the T-bar for now. I like having two handles offset from center, to make it easier to grasp them from the side. Your design would have to be at least 10-12" longer for me to reach past my own personal attributes to use it. ;)
(Hmm, sorry if I’m coming across as a bastard, I realize I’m not qualified given that I’m nowhere near Portland. )
Hmm, that doesn’t do anything to reinforce the rails though… only the handle. Am I right? Is the plastic handle the extra link between shaft and plate? I don’t have much faith in that plastic.
In my design I wanted to be able to use the lift handle. I don’t see that possibility in your design.
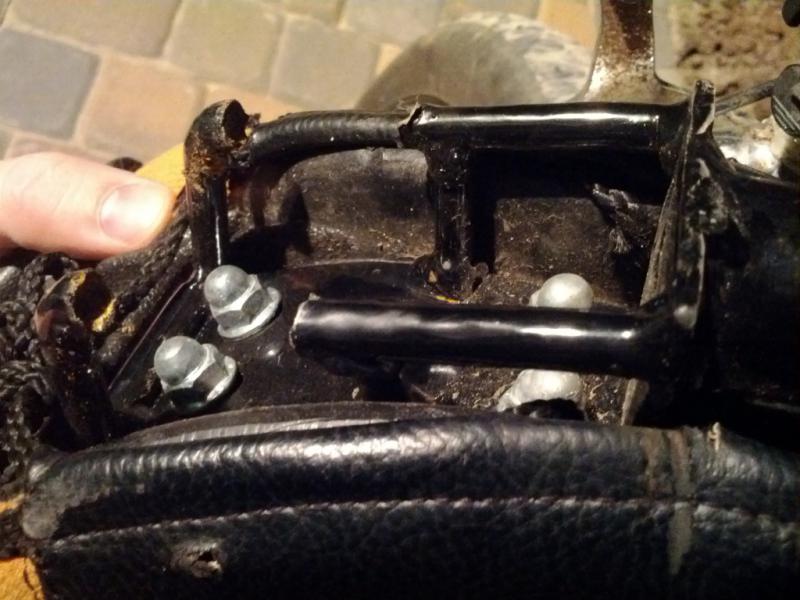
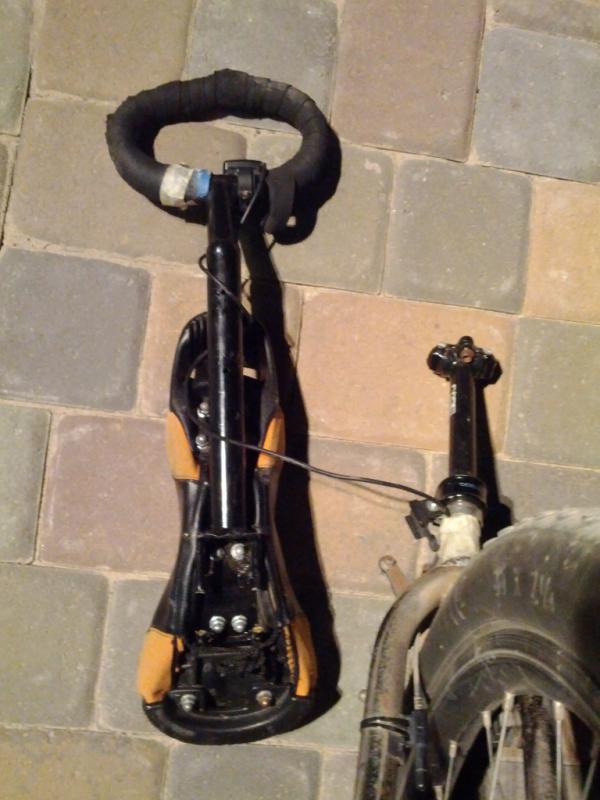
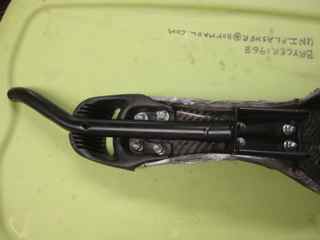
Here’s what’s left of my design. I really liked it… it was made from some drop-handles from an old 10-speed. It offered a number of hand positions, worked well with a computer and a brake, and lasted for quite some time. I might try building a second version once I get my man-cave sorted…
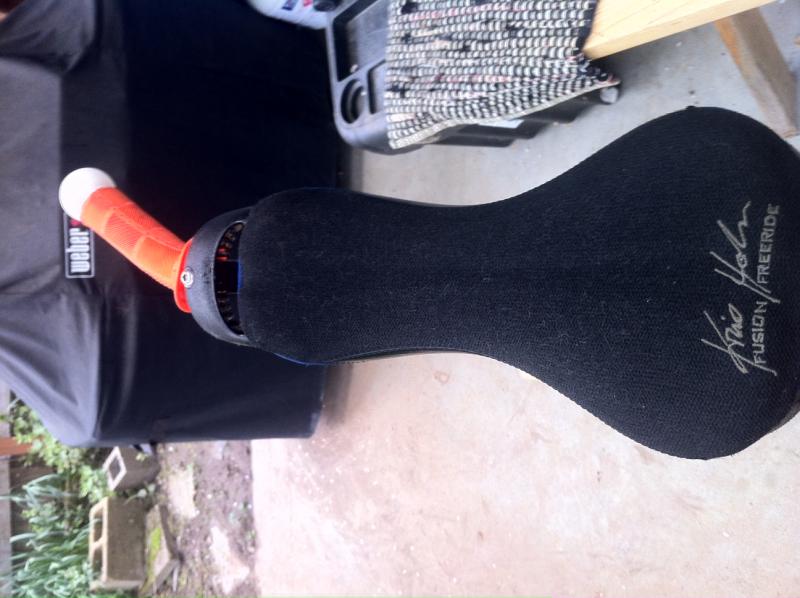
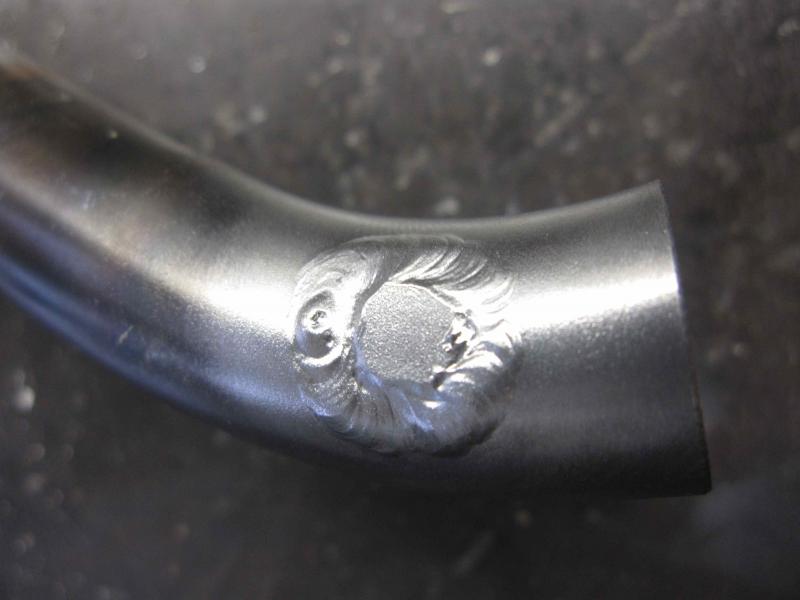
Whoooah, I think I’ve punished my black cock pretty hard over the years with UPDs and drops, but it still looks pretty good and all its parts are straight and intact. . .OOh man, that looks like it saw some hard living! Ouch!
One possible difference is that I run mine with Thomson seatposts which have a really big/wide grip on the rails and help to better spread the load on the rails.
Cheers,
Brycer
I’ve done a couple hundred km of Coker muni and a ~500km tour of Vietnam with that rig, in addition to lots and lots of smooth rolling on pavement. Overall, I’m happy with how long my handle’s lasted, but disappointed that I have to take it out to the field and shoot it…
Yeah, this post only grips the rails in two places… the interior of the clamp is hollow. I’m no materials engineer so I can’t tell if it would be better to grip more of the rail… but in either case the rails have to bear the entire load of every drop and fall.
I love the design of the new KH adjustable seatpost but unfortunately it isn’t made in 22.2 mm diameter (needed for the OG Coker 36er)… so I might have to roll my own… we’ll see.
Worked on Black Cocks today. Milled the holes for the delrin ball anchors and welded them in place. The TIG welder with pulser makes nice looking welds, pity that I have to blend them (grind them flush with the bar outer diameter) so the brake lever will fit down on the shaft.
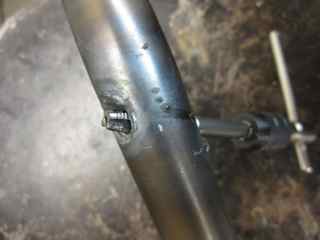
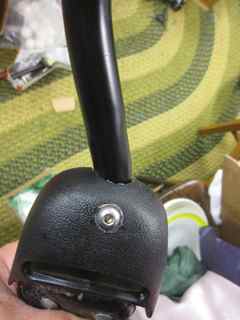
These Pics are all of the lift handle bolt anchor which will keep the handlebar bolted to a hole in the saddle lift handle. The hard part is sinking all the threaded fasteners into the bar so brake levers can still be slid down over the shaft.
The pics:
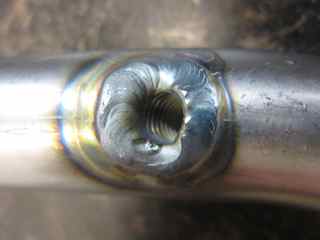
*After I welded it into the hole I milled into the shaft
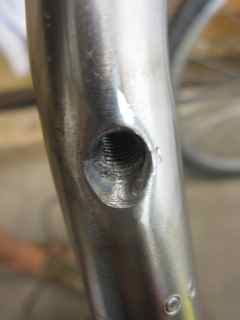
*Then cleaning up threads with a tap
*After blending (bandfiling) the weld bead flat
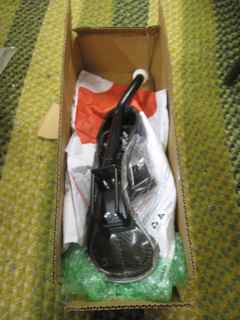
*Prepped for painting in my “paint booth” in my front yard.
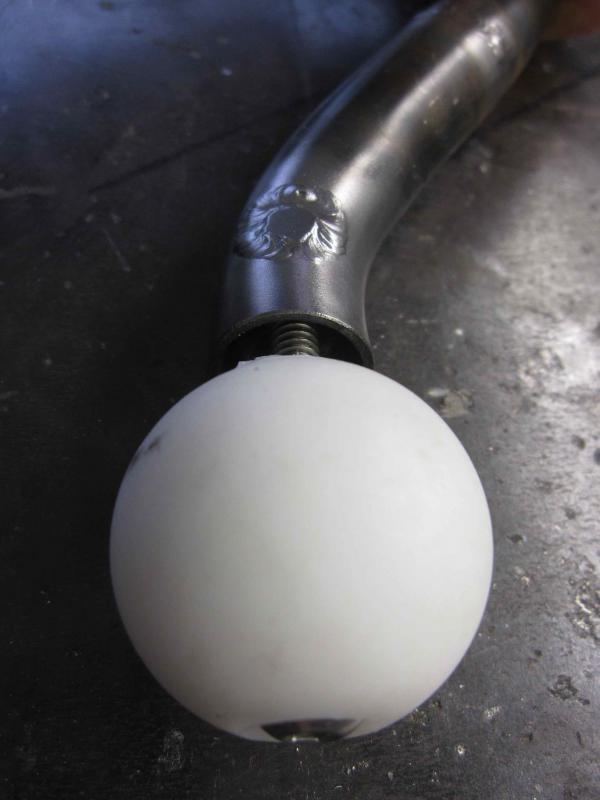
I left the grip off so the brake lever can be slid down into position. . .then the grip goes on.
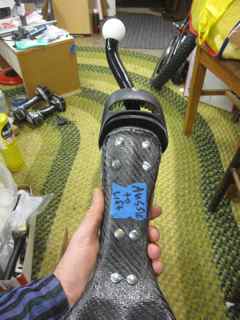
This one is getting ready to take a long trip down South
Its good to see people trying different things with handles. Your Black C**k design looks interesting. I would suggest that in any future batch you think about ditching the KH front bumper all together. With the shaft running practically through it anyway it kind of becomes pointless. With a nice substantial handle out the front the traditional bumper is only useful for those people unwilling to spend a bit of time working with a new set up that is ultimately superior in every way.
Other things you could consider would be to do away with the KH rail adapter which is heavy, and prone to failure and just mount your handle directly to the CF base (which is plenty stiff).
And I know this is a bit pedantic- but you could use a better attachment method for all your hardware/bumpers to the CF base. A guy who used to post here called Fraggle had a nice tutorial about using flange nuts and dome head allen bolts for CF base mods. Here is the link Fitting Button head Allen bolts to CF base.
As for me, all you guys with Brycers black Ck handles are missing out on the fun, pleasure and benefits of a dual ck set up like mine!
Good to see you backyard mechanics (Brycer/ Nurseben) making stuff where the market is unwilling to supply it.
Napalm: I won’t be dropping the soap in any shower that i take anywhere near that doubleheaded beast. Hide your daughters and note to self not to let you ride up behind me.
I kind of like leaving the lift handle cause some riders use both it and the black cock and it provides some abrasion protection to the front of the saddle cover. So, I pretty much build what folks want me to. . . .the CF base is not common with local riders so I’ve designed around the plastic Velo base and that has worked well and the cost is pretty reasonable.
If I ran CF bases myself, I’d definitely take advantage of its strength and maybe dispense with the Rail adaptor . . . . .
My very own black cock has arrived in Aus! Easy to install with great instructions, took it out for a spin and absolutely love the control it gives, especially for drops and up hills, awesome!!!
Thanks fro a great product and great service, Cheers from Tom