(In reference to this post:
why don't road unis have better gearing options? )
The discussion of making a Nuvinci work on a unicycle came up several times in the 3-speed sturney-archer build project.
After some mulling around I think I had figured out a way to pull this off and signed up for a frame building workshop last month taught by Paul Brodie in order to learn the techniques necessary for building a custom unicycle frame from scratch.
It’s a bit tight for time frame to write much explanation text but I’ll post a series of build pictures now that should hopefully be self explanatory!
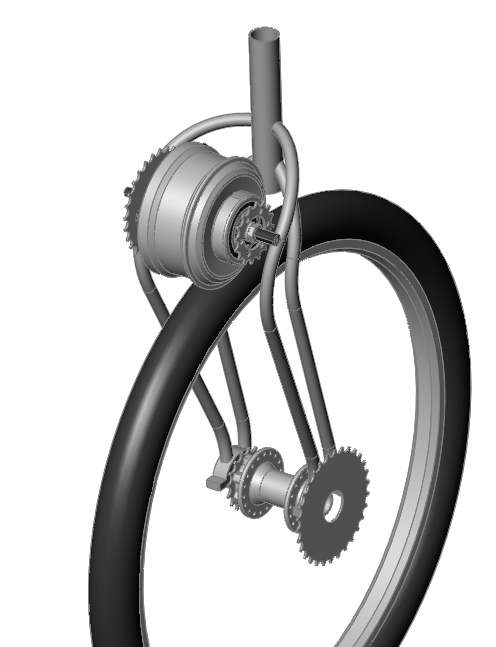
Starting here is the CAD idea that I had going into the project. The goal was to make a frame that was stiff in the direction of the chainline, since I learned from the 3-speed build that if there is much flex under chain tension, then it makes things more prone to chain skipping problems:
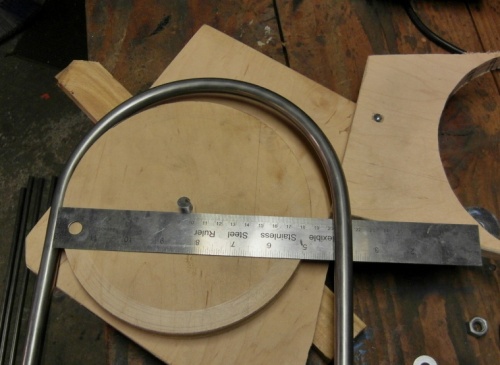
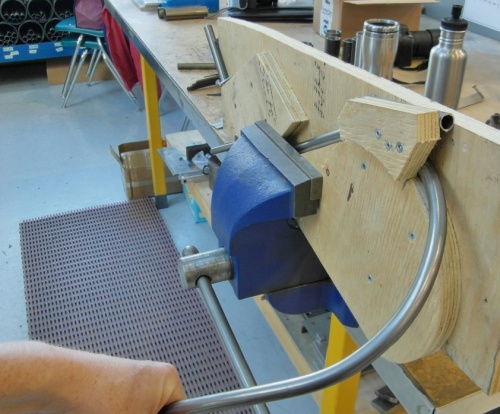
Bending Dies
Plywood disks were cut out on a bandsaw to act as a bending die. In the model, most of the bending is with a 100mm radius, and so with the wooden disks cut out at a 90mm radius the metal would spring back to 100mm pretty consistently.

Tube Bending
The 1/2" diameter steel tube with 0.049" sidewalls was soft enough that it was easy just to bend it by hand.

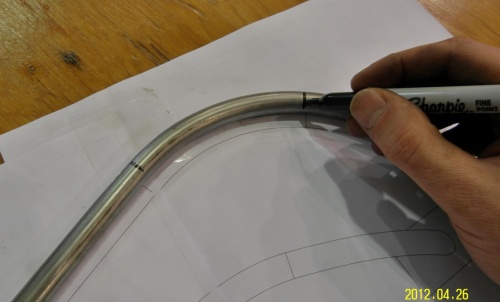
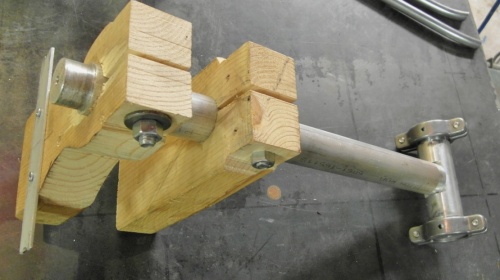
Bend Check
The curves matched the CAD printout OK, but then moving the bend into the 3rd dimension was going to be tricky. Reference marks helped a lot. The 2nd line here is where the tube needs to twist so that the bending comes out of plane and goes inwards toward the seattube.
Tube is clamped flat and then pulled out in 3rd dimension.
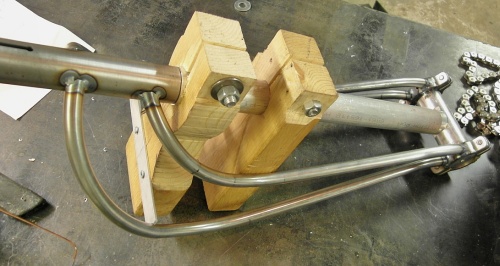
The same technique was used for both the front and the rear tubes, and then for doing left and right side versions of each. Here are all 4 pieces complete and cut approximately to length.

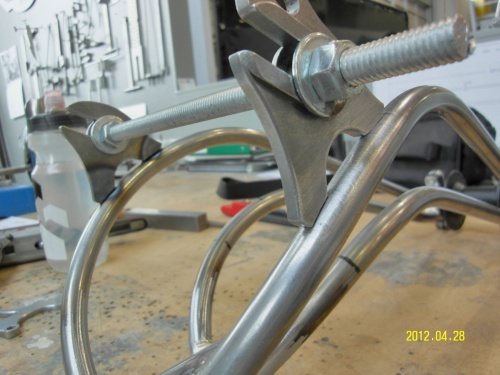
Frame Jig
The unicycle frame jig is needed to hold all the parts in alignment, and was pretty straightforward to make (at least compared to a bicycle frame jig!)
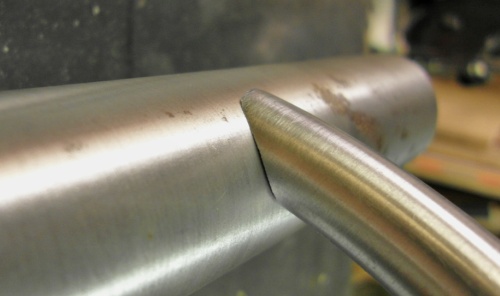
Mitering Joints
The final fit though requires a lot of hand filing with a rounded file. File - test - file - test etc. until it’s positioned just right.

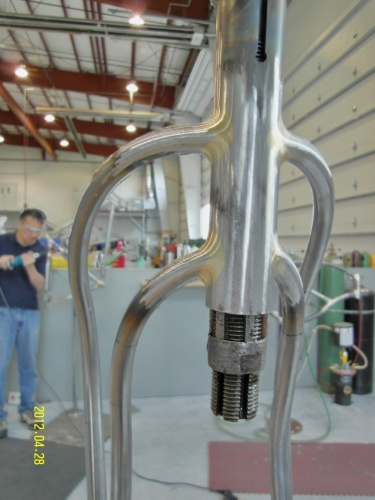
Tacking Togeter
A tig welder was used to take the ends of all tubes in place while it is on the alignment jig. The jig ensures not only that the wheel will be centered and that the set tube will sit straight, it also holes the sides of the bent frame tubes the right spacing apart for the chainline to work out without interference.
The steel bearing brackets are from UDC, I thought it was pretty awesome that they supply this part for DIY uni frame building. So all I needed for frame materials was a length of off-the-shelf 1/2" DOM material for the sides and 30mm tubing for the seattube.

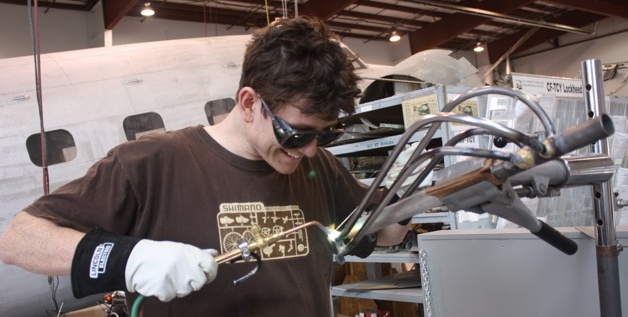
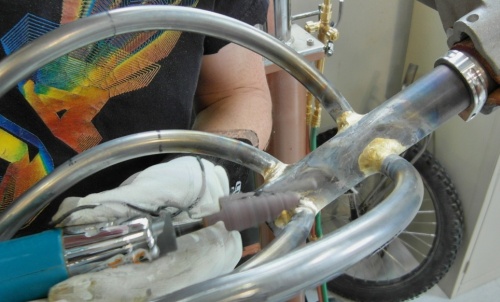
Brazing
I wanted all the joints to be smooth fillet braze welded, so the TIG torch was only used for tacking the joints but the bulk of the weld comes from brazing with a torch.

Brazing done
After all the brass is applied
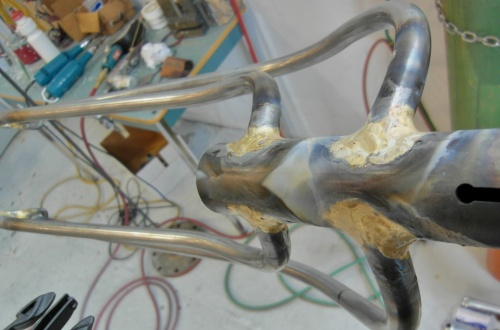
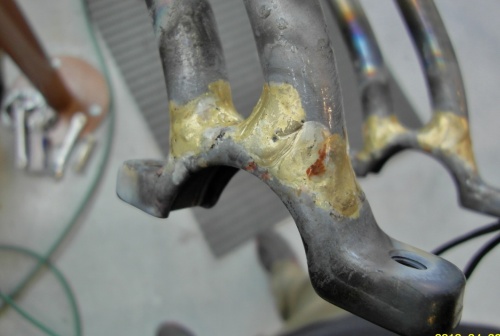
Then lots and lots of sanding
Thankfully there were some good rotary power tools for getting smoothing out the braze joint into a seamless fillet. This job with a hand file would have been most tedious.
But the results of doing a good job sanding are pretty gorgeous.
Here you can also see a reamer inserted into the seattube. The heat of brazing and tig tacking distorts the the tubing a little, and this needs to be reamed clean and circular again in order for the seatpost slide in and out.
Dropouts
The frame also needs dropouts to hold the nuvinci hub jackshaft in place.
These are standard horizontal dropouts for bicycles that looked like they would do the job quite well.
Nuvinci Work
For those following the previous multi-gear unicycle discussions, the issue of reverse torque transmission comes up because all bicycle hubs intrinsically freewheel backwards (with the exception of the S3X), making them incompatible with a unicycle drive.
The idea for solving this on the nuvinci was to install a 1-way ball bearing to lock the hub in reverse with a 1:1 gear ratio. So going forwards it has variable gearing through the CVT tranmission, while going backwards it is locked 1:1 with the sprague clutch.
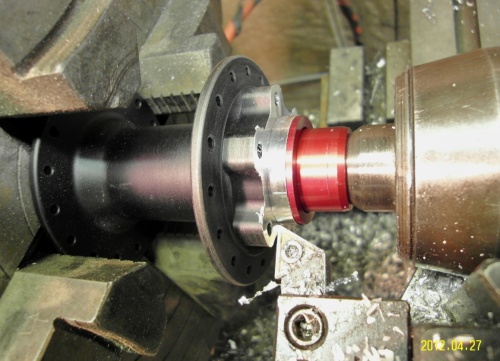
To do this I first had to machine the Nuvinci hub down to size a bit in order to have flat reference surfaces for attaching a new side cover plate that accepts the 1-way bearing. Also took off the spoke flanges which aren’t necessary in a jackshaft application.

1-way bearing adapter plate
The adapter starts off as a chunk of 1" aluminum plate on a rotary table in the milling machine.
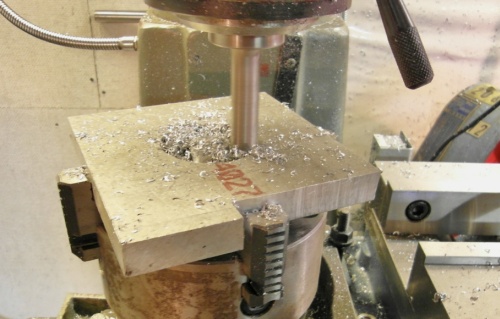
Then the outside surface is machined out. This will become the new right side of the Nuvinci hub, and the cavity in the middle is machined to a 72mm bores so that it can support a CSK35PP one-way bearing.
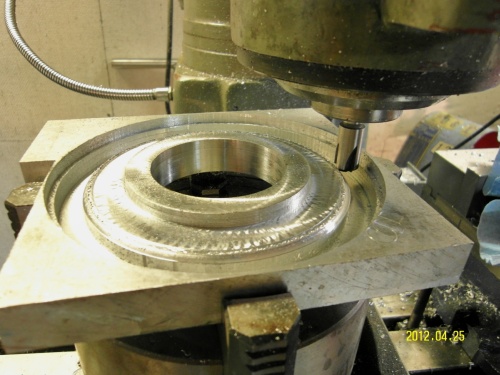
The inside surface here should just fit over the recently machined Nuvinci hub. Parting the metal piece this way out of what started off as just a square cutoff chunk of aluminum is always a bit magical.
The holes around the adapter flange will bolt to what’s left of the Nuvinci spoke flange.

Woah…So Awsome
I did not want that story book to end.
Please post more, its really cool.
Thru Axle Hub
For the actual wheel itself, I decided to use an off-the-shelf 20mm thru axle front bicycle hub rather than machining one from scratch.
The thru axle hub standard is 110mm wide, so it works OK with the 100mm ball bearing width of a unicycle frame, and by making a spindle that is 20mm OD then it becomes pretty straightforward to have a spindle that goes through the hub and rotates independent of the wheel.
The only minor modification I had to make to the hub was machining down the face for the disk mount so that the cog and chain which will bolt to it won’t rub against the frame.