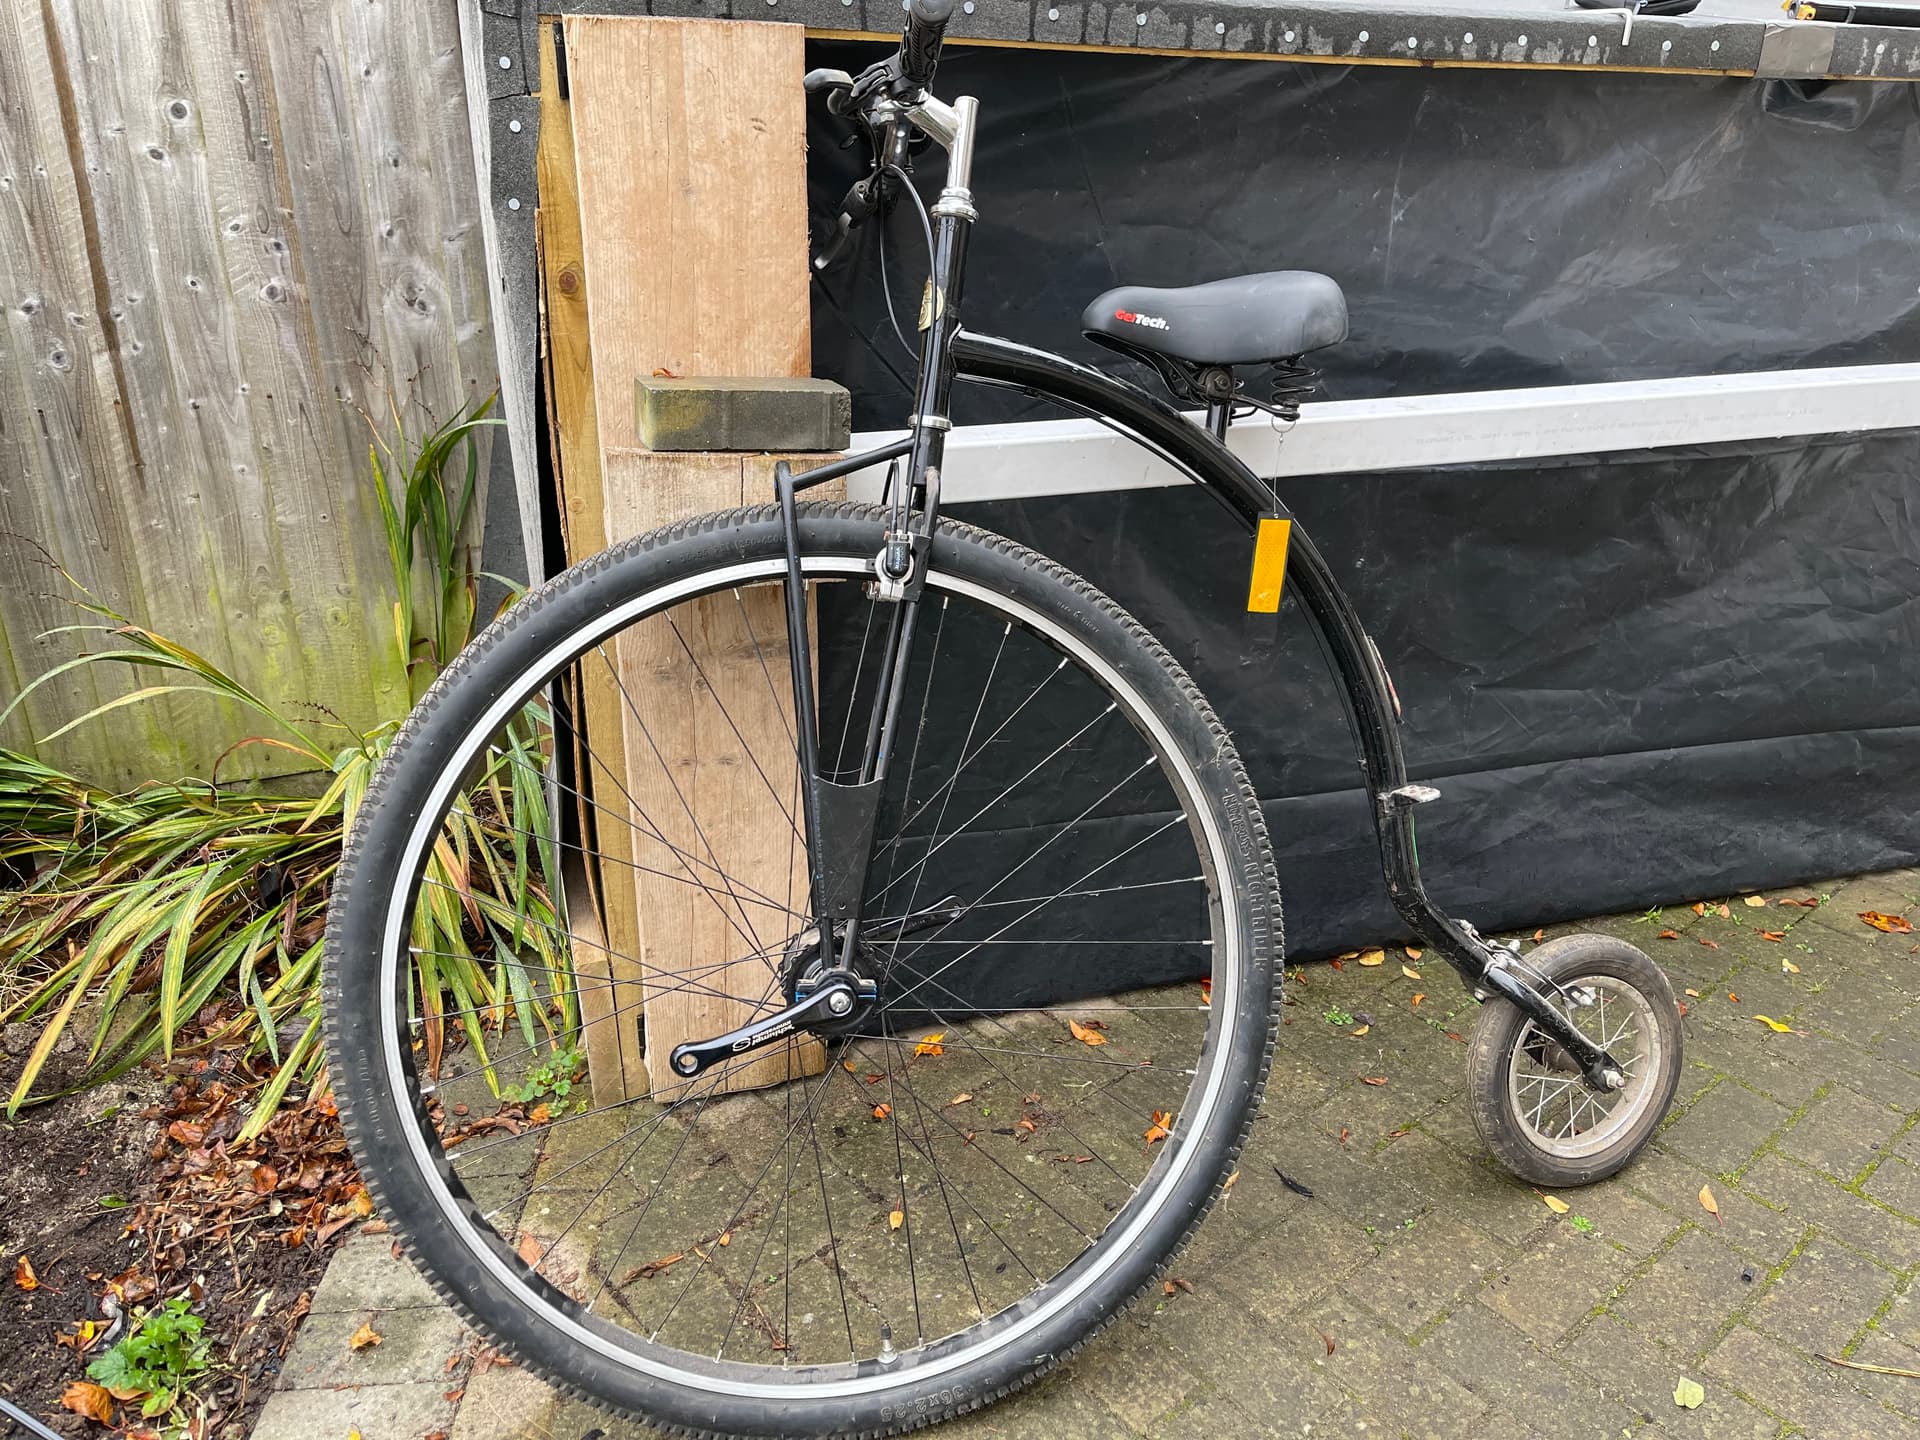
This is the start of my Penny Farthing Street Schlumpf conversion project back to being a 36” unicycle - and at the same time restoring the Penny back to fixed geared running.
This is really the second stage of my 3 x 36” wheels process.
The first was when I built my new NightRider fixed 36er, to free up a KH frame (and because I wanted that type of wheel too!)
Now starts the complex process of working out if I can revert the use of the older 40mm bearing version of the NightRider frame in this PF - back to unicycle service, or go down the route of creating secure shims for the wheel’s installation into my KH 36 frame.
Watch. This. Space. Wish. Me. Luck!
First stop is to visit my local friendly bike shop and see what they think of all my ideas and options and try and book an hour or two of workshop space / time to have a tinker.
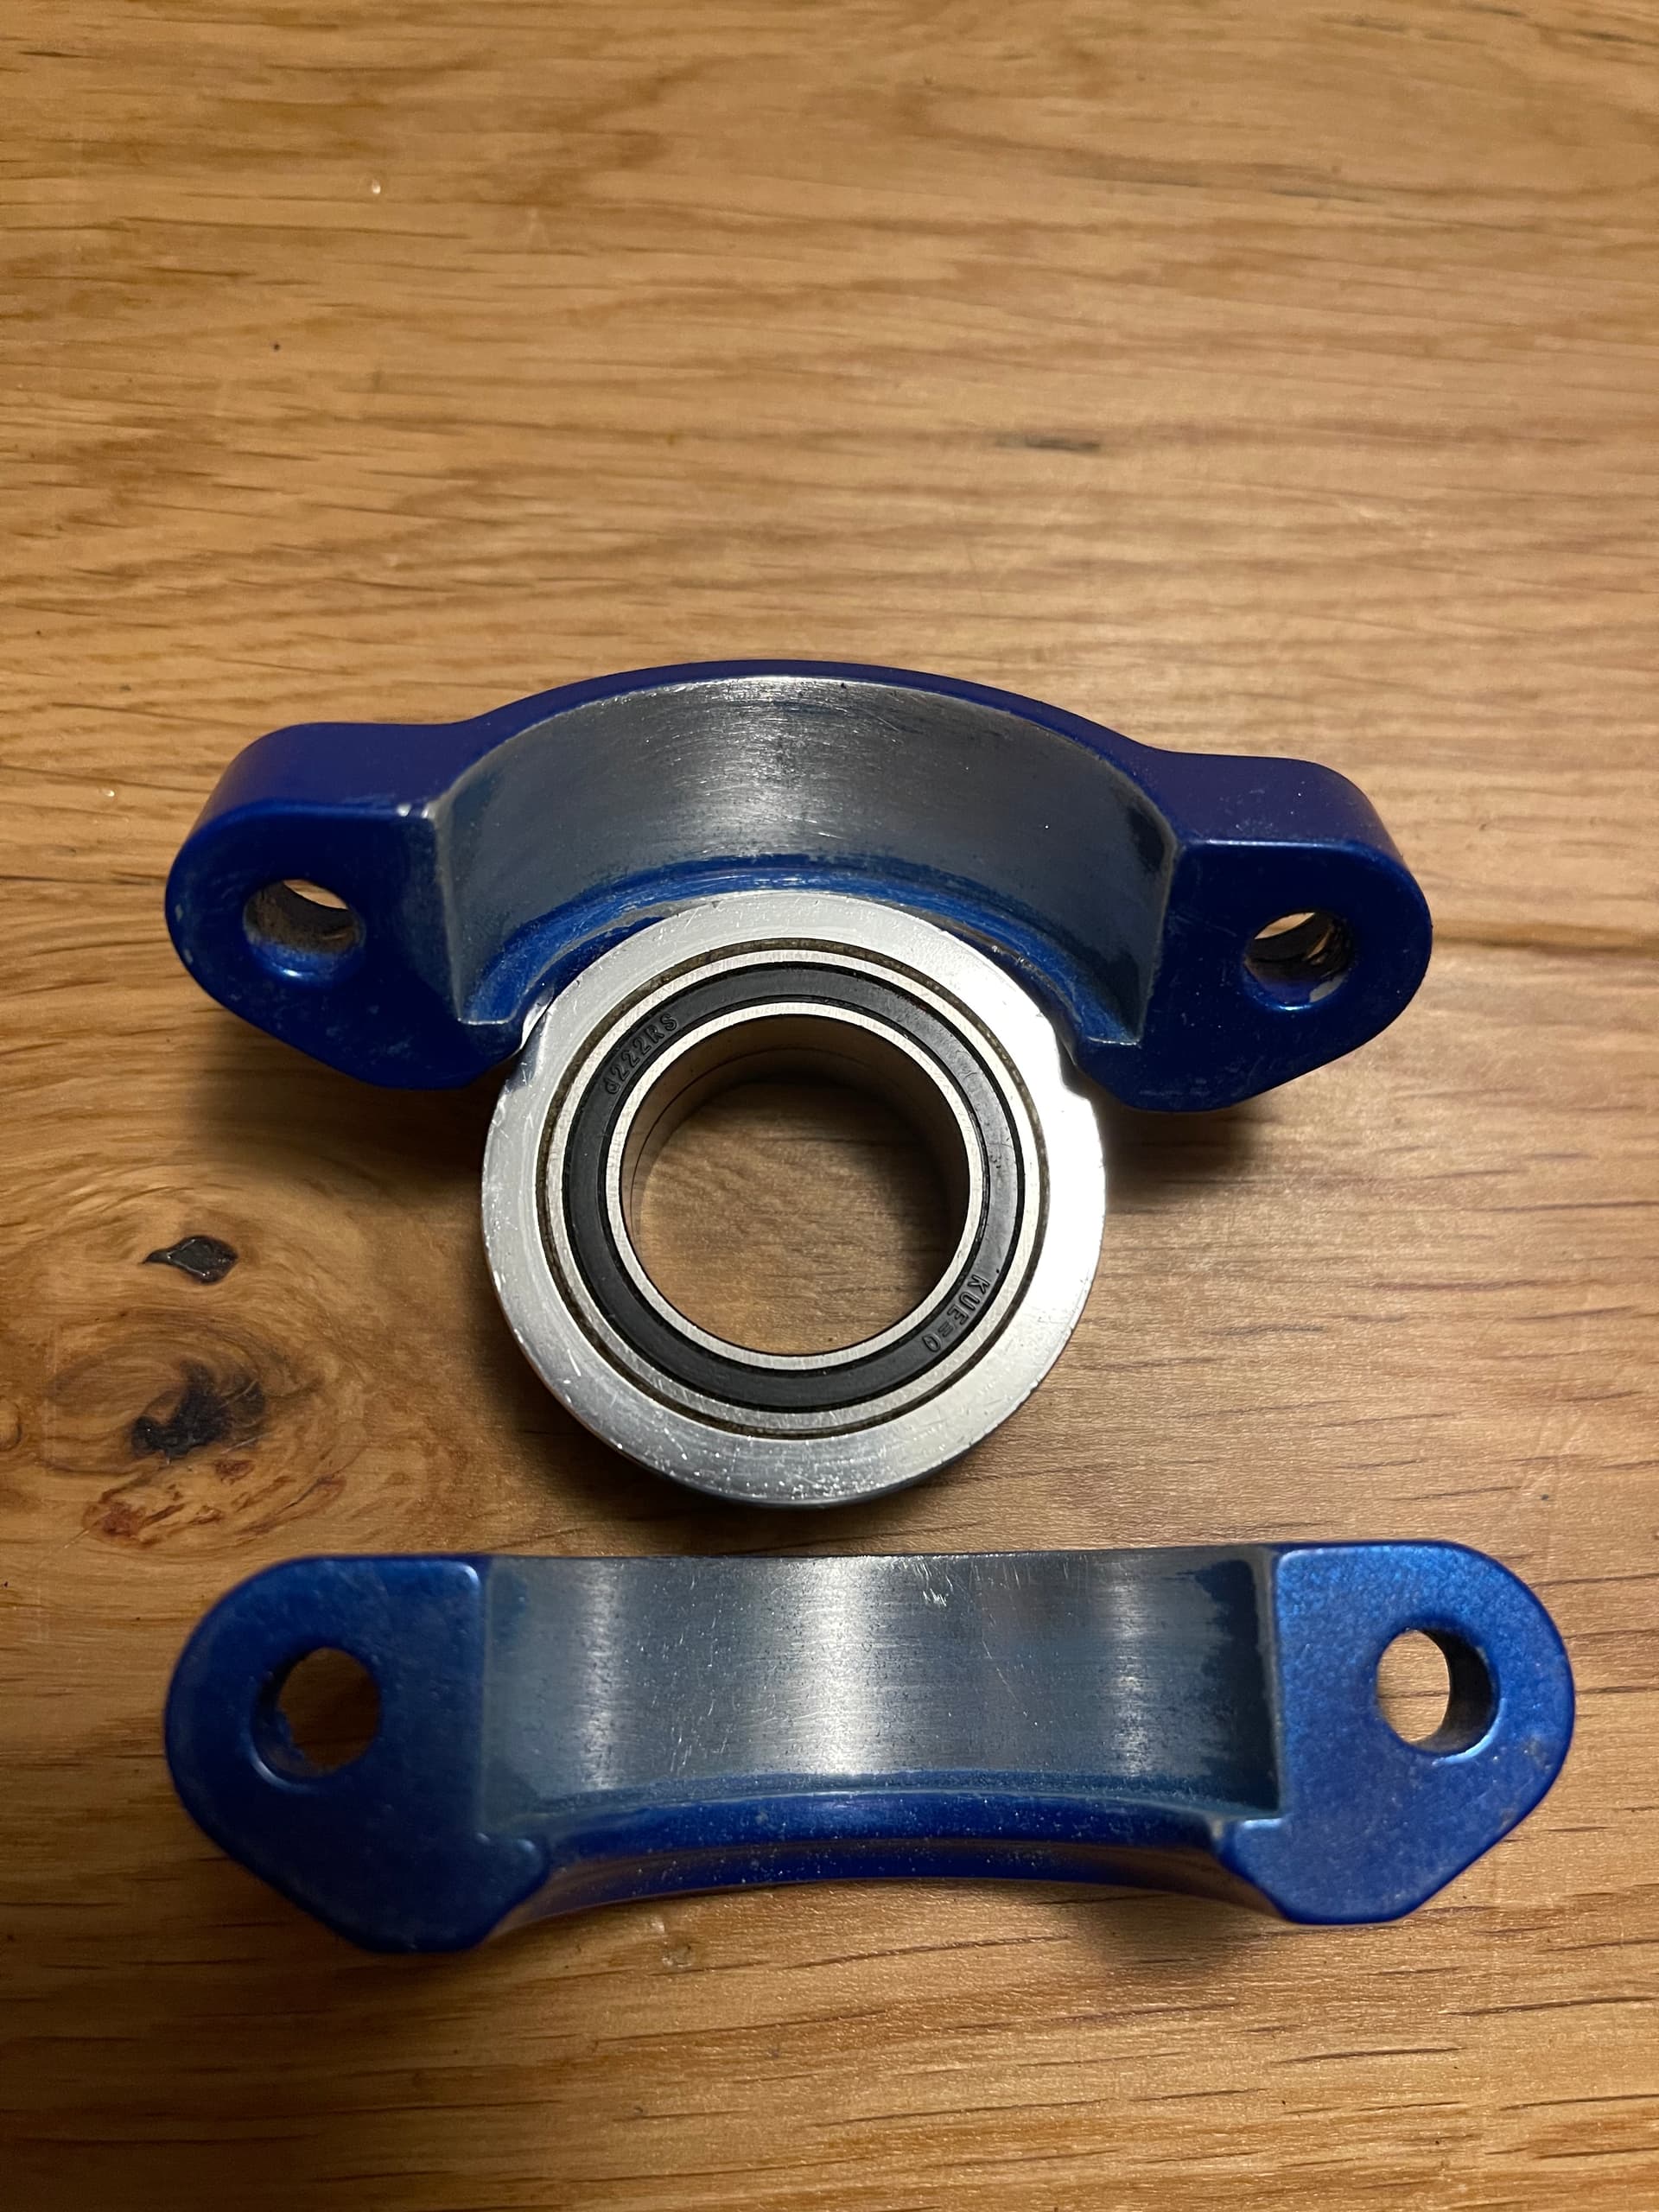
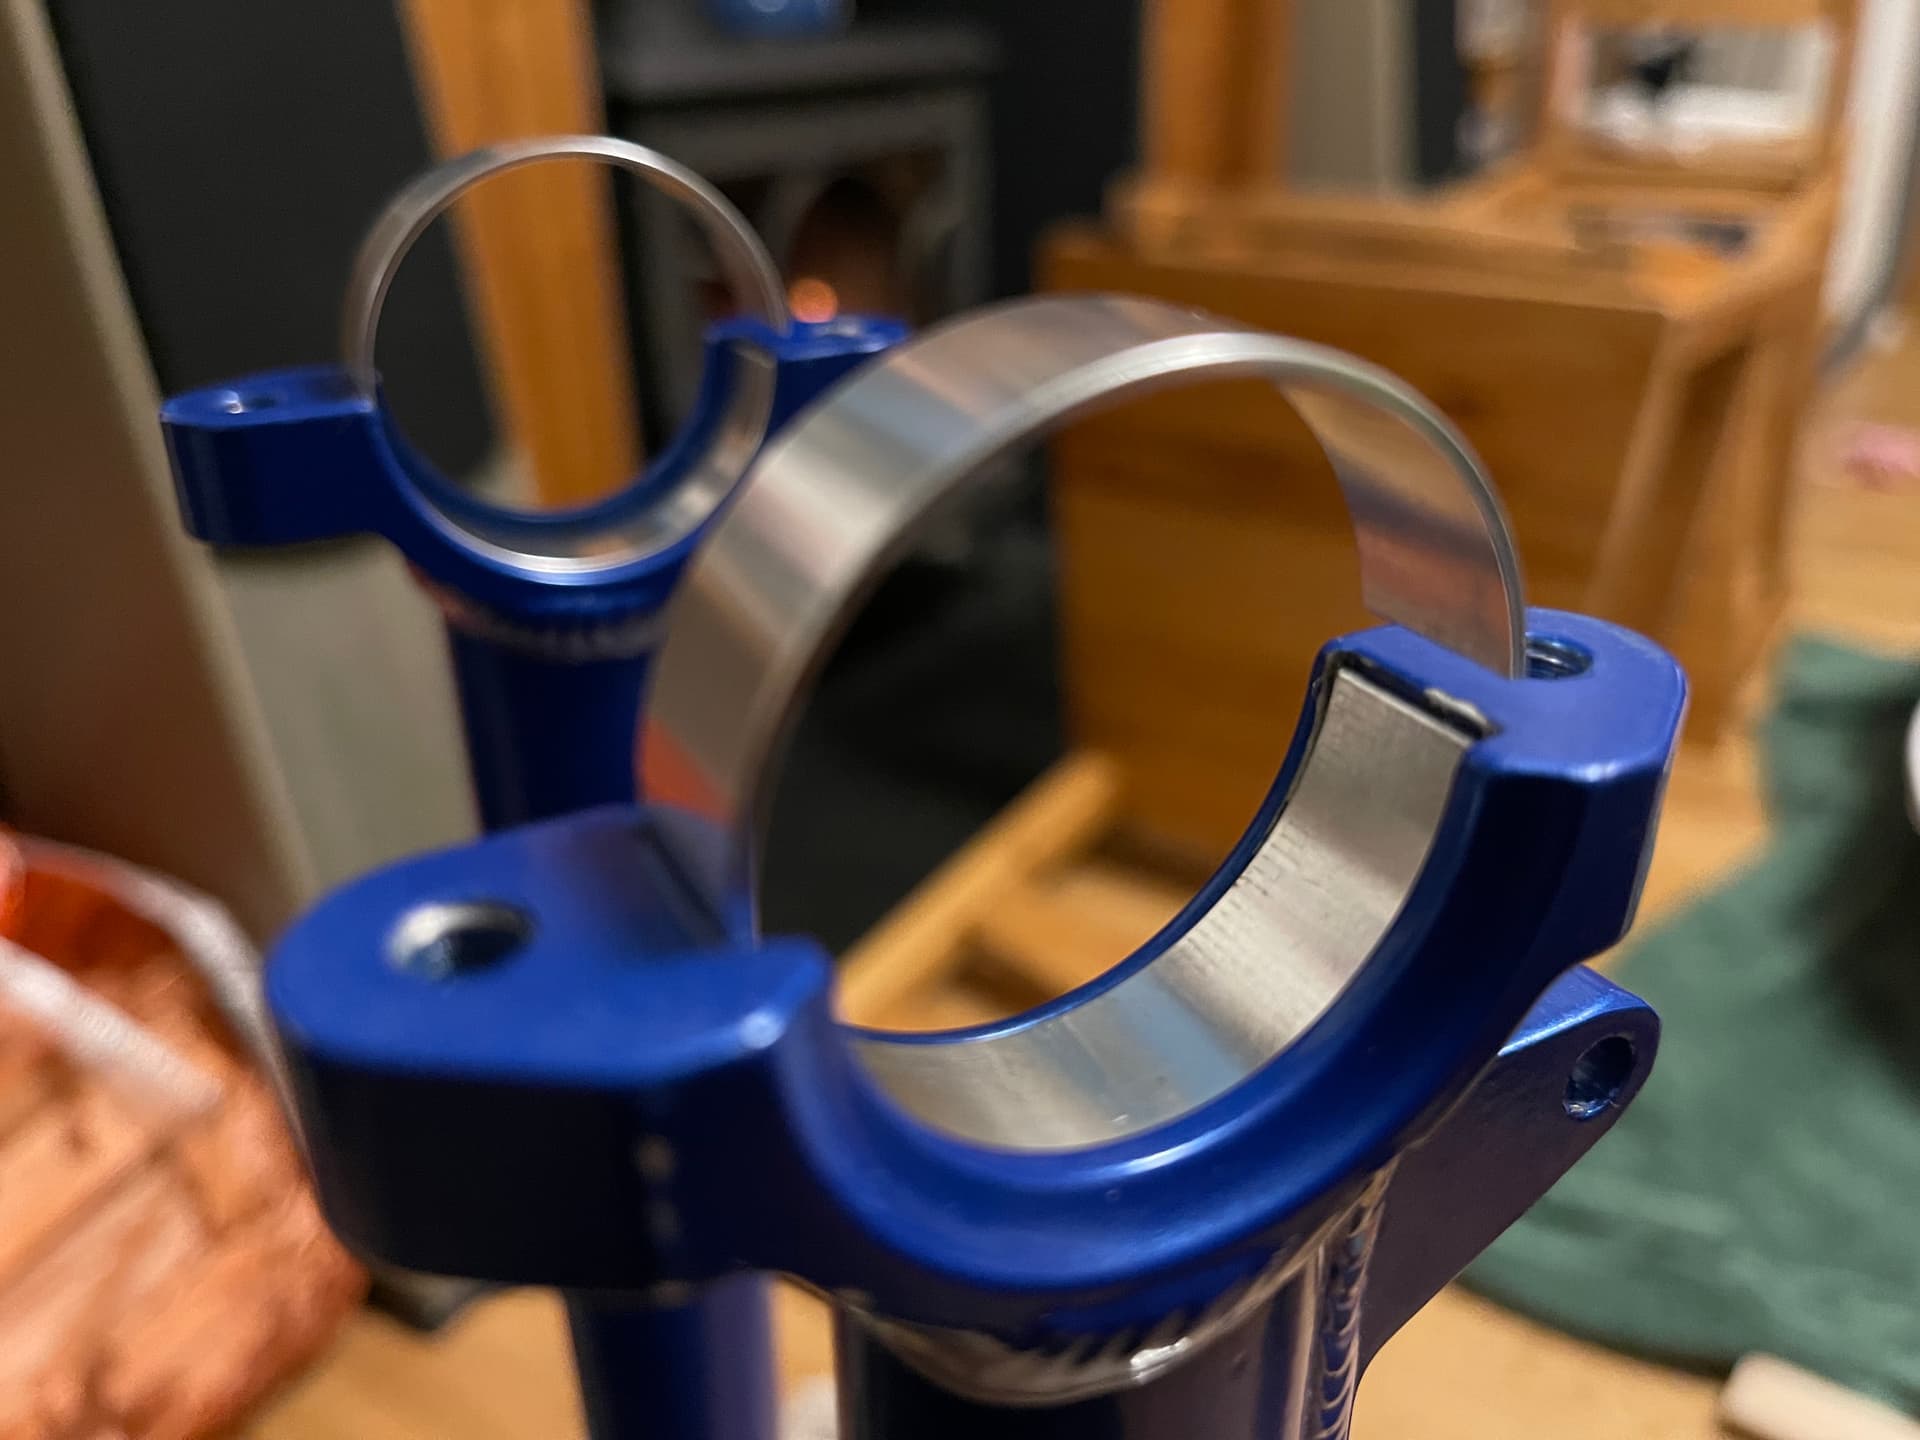
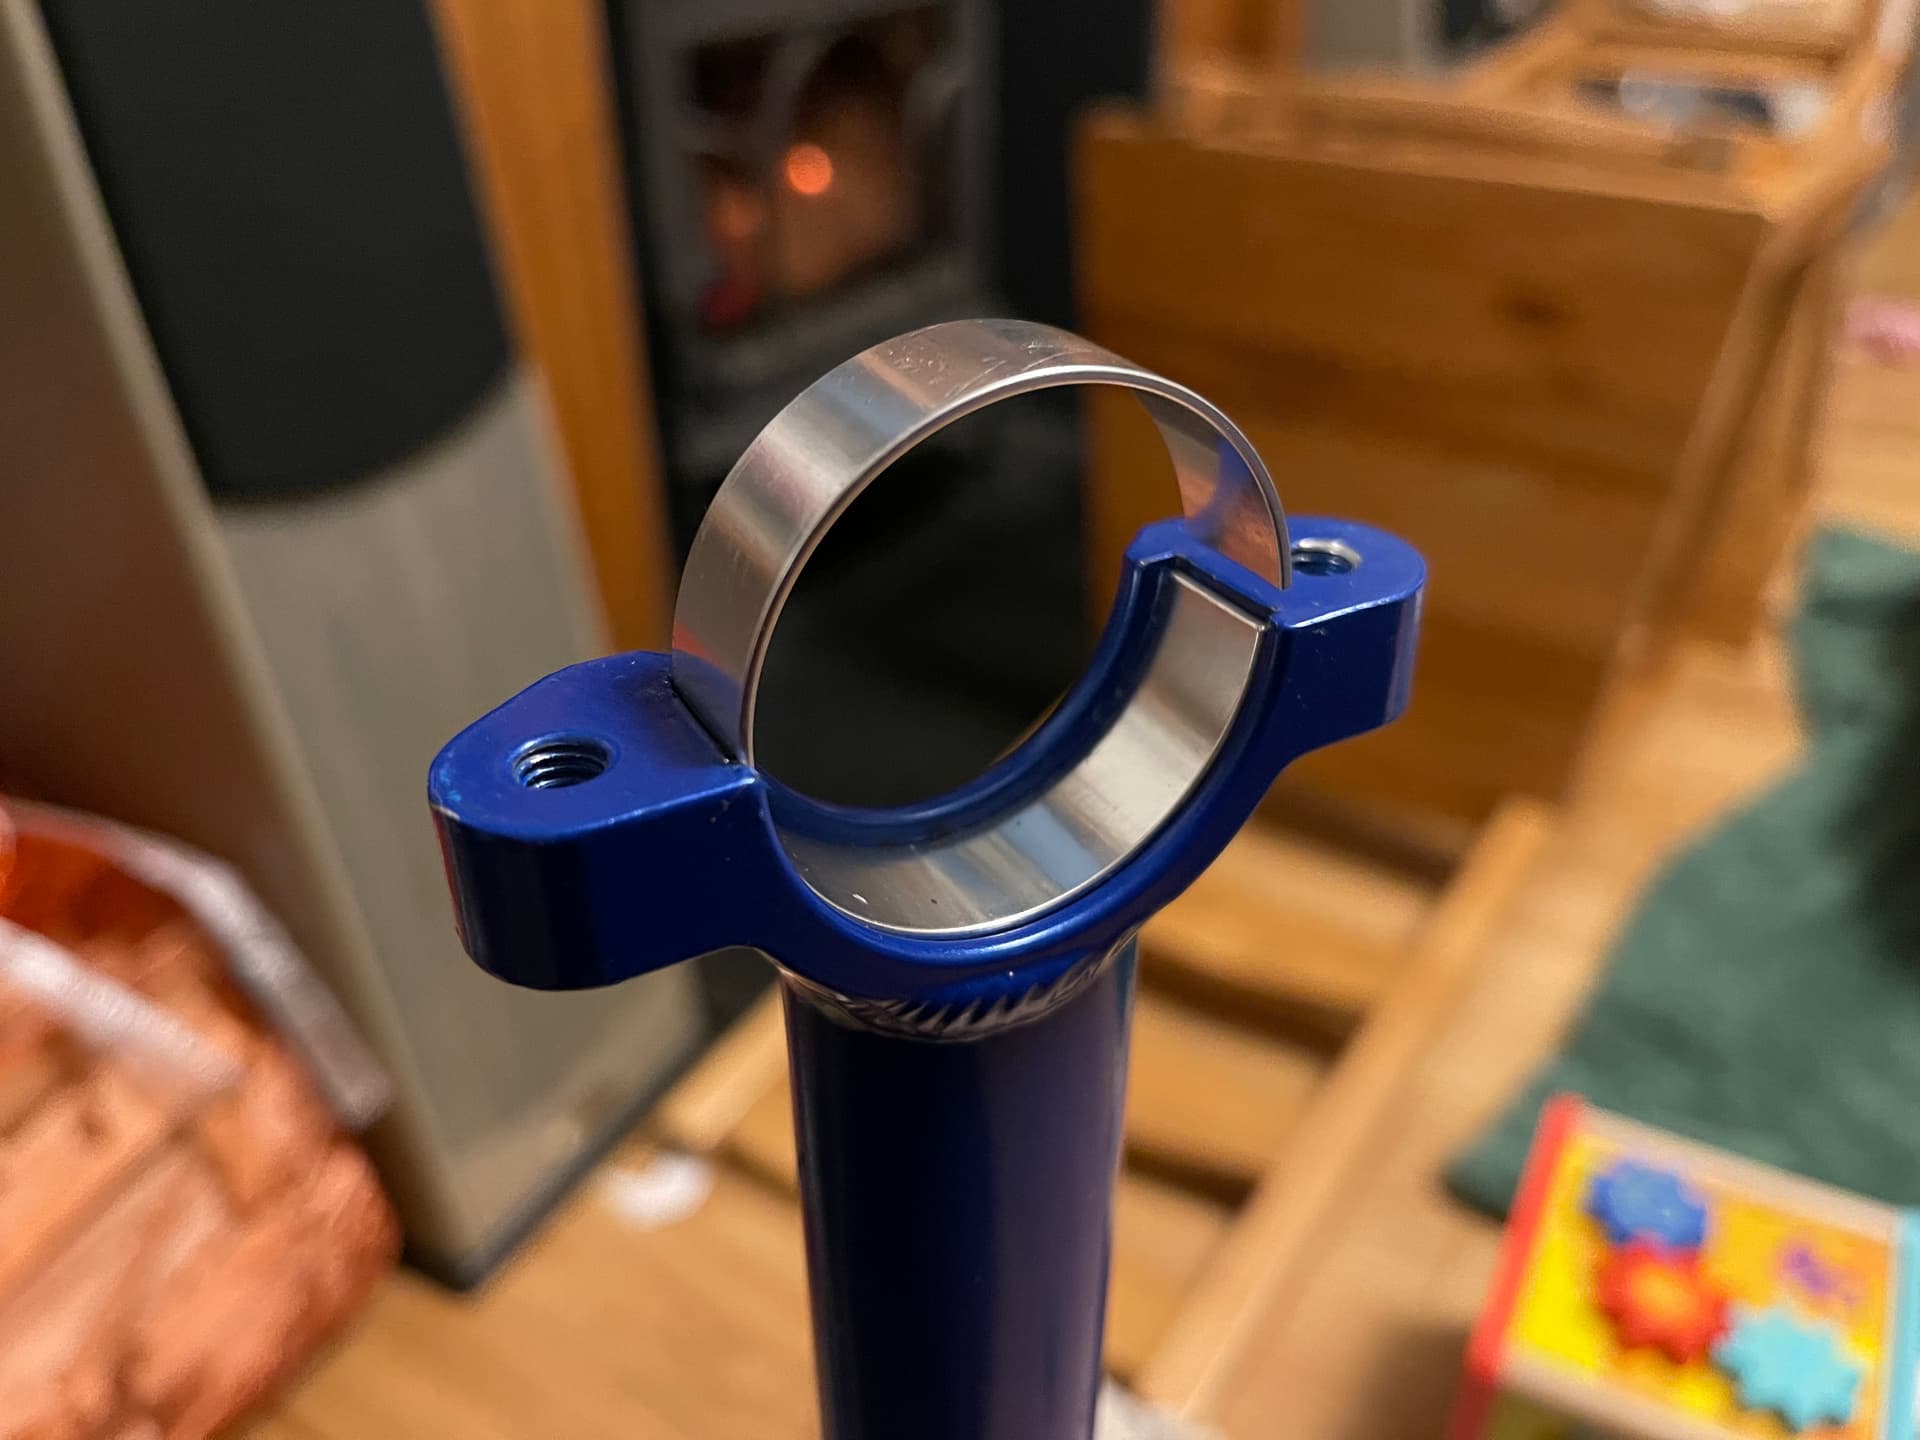
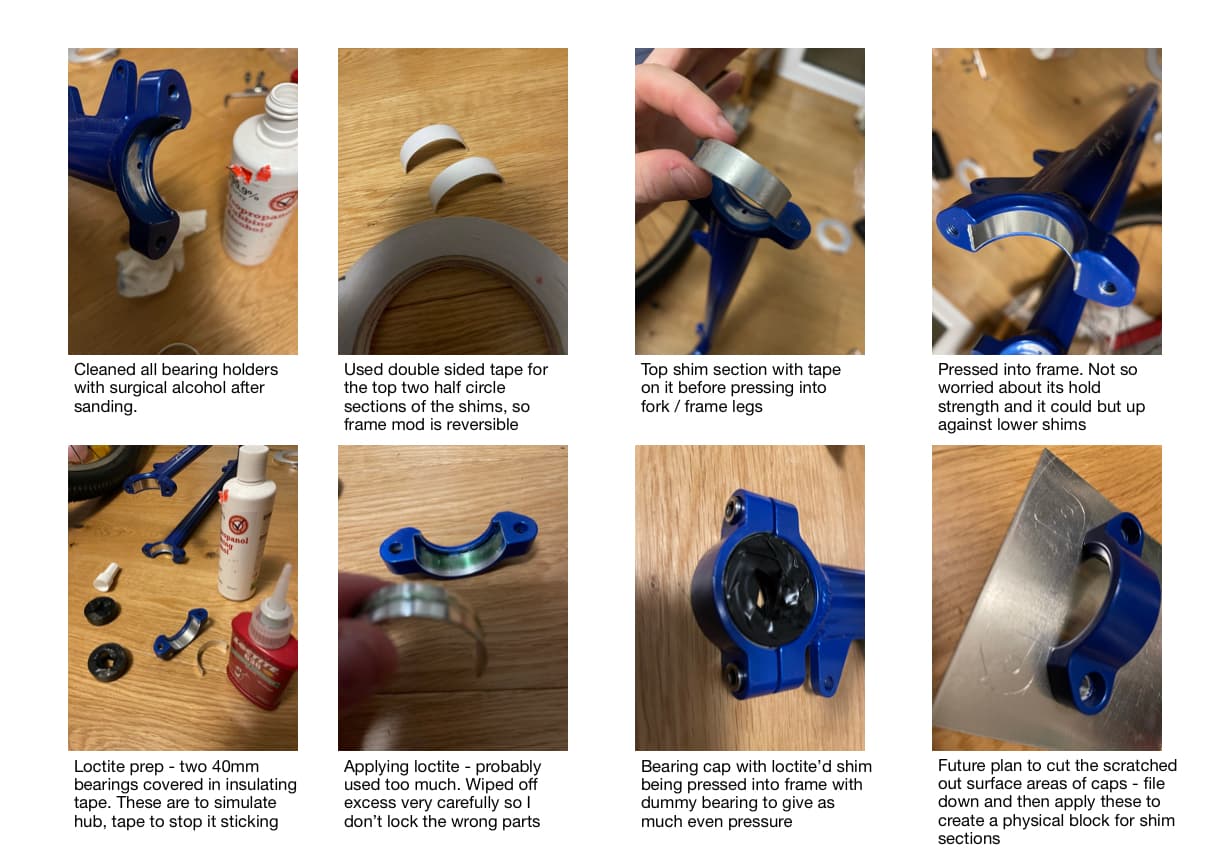
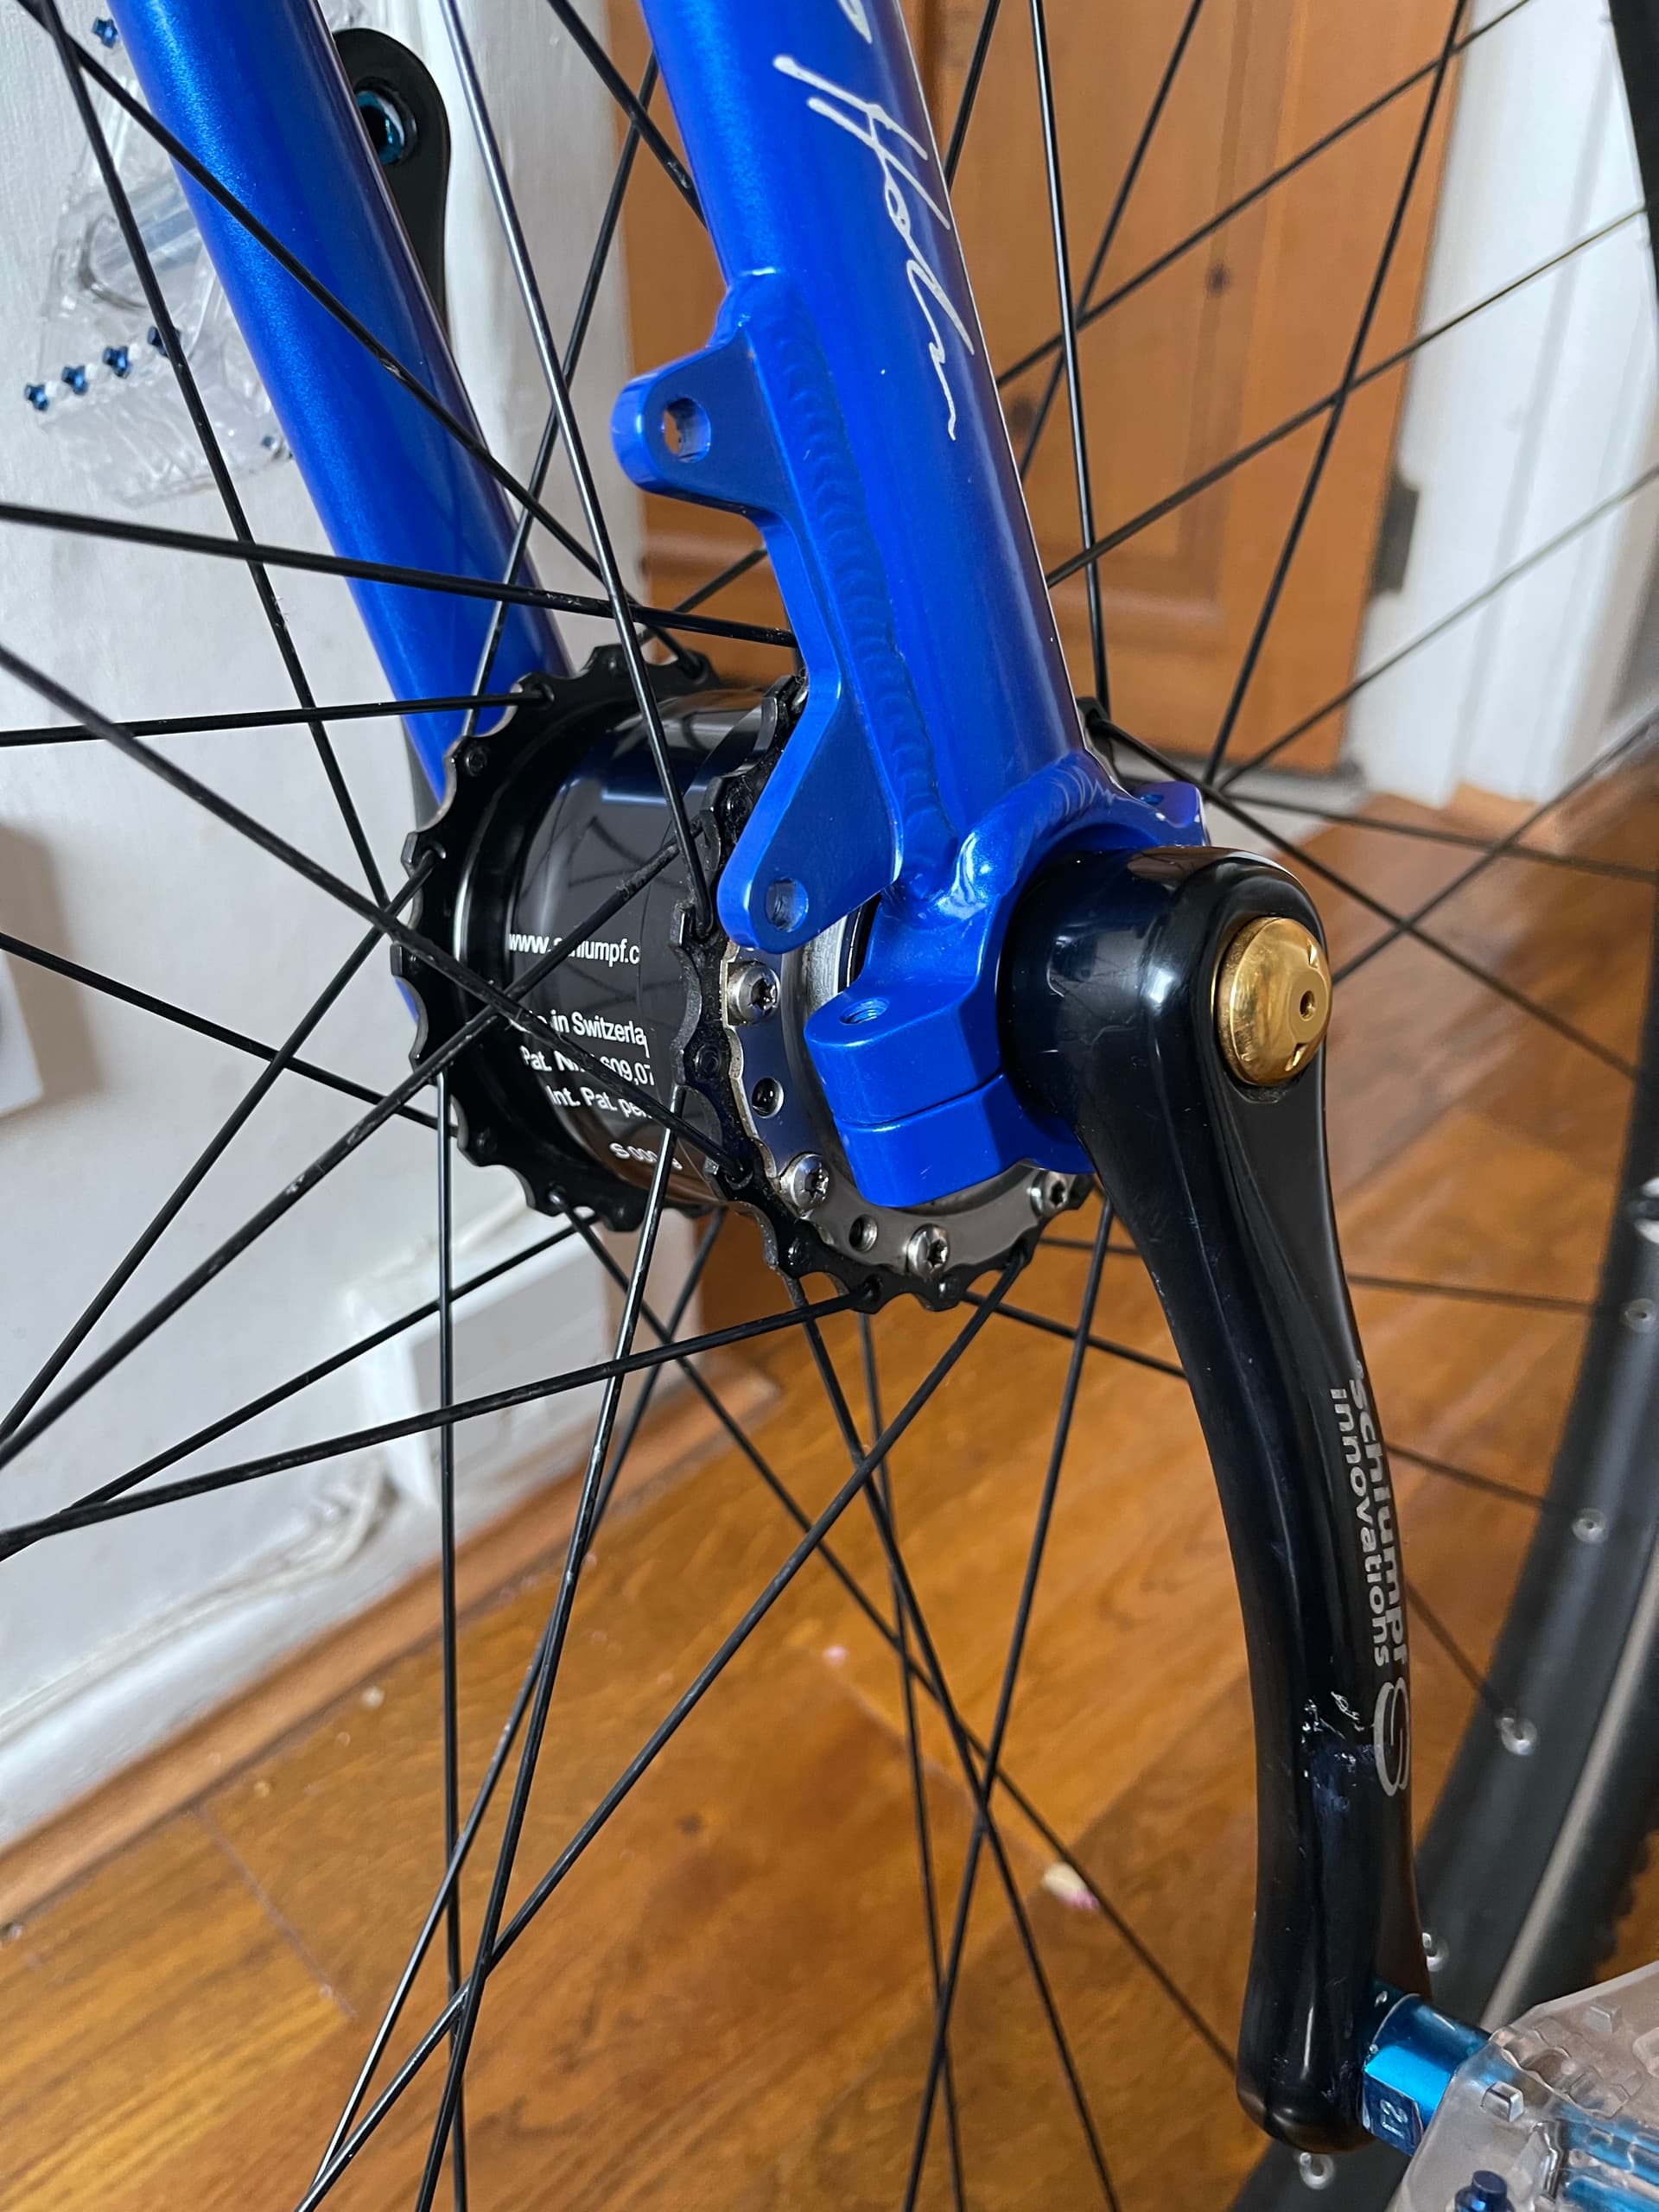
Yes I’ve in fact purchased the ones that UDC sell and am in the process of sanding down the bottom caps after which I’ll cut them into two half circles and loctite 638 the bottom ones, with the top ones being secured in my first draft at this with super thin double sided tape (so I can reverse the frame mod back to 42 mm if needed, as I’d then only need to buy a new set of KH bearing caps.
The reason this is a “complex” project (at least for me) is that the gear hub’s left bearing has a ton of reaction torque when in high gear - and it normally secured this into the frame’s bearing holders via knurling. But when shimmed the shim would just spin as it isn’t knurled. Hence my plan to try loctite.
Uff. Neither option is easy - and ideally I’d keep the Penny as is and set it up with a 36er wheel with 40mm bearings so I can ride that.
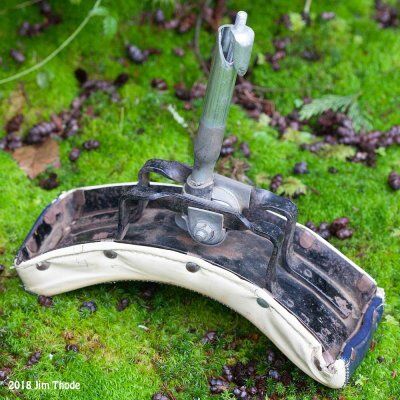
Centre bearing is just being used to prop the caps up. It’s a KH 40mm set I got to be able to set up my old KH36 wheel into penny farthing mode if needed.
Here is another thought. Take two thin washers with diameters large enough to overlap the shim, grind a flat at the bearing so it just touches. If it is steel it will be strong also and not let the shim rotate past if a slip occurs.
Thanks for the suggestion. I think I’ve been musing along parallel lines.
Looking at making some physical block think rectangles from a sheet of aluminium to file-notch in to provide a block to the shims… but perhaps I should try and find some steel washers — can’t quite visual you suggestion, and I’d need to borrow tools for that, but it does seem like a nice way to make a firm ridge block
My current idea is to in fact mod this frame fully and irreversibly on both bearing caps and legs so I can be 100% there’s no slip. I don’t believe I’ll be changing the set up any time soon… so seems logical.
I’ve ended up deciding to sacrifice this KH frame to the project so have removed the double sided tape from the leg based shims — and added small dots of aluminium tape to cover the mini hole and then put in the 638 Loctite and clamped tight overnight - so all shims are now next to non-removable.
Will be still investigating (with the help of a bike shop) the great washer idea from @lobbybopster - as it does on balance seem like a great physical way to got to block the shims from rotating - as well as seeing if I can get the bottom caps fabricated to fit a KH frame but at 40mm
We’ve had a bit of a life emergency here, but thankfully my wife is alive and recovering. So this project was naturally on hold. However I need something to distract me in the evenings so I’m back pondering this Schlumpf project.
I have already made some head way with the washer idea, so this may be something I continue to tinker with. Sadly (however it’s good I think overall) the loctite in the KH frame legs didn’t work or stick so I removed them and cleaned it all down.
Leaning towards returning the KH36 to fixed wheel duty and my focus has shifted to trying to use the older NightRider frame in the Penny.
I confess I don’t like breaking something that is already custom built however I don’t have a passion to ride a 36er Penny so I feel pretty sure I’d enjoy using the frame as a G36er and not have to worry at all about shims.
When I first took it apart I thought reverting it back to unicycle duty would be null and void and a dead end. But on second review I think I may find my way there - and more easily than the shimming of a KH frame.
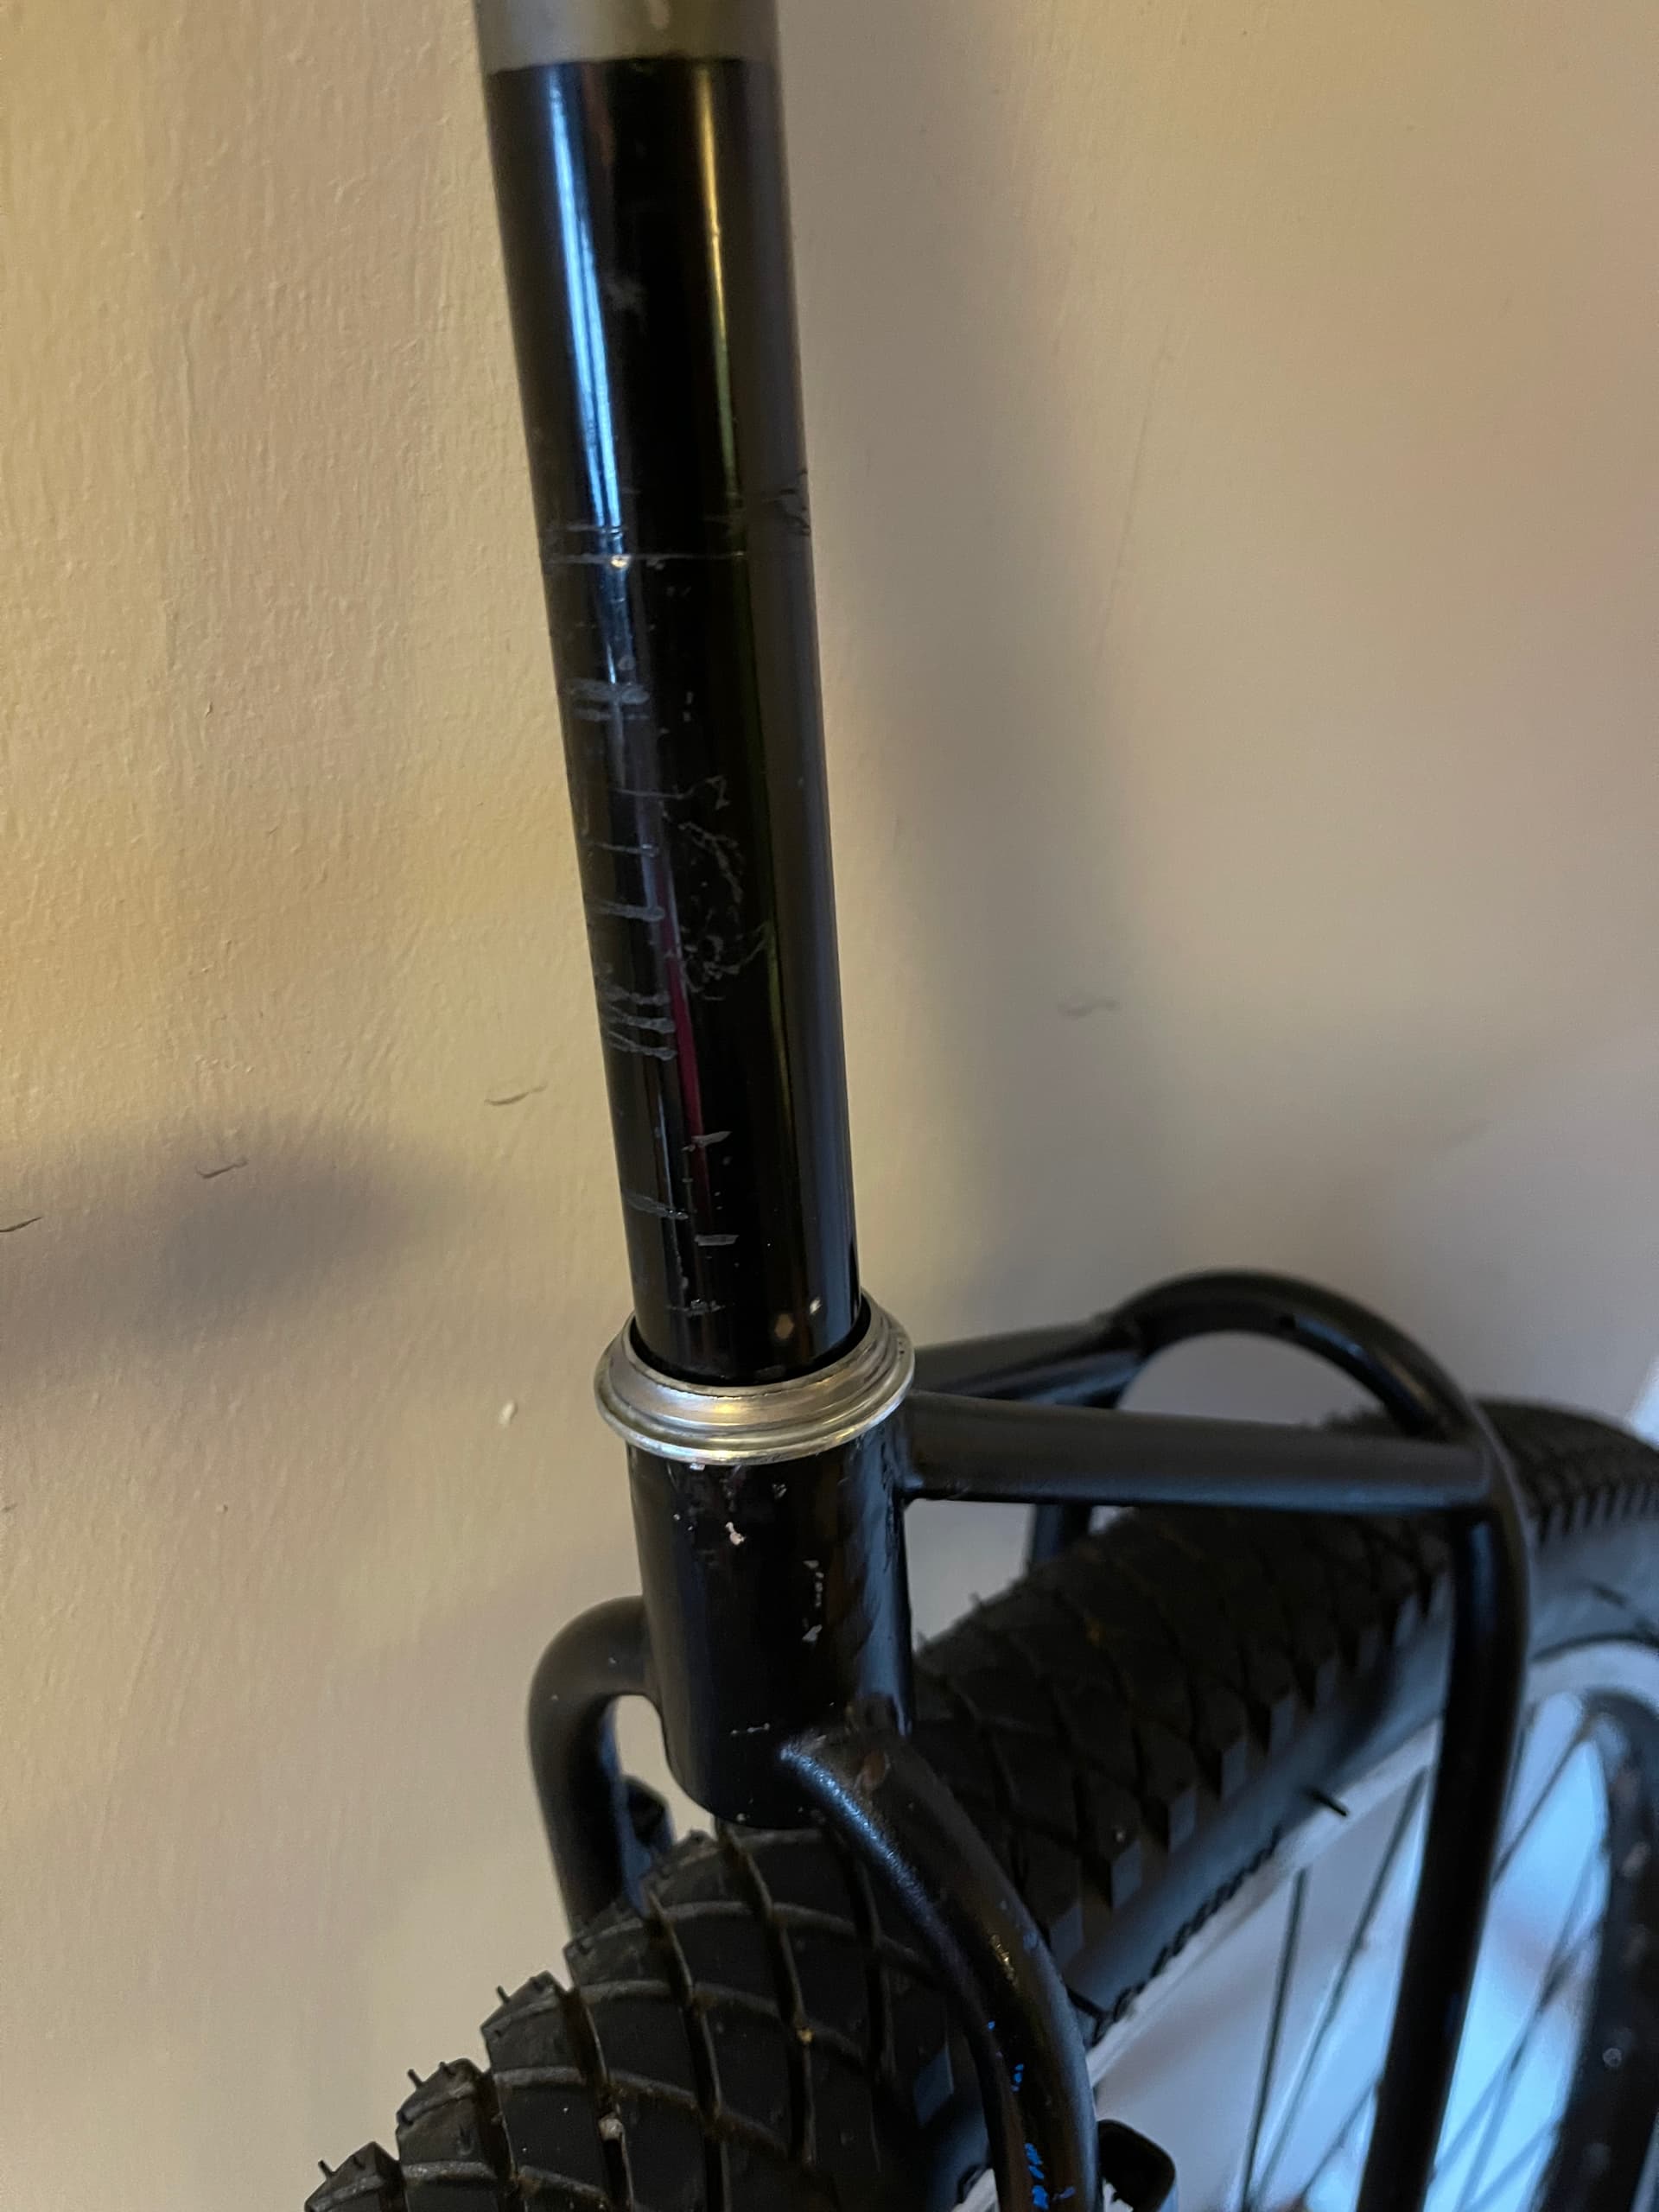
There’s a stem post welded into the previous seat post space and the clamp area has been cut off. I don’t know anyone local that is friendly enough to remove stem and weld a new seat post housing - but that would be ideal I think provided it doesn’t weaken the frame.
The stem appears well and truly established in the post hole and I presume steel is going to hold up from the weight of someone sitting in a saddle mounted to it above.
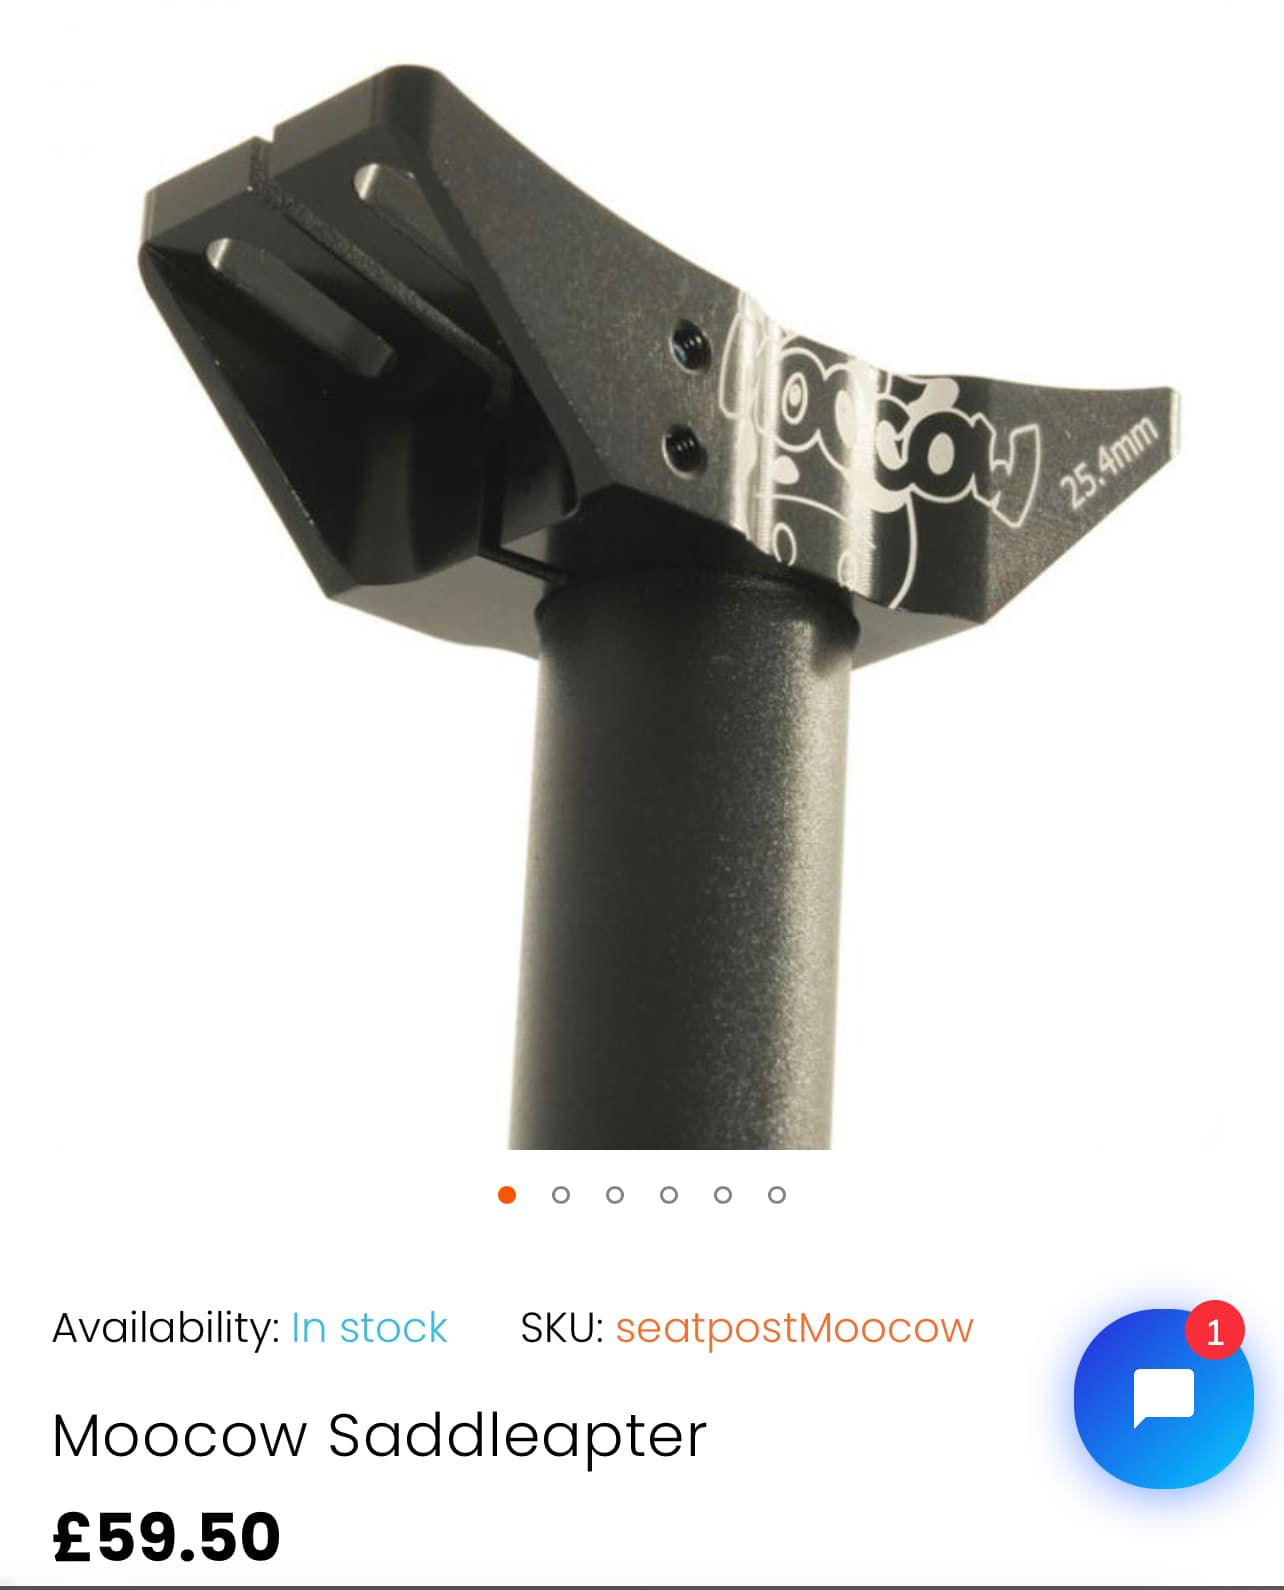
That’s the new problem to solve. How I attach a unicycle saddle to this bear 22.2mm pole.
Enter this item I searched for, as it could be a quick win if not that amazingly sturdy. I’m 5’ 7” so I don’t think there’s in fact a ton of flex on any seat post for a 36er and I generally have a small amount of the post above the frame.
This item would allow for a very small amount up and down adjustment but I’d probably just aim for it to be at my heigh and then leave it.
Which chimes in with the good suggestions on the Trading Post post from @JimT and @Unigoof ()
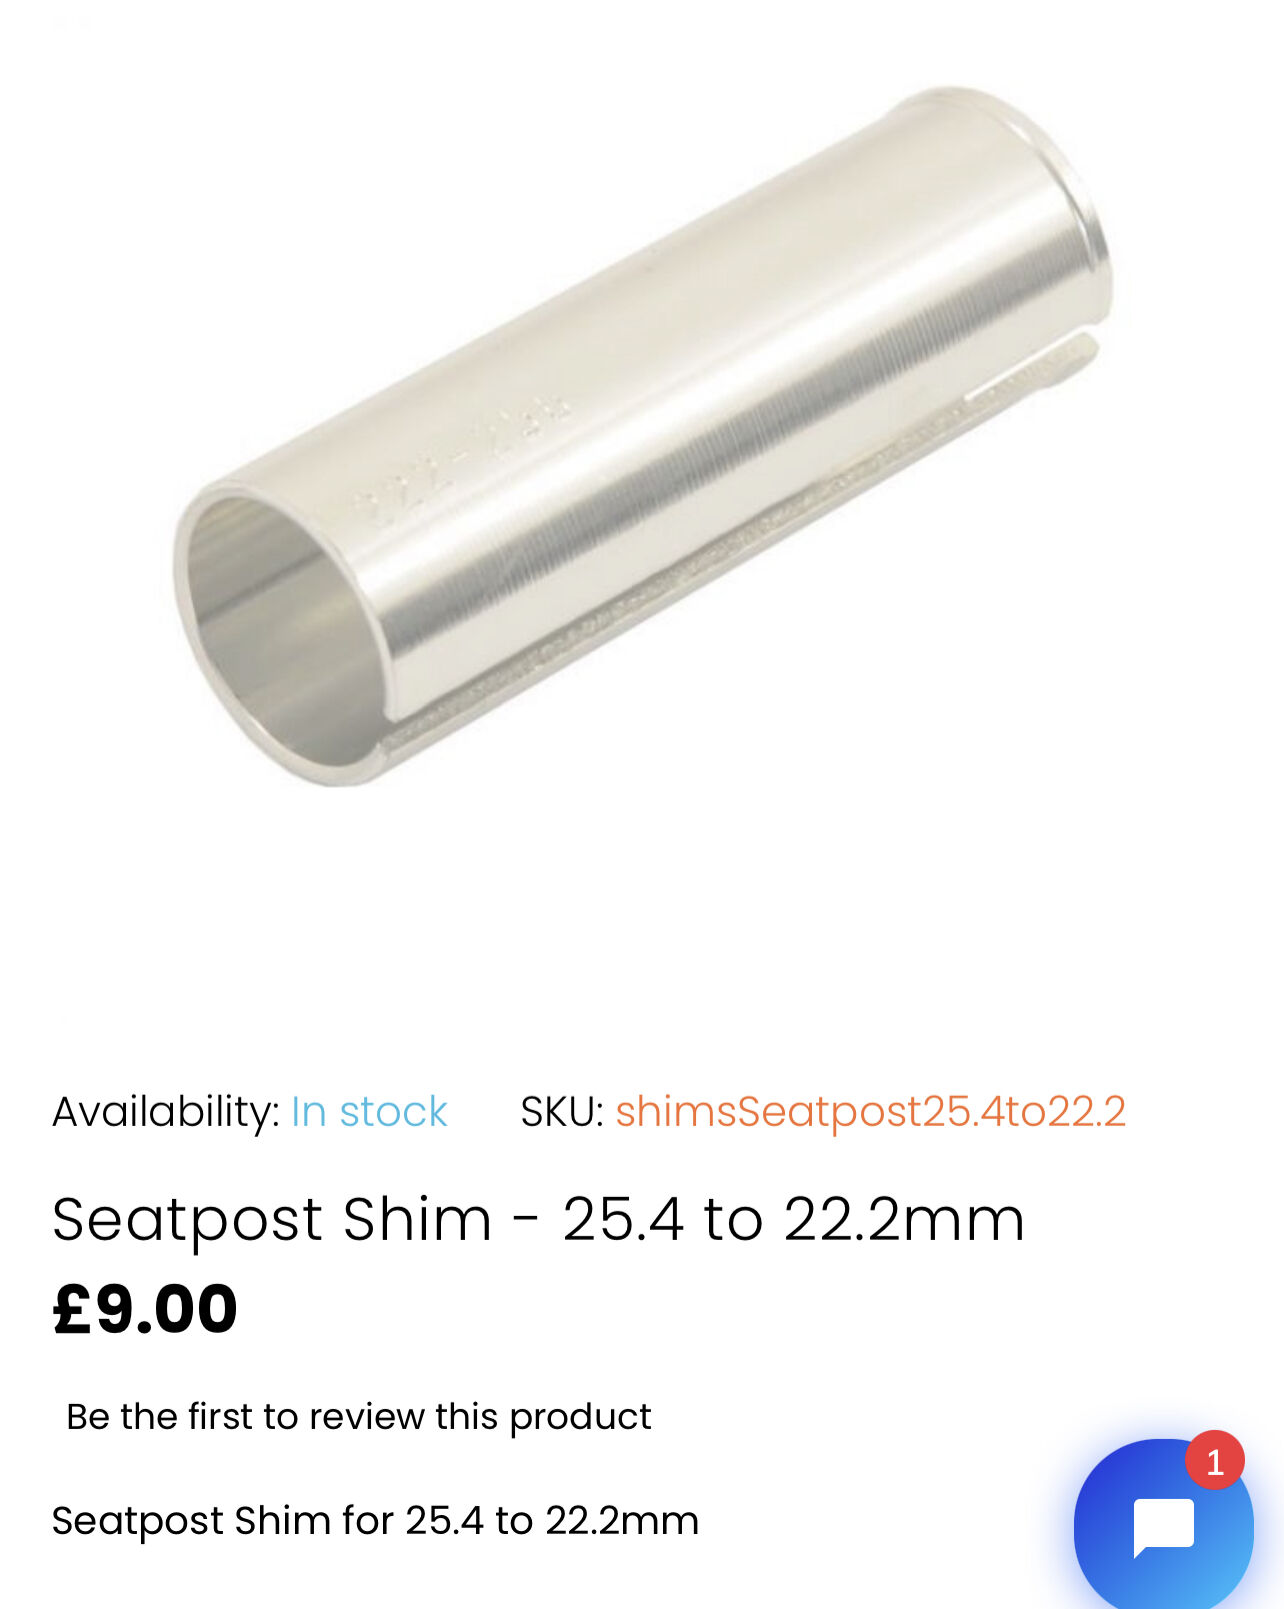
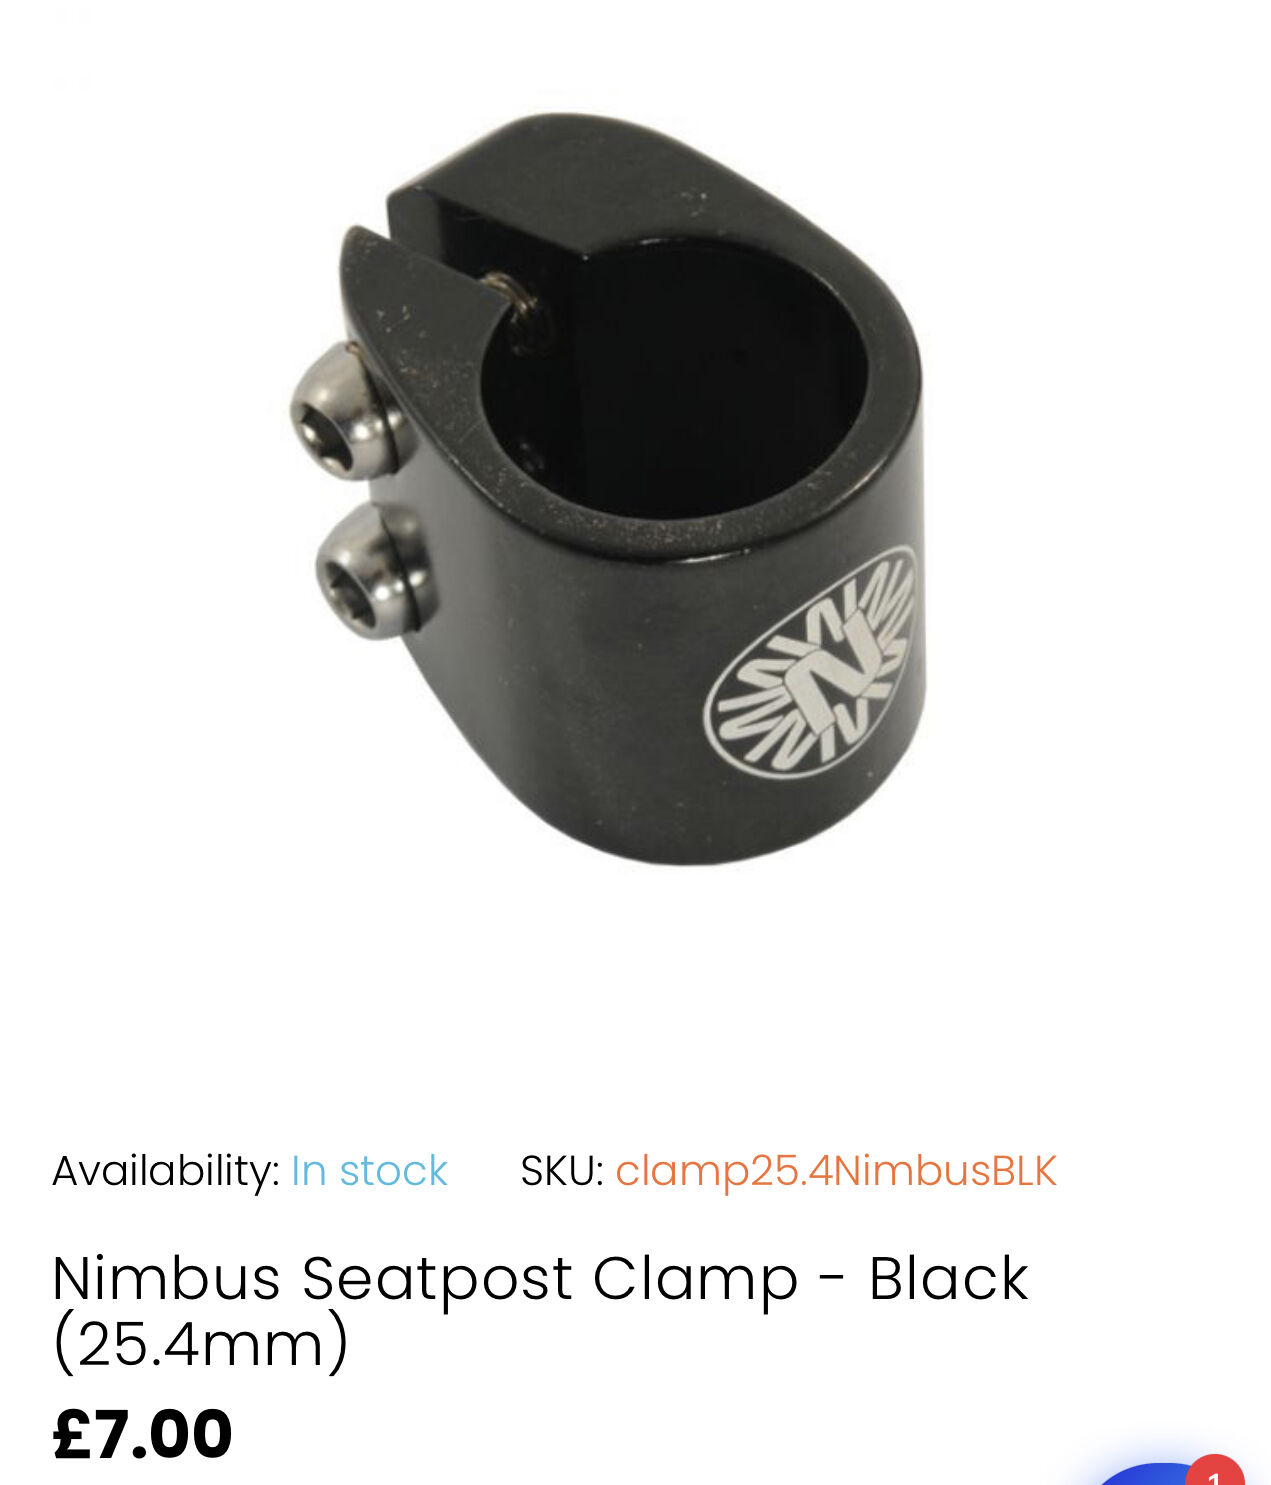
I’d use the shim to pad the pole out and up to match the Moocow mount and then file down the lip on the clamp so I can clamp the shim at the bottom of the stem / where it meets the frame. This would give added support to downward loads I’d hope into frame sections itself rather than relying on the welding of the stem internally.
So I’ve exchanged problem of the 40mm bearing shims for this seatpost and saddle mounting affair. But I feel it is likely the best route for hub longevity and safety as once the saddle is set and works I’m unlikely to shift it around much. And if I find a friendly welder perhaps I can find a more beautiful solution.
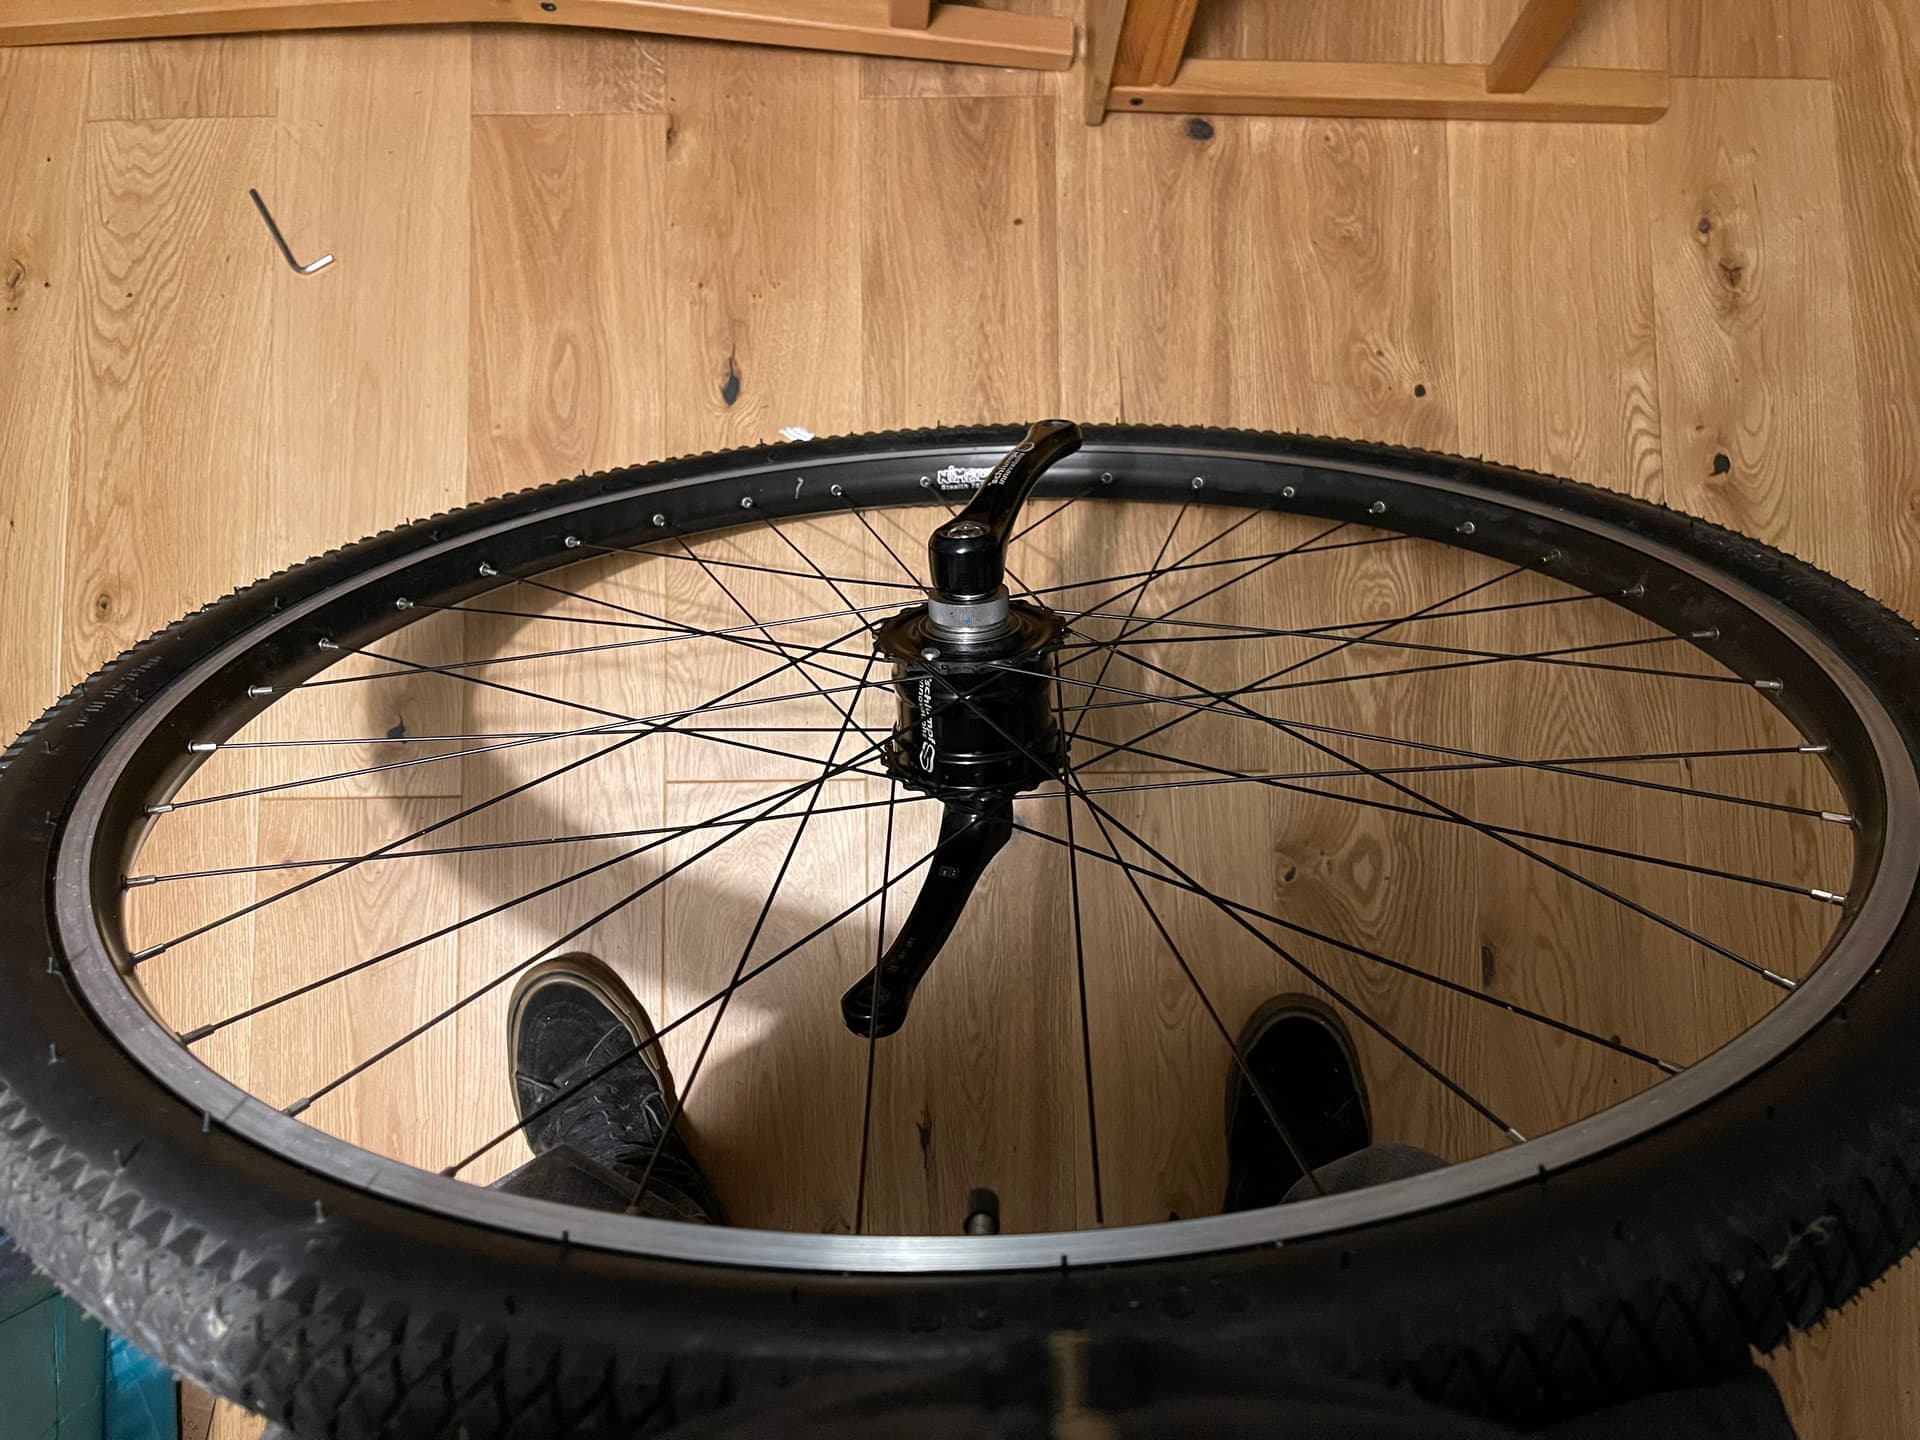
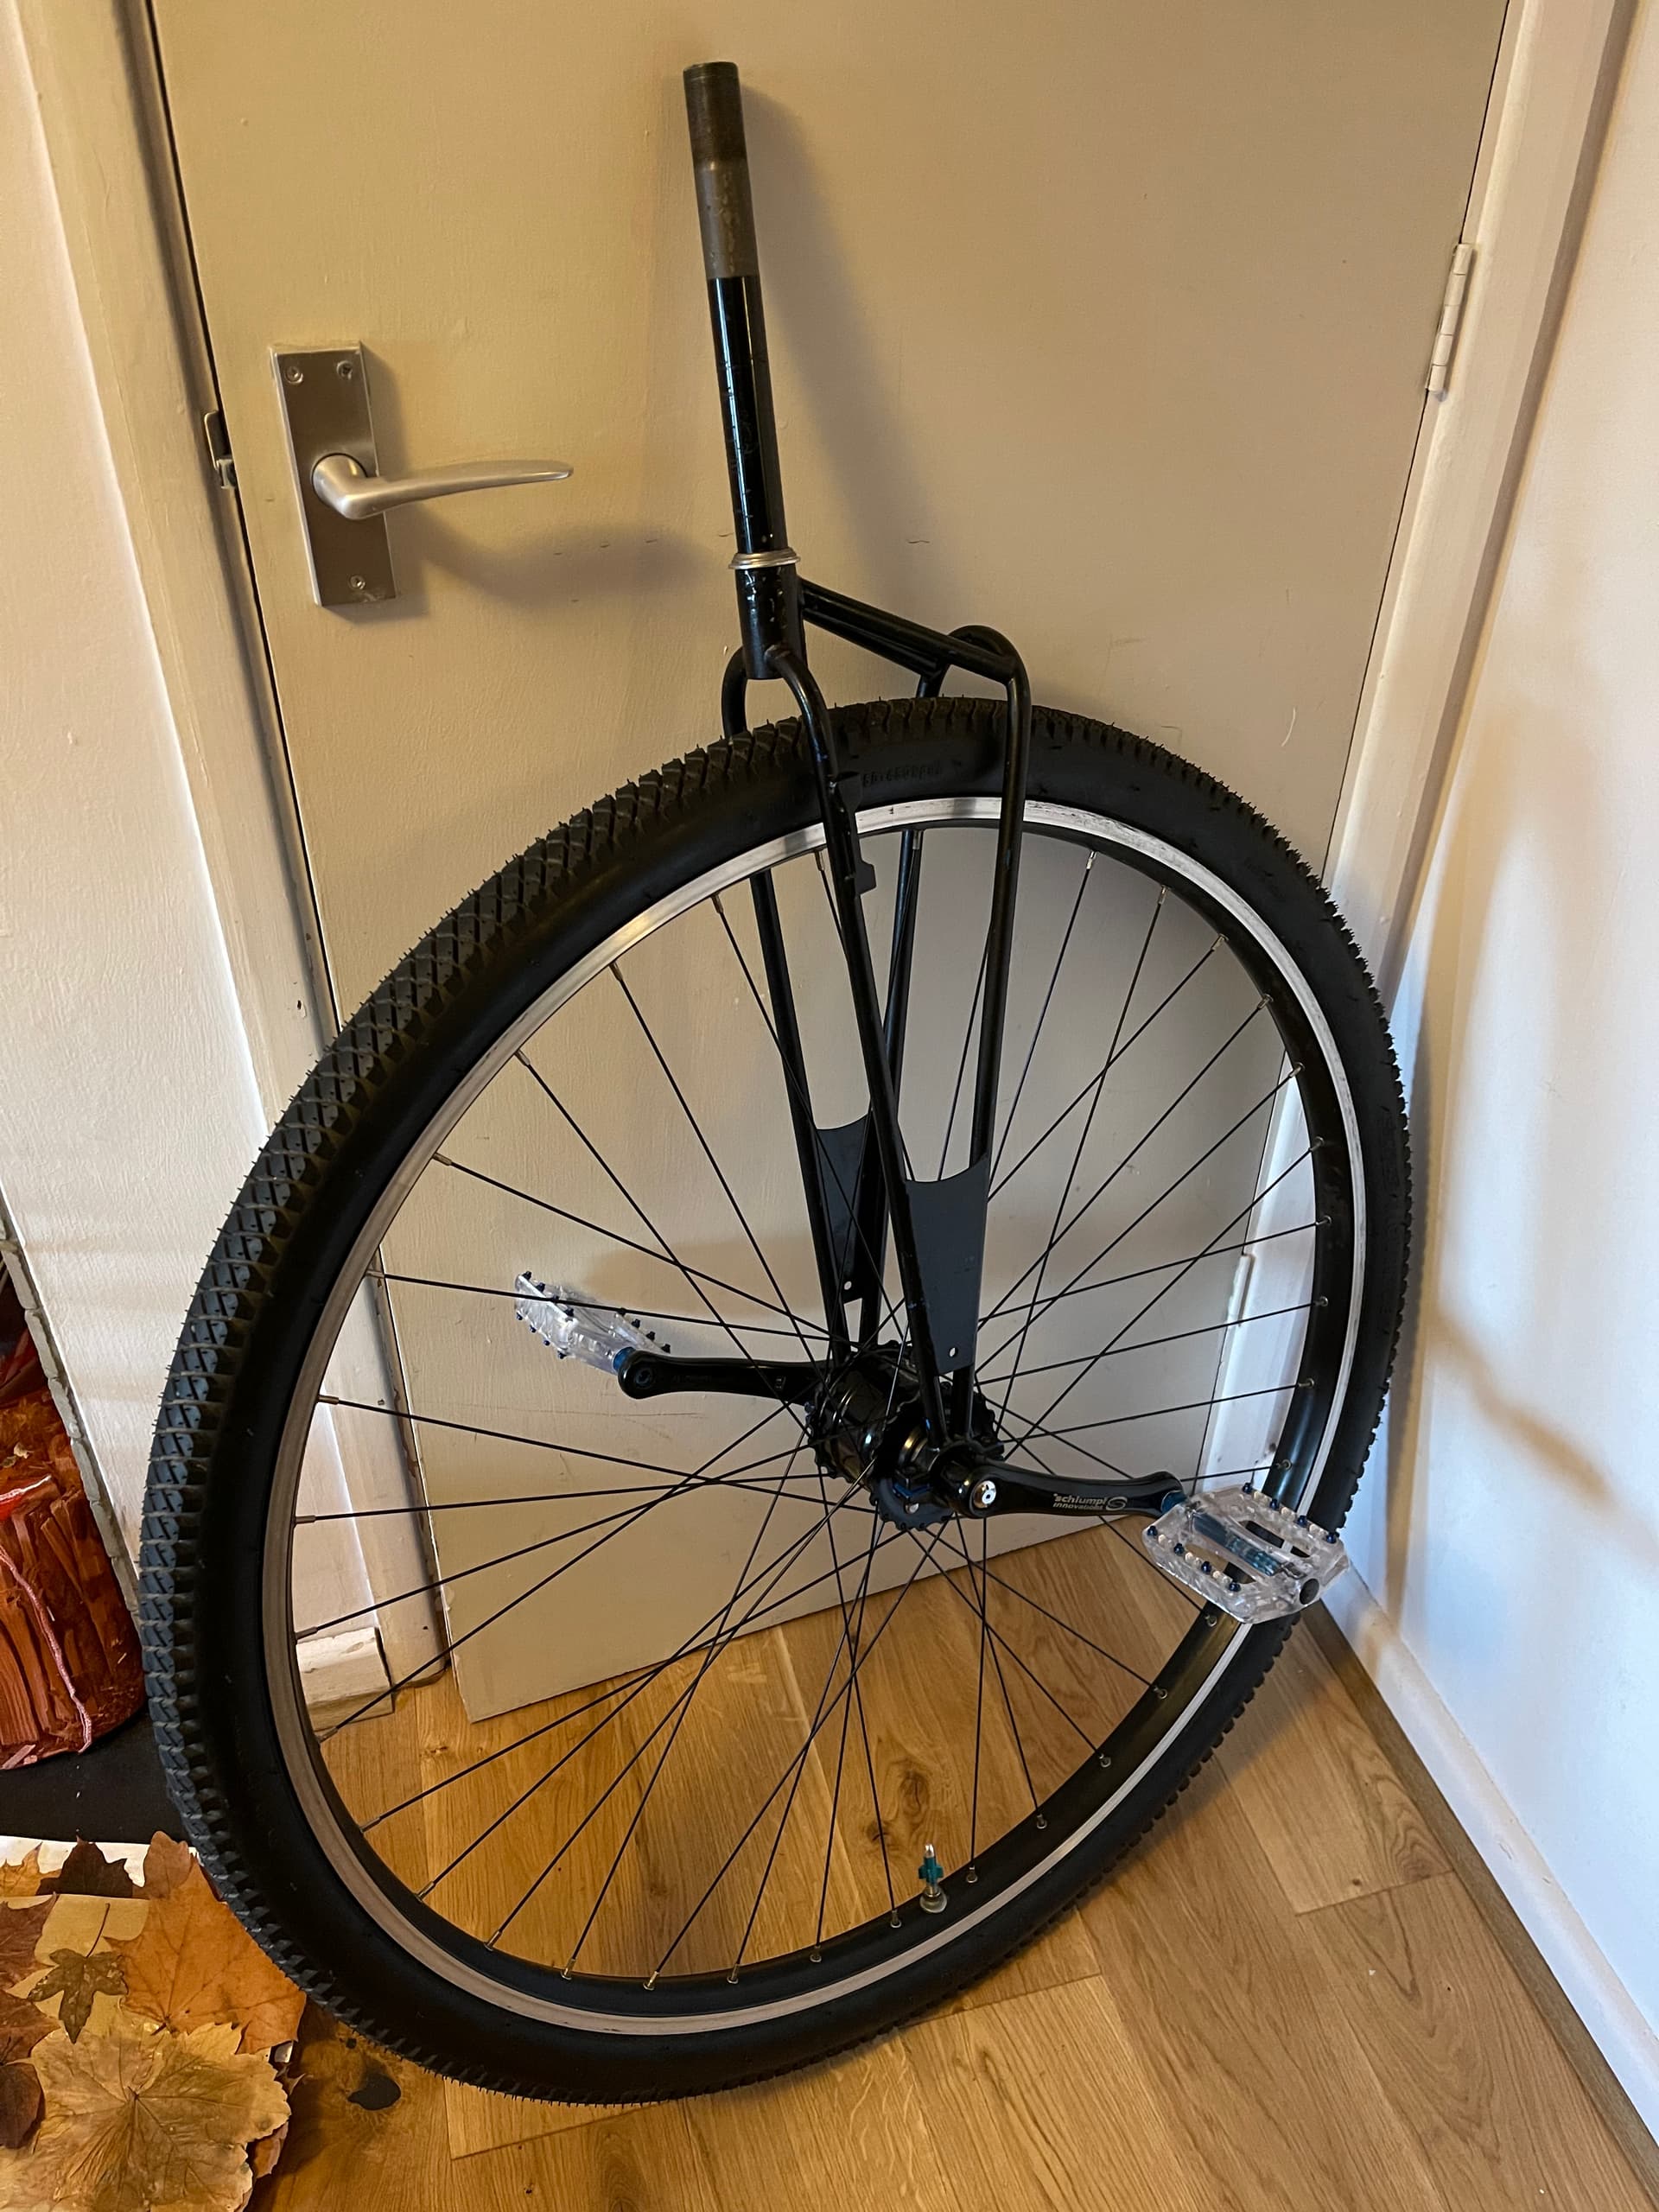
Odd side comment to this - the frame has been already cold set to 100mm and was run backwards when in Penny mode. When mounting the wheel is the orientation as you would for a unicycle I notice the wheel no longer runs dead centre to the frame. It’s not a truing issue as the wheel is true when checking in the KH frame and the build is ace - but it is more something to do with how the frame was set to 100mm I think. Odd all the same that this changes when you flip the wheel?!?
I think I’m going to have to live with it as my guess is it shouldn’t matter too much - I don’t fancy taking the cranks off and reversing the way the Schlumpf wheel runs (backwards, gold left, silver right) - but if brake rub is the next issue it might just have to do that.
Hello again,
Was hoping you had already solved the issue but then again you have had obstacles. I do not know if this would help but a seat post that expands at the inserted end like a bike handlebar stem might help. I am assuming that you will not be cutting down the seat post on the frame.
Not the seat but the end configuration.
Thanks again for chiming in here. I really hoped I’d resolved it all but it may come down to what I’m able to feel secure in using. Yes the shims probably would hold but I was in the mode where I’d be thinking and worrying about it so it wouldn’t make for a relaxing or meaningful wheel to ride.
(Warning: I have a bit of Schlumpf Hub over caring OCD! )
I like your idea and I was wondering if there’d be something around that would work like that but the ID of then stem / post that is welded in is pretty narrow and also has a ragged inside surface from the way it was attached.
It feels like I’ll need to use something that clamps around and to the pole / stem as it is now and make do with the fact I have next to zero up/down saddle adjustment.
In answer to your point - sadly I do plan to cut this stem off and it is way too long at this stage, and of course once I do that there’s zero option to rebuild as a Penny. It’ll need a large chunk cut to allow for me to sit in top and I suspect ultimately I’ll be lucky to get a saddle fitted that is strong and works for me - this will be a 5’7” Road Schlumpf and not adjustable.
So wish I had more tools and/or a more helpful LBS so I could look at cleaner solutions, or adjusting this with a proper new seat post tube being welded on.
I’ll still tinker with the KH frame washer idea you had before as I did get nearly there with that. I’m just trading one issue for another at the moment
OK then, Do like a Schwinn Uni and drill a hole thru both the seat post and the stem and shim up or down the difference. Just make sure the seat and wheel are properly aligned and your done, orrrr? Remove the seat and post then you could drill another hole 3/4" below it on the frame stem only. Then two more holes on the seat post at maybe 1" above and bellow, so between the two holes on the frame at 3/4" you could jockey between the both to get 1/4" increments adjust up and down. just a thought.
P.S. The post in the picture is 20.4 or 13/16" Jim T’s pic.
I also like Jim T’s reverse post for the seat.
Ya I would not do that either. First check if the wheel is centered and true to the hub, if not adjust it over. if it is true then check if the frame legs are equally centered on the frame. If they are not it will ride like on an off camber road.
Well now Lobbybopster’s idea is quite interesting in that with a little extra work it could turn back into a penny. If you do as he says and cut the frame to a reasonable height and drill it and the seat post, then you could do the same to the discarded frame material with scrap tubing that has a slightly smaller OD and that should enable you to bolt that extra long frame back together. Hopefully that makes sense.
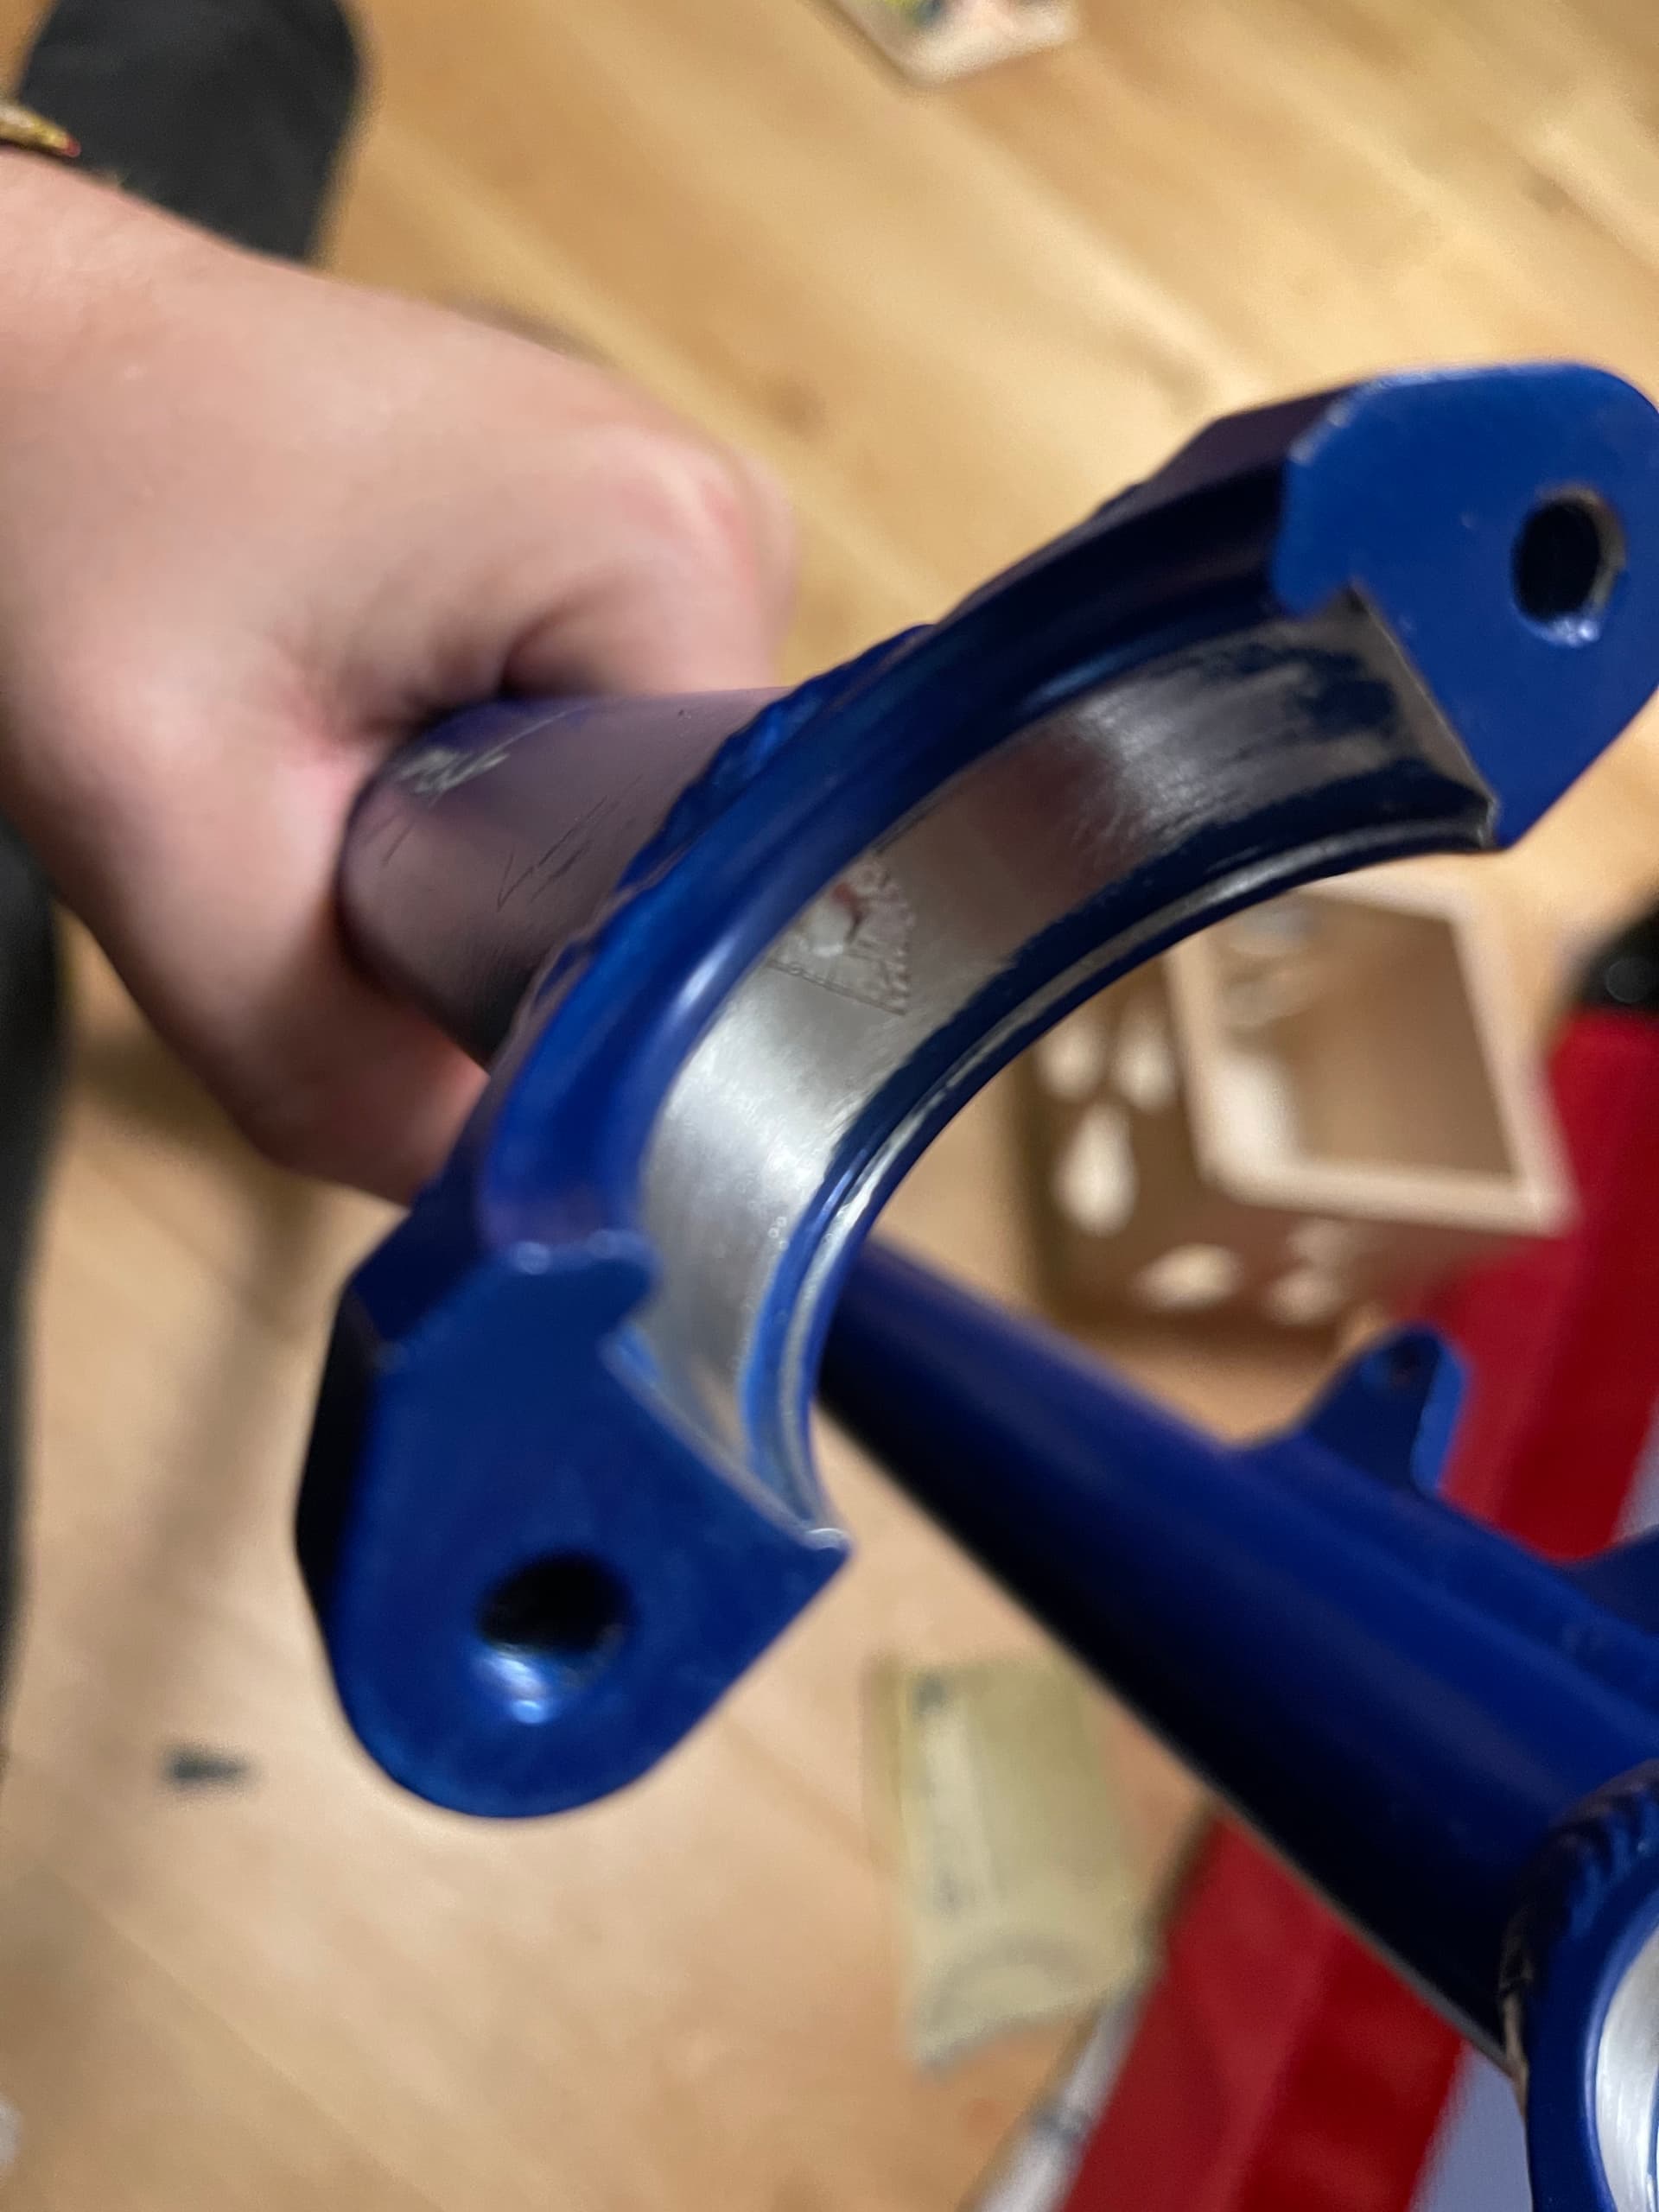
Thanks again! Happily I have got it aligned. I think it was a combination of how the old NightRider frames inside bearing mount lips were filled down - the knurled side being possibly ever so slightly higher and resting more in the side space of the bearing.
Furthermore the non-knurled bearing is ever so slightly smaller and the flipped cups also meant the knurled side was in a space that had more paint / less wear.
My fix was to file down the inside bearing mount lip to match the other side and pad the non-knurled bearing mount with around 10 very thin strips of aluminium tape. Amazing how such a small adjustment at the bearings gives a good few millimetres of adjustment at the rim side to side. Makes sense and at least this problem is solved.
Thanks also! I agree there is scope to have a back up to move back to a Penny. It will be tricky as the handle bar clamp bold needs to have full access to the stems internals but if the smaller tubing’s ID was the right size then it should all work.
I’ve come to the realisation that getting the penny up and running would cost a bit of £ due to building a 36” wheel for it etc., so while I’ll definitely look at keeping all options open to reverse course, I doubt I’ll feel inclined to spend money on this project any time soon.
Both suggestions here are great and I’m now considering doing some test runs and cutting a slot into some tubing to see how I can create my own ghetto seatpost insertion space that a clamp can compress round.
I’m short on tools but not ideas and thanks to this forum I’m able to also chart my thinkings and get support which really helps
With respect to the shims, I think you mentioned you don’t have a lot of tools, but have you considered pinning the shims in? A drill and potentially a small grinder like a Dremel would do to get this done.
I’d consider doing this with either small countersunk rivets through the shim and bearing housing (say 2 in each shim) or small countersunk machine screws (say M2.5 or something like that) either tapped through the housing or just drilled with a nut outside. You could even just glue rivets in as they would be mechanically fixed by the bearing against the head. If need be the countersink could be deep enough that it goes through the shim and also goes into the housing (to get the rivet/set-screw head in so it is flush to the inside of the shim). If you didn’t get it deep enough you could easily grind the screw head down flush to the inside of the shim with something light like a Dremel. (The countersunk head is just to stop these falling out – the bearing housing isn’t really thick enough to allow you to use parallel pressed in pins like roll pins).
I would think that four of these for each bearing (two in the top shim, two in the bottom) would be fine for handling the torque without shearing.
I can see what you mean and I thank you for the input.
I would do this route if I didn’t have the already fitting NightRider frame - and perhaps even now my worries over drilling rivers are unfounded. But given how the bearings on schlumpf hubs are sensitive and can easily develop wear from being held in an uneven surface, I know I’d be constantly wondering if the pins or rivets had somehow worked their way into the bearing shells on the hubs.
Given also how non-user replaceable much of this area is with a Schlumpf, I think this adds to the desire to solve this critical area with the least risk as possible.
I do hope to get some spares for bearing removal and repacking so as to future protect my options overall as I like to feel semi-ready and possibly able to do my own servicing down the line, but while the hub here runs smoothly I didn’t want to jinx it or land myself with a grinding bearing assembly what was next to being beyond repair.
It’s a shame really as I think the shims and washer block idea was close to working, but I realised I didn’t “need” the penny farthing so it was the route of least stress and complexity to use that frame and run with the saddle attachment.
Thanks again - and hope that whoever else reads these project posts finds some value for any oddball and niche projects that they may have a-brewing one day
Success!!
— I’m basically finished on the Schlumpf 36er NightRider and I’m really happy to have gone this route as it feels solid and “as it was meant to be”…
It’s been a faffy ride of a project and I’ve ended up with a different outcome as there’s no Penny Farthing up and running - meaning I have a fixed NightRider 36er, this Schlumpf 36er, and (shortly) my KH36er being put back together and as there’s no need for 2 x fixed 36ers I’ll likely advertise for sale.
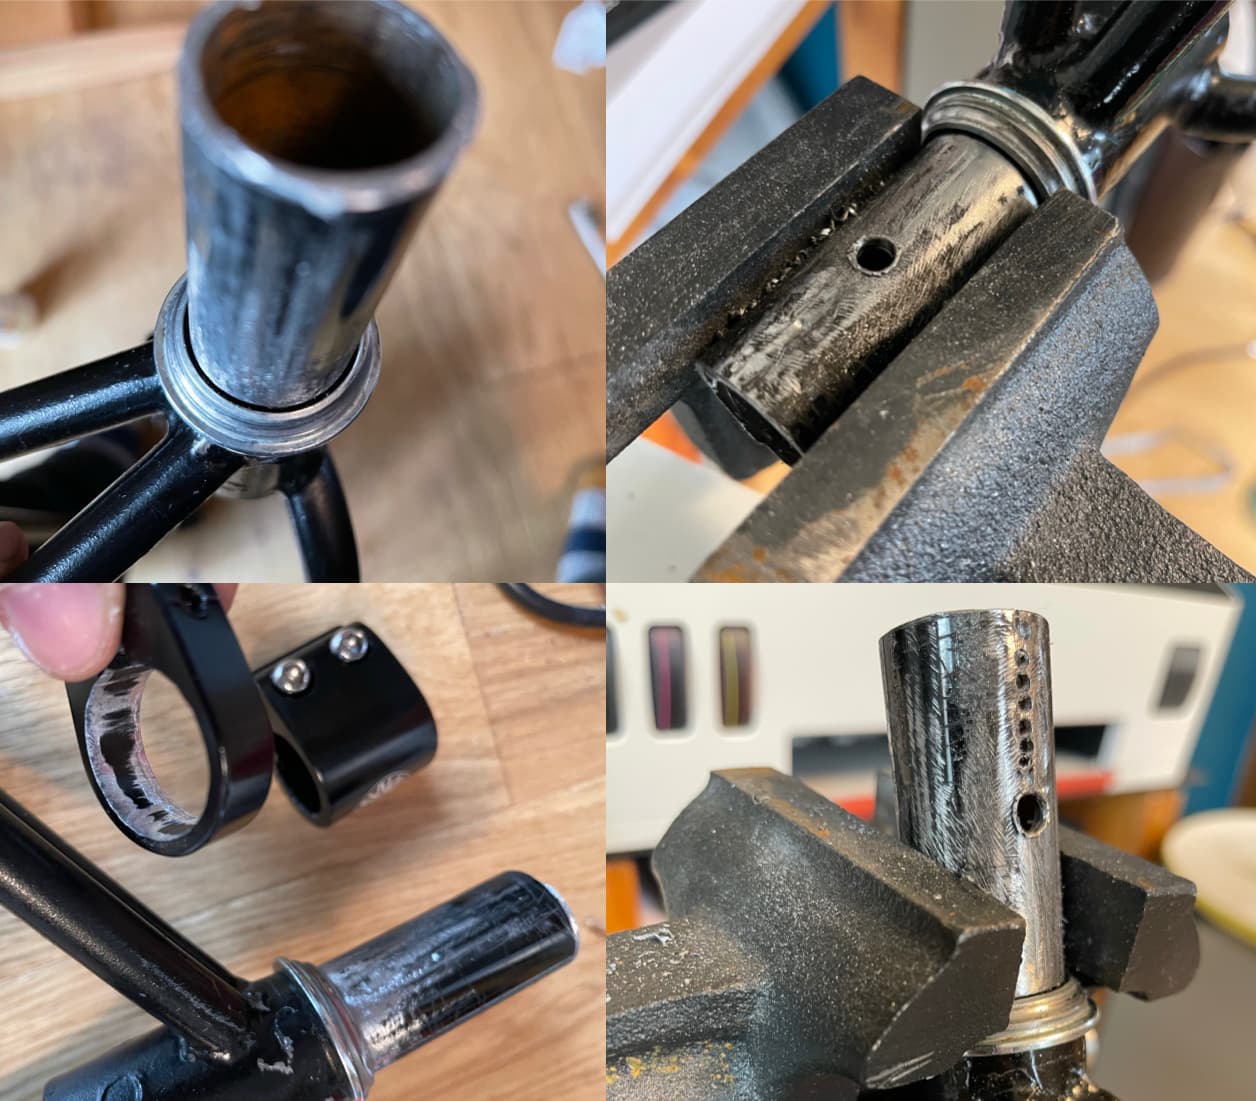
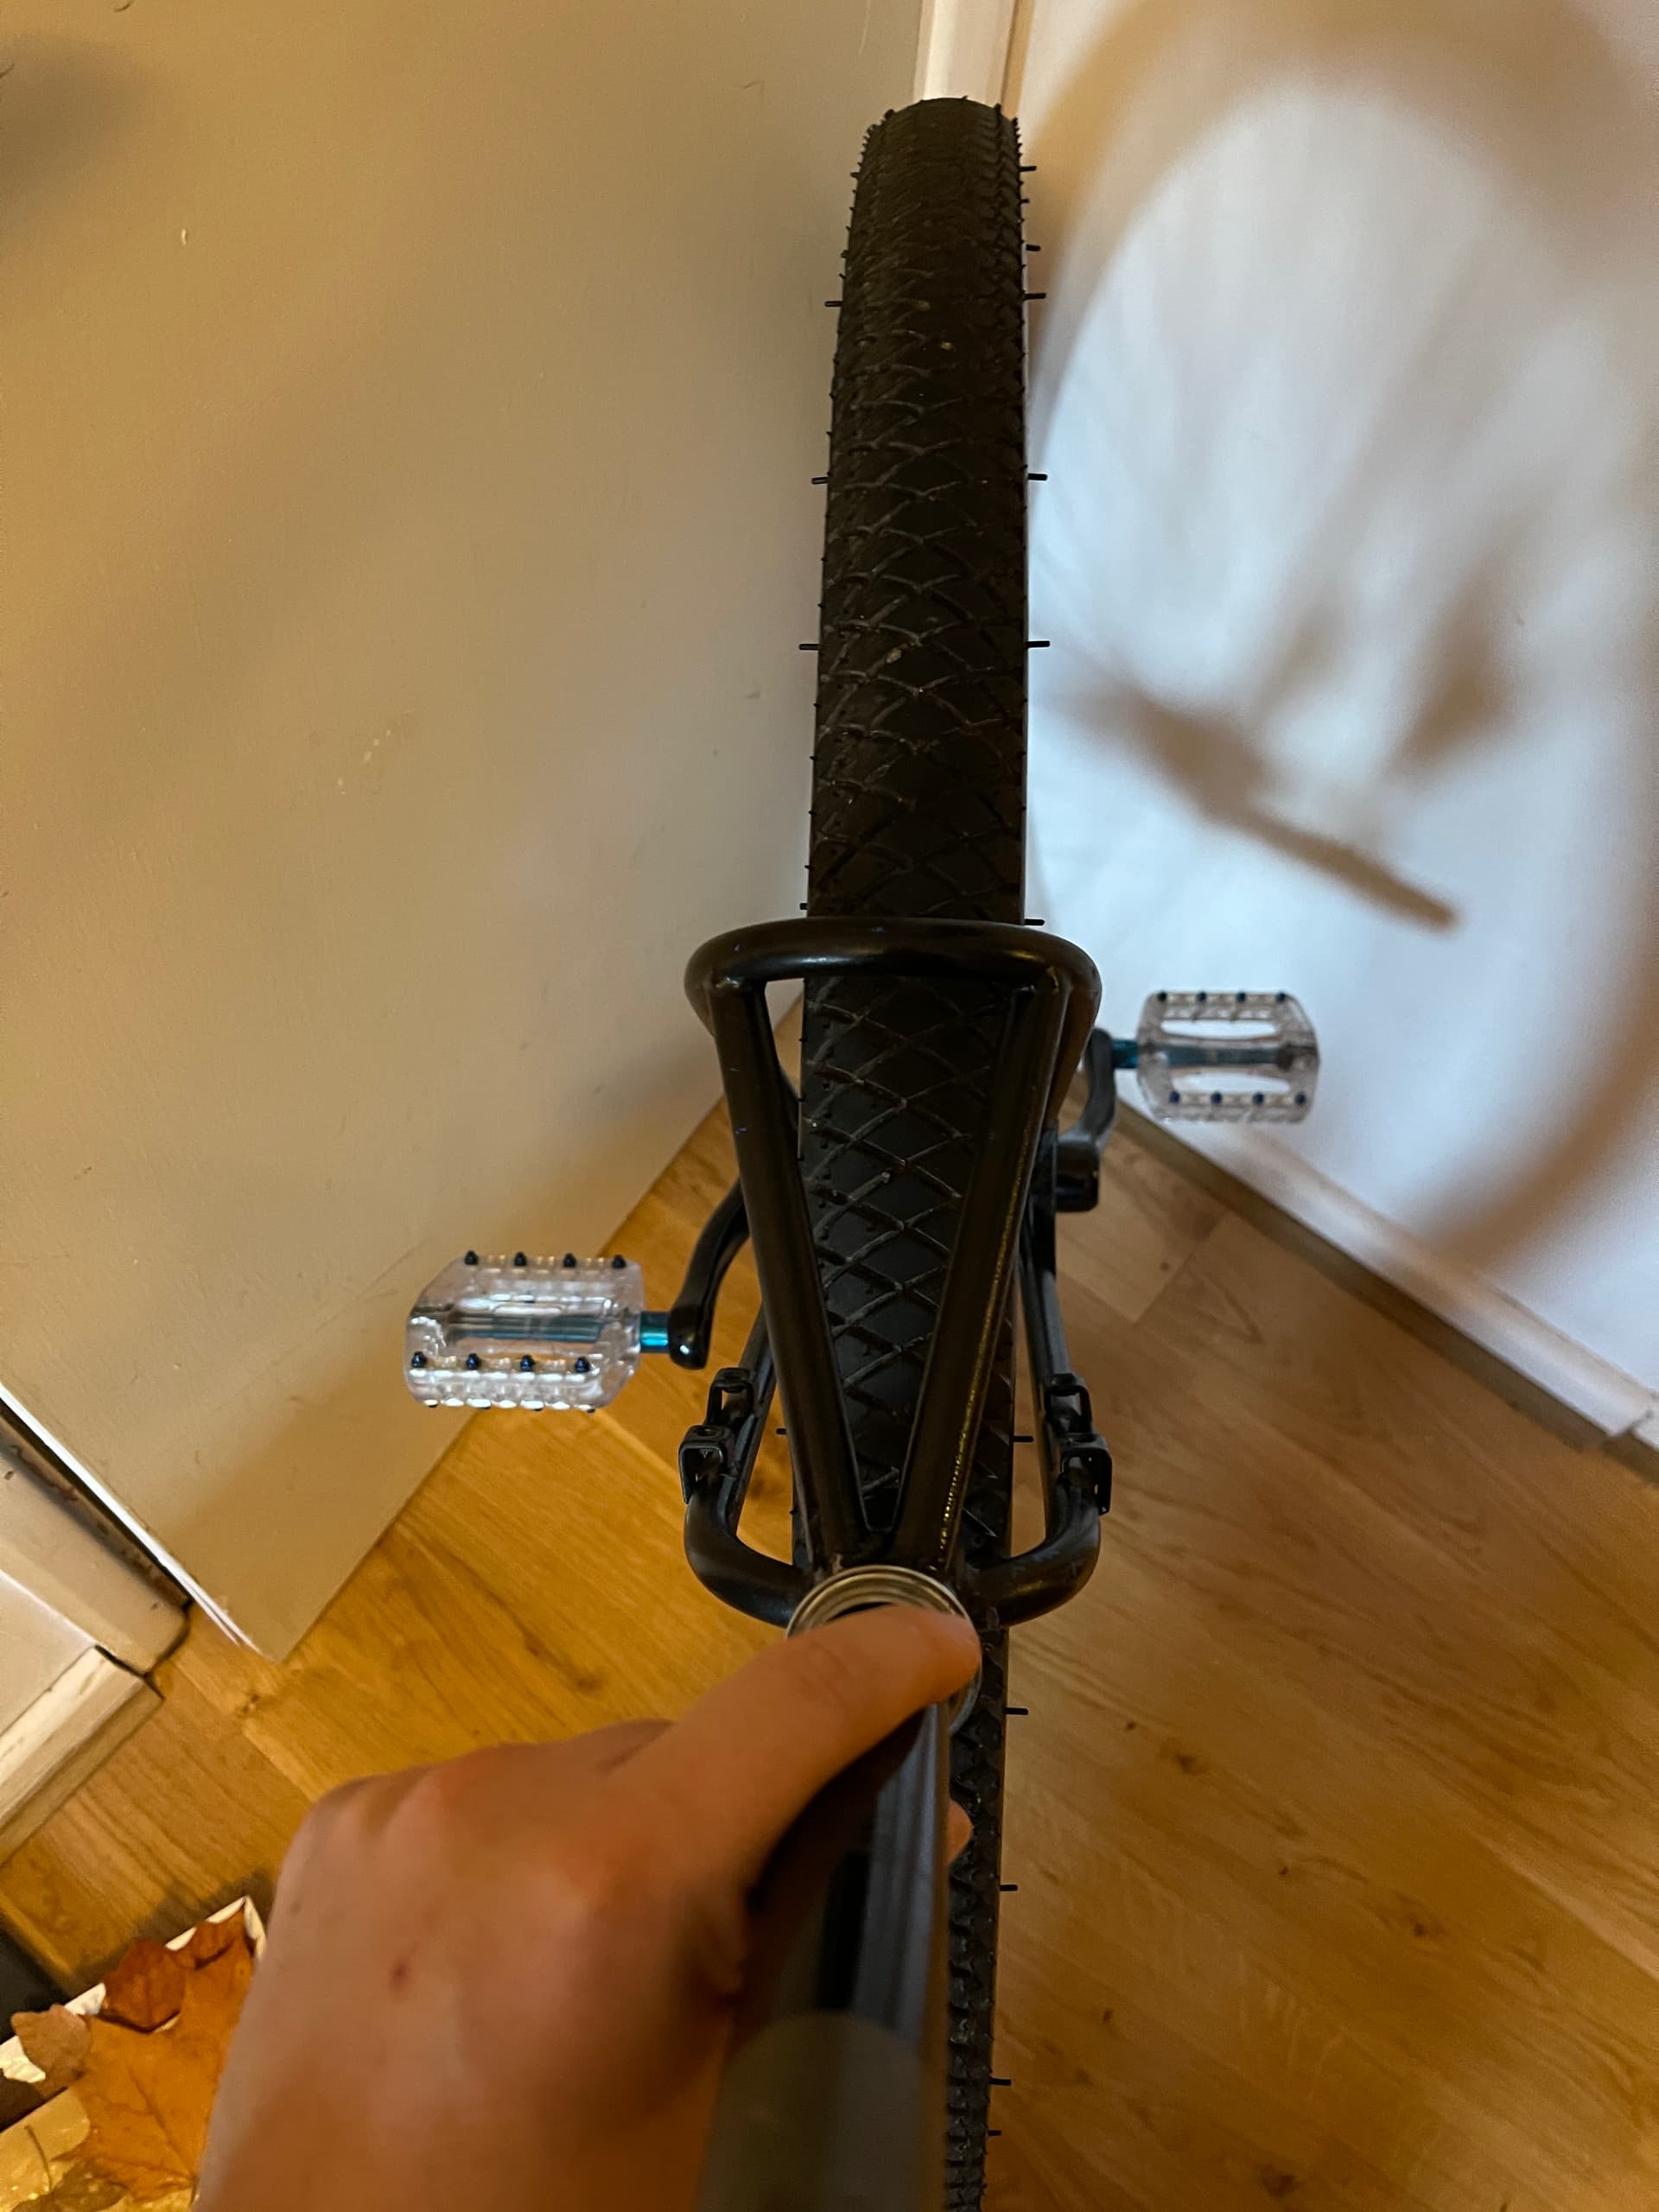
This photo shows the steps I took to cut the welded in stem that was part of how this frame was installed in the Penny Farthing.
I cut to the same height as on my fixed NightRider
Filed off paint of stem / now seatpost holder
Using a single bolt 25.4 clamp, I filed off its lip and am using this as block or stop that I clamp very tightly at the base of the post up against the silver ring of the headset mounting hardware of the Penny fitment. This is to stop any risk of the welds failing and the post shutting down (highly unlikely but I want to reduce any 0.01mm of shift or flex)
I didn’t take any photos of this but in the small groove around the silver ring and underneath the seatpost / frame base - I added in baking soda and super glue to again pad out and secure any risks of micro flexing. The welds looks pretty solid but you never know…
In vice, I drilled a larger hold for the base of the slot
Then added in smaller holes running up the post so that I could more easily file out and cut the slot shape (I’m low on tools and wished I’d had a dremel for this)
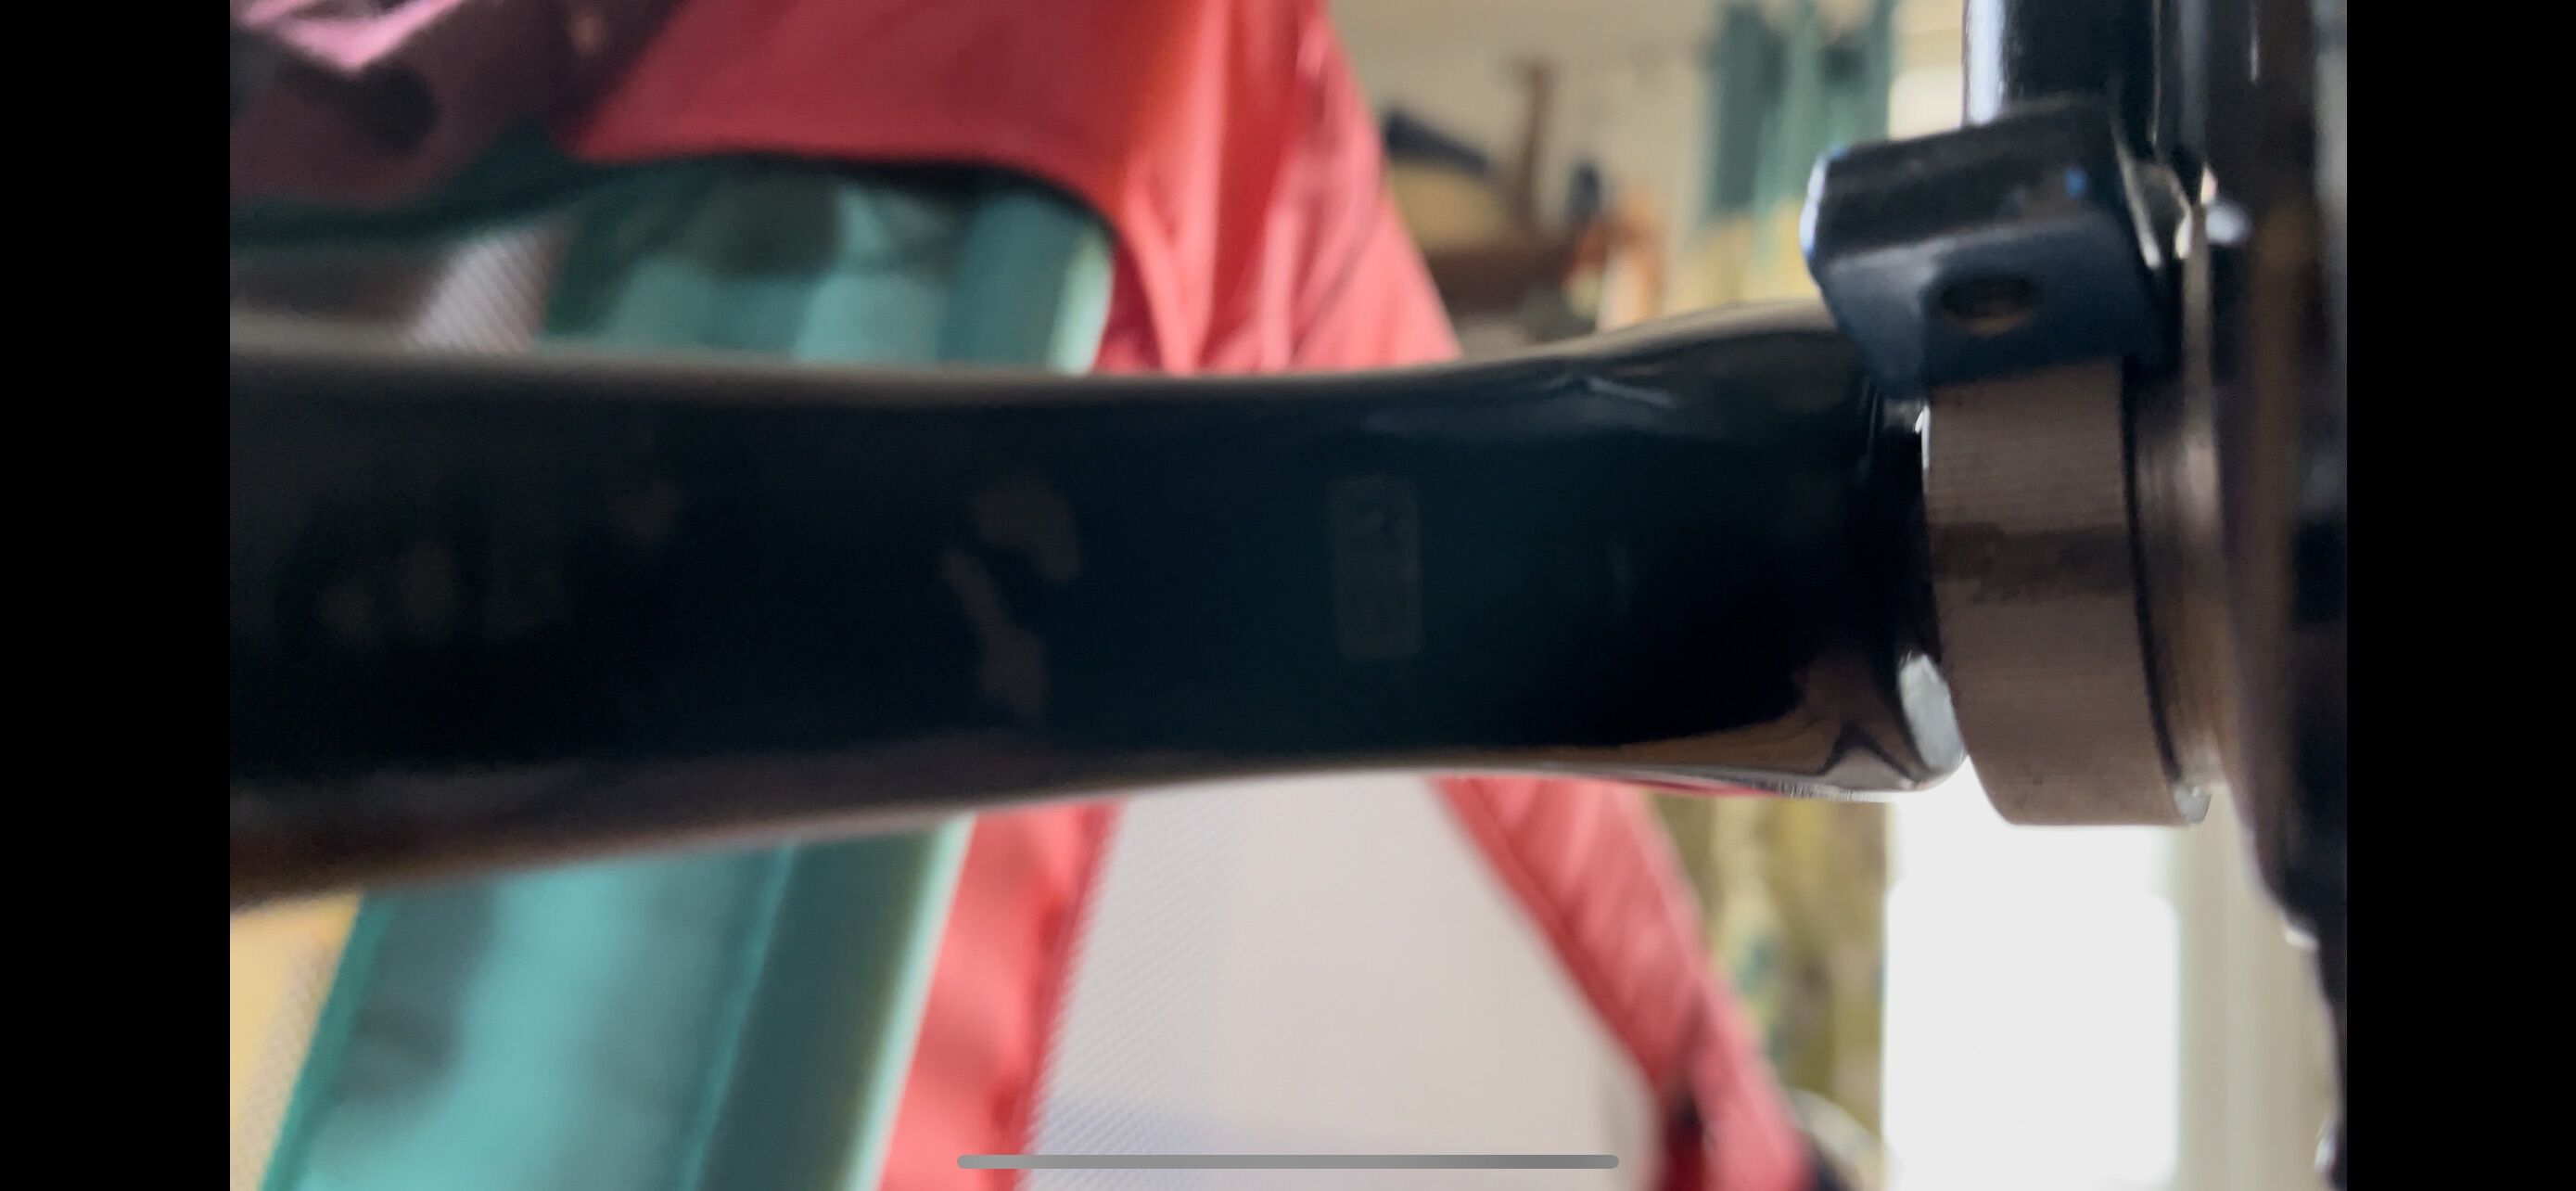
It’s all now put together and the 22.2mm seatpost cut to my height, clamps in nicely and I just can’t wait to take this wheel for a spin.
I say it’s finished, but I do have one final step I may splash out on - and that is to have the steel frame shot blasted and restored via professional frame restorers that happen to be local to me, and get it enamelled in probably a nice ocean metallic blue or gold-ish bronze. The company looks to do amazing work as the overall process includes a priming and metal check over before the painting, baking and glazing are done. I’ll have to wait and see how I feel about this as it looks to cost £85… but I’m salivating just a bit
Thanks for all the help, and to all those that read and followed along!


 )
)