Post Your Current Projects Here

Yeah - me too (though I currently have a Nimbus Gel, which I think is even more of a sofa). I’d still prefer something narrower as well as slimmer though. Have you ridden your bike recently - when I’ve got back on mine I find the saddle really does feel very narrow and hard!

I’m looking on with interest, as I’d like to build something very similar - though I actually prefer the Oracle frame to the KH (it being lighter is a bonus), and suspect I might try reusing one of the weenie Formula B4SL brakes I’ve retired from my MTB (I have one in IS mount, which kind of makes my arguments about that moot :o ). Would also like to get a KH rim - will take the weight hit, as I’ve been persuaded by the arguments about how it helps with the tyre profile (though if I could get a Flow rim in 36h, or an Oracle hub in 32h I might be tempted to go all weight weenie).

Then again I should probably wait until I have a proper job - I don’t suppose my 9 hours of contract work this week will cover it!

Good plan - I’ve built lots of wheels, including some very light ones with alu nipples - but for normal wheels I’d still use brass nipples, and would (will) definitely build a uni wheel with them. Alu nipples just aren’t worth the hassle unless you’re into saving every last gram (which is kind of the case with the MTB those wheels are on - a full-sus weighing less than 10kg).

As for pedals, I’m still using Twisted PC pedals on my muni - haven’t had any issues with slipping on them, and they’re undoubtedly lighter than anything metal - the bonus being that they’re very cheap!

I am all for light but what I feel is acceptable on my bike wheels isn’t for my Uni DT Revolution spokes and Ali nips save such a small amount of weight it isn’t worth it.

10kg pah :wink: my rigid ss was 6.8 kg (15lbs) before I stuck a carbon lefty on it and a some beefier cranks and tyres (about 8 kg /17.5 lb after that) :smiley: My Mrs is under the illusion that is her bike now :roll_eyes: whatever love lol :stuck_out_tongue:

Seriously good feat for a full boing, I helped my mate get his Scott Spark down to 9.3 kg / 20.5 lbs

After being used to bikes of that weight my 7 kg Uni seems like a boat anchor :stuck_out_tongue: I am hoping the larger wheels (about 7% increase in development) added difficulty on the hills will more than be off set by about a kilo of outer wheel weight loss making it a better hill climber over all. A bit more pace on the flat will be nice as well.

I think I might take a punt on the HK slim saddle the Impact Naomi looks very thin indeed, I am just finding the foam on the freeride is squashing out and making the seat wider and chaffing my inner thigh and pinching the skin in the leg groin (leg pit? :p) area.

Roll on tomorrow, I am a like a kid before Christmas :smiley:

You’re currently using a 3" tyre and planning on a 2.4? Difference will only be ~3% (the same difference as going from a 2" tyre to the 2.4). I doubt it will be the most significant difference - I reckon I go faster with the Fat Albert 2.4 than the Duro 3", and the difference in hill climbing is more than can be put down to the slightly lower gear.

The 2.4 Rubber Queen is BIG it doesn’t fit in the old KH26 frame like the 26x3" tyres and needs the extra room KH26 I measured my 24x3" Duro and using some measurements of the 2.4 Rubber Queen I found online worked out the circumfrance / development was about 7% (could be wrong depending on the Rubber Queen sizes I founf). Thats why people like the 2.4 Rubber Queen is it is very big for a 2.4 with a lot of height not just width yet is stilll 850g in folding form :slight_smile:

The lighter weight at the wheel edge was massively noticable on my MTB when I was running 370g 2.1 Schwalbe Rocket Rons (paper thin and only lasted me 6 months) and 86g inner tubes, that jsut accelerated and flew up hills.

The Duro is awesome but a monster to spin up and maintain going up hills, get some mud on it and you almost stop with an extra pound of mud glued to it :stuck_out_tongue:

This new Uni is going to be such a different beast, I am very excited to feel how different it is to ride :smiley:

I had no problems with the dished wheel, i trued it inside my frame and it just works :slight_smile:
It was my 7th wheelbuild ever, first dished.

This is my first scratch built wheel!

Remaining parts (not the disc adapter on the calliper already! Id did ask them if it came with one that can go back, free returns now)

Panicked at one point until I realised Chain Reaction kindly gave me an extra few spokes and nips :stuck_out_tongue:

First right trailing spokes

then the left

then all the leading spokes and how it looks now pre tensioning/truing (have to do dinner bah!)

Sheldon would be proud a nice hub label directly opposite the valve hole :slight_smile:

Will post more pics later when I start truing, I am impressed even now it is very round and centred so the spoke length must be good

DSC00420.jpg

DSC00421.jpg

DSC00422.jpg

DSC00423.jpg

DSC00425.jpg

Nice work Feisty, I enjoy building wheels too…the satisfaction when it spins perfectly true gives me a real buzz.

Looking good! :slight_smile:

Cheers :slight_smile:

I have wound all the nipples in to an equal point on the last visible thread so everything is equal and gave a bit of a push on the outer spokes at the flange to improve the angel of the trailing spokes. I also have fitted disc and bearing and popped it in the frame

Once the kids are in bed I will start the truing, it needs dishing a fair bit as it is about 10mm off centre at the moment but is vertically very close bar one slight hop, laterally it is within 3mm

@ Feisty: Your 24" is the old style crown that was prone to cracking, so the new ones are improved.

So, you’re going to build your first wheel ever and it’s going to be with the new Nimbus disc hub, hmmmm.

Can I suggest something without making you mad?

Don’t do it yourself. It’s not that building a dished wheel is hard, the problem is that the spacing between the flanges is very, very narrow, even in contrast to a bike hub, so your disc side spokes will be tensioned very high and this makes it harder to build the wheel because the “margin for error” is not as wide.

I’m not saying you can’t do it, but you may get very frustrated with this build, esp since it’s your first. A symetrical build would be a great first wheel build.

If you really want to build it yourself, go and talk to a wheel builder at your LBS and get some tips on building, esp pre-flexing spokes to improve set in, using spoke prep and spoke lock.

Edit: Ah, I see you already built it. Well, it’s not too late to add thread lock. FYI, the round is normal until you start tensioning, that’s when things get wild and your spoke tension will pull the rim crooked.

After getting the initial tension and true, consider having the LBS do your final tensioning using a tensioning tool that allows the high tension spokes to be equally tensioned. The high tension/disc side is the one that matters, so get them cranked up and as even as possible. Be careful to avoid causing flat spots/hops, they are harder to fix.

Good luck!

I disagree with using thread lock - if you build properly you don’t need it (I’ve never used it on any of my wheel builds), and it can make it more difficult to avoid getting wind up on the spokes - which will result in the wheel going out of true when ridden. It is a very good idea to lube the threads though, as it helps decrease the amount of wind up - more of a problem with the butted spokes Feisty is using than the plain gauge which seem to come on most uni wheels.

There’s also no need at all for a tensioning tool to get even tension - provided you have a decent ear for tone, you can just pluck the spokes. Maybe useful to determine an absolute level of tension, but for that to be useful you have to know what tension you’re aiming for. In actual fact, from an absolute tension point of view, it’s the non-disc side which is more critical, as it needs to be high enough that spokes don’t go slack when in use - again you can check this by plucking and listening for a decent tone rather than a dull sound.

I have just checked the Sheldon Brown article Feisty is working from though, and it mentions all that. It also reminded me of something I’ve done with wheels before - used different gauge spokes for each side to even out the tension. I might be tempted to use Revs (or Sapim Laser) on the non-disc side for a lightweight non-aggressive muni wheel - the issue being that it does make a significant difference to the lateral stiffness, most of that coming from the lower dish side.

Using linseed oil to lube the threads is a good if old fashioned solution… as it drys out the threads will ‘lock’.

In terms of tensioning, using tone is nice in theory, but it is not reflective of actual tension, you can check this theory by first tensioning by ear then check it with a spoke tensionometer, being off by ten percent might be fine on a symetrical muni wheel, but not on a steeply dished muni wheel.

The reason the high tension side is key is because the strength of the wheel is derived from the higher tension. The high tension side must be tensioned high enough and evenly enough such that the low tension side doesn’t fall out of tension too easilly, otherwise the wheel will come out of true easilly.

The thread lock helps keep the low tension side from loosening, but still allows the threads to be adjusted. Spoke thread lock is not the typical thread lock you get at a hardware store, it is specific to wheel building. I don’t generally use thread lock, but in the case of the very narrow/steeply dished Oracle hub, I had excessive spoke loosening on the low tension side, so “I added " spoke thread lock” and the problem is resolved.

“All Universal Cycles Wheelsets are completely Hand Built.
All Universal Cycles wheel builders have built thousands of wheels.
All wheels have less than a 5% tension variance between spokes when they leave our facility.
All wheels are laced using Wheelsmith brand Spoke Prep thread lock to ensure longer life.”

There is no inherent problem in building with DB spokes vs straight gauge, they don’t stretch or do anything odd, they are thinner in the center for weight reduction, otherwise they build up and true the same as straight gauge.

I still suggest Feisty have an LBS due his final tensioning on this particular wheel build as it is not an easy one due to the very high tension on the disc side. An 80mm flange spacing is very narrow in the bike world; I’m still on the fence as to whether it is too narrow…

If you don’t want to take my word for it, talk to an experienced wheel builder at your LBS.

More from Sheldon:

“…and best way is with a spoke tensiometer. Every well-equipped shop should have one. Average freewheel-side tension should be up to shop standards for the type of spokes and rim being used. More important is that it be even. Don’t worry about the left-side tension on rear wheels. If the freewheel side is correctly tensioned, and the wheel is correctly dished, the left side will be quite a bit looser. You should still check the left side for uniformity of tension.”

On the Oracle hub, the disc side is your high tension or “freewheel side”.

Sorry Aracer, I don’t want you to think I’m picking on you, but misinformation has a way of getting around, and a new wheel builder needs as much help as possible before embarking on their project.

Musical tone is a very good indication of tension, as the tone is directly proportional to the square root of the tension - simple physics. I’ve not personally checked against a tensionometer, but others have and confirmed the accuracy. 10% difference in tension makes a difference in pitch of almost one semi-tone - I can easily hear that, or in fact far smaller difference than that.

Fairy nuff - as you say, the difference in tension between the two sides is pretty high with an Oracle, so I can see you may get issues with nipples undoing. I thought you were recommending it for all wheel builds - which IMHO is usually a sign that somebody can’t build wheels properly and is relying on a crutch. Apologies.

Apart from that they tend to wind up more as they have less resistance to twisting - particularly a problem with DT Revs (or even more for Aerolite/CX-Ray, but there the issue is easy to spot) - means you have to be more careful to overshoot and back off when using your spoke key in order to avoid the wheel detensioning and going out of true when first used.

80mm? The numbers I can see suggest the spacing is actually 48.5mm, which might be narrow, but there are certainly some bike hubs which are narrower - I had a quick scan through the database in my spoke calculator and found several. The real issues though are the width of the flange on the least dished side (as that is the side which provides most of the lateral stiffness), and the difference in widths (which results in the difference in spoke tension, though that can at least be partially addressed by using different spoke thicknesses each side as I mentioned before). Sure the Oracle is getting towards the tricky end of things, but it’s not totally extreme.

Do many LBS mechanics still build wheels from scratch in the days of factory wheels? In any case, I might not have built hundreds of wheels, but I’ve done some tricky builds (thin spokes, aero spokes, unusual spoke patterns, low spoke counts, highly dished wheels, tandem wheels) which many people who’ve built lots of standard wheels might not have, without having any problems. I’m also afraid that with all due respect, LBS mechanics typically tend to repeat inaccurate folklore which they were told by somebody more experienced than them.

I’ve certainly conversed with plenty of pro wheelbuilders on bike forums though - the ones who do actually understand what they’re doing.

As for the point about which side to worry about the tension on - I agree with Sheldon that you should try and make both sides as even as possible. I don’t disagree with his point about only worrying about the tension of the tighter side either - not for an experienced builder, or somebody checking that the tension is high enough. I was just suggesting that for an inexperienced builder it’s actually worth checking the looser side, as one of the most common mistakes is not to tension enough, and the problem comes with the spokes on the looser side going completely slack, rather than anything that happens on the tighter side. You should end up with the same result, but for somebody less experienced it’s more obvious that the looser side is too loose, and the ultimate aim is still to get enough tension in the looser spokes, however you get there (having a bit more tension in the tighter side makes no real difference to how that side performs).

Next Project!

Seeing as though i finished my new GMuni build, its time I moved onto my next project. I’ll be travelling to UNICON in Italy and Switzerland later on in the year and need a way to safely transport my GMuni. I am planing to design and sew a unicycle carry bag that can fit my GMuni and my assorted riding equipment safely for the trip. Here are my design concerns for the bag:

1)Must be durable, lightweight, and fit my unicycle with minimal dismantling/assembling.

  1. Should be able to store the unicycle both with, and without the handlebar set up attached to the saddle.

  2. Storage space for Helmet, 5:10 shoes, Ay-Up lighting kit and accessories, gloves, bibs, tools, pedals, spares, cycling glasses, camel pack.

  3. Comfortable but efficient backpack harness system

  4. Ability to alter bag capacity with compression straps to make the most out of Airline Baggage allowances.

Progress:
A good while ago I saw a bag that an Australian rider sold on the forums here. It looked really good but was unfortunately not what I needed at the time. It was made of a non rip canvas and and old back pack harness system. I’ve attached some pics of the set up.

My design will be similar in materials and construction with a few changes. Instead of a bulky hiking harness system I will be using a light weight webbing and mesh system I picked up from the Army surplus store for $15. The bag will have a pouch for the protruding front handle, but it will also be able to be pinned down one side when it is being transported by rough and tubule baggage handlers at the air port (don’t want them snapping my carbon seat post! :astonished: )
I will not have pedal pockets (i’m not that lazy that I can’t spend 2 minutes to whip off the pedals). While I do really like the slim and efficient fit of the bag i’m using for inspiration, I am going to need more space in my bag so I don’t end up paying for excess baggage fees. My bag will have more volume and use compression straps around the outside of the bag so I can adjust its size and also help reduce the forces exerted on the zipper.

The thing i’m worried about is carrying comfort. WIth the harness in the centre of the bag, the crank is going to run across my back. Because I need the bag to collapse down, I don’t want to have built in padding. All I can think of at the moment is to use clothing to pad out the side of the bag that will be against my back. For the situations in which there is not too much gear in the bag (just the riding equipment) I should be able to work up a shoulder strap or something to avoid ‘crank/back issues’.

Anyone else made their own unicycle bags? What worked/ didn’t work for you. I’ve got all the gear, will be next week before I can borrow the sewing machine and get to work- so there is time for adjustments to my design.

Mark

IMG_2452.JPG

IMG_2453.JPG

Hi all

Nurse Ben I take no offence at all your comments are made as a helpful and well respected of this community and am grateful for your advice.

Whilst I am a Uni noob I have been truing bike wheels for 20 years and before being a dba/programmer (whatever the hell I am) I was an engineer (mechanical and then electronic with a bit of acoustic thrown in). If I had a lathe and Milling machine I would have been riding my own Disc Hub from the start :slight_smile:

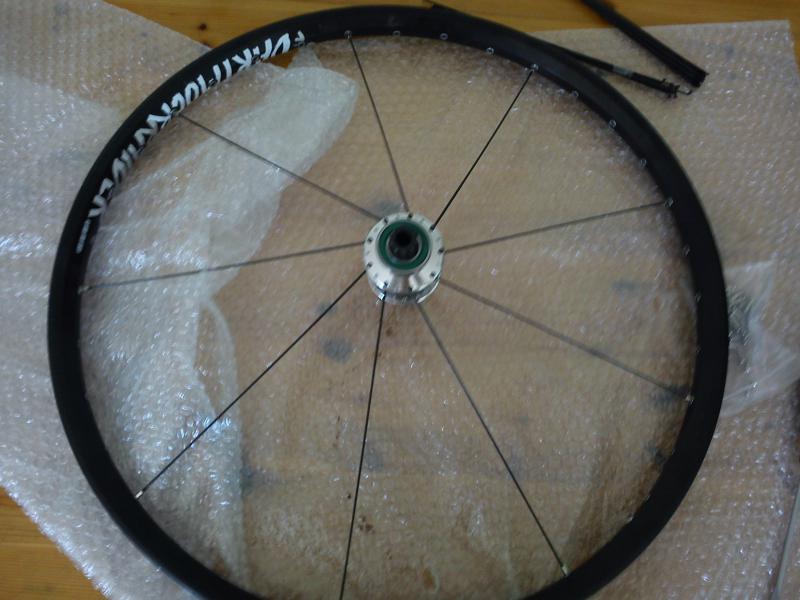
I had concerns on the narrowness of this hub 15.5mm on the disc side (ouch) but with 9-10 speed rear cassettes on MTBs this is not to much difference (and they have a wider non-drive side flange spacing so the spoke tension variance between the two sides will be even greater.

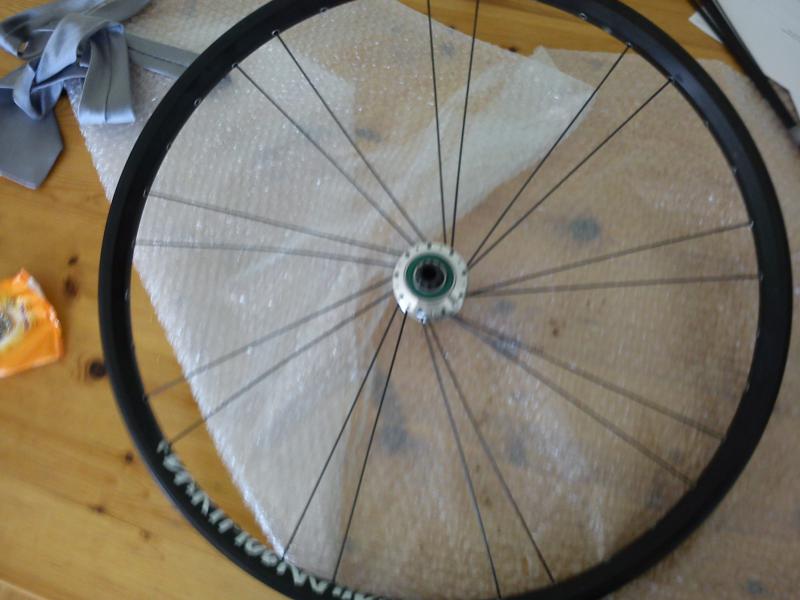
The build went fine, I toyed with thread lock and read as much as I could and the advice is so diverse and everyone having their way. In the end I very lightly lubed the inner eyelet face with some light chain oil and the spoke ends were dabbed in a small amount of anti seize.

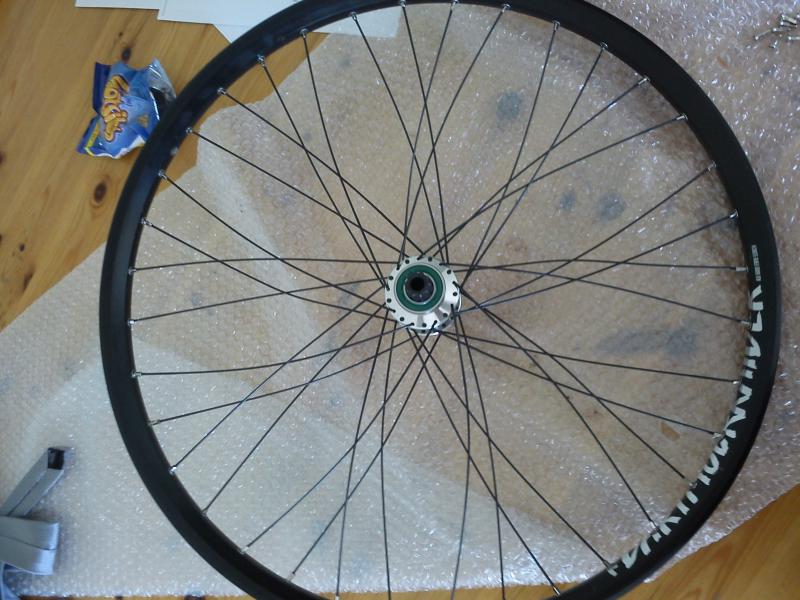
Tension is notably higher on the disc side as expected and feels very even, the non disc side is tight but slightly looser than the disc side. The Vertical and Lateral run out is less than half a millimetre which is less than the rim join bulge so with nice even spoke tension I called it a night there.

As I went along I gave the trailing spokes a slight bend at the flange with my thumb to straighten them a little and about 5 times through the build I went all around the wheel grasped and squeezed two pairs of spokes on opposing sides to help bend the paired lead/trailing spokes over each other, than re trued etc.

I normally have DT Rev spokes on my wheels but with the extra loads on a Uni wheel I went with the DT comps ( I did consider using revs on the non disc side to help balance spoke tension which is sometimes recommended). I also believed that DB spokes were generally better than straight gauge due to the elastic properties of a DB spoke allowing it to stretch and return back to shape distributing the load more evenly across adjacent spokes?

I was aware of spoke wind up and when the wheel started getting some tension I held the spoke as I adjusted it to feel the windup and made sure I was over shooting and backing off enough to get it out.

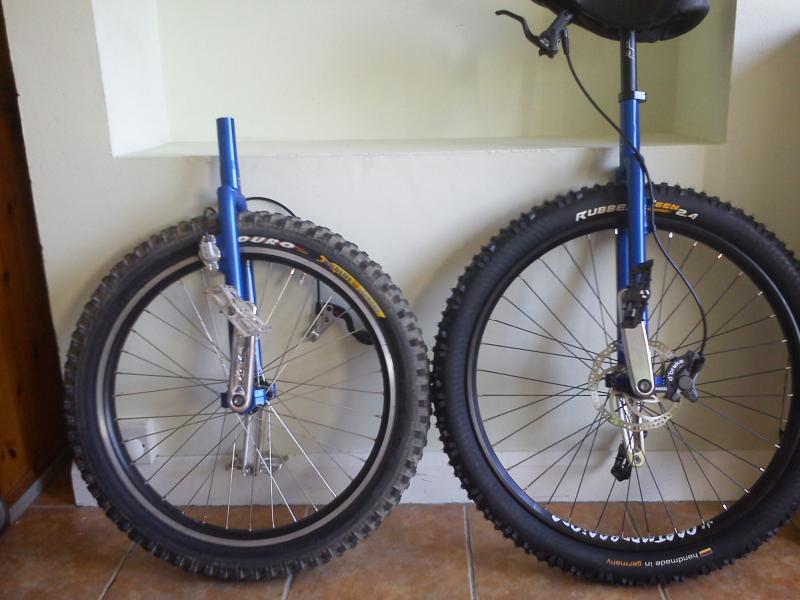
The Rim is perfectly centred / dished correctly and is truer than my Nimbus 24" rim (man that has got a pants pinned rim join).

I rode in to work today and I didn’t get a single ping or creak from the wheel presumably to the length I went to try and settle and stress relieve the spokes.

I will obviously keep a check on the wheel and I have a friendly wheel builder who I may well get to critique my build for learning purposes but overall I am very happy and found it an enjoyable experience and look forward to building some more wheels (I may even buy a stand, and tension gauge).

I hope that although a noob you can see my research and approach was far from noobish :stuck_out_tongue:

Anyway back to the build

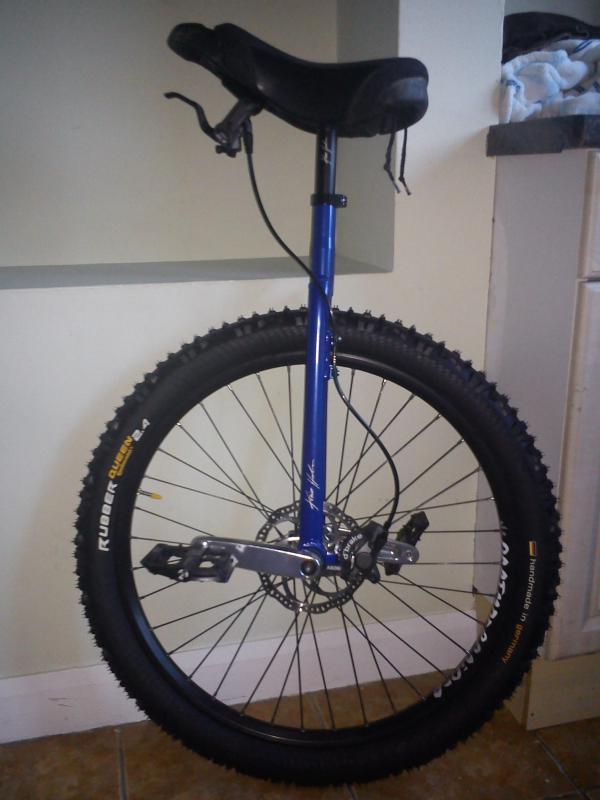
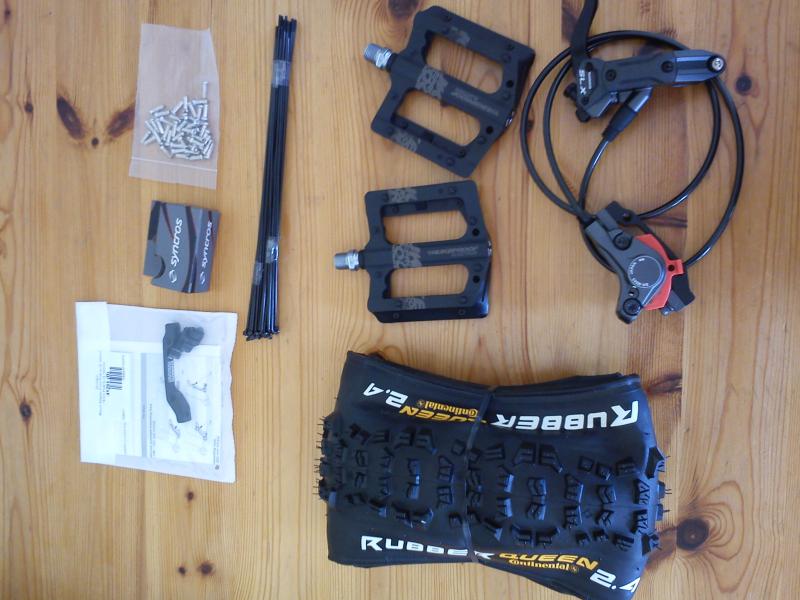
Wheel done I slung the Rubber Queen on and she is a fatty, she has massive volume for her width (which isn’t too shabby) and on the Dartmore rim I just had to tickle her to get her on the rim.

Stole my seat and post of my KH24 for now and slapped that on.

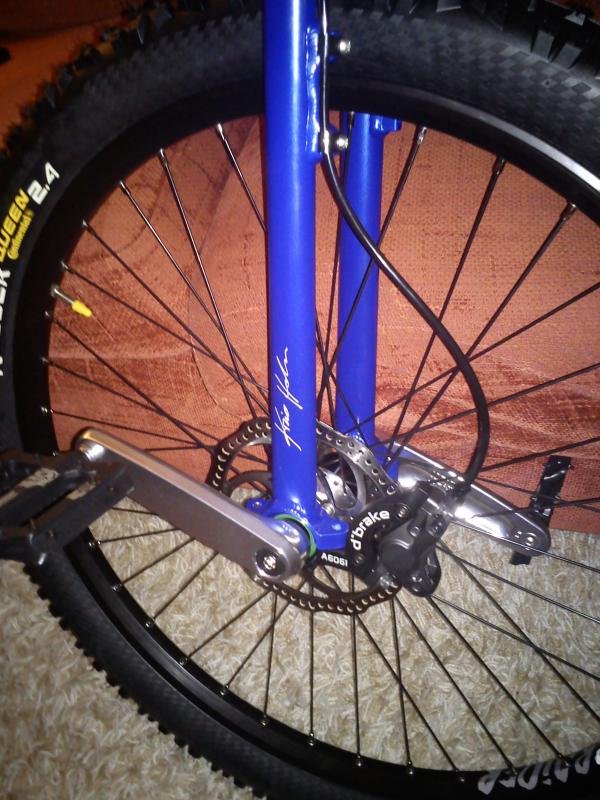
The SLX brake is awesome, like my old XT brakes it has a servo wave cam (As was introduced on V-brakes in the day) so the pads move fast and a big distance then the cam rolls down a ramp to decrease movement and increase leverage. On a disc brake this means oodles of pad clearance so a doddle to set up and no brake rub, even with a tweaked rotor you would be fine! The only issue is the lever clamp bolt is in a poor place so in gets squashed between the seat base and the KH lever mount, not by too much so the handle is still nice and tight.

It is irritating that in the name of ergonomics (not cost saving honest) calliper manufactures have gone with fixed angled hose inputs as the back angle of the D-Brake to allow easier wheel removal means you can’t angle the hose on most callipers now

I chopped the cable and fitted the insert with the handy hose clamp provided no bleeding required as a capillary action held all the fluid in the hose. I then used some car P-clips on the magura mounts to hold the hose in place which looks nice and neat.

The Qu-Ax cranks are nice and light and feel more than strong enough for XC riding, torqued them up nice and tight with some thread lock (I HATE loose cranks). I then popped on the Electron pedals which are stupidly light and the low profile design is fantastic, a bargain for £32!

My ride to work was awesome, I mounted first time and it felt a little odd, definitely faster with the bigger wheel and 145mm cranks, but the two main things that got me was how fast the light wheel spun up this thing is going to climb so well! The other big thing was how well mannered she was, the KH24 in retrospect feels so twitchy where the kh26 feels planted, she turns just as well but resists wobbling so much more, not to mention she smoothes out the bumps rolling over things that would make me have to correct on the KH24 when it would grab my wheel.

I was going to still take my KH24 on the first MUni group ride of a new group I am now a member of as I was worried the KH26 would knock my proficiency back a step or two but I have no such worries now :smiley:

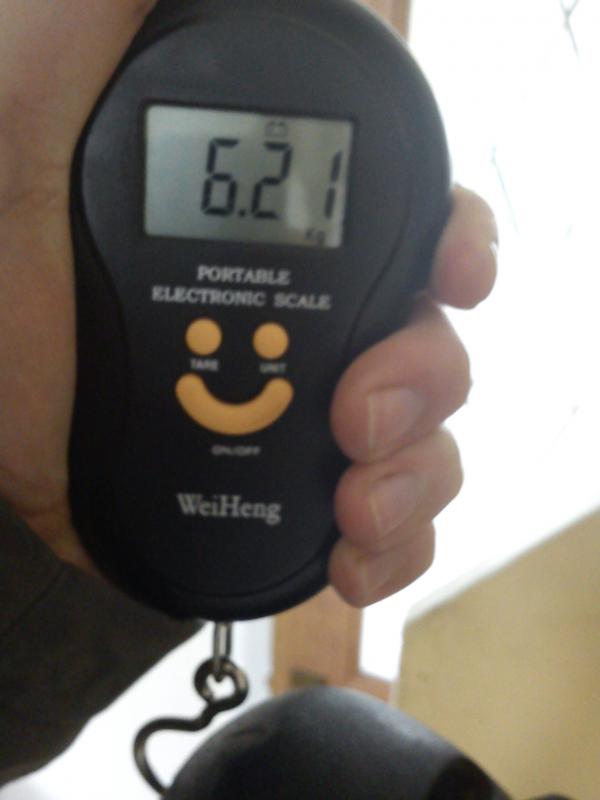
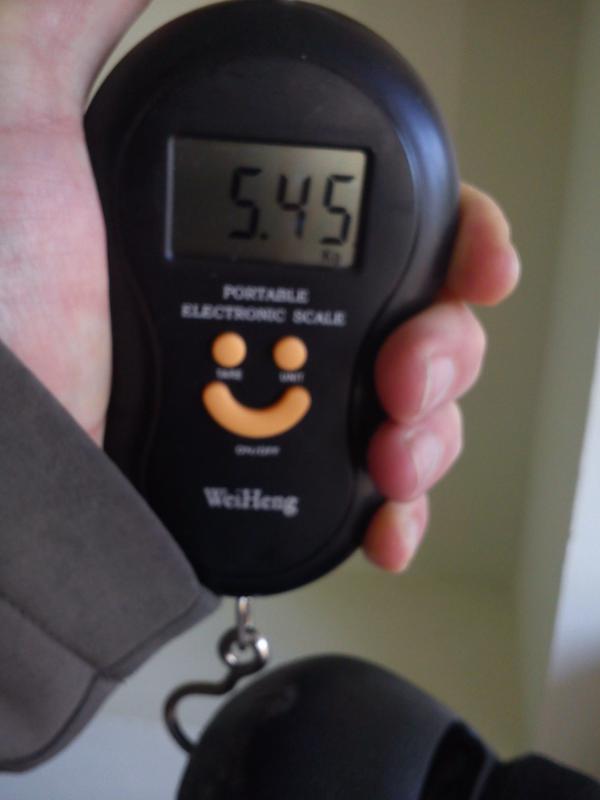
I will weigh and measure my forward development of my KH24 and KH26 tonight and post the figures up as I think that will be pretty interesting.

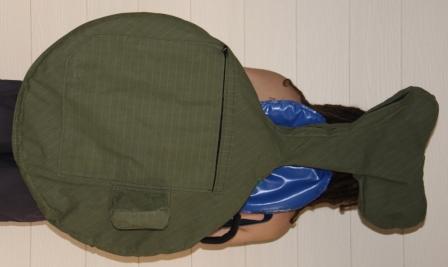
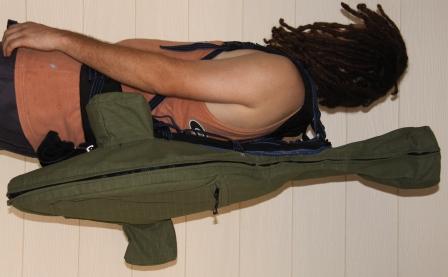
Now for some pictures, sorry they are not great, the light last night wasn’t great (being night time and all) and this morning it was still rising when I left. I will get some better ones later.

kh26a.jpg

kh26b.jpg

From what you’d said about your experience of spannering and fixing wheels, I had every confidence you’d do a good job - and it certainly sounds like you’ve followed all the right steps to get a better built wheel than you get from the average LBS chap who’s built hundreds of wheels, but is working to a tight timescale. Looks great - I’m feeling very envious (might just motivate me to get myself a new job!)

I know I mentioned this above, but on second thoughts I reckon Revs on the non-disc side would be a bad idea. It would help balance spoke tension, but with a strong rim such as you have there (rather than something light and flimsy) you can get the disc side tension high enough that there shouldn’t be an issue with the tension of the non-disc side. The big disadvantage of using thinner gauge spokes on the less dished side is that it’s that side which provides most of the lateral stiffness, so you’d be compromising that significantly.

Thanks for the kind words, like anything I am sure I could do better with practice but it is more than good enough for the XC riding I do

It is such a nice ride I am very pleased

Forward development of the KH24 with 3" Duro 204cm

Forward development of the KH26 with 2.4" Rubber Queen 214cm

So about a 4.9% increase

Weight 6.21kg / 13.6 lb kh24 and 5.45kg / 12 lb kh26 14% decrease in weight and nearly all of that on the wheel where it counts!

Sweet :smiley:

DSC00419.jpg

DSC00433.jpg

DSC00435.jpg