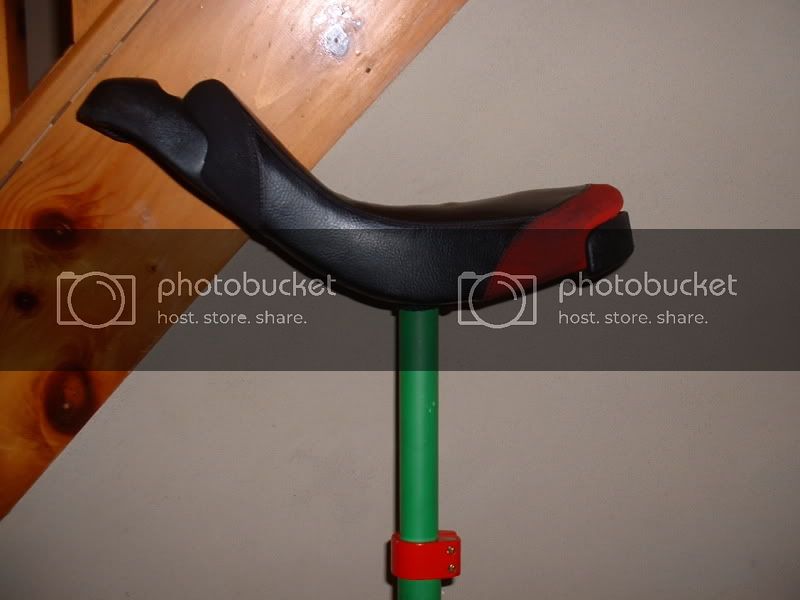
Poor man's freeride seat- Maximus Unius revision (working thread)

Since I have some injured fingers and I can’t type to fast, this is mainly gonna be a picture tutorial with captions. After much research about what works in seat shapes, what doesn’t, how to go about doing it, etc., this is the product. Thanks to Chrashing, John Childs, and Terry for doing the original poor man’s seat, giving me an idea of how to do the center cuttout, and giving me the idea of cutting out the saddle cover in the foam cutout area (of course I changed this a little).

Materials:

Drill
Duct tape
Serrated knife
pliers
marker
ratchet w/ sockets or socket wrench
ruler
flathead screwdriver
hacksaw (optional)
glue
scissors
staple gun (depending on drawstring cover or not)
drill bit
sandpaper

Remove seat from seatpost

Remove handle and bumper

Take off seat cover, do it very slowly or the foam will rip

Mark with a marker a line at the very edge of the curve on the top of the foam. You will be cutting this sliver off.

Once you have cut off the top sliver of foam, set it aside. Now mark two wedges on the front and back of the block of foam, being carful you won’t cut through the foam in the middle. You will have to decide for yourself, but I decided to make the bottom piece of foam that is left after cutting the two wedges very flat. You should make it as flat or curvy as you think will work best for you.

This is after cutting the back wedge. Now cut off the front wedge.

After cutting the front and back wedges, set the flat(ish) piece of foam aside. Discard (but keep) the wedges of foam. Now take out your drill bit, duct tape, and sand paper. Wrap the sandpaper around the end of the drill bit (covering the bit to the very end) and tape it at the base of the sand paper (make sure that it won’t fly off). (Thanks John Childes for the picture of the real tool in your coker seat mod album).

Get out the first sliver of foam that you cut. Now put the bit in the drill and holding the drill steady (and the foam!) drill a channel in the center of the foam spanning most of the way down the length of the foam. I made my channel ~17mm deep and ~20mm wide, but it’s hard to be exact with this sanding tool. I also made my channel gradually level out with the rest of the foam in depth.

Sorry for the small pictures.

Now do the same thing with the bottom, flat piece of foam, but make the channel around twice as wide. This will make the center out the foam have more give for tender spots.

Later on, I filled this bottom channel with medium sized scraps of foam (don’t pack it in there though), because there was too much give and the channel would bottom out on the seat base. Now it feels perfect.

Use a bit of tape to hold the top sliver of foam to the bottom flat piece of foam (line up the channels).

Use a few staples to hold the cover in place while you put the bumpers back on.

Ok, this is where Terry’s idea comes in. Once the cover is back on, get out your craft knife. Make a rectangle outline of where the channel is (lightly, don’t cut the cover yet!) with your knife. Now make a cut from edge to edge of the channel every 2Cm’s. Cut out every other square. This next part is optional if you care about dirt getting in the channel.Get a piece of stretchy fabric or elastic and weave it through the holes.

When putting the seat back on the post, make sure to angle to front handle up as far as possible to allow the pressure to go on your butt. Notice how the back end of my seat is horizontil. Also make sure that the post is facing forward (one side of the plate on the seatpost will be more horizontil than the other. Make sure the one that is more horizontil is in the back).

Done.

Hope I helped, post any questions here.

Nice job looks good!

[QUOTE=maximus unius]

QUOTE]
also make sure clamp is facing the correct way?

Awesome guide, I’m going to have to try it out with the extra foam I have.

[quote=“torkerdx”]

Good eye. But I already thought of that. When I was putting the seat back on, I realized that one side of the plate was flatter than the other, but that the flatter part was in the front. It should be in the back, so that you can angle the seat forwards as much as possible, making the back of the seat as horizontil as possible. So I just put the seat on backwards and turned around the seatpost after this picture.

Oh yeah, I forgot to mention that you don’t have to use all of the tools in the first picture if some of them do the same job, but for example, the serated knife cuts faster, so it’s good for the initial cuts, but the hacksaw cuts cleaner, so it’s good for final work.

Hey Maximus,

I’ve been riding my Torker DX for several months now, and I’ve gotten to the point where the seat has become the limiting factor for how long I can ride. I saw your post and knew I had to give it a try! My wife and I are going away for a unicycling weekend up in northern MN at a ski hill for our anniversary this week, so I finally got around to doing the modifications.

I really didn’t want to cut the seat cover, so did this abbreviated version of your mod…

Pre-Modification…

Cut away the front section…

Cut out a slot…

Reattached the cover…

Finished

It appears alittle baggy, but it’s really not bad at all, and is much more comfortable than the original.

I just used a hacksaw for the big cut, then used a dremel with the sanding wheel to shape the foam and cut the groove. Worked pretty slick.

Since we’re trying for some little unicyclists, I thought it best to take some precautions, not to mention I’ll be able to ride longer with the added comfort.

Of course, when my wife gets good enough to start off-roading, I’ll be handing down the Torker and getting a new KH with the free ride. :slight_smile:

Thanks again for the great idea!

Gnonim

Gnomin, you should have cut off the back of the saddle instead (or in addition to the front), now the seat in my opinion will be at a pretty terrible angle downwards. The key to how Maximus cut it was that they cut off the back part of the saddle so that the area where you should have most of your weight is parallel with the ground keeping you from sliding forwards and putting pressure on the sensitive parts.

Hey Brian,

The downward angle is no worse than it previously was, but you are right, I should have taken alittle off of the back to make that surface more close to parallel to the ground. I realized that after I had it back together.

The way it is now, I like it better than the original, but will make the additional modification after I get back next week.

Thanks for the input!
Dave

I stuck a bunch of washers between the front of my post and seat today.

It feels quite a bit more comfortable now.

is it thinner at all? it looks better for distance riding rather than trials or street?

This is my most idiotic sounding post evar. What’s the point of this mod? sorry :slight_smile: Is it to tilt the seat up?

it makes the DX saddle more comfy
buut… i don’t really like this tutorial at all.
if you have a Dremel or other rotary tool, play with a few bits that you have for it, one may be better.
cut the major stuff from the bottom of the saddle, then you don’t have to feel it and as far as the groove goes, smooth curves are more comfortable.
the major problem with the tutorial: why seperate the sides of the foam?
there is no point to that that i can see.

Borgschulze, what seat base do you have?? it loooks really curved

Torker DX seat with cut down foam, and some washers to add more tilt.

Do not cut from the bottom you need the side foam, trust me. I think the best thing to do is what he did, cut the top off then thin out the bottom and put the top back on. Then the top is still smoothed out and you have the foam which goes down the side of the saddle.

I cut mine from the top, didnt save the curved piece at all, and just put my cover back on. Sure there are tiny bumps and stuff on the foam, but when you sit on it, you dont feel the bumps at all, or the side edge being squared and not rounded. Youd have to have some pretty big and deep bump from the foam to ever feel them.

There is deffinitely a point in not leaving the top part off.

When I did my trials saddle, I cut the top 1/2" of foam and discarded the bottom foam with the sides. I don’t really care, cause it’s uncomfortable as hell for sitting on anyway, but for a muni saddle like this one having the side foam makes a difference. I think having a smooth top does too. Another thing about using the smooth top foam is that the outside of saddle foam has a sort of “crust” that is a little bit firmer than the foam inside. I’m pretty sure this makes it a bit more comfy too.

Yeah, its a bit thinner. And yeah, it was made for muni/distance, not street or trials.

Thats for your trials saddle, right? Next time you go for a coker ride, slap the saddle without the top foam on your coker and see if you like the smooth or bumpy one better.

sorry, i mean the INSIDE bottom, cut away from the INSIDE, NOT the sides, i’m saying DO NOT cut the sides at all… at first… just cut away from the inside so that the seat rests lower, then trim the sides, you don’t have to smooth it nearly as well that way, and if you can do it… it should work out a whole lot better.

It’s gonna be way faster to just make a couple horizontal cuts than dig out the insides of saddle foam.