Right now I think I’ll just add posts from the forum to the tutorial. If I end up rewriting it at some point to include the updates, then I will probably do as you say, and update here. I can then paste from here to the gDoc without formatting problems. It’s strange that it doesn’t go both directions like that.
So your method is much faster than Sheldon’s, AND requires no spoke bending? I’m sold!
Having read a bit about linseed oil on the bike forums, though, I think I will use grease or Vaseline as a spoke prep instead. One day, when I become more confident in my wheel building and feel I can do everything right on the first try, with minimal truing afterwards, then I will definitely head to the art supply store and get a little bottle of linseed oil (paint stores and hardware stores only sell linseed oil by the quart or gallon).
Sorry for all the questions, but when your tutorial says to look down at the valve stem hole and see if the rim is right- or left-handed, you meant from this perspective? So this KH20FL rim is left-handed?
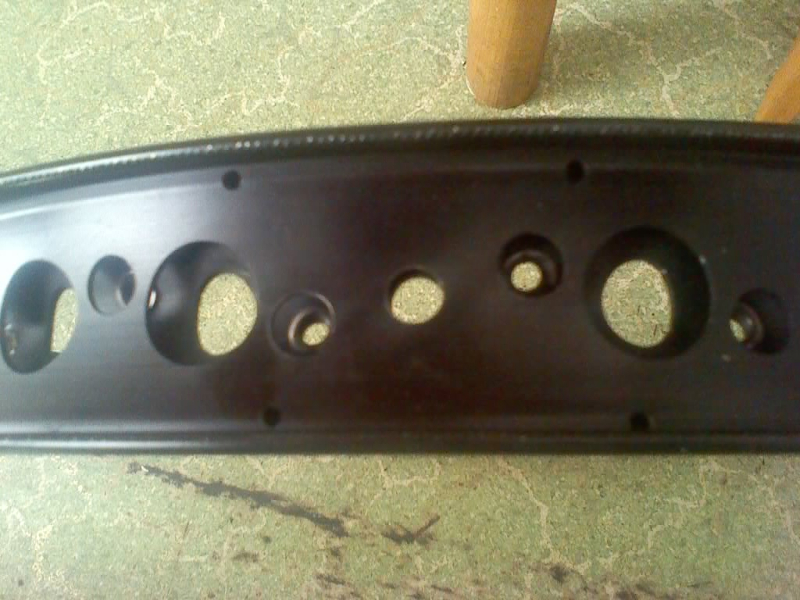
Yes, that is right. So in this case you would put your “key” spoke into the second hole from the valve. When you put your “key” through the hub the spoke to the left of it on the opposite flange will be the one that goes next to the valve hole.
While he even pointed to patterns like the scare-crow.
Now a 404, but I think this is a copy of what was linked to.
Nipples that come loose are usually because of unequal tention and/or being too loose already.
If I want things to sit tight I usually don’t use grease.
But to answer in full: I use nothing other than the oil that’s already on new spokes.
That’s being added for that purpose!
Secondly I almost always mill my spokes myself, and so they have a minor bit of cutting oil left on it.
Actually anybody I know who can build use one of the two combinations.
Even the engineers of Sapim (though I talk in our native language with them).
This year they helped me designing a special unicycle hub (that’s not ready for production yet, but perfectly fitting their default head).
Now he’s even postume honored with a spoking method name. While the method is at least double the age of his grandfather…
Except when you have a rim meant for X-spoking, well, I think; I’m always confused when doing X-spoking.
Someone here told X-spoking was not effective - arguing there was some mathematical proof or scientific research - but lacking linking to it. So I’m still curious to learn anything about that (maybe in a seperate thread if desired). Personally I think for freestyle, street, flat, trial it’s benefitial for sideways impact, which in for example racing and long distance is irrelevant.
Do you do much hopping? The bicycle world seems to be very divided about spoke prep, but most bicyclists don’t hop or drop very often. I still don’t really have a strong opinion about spoke prep either way, though, and I am pretty sure my spokes came loose and/or broke after my first wheelbuild because I didn’t tighten them enough and because I reused a pile of unlabelled old spokes from my previous wheel and had to bend some of them to get them in. What you say about just using a tiny amount of oil makes sense to me, though.
Well, if being mentioned by me, a semi-anonymous unicyclist on the Internet, is an honor, then I guess Sheldon Brown has been honored! He does deserve some credit, though, for having taught me (posthumously and online) to build a wheel. Several people on this forum and a BMX woman on You Tube also helped.
I appreciate your bringing up historical context. Right now there are more NATO troops massed on the Russian border than at any time since Operation Barbarossa (except that those troops weren’t from NATO), and almost no one says a word about it. This problem of ignoring historical context is especially widespread when discussing technical issues such as wheelbuilding.
The suggestion in jtrops’ tutorial that spokes should all be thrown on at once has allowed me to build what appears to be a much better wheel. For me, this method is not much faster than Brown’s because this is only my second build, so I am slow, but it does yield a wheel with straighter spokes. It also seems to make it more feasible to copy the spoke pattern seen on another wheel.
Wow this video made by the bmx girl is the clearest tutorial video i’ve seen on youtube so far.
Thanks for this.
Do you guys think there is something wrong or missing in this video or a reason why it shouldn’t be used for building a unicycle wheel? (without disk brake)
Is this a left handed rim or a rh on the video?
It is a LH rim by my definition. I didn’t watch the whole video, just the beginning, but there is nothing special about any tangentially laced wheel. Well, really they are all special for their strength to weight ratio, but lacing them is the same for any purpose.
As in any wheel build getting the correct spoke length is critical. If you are building a wheel with asymmetric dish, like a disc wheel, you will need two different spoke lengths. Symmetrically dished wheels, like most uni wheels, will use the same spoke length on both sides.
That video shows how to put the spokes on in sections, which is part of why it’s so clear, but putting them all into the hub at once, as Leo and Jtrops recommend, will give you a wheel with straighter spokes. This method is also apparently much faster once you get used to it, and, as I mentioned, it allows you to use another wheel as a reference. If you put the spokes on in sections, as in the video, looking at a fully-laced wheel will only confuse you!
And if those are different brands then often the thread may be slightly off.
Although fancy alloy colors may look nice, for strength I prefer to original nipples by the same manufacturer.
Another reason why nipples may move is when the hole doesn’t give much grip, as it’s to edgy. Then I sometimes give them a bit of bevel by a special tool I have, such that the nipples will hold better.
Last but not least - why I think I suffer it less; I usually spoke my wheels cross-1 and sometimes cross-4, but I avoid cross-3 as it’s not carrieng nice. I believe it’s the cause why loose nipples is happening more often at cross-3.
I doubt oil will make them sit more tight. It’s only less squeeky.
But also I think he wouldn’t have liked it to be such an serious authority.
I guess that’s why he wore a ridiculous helmet. But heck, that’s something I also do.
Yes, and even huge brand make stupid mistakes because of that!
I have a friend in the bicycle industry that could for 2 hours just about the threading of pedals.
So when I see last month a engineering student discussing a virtual CNC project here, then I rather don’t bother to try to even explain why whatever you do you’ll always will be wrong. Though it’s useful to understand.
Yes. Why to me it feels better.
It’s not wrong. But simply not clever. Or better said: it’s overcomplicated.
Is cross-1 strong enough for a fat guy riding down the stairs? Cross-4 is, I think. Josh at Unicycle dot com said cross-4 would be “overkill” on the reinforced rims of today, so I have stuck with cross-3 so far.
My point was that a little oil (as you described) seems like it would serve the essential purpose of preventing the spokes from rusting or galvanizing to the nipples and that it would also make the nipples easy to turn when truing, but not too easy, as grease perhaps would. Jobst Brandt also just recommends a bit of motor oil. I used chain oil, which seems to have a similar viscosity.
Oh well, in any case, I appear to have turned a slightly damaged wheel with crooked spokes that broke all the time into one that is stronger than when I bought it!
Most of this success is thanks to advice from jtrops in this and other threads, even though I didn’t really follow his tutorial. Just to recap:
-
To fix both damaged and undamaged rim eyelets (or make them redundant, really), I used rim washers.
-
As a result of the main recommendation of this tutorial -that all spokes be put into the hub before beginning the wheelbuild- I was able to use my 29, which has the same hub as my 20, as a reference. I just sat down and copied its spoke pattern exactly.
-
Tightening every adjacent spoke on my wheel sequentially (as most wheelbuilding tutorials recommend) was how I had damaged my rim eyelets to begin with. Following the instructions in this post allowed me to bring my wheel up to tension fully and fearlessly.
Time will tell whether all this worked, but right now it seems that it did. Thank you!
It used to be in the days unicyclists generally had stronger flanges than today.
But there I already focus on the flange, while your question was if the pattern was strong enough.
If you don’t hubs made of unsuitable material, especially those that have the holes far too anorexically tight close to each other (such that even a shitty spokes can tear it apart - without breaking any spoke), then my answer is yes, cross-1 is not the problem, and even fine for fat guys. Especially when using stronger spokes than any unicycle outlets are selling today.
But in case your flange is weaker than your spokes, then you can switch to another pattern.
Nowadays rims can’t deal with that force anymore? No clue his point is.
…but likely the opposite of having them sit tight. So if they come loose, then decide what’s your primairy problem.
Maybe you wish to have self locking nipples, which are -like self-locking nuts- having a piece of rubber inside.
My 1st choice (Sapim) and 2nd choice (Alpina Raggi) spoke manufacturers make those. And they look like this.
Putting something on the spokes to mitigate galvanic corrosion is wise. It doesn’t make them more likely to get loose, and in the case of Wheelsmith SpokePrep, and Boiled linseed oil it gives a little more security (although it is not necessary if there is enough tension).
As long as you have appropriate tension you shouldn’t have a problem with wheels becoming loose.
When the nipples and spokes corrode together it does make working on the wheel later much more difficult, and adds quite a bit of time to the repair. The linseed oil maintains the lube effect long after it has cured. It also acts as an excellent barrier to keep the nipples from seizing. A wheel can be built fine without a prep, but there is no reason not to and plenty of reasons to use it.
Leo:
I think what Josh was saying is that the rims are so strong anymore that it is not necessary to use 4x, not that they can’t handle the force.
Late to the thread hear but there is not mention of spoke prep that I saw. The spokes should always be prepped with either Teflon lube or blue loctite depending on your school of thought.
It seems like there have been at least a couple of posts regarding prep, and in the tutorial it is in the list of assumptions at the top of the page.
I didn’t intend for this to be a comprehensive tutorial, but more for someone who has already built wheels who is looking for a more efficient method. Prepping spokes, and rims is up for a lot of discussion. As much as people feel strongly about how they do it, most wheels that are built with care and consideration end up strong. So, the specifics are less important.
As I’ve said before in this thread the spokes should be prepped to lube, and prevent future galvanic corrosion.
I really don’t think anyone should use Loctite on spokes though. Even blue (242) is too strong for the fine threads of spokes. I use boiled linseed oil which sets up as a mild thread locker as it cures. Anything more than that (or Wheelsmith Spoke-Prep) can lead to gluing the nipples to the spokes. Of course you can always use heat to break the bond.
But combined with the discussion that follows it, plus the various links, what you have is pretty comprehensive!
With the help of this thread (and the ones I linked to), I went from a very shitty first wheel build to one that allows me to ride down the stairs without any clicks, creaks or squeaks, -only the blissful sound of rubber striking pavement!
As to spoke prep, above it is discussed at length. I would have used linseed oil if I had known that my wheel would turn out so well. Who knows, maybe spokes will start breaking again in a few weeks, just like they did before, but that hasn’t happened yet, and they are of a much more uniform tightness this time around.
I’m glad it helped you. As long as you have appropriate tension you shouldn’t have problems with your wheel.
I’ve been meaning to write something up to give an alternative to Sheldon’s wheelbuilding page. Sheldon’s site has served a lot of new builders well, and so I just let it go for awhile.
There is still more I would need to add to make it truly comprehensive, but as you said if you dig through my old posts in the forum a lot of that info comes up. Some things I can think of off hand are:
[LIST=1]
[/LIST]
In the unicycling world, the dishing stuff is really only an issue for people with disk brakes. I would leave it out, or put it in some sort of epilogue.
I would add something about squeezing the spokes inward before bringing the wheel fully up to tension. I think it’s Jobst Brandt who says that this is one of the most frequently overlooked steps. Oh- truing the wheel before fully tensioning it is also a very good idea, in my opinion.
Anyhow, good luck if you write a comprehensive tutorial, but from this thread and its links, I think many people will probably be able to build a decent wheel. Thanks again!
Not to be pedantic, but dishing isn’t optional. A dished wheel is one whose rim sits in the middle of the dropouts/bearing holders. “Dishing” a wheel is the process of centering the rim. As I understand it the origins of the term are lost, but I learned that it was because of what it looks like when you put two dishes together with the rims touching. A symmetrically dished wheel is like a front wheel on a bicycle, or a standard unicycle wheel. An asymmetrically dished wheel is like a rear wheel on a geared bicycle, or a disc wheel.
What you refeerence from Jobst is what I refer to as “setting” the direction of the spokes. I also believe this is important for a strong wheel.
But don’t symmetrically dished wheels usually pretty much take care of themselves?
I have never built a geared bicycle wheel, or a unicycle wheel with a disk brake, but it seems to me that dishing such a wheel would be far more complicated than what I have done. Don’t the two sides of such wheels have spokes of different lengths and different tensions?
For both the wheels I did build, which were symmetrically dished, since I had tightened the spokes pretty much uniformly (until fine-tuning them for roundness and lateral wobble), I assumed the rim would get centered on its own. I did eyeball it to make sure, but it didn’t appear to be off. Of course, I don’t own one of those dishing tools, but can’t you can get away with not having one if you only build symmetrically dished wheels?