I have an old Roach air seat cover for a Miyata base that’s falling apart that I’d like to replace with a new one, and unfortunately those covers are not sold anymore.
How hard would it be for a sewing novice to hand-sew a seat cover like the Roach using readily available materials?
I’ve watched YT videos on hand-sewing materials, and it doesn’t seem that hard, but I have really terrible construction skills.
What do you think of this plan:
Purchase leather or ripstop nylon for cover
Unstitch the existing Roach cover to use as a pattern
Cut new fabric with scissors using the pattern
Hand-sew the patterned fabric together. Sew from inside out so the seams face inward.
Attach metal grommets to bottom edge of the seat cover
Put cover onto the seat over an air pillow, on top of a Miyata CF base
Insert shoelaces through grommets and pull tight to hold cover onto seat
That should work. There are a couple of finer points that you may not be considering due to lack of sewing experience or “terrible construction skills.”
First, using the old fabric as a template is a good idea. what you want to do is pay attention to where the seam needs to be, and then make a patterm by adding a seam allowance outside of that, maybe a half inch. If you cut the new fabric along the same cut as the original it may not have enough seam allowance in some places, and the finished piece could have tight spots and bulges.
Another thing is that two pieces of fabric together in a straight stitch make a pretty weak seam. It is better if there is at least a third layer which can be made by folding one (or both) pieces of fabric into the seam. You could get fancy by adding a piece of lycra folded over in the seam, and that would look like piping when the fabric is inverted.
Any thread would probably work. I usually use type 69 upholstery nylon when I sew any technical stuff. It is heavy, but it also is so strong that it makes up for some lack of sewing technique that might lead to weaker seams.
With that you should be able to replicate the cover without too much trouble. It is small enough that it shouldn’t take a long time even hand sewing.
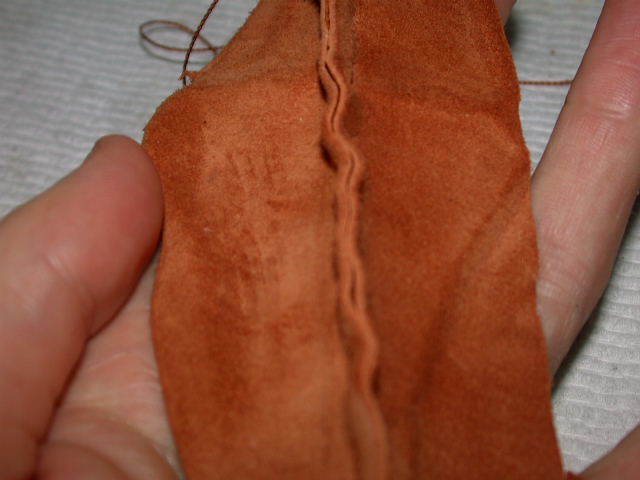
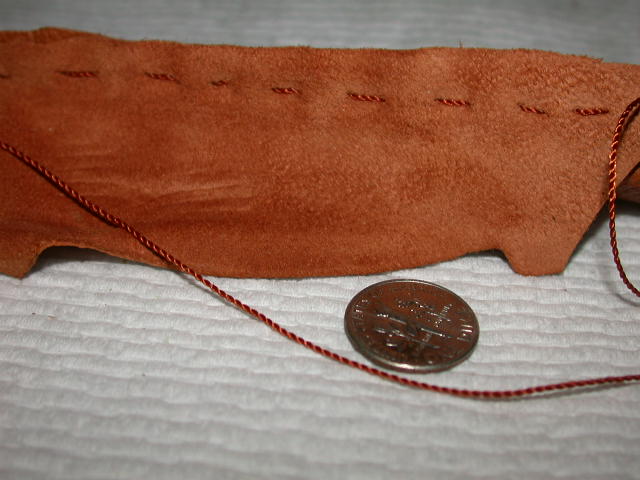
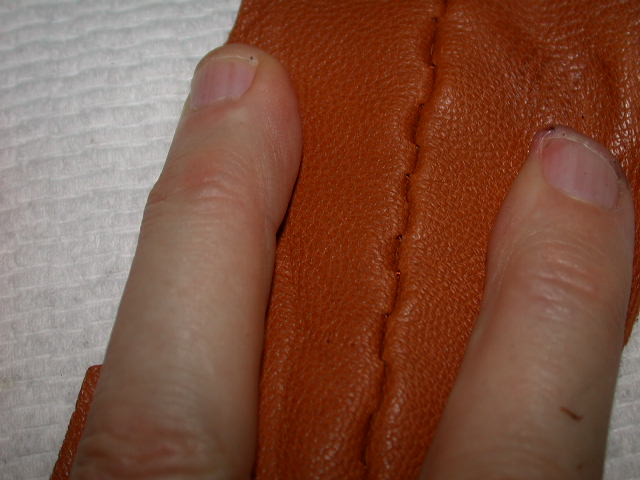
Here’s my first straight stitch. I thought I would practice the easiest stitch first on a sample of the material I bought at Hobby Lobby ($31). They had a pretty limited selection of leather; this material is like a mid-weight fake glove leather. There’s enough material to make at least 2 covers.
I totally forgot about the thread to buy, so I found something that I thought might work (#2 Nylon Thread), but I’m not sure anyone uses this for sewing. Ah well, it seems to work well enough so far.
It took about 15 minutes to sew this and I am getting faster as I go. At first the sewing was really tedious and I briefly reconsidered my plan, but it just requires practice (like unicycling!). The hardest part is pushing the needle through the material. I plan to get a ruler and an awl to make the stitch more even.
I wasn’t sure about doing the stitch with the folding and the 3 or 4 layers – wouldn’t that expose the thread to friction from the outside? The way it is now, the thread is not exposed very much at all. It seems like the seam is pretty strong, but any suggestions to make it better are welcome. I’m sure there’s plenty of room for improvement.
If you are sewing leather you can get special leather sewing needles that make it easier to pierce and slide your needle through the leather. Basically they are a regular needle with a three sided “triangular” tip. A thimble is highly recommended if using a needle with leather.
If you want the seam to be perfectly flat with tension on it I would suggest using a sewing awl instead of a needle. A lockstitch would give a very nice looking seam regardless of tension applied to the cover and can be easier to get consistent than a strait/running stitch.