I posted this in RSU a while back and it got buried… just in case you get the mad idea to rattle-can (i.e. spray paint) your uni or components thereof, this may help you achieve a paint job that’ll last a little longer than a few weeks.
first, check out this case modder’s site on how to achieve a “show car” paint job (be sure to read parts one and two): how-to, part one
as the site says, the first key to a good paint job is preparation. of the process, the preparation takes the most amount of labor, by far.
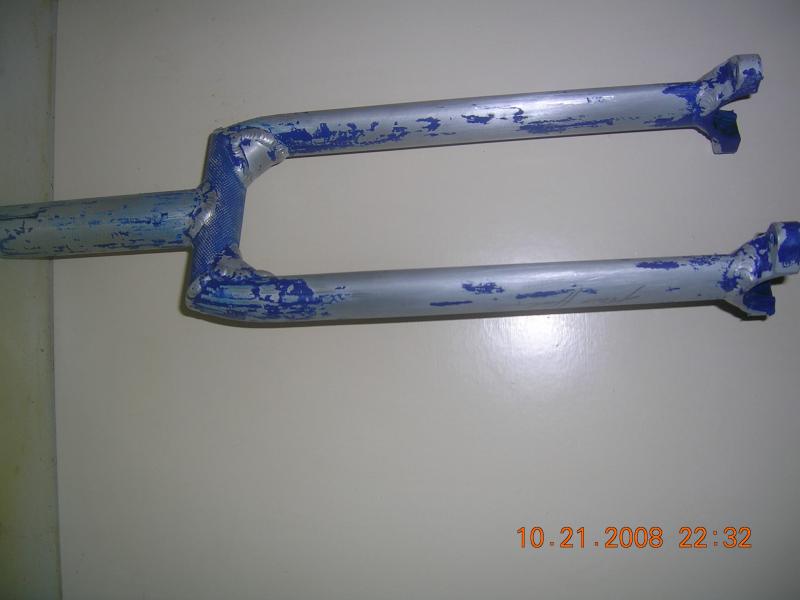
1st – you’ll need to completely strip the existing paint from the frame… the fastest and best way to do this is to sandblast the frame… ask your local paint or machine shop if they’ve got the equipment and if they’ll do it for ya… it shouldn’t cost much.
if this isn’t a possibility, the second best way to go is to get a wire wheel and attach it to some sort of hand-held rotary tool such as a die grinder, buffer or drill. it’ll take an hour or two but you want take the frame down to bare metal.
2nd – now you want to clean the frame of any residue, grease, etc. wash the frame with soap and water… dish soap is fine… although if you’re paranoid that the frame is really greasy you can wipe it down with a solvent such as acetone or kerosene before the wash.
rinse it well and let it dry in the sun. completely, bone dry. if you want to be sure it’s dry, you can put it in your oven and bake it at 200-250 degrees for 5 minutes or so… just remember to use oven mitts when taking it out of the oven!
3rd – set up your frame for painting: un-bend a wire coat hanger and find a way to attach it to the frame such that it’s out of the way. the KH frames have a little hole (the size of a BB) at the bottom of the seat tube… i straightened the hanger, sent it through the hole, then bent the end to resemble a small hook. you could also use a brake mount or bearing holder to hang the frame by. now hang the frame such that it’s a few feet off the ground so you can easily spray it from many different angles.
make sure you have a clean area to work in, free of dust and debris. lay a ground cloth down to catch the overspray and trap any fallen dust. it’s best to paint when it’s cool (65 - 80 deg F) and dry (not foggy or misty or humid), otherwise the paint may not adhere very well, or it will take a long time to dry. it’s also best to paint in still air… wind may cause your spray to go all over the place, and even worse, it may kick up dust that will stick to your paint.
i painted my frame in my garage, leaving the front and back doors cracked a little for ventilation. even with a ground cloth, everything in the garage got a fine mist of paint on it! cover EVERYTHING in your work area that you don’t want getting dirty, dusty or painted. that includes you! wear full-length pants, shirt, a hat, shoes, AND A FACE MASK. you will be breathing paint otherwise and it will stick to your nose, throat, etc. bad stuff.
4th – primer time! make sure to put your first few coats of primer down soon after you’ve dried the frame… otherwise your frame might start rusting and you’ll have to start over with your prep! use an etching primer, such as rustoleum, which eats through surface oxidation and binds directly to the metal.
apply two or more VERY VERY THIN coats… it’s okay to see bare metal under your first or second THIN coats… just wait and do more coats. if you spray too much at once the paint will run, clump up, etc. and it’ll look bad. if you do this, don’t worry, wait at least 48 hrs. for the paint to dry, sand down the clumps and start over (make sure to rinse and dry every time you sand!). make sure to get paint everywhere, underneath the seat post, around the bearing holders (don’t put too much paint UNDER the bearing holders!), around the crown, etc.
when you paint, hold the can 1 - 2 feet from the frame and hit the frame with little blasts of paint. wait 3-5 minutes between each THIN coat… 10 mins max… otherwise you’ll have to wait at least 48 hrs for your next coat(s). four or five coats should do… although when you re-sand the frame (step 6 below) that’ll tell you how well you coated it, and what spots you may have missed!
5th – WAIT. when you’re done painting you prolly want to check it to see if it’s dry, or move it around, or whatever, but you really shouldn’t. moving the wet frame will likely get more dust on it. touching the frame will leave fingerprints… handle it only by the hanger if you must, but it’s best just to let it sit (make sure it has some ventilation) for at least 24 hrs. before you move it and at least 48 hrs. before you touch or it.
MAKE SURE YOU WASH YOUR HANDS (or use clean gloves) BEFORE TOUCHING THE FRAME!!! Until you’ve got your last coat of paint on the frame, you don’t want to get the frame dirty… it could ruin your finish!
6th – successive coats: you may want to follow with several coats of color then again with several coats of clear gloss (or flat) depending on the desired finish. you’ll first want to sand and clean the existing surface… at least 48 hrs. after the previous coat, rub the frame down with some fine sandpaper (~400 grit or higher) or some fine steel wool (better).
don’t rub too hard, you’ll take all the paint off! you just want to smooth the existing surface of any irregularities and provide the next coat with a rough-ish surface on which to bond. make sure to rub every part of the frame you painted a little, then rinse the frame well (rub it with your hands or a soft cloth while rinsing) and let dry. you want to get all the grit you sanded off the frame! don’t use an oven or hot air gun to accelerate the drying at this point (ordinary paint can’t handle temps higher than 250 deg F), but if you’re really impatient you can use a hair dryer on a low setting.
you’re ready for your next coat(s)! have at it! paint it as much as you like! if you want that showroom shine, put several coats of clear gloss on top, then rub the frame down with a buffing / polishing compound (see the link above for advice and pictures)… rinse it clean then give it a coat of turtle wax. WOW that’s shiny!
 and i have a kh and you know on the crown, and around that and over it just wont come all of… i will keep doing it… i’ve wased it before a new layer of remover like 3 times, doesn’t really help a lot…
  can anyone help me?
 or will i just use a box and get nowhere?
